Wild at heart
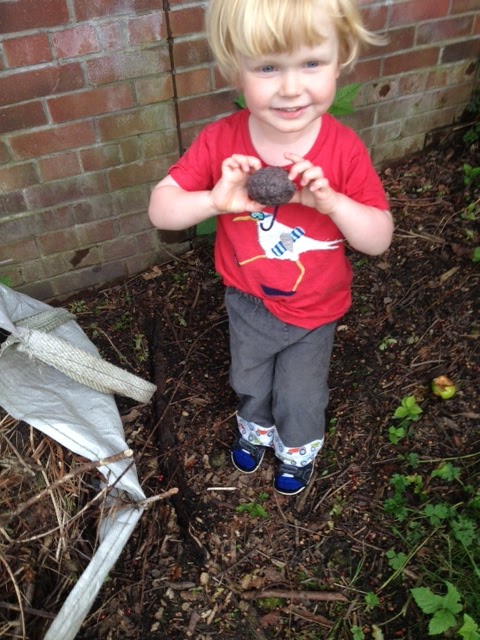
No it’s not poop! Read on to find out what Euan’s holding
The big picture
First of all we should also remember that the wildflowers themselves are part of our country’s heritage. Wildflowers aren’t just picnic sites for bees and butterflies to eat nectar or for birds to eat the seeds. But with plants and wildlife being so closely linked, if we help one, we help the other. As native plants and wild animals have grown up together over thousands and thousands of years they know each other really well and how best to live alongside each other. Some plant-eating insects only eat one type of plant (that’s a very boring diet) and it’s always a native one. The common blue butterfly only lays its eggs upon bird’s-foot trefoil or greater birds-foot trefoil. So if those plants disappear from our countryside the common blue butterfly will starve and become extinct. Have a look at this BBC video that shows brainy folk with more reasons why native wildflowers are the best.
The clever people at Plantlife are trying to encourage mother nature to regenerate her wildflower areas and colonise our countryside with native plants that would have been there in the past. They are trying to protect the pockets of wildflower populations that we still have so that the flowers can naturally spread to neighbouring areas. Plantlife help the flowers to spread by sowing locally collected seeds or spreading local soil that contains seeds. Even animals can help out as seeds can stick to the hairs of cows as they are moved between fields and to horses as they are ridden through the countryside. This sort of spread is what would have happened naturally in the past and the seeds have a greater chance of growing as they are well adapted to local weather and soil. If we can’t use these natural methods of spreading local seeds then it is time to turn to manual sowing of local seeds. But you need to make sure the seeds are from native plants and are suitable for your garden. Scotia Seeds is a reputable source of native wildflower seeds recommended by Plantlife. Remember to never, ever dig up plants from the wild as that is against the law.
What you can do
- Yellow rattle- great in a meadow
- Teasel- perfect in borders
- Red campion- loves woodland edges
- Waxcaps- pretty fungi found in meadows
- Lichens- happily covers walls, trees and rocks
- Daisies- makes for pretty lawns
- Ivy- low maintenance green walls
- Devil’s-bit scabious- loves meadows
- Nettles- some butterflies only lay their eggs on nettles
- Primroses- ants love to munch on their seeds
If you have a dry stane dyke in your garden why not fill a few of the holes with soil, sand or gravel in which wild flowers can grow? Harebells, saxifrages, herb robert and mosses and lichens would all love a home there as they’d think they were in the rocky outcrops they love in the wild.
You could grow meadowsweet in a wildlife pond area. Mummy and Daddy recently blogged how easy it is to make a pond in a small space (even in an old bucket!)
Plants to avoid
Every year us Brits spend 1.7 billion pounds trying to to get rid of invading non-native plants. So make sure not to plant them into your garden in the first place. Here is Plantlife’s list of the worst 12 plants and wildflowers that you can buy and plant, but shouldn’t:
- American Skink cabbage (sounds too smelly anyway!)
- Broad-leaved bamboo
- Chilean giant rhubarb
- Cotoneasters (only 1 type is native the other 70 are invaders)
- Himalayan balsam
- Hottentot fig (fab name for a bully of a plant!)
- Japanese knotweed (strong enough to grow through tarmac & concrete!)
- Pirri-pirri bur
- Rhododendron superponticum
- Spanish bluebell
- Three cornered garlic- smothers primroses and violets not vampires
- Variegated yellow archangel
Lobby your council
You could write to your local MP or council to ask them to plant native wildflowers in unused land such as that along side roads or in roundabouts. It’s becoming more common to see traffic islands that have been sown with wildflowers. This reduces the cost the council of mowing the grass that was there previously and provides a lovely display of the flowers and visiting pollinating insects.
This process is also the idea behind On the Verge, a voluntary community project in Stirling and Clackmannanshire. So far they have established almost 3,000 square metres of wildflowers working with community groups including 25 community councils, 22 schools, 4 housing associations, 3 churches, 2 care homes, 5 Cub Scout and Brownie/Rainbow packs, 5 community garden/allotment groups as well as lots of local gardeners. On the Verge provide the seeds and can also help identify and prepare suitable areas. Their seed is made up of annual and biennial and perennial nectar-rich native Scottish wildflowers. The annuals flower in the first year and then the biennials and perennials provide a lasting wildflower area.
Throw some bombs
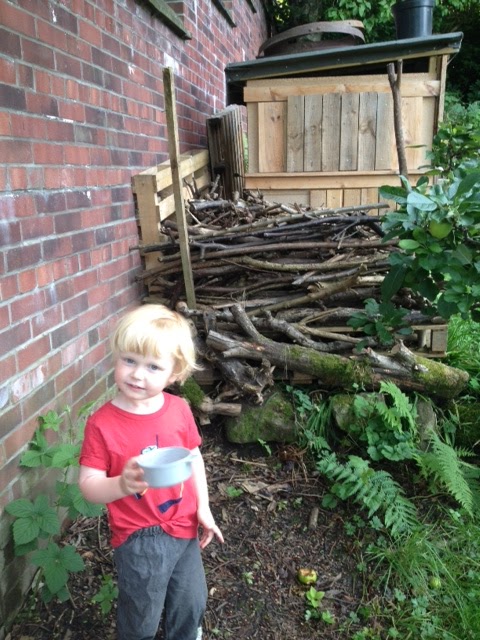
Euan found the perfect location for a spot of seed bombing!
Go enjoy
You can also get outside and see these wildflowers where they grow. There are nearly 50 internationally important sites for wild plants in Scotland known as Important Plant Areas (IPAs). You could look for the native alpine flowers on Ben Lawers and the Breadalbane Mountains above Loch Tay. Or you could explore our Celtic Rainforest (I never knew we had rainforest in Scotland, but I guess it does rain enough!) on the West Coast. But you don’t need to travel far to enjoy native wildflowers, just have a look at the side of the roads near you. More than 550 different wildflowers grow in Scotland’s road verges. Let’s all do a little bit to help our local, native wildflowers.
There’s a worm at the bottom my garden
Actually there are loads of worms in my garden and I’ve called them all Wiggly Woo, it is pretty hard to tell them apart so I though the smart thing to do was give them all the same name. Mummy says that worms in our soil means the ground is good for growing things. But why is that? What do worms do? I’ve been finding out….
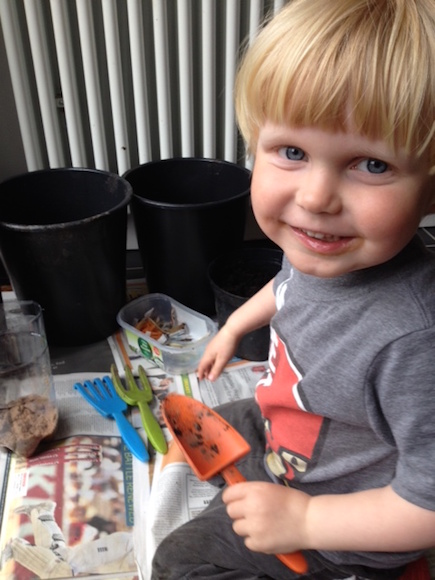
Just what am I up to?….
Worm facts
- Worms can eat up to 75% of their own body weight every day (even more than me!)
- Earthworms live for up to 15 years but some larger types of worms can live to 50 years (even older than my Mummy and Daddy…just!)
- Worms can have up to 5 hearts, depending on the type of worm.
- They use teeny tiny hairs to crawl- try looking for them with a magnifying glass.
- They don’t have eyes but their front end is more sensitive to light than their tail.
- The longest earthworm ever found was 6.7m long.
- Relatively speaking a worm is 1000 times as strong as us.
- Worms breathe through their skin. That’s why they come to the soil surface after rain- if they stayed underground they would drown.
- The sticky slime they produce helps them move through the soil. If they dry out they can’t breathe.
- A worm chopped half doesn’t become 2 worms. Just the head end will make a new tail. The tail end dies.
- Lots of other animals eat earthworms in the wild. Toads, foxes, moles, birds, snakes, slugs, and beetles do. Even some people eat worms (populations from China and New Zealand do). Wow, it’s tricky being a worm, isn’t it?!
What do worms do?
A really clever man, who found out lots of cool facts about animals and nature, named Charles Darwin, called earthworms “natures plough”. That’s because they mix up the soil with their burrowing. Whilst they burrow they eat decaying plants and then create worm poo (called casts). This is tiny and easily breaks down into the soil to give it lots of nutrients. Then bacteria and fungi feed on the poo (yuck!) and release the nutrients into the soil for new plants to use to grow. So by burrowing, the worms make nutrients available all through the soil and not just on top. Even more helpful in the garden, worms don’t eat living plants, they have to be already dead and decaying. They are hard workers, one acre of worms can contain 1 million worms and they can break down about 50 tonnes of soil. Worm tunnels also help to hold soils in place and stop water erosion.
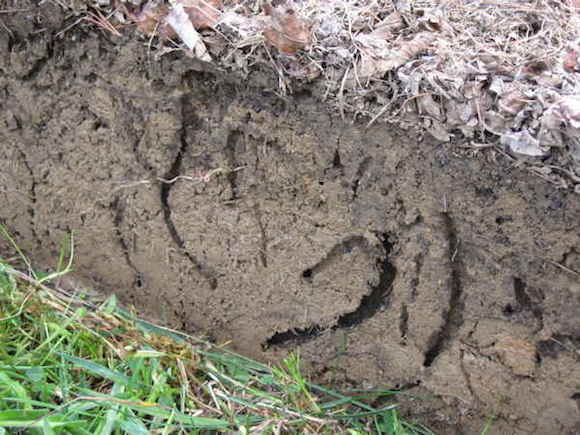
Earthworm tunnels helping to spread nutrients throughout this soil
Watch them in action
To find out more about what worms do in the soil you can make a temporary earthworm wormery. You’ll need:
- a clean 2L clear, plastic bottle
- safety scissors (& an adult to help)
- damp soil or compost
- damp sand
- water to dampen layers
- worm food- kitchen veg waste, dead leaves, shredded newspaper
- worms
- black card or paper
- an elastic band
Gently and carefully collect some worms from you garden. The best time to collect worms is after a heavy rain fall as they will come up to the surface. They are normally easy to find in shady spots below shrubs or stones. I found it easy to find and gather worms using my fab Twigz garden tools. They’re not just perfect for growing veg but also for all the important garden jobs I need to show Mummy how to do!
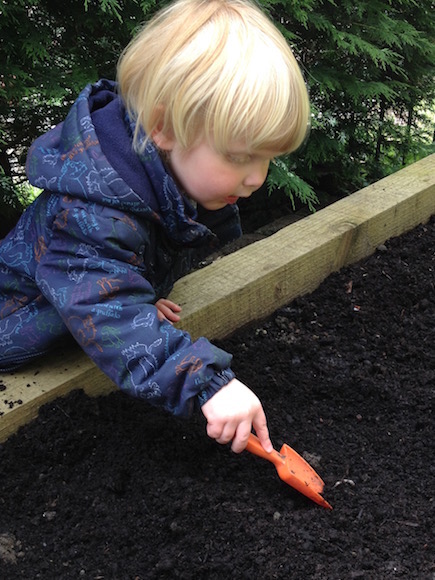
Carefully gather your earthworms
Cut the top 1/4 off the bottle and make a small slit in the side of the bit you’ve cut off top (to make it easier to slot back on as a lid)
Fill the bottle with a layer of sand then soil then sand then soil, then sand, soil, sand, soil.
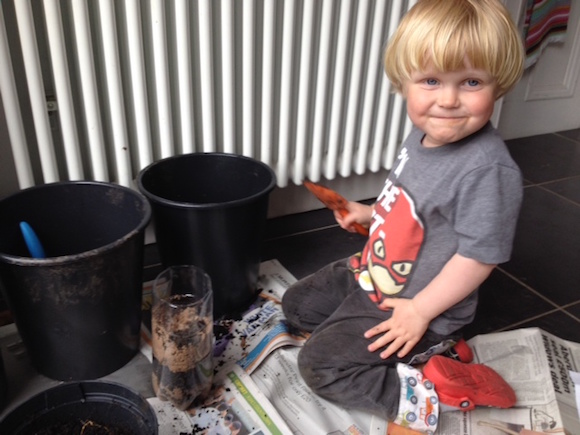
Fill your bottle with layers of soil and sand
Add a few worms to the top and watch them burrow down.
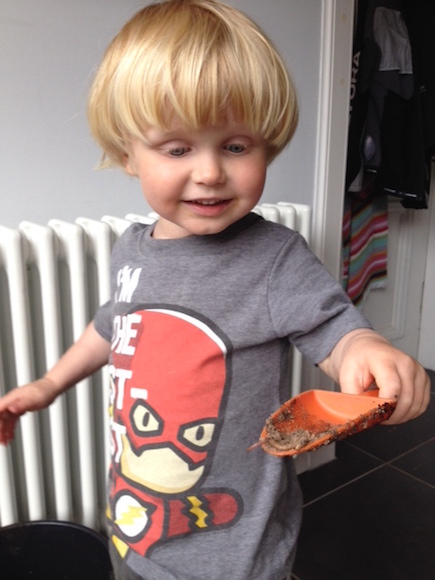
I very carefully lifted the worms using my Twigz trowel
Add food to the top (I used potato and carrot peelings and damp shredded newspaper) and wash your hands.
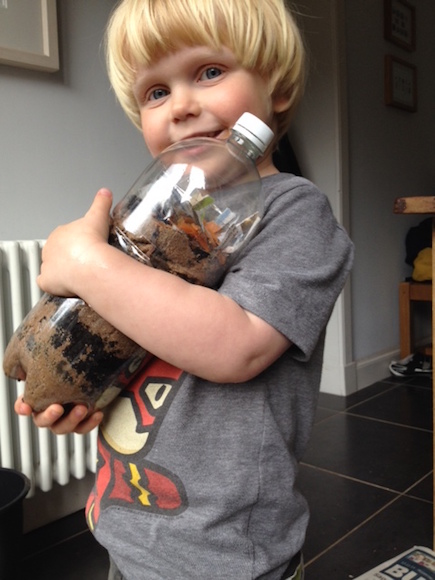
My complete wormery ready for wrapping up in dark paper
Wrap the black paper around the wormery and fasten with elastic band. This encourages the worms to burrow around the outside of the wormery where you can see them. Place in a warm place and you can remove the black paper each day to see the worms, what food they’ve eaten and how their burrowing has changed the wormery layers. After a week release the worms back into your garden.
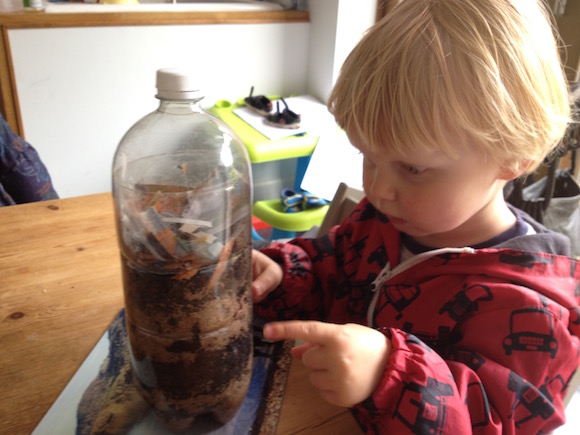
Just 2 days later the worms have been busy mixing up the layers
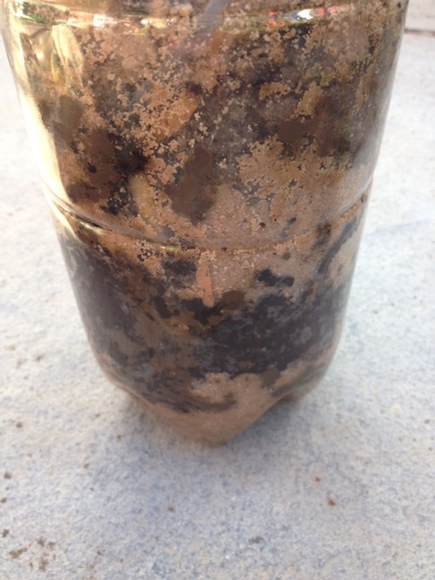
After a week the layers are mixed up with carrot down in the bottom compost layer
Composting wormeries
This temporary wormery is different from a composting wormery. Special worms that live above the ground in piles of decaying leaves/other garden waste are needed for that, not earthworms. If you keep them in a wormery the worms digest your kitchen and garden waste into a wonderful compost in around 3-6 months. Composting worms like to eat: coffee grounds and tea bags, fruit and vegetables peelings, cereals and bread, crushed egg shells. Composting worms don’t like: onions, citrus fruits, meat and fish, fats or greasy foods, dairy products, rice, pasta or cooked potatoes. Worms don’t like to be too cold and eat more when they are warmer. Don’t leave them in direct sunlight though or they will get too hot. It’s best to keep your composting wormery in a garage or shed in the winter. Make sure they stay moist but don’t make it too wet. You can add rainwater or dry bedding if you need to. They will sort out their own numbers and shouldn’t try to escape if wormery conditions are right.
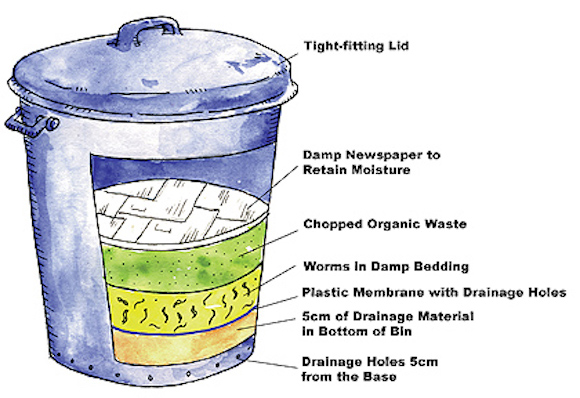
You can buy composting wormeries or make one from an old bin following these instructions
So next time you find Wiggly Woo or one of his friends in your garden, be happy as it’s great to know you’ve got some help in the garden.
To learn more about compost please read my blog all about it.
Big hugs,
Euan
A Garden of Fairy Tales

Don’t worry Beauty, Princess Lulu is coming to the rescue!

I had to stop on my way to saving Beauty to have a sniff of this beautiful rose!

First of all we visited the Fairy Attic to meet the Prince, discuss the problem and potential strategies and get our clues (and costumes if you are not a real princess like me!)

The Prince had this beautiful book in his attic

We found the first clue but how do you make the magic seat work and who is Peter Pan’s best friend?…

Next, we set off to discover a fairy door…

I wonder what happens if you blow a kiss to the Frog Prince?

I have found the glass slipper but will it fit? Cinderlulu is my name after all…

This tree is almost as old as my Daddy. Will I find a clue hidden up here somewhere?

I’m off to survey my kingdom!

It’s not all glamour being a fairy princess you know? We need to know how to drive diggers too!

Come on, the next clue is this way…

Yikes, the Poison Garden! Be careful, the Wicked Queen will be around here somewhere!

This pretty meadow must have clues hidden in it…

Aha! All the kings men. But what couldn’t they fix again?..

I think this poor fella needs some Arnica Cream

Stopping to admire some primulas on my quest

What a great place to have a treasure trail. It’s gorgeous (a bit like me!)

Putting my magic powers to the test…

Shazam! Look what I managed to do!
I hope you can tell from my pictures what brilliant fun I had helping Beauty escape the evil grip of the Wicked Queen. Alnwick Gardens are one of the prettiest gardens in the country anyway and this new treasure trail makes it super fun for ALL the family. Some of the clues are quite tricky so make sure you brush up on your fairy tales before you go. But don’t worry too much as there are some lovely resident fairy tale characters in the gardens to help out if you get a bit stuck about where to go next. So if you are looking for a brilliant day out this summer make sure you head over to Alnwick Gardens.
Lulu xx
Beautiful Butterflies
Butterflies are indeed pretty as flowers plus they help pollinate plants whilst they feed on the nectar. Most species of butterflies don’t have caterpillars that eat our crops so we should be encouraging these pretty pollinators in our gardens. As the Big Butterfly Count has just started, I thought I’d find out just what we can do.
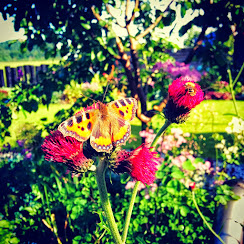
Why us gardeners like butterflies
Apart from them looking really, really pretty that is! Butterflies pollinate plants as they drink their nectar. Since a butterflies’ legs and proboscis are further away from their body than those of bees, they are not quite so good at pollinating our plants. But they can fly further and so help ensure our native wildflowers grow in lots of places for lots of us to see. Also they can help reduce the effect of bee diseases on pollination.
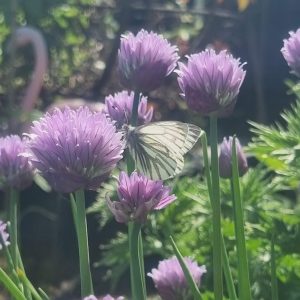
Big Butterfly Count 2015
From July 17th there has been a big butterfly study carried out by people like you and me all over the country. Last year a massive 44,000 people took part. It’s called the Big Butterfly Count and will find out how healthy nature is. Butterflies react really quickly to changes in our environment so they are great at warning us early of problems. Also it is good to know if any types of butterflies need more help from us so we can make sure they get back to being happy. To take part you just need to try to sit still somewhere nice and sunny (so the hardest part will be finding sunshine in Scotland then!) for 15 minutes. Then count how many of each different type of butterfly you see. Once you know what type of butterflies you saw you can input your results into the Big Butterfly Count website. Your work will still count even if you don’t see a single butterfly. If you’re aged between 5 and 10 you can take part in the Count at Jupiter Urban Wildlife Centre on Wednesday July 29th. The Big Butterfly Count runs until 9th August.

I’m taking part so why don’t you?
Gardening for butterflies
There are 59 different types of British butterflies. But Red Admiral, Peacock, Brimstone, Painted Lady, Comma, Green-veined White, Small Tortoiseshell, Small Cabbage White and Large Cabbage White are the butterflies you’re most likely to see in your garden.To see more butterflies you should plant a range of flowers and herbs to provide them with nectar from March until October. Basically butterflies like bright colours and flowers that provide big landing sites for them. They like you to leave any over-ripe fruit that falls from your trees on the ground so they can feed on the fruit juices. Mummy butterflies also need somewhere to lay their eggs. As silly as it may seem, leaving a bit of your garden to grow weeds in is a great help! Red Admirals love to lay their eggs on stinging nettles and Painted Ladies will lay eggs on thistles. And of course the caterpillars are very hungry when they first hatch so they will munch on these weeds.
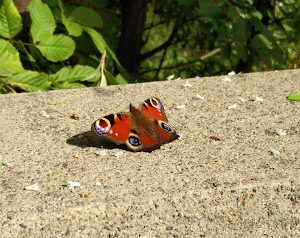
Coping with very hungry caterpillars
So the bad bit of encouraging butterflies is caterpillars. But they are very picky about what they eat and it is only really the Large and Small Cabbage White varieties that like to eat crops that we grow. They love cabbages and other brassicas (like broccoli) and nasturtiums. So if you don’t like eating either of those, don’t grow them and you’ll not get any pesky caterpillars trying to eat your food! Just by growing some nasturtiums beside your brassicas can save your crops as nasturtiums are butterflies favourite food (I prefer ice cream myself!) Or you can be very careful about looking out for little clusters of round yellow eggs on leaves and stems. Just remove these before they hatch into caterpillars. Or you can use insect barrier mesh over your veg beds. Be careful that the mesh doesn’t touch any leaves as abbage White butterflies can lay their eggs through mesh onto any touching leaves. You could also use teeny, tiny worms called nematodes or really small wasps that are both natural ways to kill caterpillars.
Butterfly Craft
Butterflies don’t live for very long so how about making a caterpillar that changes into a butterfly for you to keep for ever?
You’ll need:
- A cardboard egg box
- Sticky tape
- Paint
- One piece A4 white card
- One piece A4 coloured card
- Two pipe cleaners each cut in half
- Googly eyes (or you can draw on eyes)
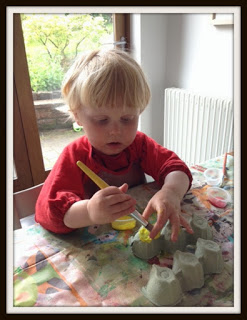
My caterpillar is going be lovely and bright
Roll up both halves of one pipe cleaner to make 2 antennas and insert these above the googly eyes.

This caterpillar is almost as hungry as I always am!

The caterpillar will have a lovely nap in his cosy cocoon
The next day remove cocoon and use the other pipecleaner to fix the wings to the body. Unravel the antenna a bit.

Look what I found when I came down to breakfast!
Thanks “Local Fun for Kids” for the idea.
Right, It’s sunny outside so I’m off to count butterflies! If you want to find out more about the different butterflies you can find in your garden have a look at the fab UK butterflies website. They have loads of great photos.
Big hugs,
Euan
The Plight of the Bumblebee
Hopefully all the yummy crops in your garden are growing well and you can start to see berries, fruit and veg appearing on your plants. If you can, it is likely that pollinating insects like bumblebees have been out and about in your garden. Bumblebees look really cute and with big bodies and tiny wings don’t look like they should able to fly. Like me they aren’t happy being told what they can’t do so they do fly just to spite the mathematician boffins! I thought I’d find out a bit more about them and how they help in our gardens and what we can do to help them in return.
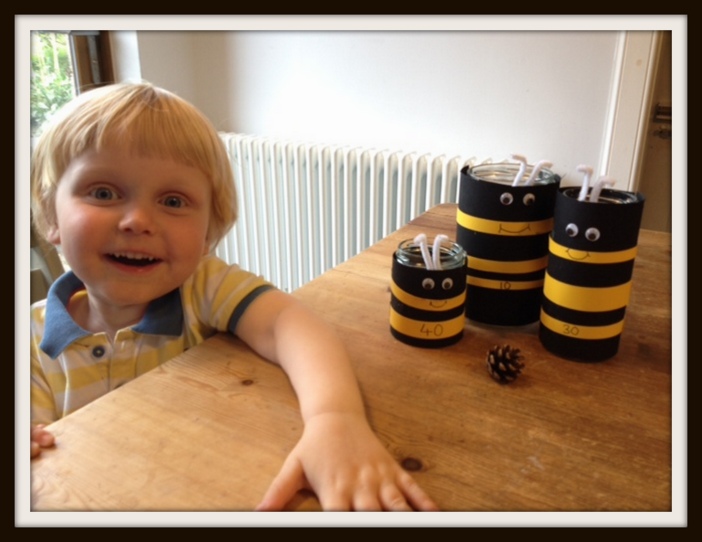
Read on to find out what I’m making…..
Bumblebee facts
- There are 250 types of bumblebee in the world, 24 in the UK but you’re likely only see 6-8 kinds in your garden.
- You can mainly tell the types apart by the colour and number of their stripes.
- They live in nests of 50-400 bees in the ground or in piles of old leaves.
- Each nest has one Mummy who is in charge (just like my home then!) She is called the Queen. The daughters all do the work in the nest and the few sons leave home when fully grown and sleep on flowers.
- The Queens sleep all winter (a lovely long sleep called hibernating) and then wake in Spring and lay eggs to start a whole new nest.
- Bumblebees have 5 eyes! They have 3 larger ones at the sides their heads and 3 little eyes on top of their head.
- Female bumblebees can sting, but only if you scare them. Their stings are like those of wasps- they don’t have any sticky-out bits to get stuck in the skin so the bumblebee can remove it and sting again. Honeybees can only sting once.
- Their buzzing noise isn’t made by their wings but by vibrating muscles!
- Their left and right wings don’t flap together, each flaps on its own.
- The speed and noise that their buzz makes (its frequency) is perfect for releasing large amounts of pollen from tomatoes. Now almost every single European tomato we buy is due to a bumblebee’s buzz, wow that’s a lot of buzzing as I can eat LOADS of tomatoes all on my own!
How Bumblebees help us
Bumblebees drink the sugary juice called nectar that’s in flowers and they collect yellow dust called pollen to feed to their babies. When they do this they “pollinate” the flowers and that lets them turn into fruit and veg. They are faster pollinators than honeybees as they can visit twice as many plants every minute and all their hairs means nectar sticks all over them. Being bigger they can carry more pollen and so can go on longer foraging trips. They are hardy insects, not put off by drizzle or winds- perfect for Scotland. They are happily active at temperatures down to 10°C. They aren’t as scared of enclosed spaces such as greenhouses as honeybees are, so do more of the pollinating on indoor crops. In fact some bumblebees are grown just to pollinate crops such as tomatoes, courgettes, strawberries and peppers grown by farmers inside greenhouses. In the UK bumblebees, solitary bees and hoverflies also pollinate 97% of our wild flowers.
Helping bumblebees
Two types of bumble bee have disappeared from our gardens in the last 80 years. If we don’t want to lose any more types we can grow their favourite plants in our gardens. Wild flowers such as foxgloves, daisies and buttercups have lots of nectar and pollen. Our countryside used to be filled with wild flower meadows but these have been disappearing. We can plant these in our garden. Or we can plant tasty herbs such as rosemary, chives, thyme, sage and marjoram to feed bumblebees and us.
Remember to try to plant different flowers that bloom from Spring through to Autumn- we’d not be happy if we could only eat in June and July! Also, different types bumblebees have shorter or longer tongues so need flowers of different sizes too so they can find their perfect fit- just like Goldilocks and the 3 bears! Some bees manage get around this problem by nibbling a teeny hole in the base the flower so they can still get access to the nectar- how smart are they?!
Learn how bumblebee friendly your garden is by finding out your Bee kind score and then you’ll get help picking other favourite bumblebee flowers to plant alongside those you already have. My garden got a score of 2604, not too bad as the average in Scotland is 2061.
If you ever come across a bumblebee lying on the ground looking tired/unwell you can try to help by feeding them a mixture of 1 teaspoon of sugar in 1 teaspoon of water and placing that near the bee’s head. It should then stick out its really, really long tongue, lap up the sugary water and then use the energy to fly off. Never try to keep a bumblebee inside, they need to be outside foraging, building a nest or hibernating.
Identifying bumblebees
It’s fun to learn what types of bumblebee you have in your garden. You need to begin by making sure it is a bumblebee and not a honey bee. Bumblebees are normally bigger and hairier than honeybees or solitary bees. Next work out what colour its tail is and how many bands it has on its body. Finally look to see if there is a ball of pollen (or a shiny surface ready cover with pollen) on its back legs. You can even get involved in the Bumblebee Conservation Trust’s Bee Watch survey. You just need to take a photograph of the bumblebees that you see and then upload it to their webpage telling them the date and time the photo was taken. The tools help you work out the type of bumblebee (don’t worry an expert bumblebee identifier -what a cool job – will check your answer later) and your bumblebee will become part of their survey results. All the results will help brainy people check on what types of bumblebees are found where and how many of them there are just in case any types need extra special help from us.
Bumblebee craft
Here’s a great way to use old jars of plastic bottles and turn them into a fun craft project and game.
You’ll need:
- empty, clean jars or plastic bottles (if using bottles get a grown up to cut off the top third)
- black, yellow and white paper or card
- googly eyes (or you can just draw eyes on)
- pipe cleaners
- glue
- marker pen
- scissors
- a small pinecone (or you can use a little ball)
To make:
- Start by covering the outside of your jar with glue.

Gluing on the black body- be extra careful when holding glass jars
2. Wrap a piece of black paper around the jar.
3. Cut the yellow paper into strips
4. Glue a couple of yellow strips around the black jar to make bumblebee stripes.
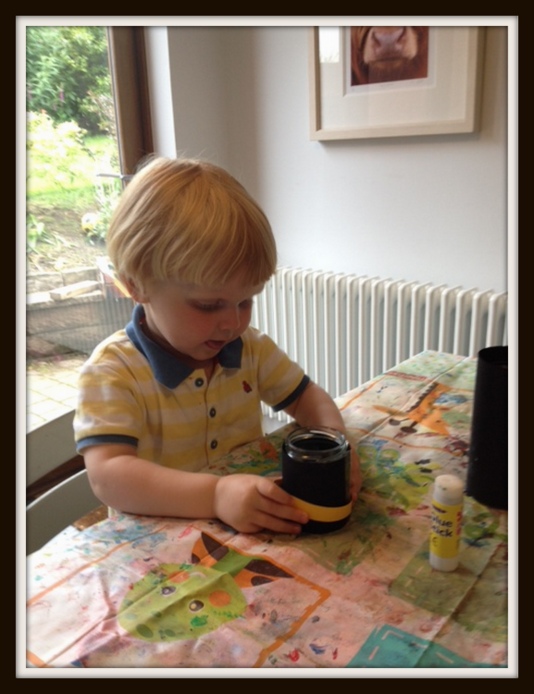
This bumblebee will have almost as many yellow stripes on his tummy as me!
5. Stick on googly eyes near the top of jar.
6. Make antennas out of pipe cleaners and slip this in between paper and jar.
7. Draw on a face.
8. Cut out some wings from white card and glue these onto back of jar.
9. Write numbers on the front to tell everyone how many points you’ll get for throwing the cone into that bumblebee.
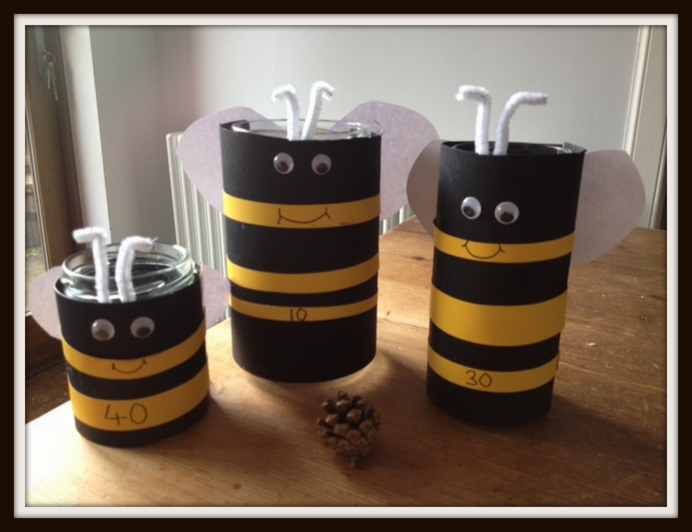
My hungry bumblebee family
Now you have a fun game where you can take turns to throw the pinecone “pollen” into the hungry bumblebee’s tummy. See who can score the most points!
Remember, if you enjoy eating tomatoes and strawberries or looking at pretty wild flowers as much as I do, please help out in the plight of the bumblebees and grow a few more bee friendly plants in your garden.
Big hugs
Euan xx
Let’s Fight That Blight!
If you’re growing potatoes and tomatoes you’ll want to avoid a horrid sounding disease called late blight. It’s caused by the fungus Phytophthora infestans (now that’s hard to say!) The fungus normally appears in the UK from July or August and loves to grow in wet, humid conditions. Read on to find out how to identify it, what to do if you get it and what you can do to try to prevent it.
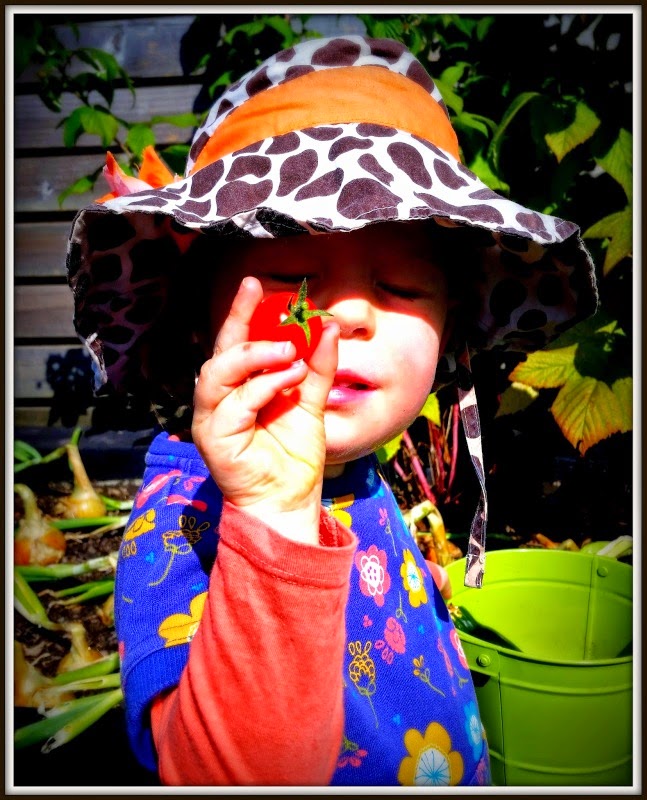
Not a hint of blight in sight!
How to look out for blight
Within 3 days of the fungus landing on a leaf the initial symptoms appear. Small, dark spots develop into lesions. There is often a halo of light green issue around the dark brown lesion. The leaves will shrivel up and turn brown. In humid conditions you might see a white fungus growing around the edges of the undersides of leaf lesions. Next the brown lesions spread to stems and if untreated rain will wash the fungus down to the developing crop of potatoes and tomatoes. Potatoes will develop a red-brown decay below the skin and will rot quickly in storage. Green tomatoes will develop brown patches and ripe fruit will again spoil quickly.
If you live in a blight-prone area you should register with blightwatch. It’s a free service provided to potato farmers but us amateur gardeners can use it too. It calculates the risk of blight being in your postcode based on weather conditions
How to treat blight
Dealing quickly with an attack is key. If you catch it early you might be able to remove and destroy any diseased leaves. Ideally burn this material or bury it more than 45cm underground. If more than a quarter of the foliage is affected or if the stems are affected then you will have to remove and destroy the whole plant. If it is late in the growing season you can remove the potato foliage near soil level and leave the developing potatoes in the soil for 2-3 weeks to harden the skin and allow the fungal spores to die before harvesting and eating.
How to avoid blight
Blight survives over winter in infected seed potatoes, diseased potatoes dumped by your veg plot and in unharvested potatoes left in the soil which will sprout the following season. Black nightshade and bittersweet are common weeds in Britain that can also be a natural host and spreaders of blight. The majority of infections in gardens are due to spores being blown on the wind from neighbouring gardens and allotments. So unless you want angry neighbours, make sure your garden is as clean as possible. Also make sure that you’ve removed all potatoes at harvest time. Don’t just use any old potatoes as seed the following year but buy certified seed from reputable suppliers.
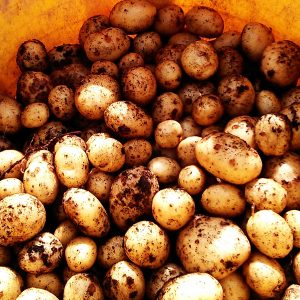
Our trug full of lovely perfect potatoes
How to get the better of blight
In blight-prone areas you will have best success with first and second early potato varieties as these are harvested earlier, giving the fungus less chance to attack. You can still get blight in older cultivars of potatoes and tomatoes that are labelled as “blight resistant”. This is because the fungus has changed over time and learned to attack these cultivars. Despite having pretty sounding names such as Pink 6, Blue 13 and Green 33 these new strains are highly infectious.
Make sure to chit your potatoes before planting as this will give a shorter time to harvest and less time to be susceptible to the fungus.
If you’re growing more than one variety of potatoes you can try to alternate rows of varieties with lower and higher blight resistance. This can reduce spread of milder cases.
If possible grow crops on a 4 year rotational basis so your earth has a chance to clear plant specific diseases in between crops.Blight typically affects tomatoes grown outside so you should have better success in avoiding the disease in plants grown in the greenhouse. Despite “Feline” and “Legend” tomatoes being labelled as resistant, they will succumb in prolonged humid conditions.
Suttons Seeds have just started to sell a new variety called Crimson Crush that they claim is the “world’s first fully blight resistant tomato”.
Hopefully armed with this information you’ll manage to grow yummy blight-free potatoes and tomatoes this year.
Lulu xx
North Kelvin Meadows – a dear green place for all?

We love exploring in the Children’s Wood
Read on to see what small thing you could do to help give loads and loads of other children the chance to have fun in this wild space.
Why wild spaces are great
North Kelvin Meadows
The Children’s Wood
Objections to planning application
- Retain trees which contribute positively to the historic character of the area,
- Retain all existing open space, public or private, which contributes positively to the character of the area,
- Respect the historical context and have regard to the historic plans of the area,
- Preserve and enhance the special character and appearance of the area
Future events
If you’re not fast you’re last- in my garden anyway
If you’ve not yet started growing any seeds in your veg patch this year but would still love to have some yummy home grown goodies on your table this summer, don’t worry. It’s not too late as you can either buy small veg plants from garden centres or you can save money by growing heaps of different speedy veg from seed. Some are fab for little ‘uns like me to do all on my own but others were a bit more fiddly so I let Mummy feel all important and give me a hand.
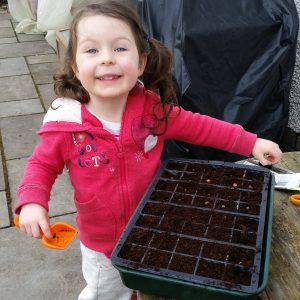
Lulu is growing some veg too!
Let’s see the contenders in the race to be the fastest thing growing in my garden this June…
On Your Marks
The competitors stepping up to the mark are:
Broccoli Rabe “60 day”
This isn’t technically a broccoli but is a cousin of the turnip and mustard family. So it has a slight bitter taste. It’s also known as turnip broccoli, rapini and rappone. All of the plant is harvested and the stem, leaves and flower buds are eaten. Don’t be fooled by the 60 days in the name as it can be ready well before then and it will bolt (and go yucky tasting) almost overnight so harvest as soon as you see the flower buds form. You can store it in the fridge for up to 10 days before using. These were little seeds so Mummy only gave me a small amount in my hand at a time for sowing.
Turnip- “Purple Top Milan”
Just 6-10 weeks to mature but you can eat some of the leaves in salads before roots have matured. This is a good plant for growing in-between slower crops. Harvest when golf ball size to eat raw or when tennis ball size to cook. Another fiddly little seed so Mummy had to help me get these sown.
Dwarf bean- “Bobis d’ Albenga”
These are all stripy and remind me of the beans in Jack and the Beanstalk. The plants will grow to 50cm tall so they won’t win the prize for biggest thing in garden as I’m already way taller than that! They need just 9-12 weeks to grow and if you harvest them whilst no bigger than a pencil you can cook them whole, making them super easy for weaning babies and toddlers to munch on. The pods grow to about 12 cm long and they are stringless. The beans were really easy for me to handle as they’re nice and chunky.
Pea – “Kelvedon Wonder”
My Mummy remembers helping her Mummy harvest fresh peas from the pods a little girl and this is the first year we’ve tried growing any in our garden, so I have a really important job to do making sure Mummy does everything right. This variety is really good for June sowing and is ready in 12-13 weeks. Each little branch on the plant produces 2 pods so the plants should produce a really big harvest of tasty peas. It is also resistant to pea diseases such as pea wilt and downy mildew. Plant will only grow to 45 cm tall so good for smaller gardens. Cool fact- you can eat the pea flowers, shoots or vine tendrils and they all taste like young peas. The pea seeds were also easy for me to handle and sow all on my own.
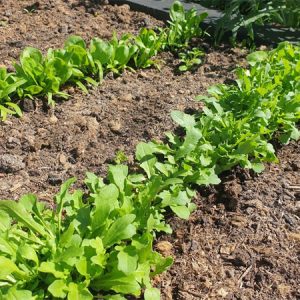
Some fast growing veg!
Mangetout – “Shiraz”
We grew these purple mangetout peas last year. They were easy to look after and they produced heaps of pods, the more we picked the more the plants produced. Pods are ready about 12 weeks after planting when the peas are just starting to form. This variety is resistant to powdery mildew and will tolerate downy mildew. Plants grow to 1 metre tall so need supporting with canes or a trellis but they will be happy in a large pot on your patio with a cane wigwam for support. We ate them raw in salads or lightly steamed. Again these were easy for me to hold and sow without help from Mummy.
Salad Leaves
Easy peasy to grow. You can get loads of different mixes with plants such as pac choi, mustards, cresses as well as lettuces. I like the spicy, peppery ones best. These only take about 3 weeks to grow so these must be the bookie’s favourite to win the growing race. simply harvest a few leaves from each plant so you can keep going back and harvest more and more. These are teeny tiny seeds so mummy just gave me a few seeds at a time that I sprinkled over our compost in a container for our patio.
Last contender of all:
Me
I am a growing 3.5 year old boy after all, especially when I eat all of this home grown veg!!
Get Set
Before sowing seeds you need to remove any weeds and rake your soil to make it all nice and a fine. Lulu has a set of funky kids garden hand tools from Twigz which I’ve tried unsuccessfully to take home with me on several occasions. Mummy recently got me my own set. She said it was so I could finally “work for my dinner” but I didn’t know that food could be your boss! I found them really easy to grip and work with and I love the funky colours- orange just happens to be my favourite colour at present. I even let Mummy have a go with them and she thought they were really study and would put up with me using them for planting and as pretend airplanes, not like the sand pit rakes and trowels I had been using in the garden.
Go!
If you’re quick (get it?) you’ve just got time to get some of these seeds planted. They (except rocket) should be in the ground by the end of June as they don’t like it too hot:
Rocket
I love space rockets AND I love peppery salad leaves so a whole container of this might yet start on our patio. Again it is really easy to grow and it only takes about 4 weeks for a crop to be ready. Pick only 1 or 2 leaves from each plant to get the longest harvest- called”cut and come again”. Pinch out any flower buds when they appear to lengthen the harvest time. To stop plants bolting and becoming yucky tasting make sure to keep the ground well watered and grow bolt- resistant varieties such as “Skyrocket” which is also really fast growing-wooosh!
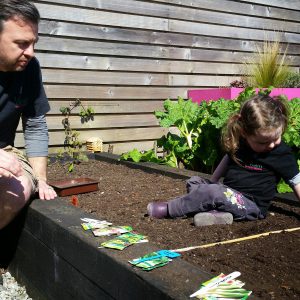
Prep your soil then sow your seeds in a nice neat row
Runner Beans
They like colder weather so are perfect for Scottish gardens. If you’re short on space you can even grow these in your flower borders as the plants produce lovely heart shaped leaves and pretty flowers. Also fab in containers but they do need supporting- make a wigwam out of canes. “Hestia” is a new dwarf runner bean variety. As it only grows to 45 cm tall it is great for containers and can easily be covered with a net to stop birds eating all your beans.
Outdoors Cucumbers
Radishes
These take only 3-4 weeks to crop but turn yucky and hard if you leave them in the ground too long so don’t get carried away and sow all your seeds at the same time. Sow some every week to spread out your harvest. Like runner beans, radishes don’t like too much heat so they are good for sowing in Spring and up until June. If you sow then in July you will need to be extra careful when watering- too much and their roots can split and rot, too little and they can bolt. Pick them when about 2cm in size and eat raw in your salads. You can keep them in your fridge for a week. “Sparkler” is a yummy type to try as it is reliable, easy and fast to grow.
So let’s get growing and see who/what can grow quickest in the next 2 months……
Quick update 2 months later and the first crop we got was broccoli rabe 60 days. It was yummy. Almost as yummy as the pigeons found our young pea plants! Peas now covered with a net and growing well.
Big hugs,
Euan xx
Growing Red, White and Blue (Yes Blue) Tomatoes
Mummy, Daddy and I were really upset when we found out that 4 out of every 5 tomatoes that we eat in the UK are imported from other countries. May 18th-24th is British Tomato Week so I’m going to try to persuade you to have a go at growing your own (or at least eating British) this year.
Tomato Facts
Tomatoes are the most widely grown ‘vegetable’ (ok, you and I both know they’re a fruit) in the world. They are grown from as far North as Iceland and as far South as the Falkland Islands. Some have even been grown in space. But British tomatoes taste best as they can be harvested when riper with less distance to travel to reach our tummies. They can be in the shops within 24 hours of harvest.
Science boffins have just found out that the colour of light the tomatoes are grown in makes tomatoes taste differently and can vary the amount of vitamins they contain. The energy efficient LED lights cost less so UK farmers will be able to compete with cheaper imported tomatoes. The first ever British Winter tomato crops were harvested in December 2014.

Yummy tomatoes
Growing your own
The time to reach tummy is even less if you grown your own. Tomato seeds are normally sown between February and April. Don’t worry if you’ve not sown any seed, you’re not too late to grow tomatoes this year as as you can easily pick up some small plants at garden centres or specialist tomato selling websites. For expert tips on growing tomatoes from seed (for next year) and making yummy chutney read my Tasty Tomato blog.
Despite the biggest UK tomatoes greenhouse being the size if 25 football pitches (!!), you don’t need much space to grown your own. Just pick types that will happily grow in pots or even a hanging basket. Sunlight rather than heat is the thing that make for best tomatoes. If its too hot the plants produce less fruit and they don’t taste as good or last as long. Let’s hope we get a sunny Summer then!
What varieties to grow
By growing your own you can get a really big range of colours, sizes and flavours. Euan is growing black tomatoes this year but I never knew you can get pink, white and even indigo blue tomatoes. If your garden does suffer from blight you can pick certain varieties such as Ferline, Legend and Losetto that are more resistant to the disease. But they can still catch it in warm, wet weather.
Losetto has the bonus of being way to grow in containers in small gardens. Sungold is an orange coloured cherry tomato that loads of people think is the sweetest and best tasting of all. Shirley is one of Euan’s granddad’s favourites and he’s been growing tomatoes for 60 years. It is a medium sized tomato that normally gives a good crop. Rambling Redstrip is a great one for hanging baskets and has lovely green stripes on the red tomatoes. It has a long cropping season too.
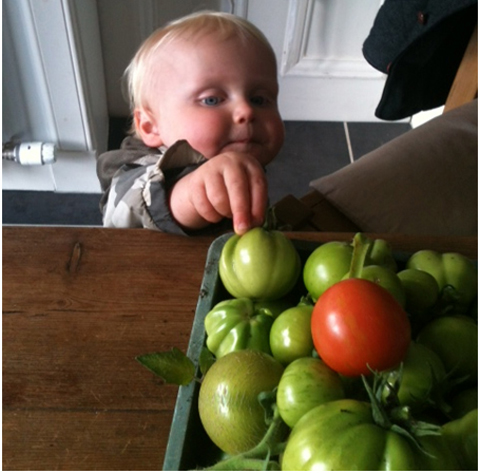
Euan likes to give his home grown tomatoes a bit of a taste test first!
Problems to look out for
Although they looking nothing alike, tomatoes and potatoes are related to each other (I think they’re second cousins once removed or something). So tomatoes can also suffer from the nasty sounding disease blight. It’s caused by a fungus and is normally more of a problem in tomatoes grown outside as the fungus likes damp weather (look out for my blog all about it next month). The brainy folk at the RHS have useful info on their webpages about blight and other tomato diseases such as blossom end rot and cracked or split tomatoes (both can be prevented with regular watering).
Just make sure to water the soil and not the plants- tomatoes hate getting their leaves and stems wet (almost as much army BFF Euan hates getting his hair wet!)
My favourite way to eat home grown tomatoes is right off the plant when you can still feel the sunshine on their skin, yum. Even in pasta sauces Mummy says they don’t need cooking as they are so yummy. She just chops some up with garlic and torn basil and tosses them through pasta with some olive oil.
I’m off to check on our little tomato plants to make sure they’re got enough water.
Make sure you buy British this week.
Lulu xxx
We dedicate this blog to my BFF Euan’s grandad Ian Kerr who sadly passed away this week. Ian was a tomato grower extraordinaire and obtained enormous pleasure growing hundreds (yes hundreds) of tomato plants each year to give to friends and family.
Alpine Loveliness
The Alpine region is renowned for its prettiness as well as its skiing. I have brought a little bit of the Alps to my own garden. Read on to see whether it involves slaloms and ski lifts…
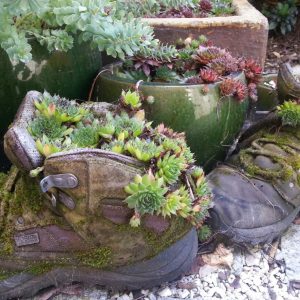
You can even plant in old boots
OK, I haven’t created a dry ski slope in my back garden (though that would be cool, wouldn’t it?) Instead I have created a mini project which is sure to brighten up your door step. Here’s how to…
Create Your Own Alpine Trough
You will need:
- Some form of container (it could be something funky like trainers or a chimney pot or an old trough or container
- Compost
- Grit
- Alpine plants
- Garden tools (you will see me using all my trusty old Twigz tools for this project!)
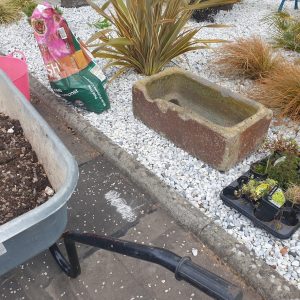
A stone trough is perfect for alpines
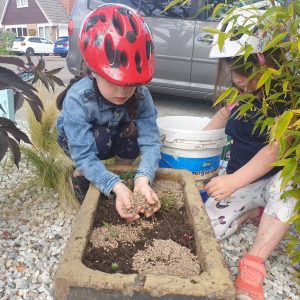
Add grit to the trough

Aren’t my alpines looking pretty!
Feathered friends
Birds are very pretty, they sound nice and they help us gardeners control pests and weeds. Did you know that more than 140 different types have been spotted in our gardens during surveys like the Big Garden Birdwatch and that 30 different types are found very often?
At this time of year the birds are very busy singing and making nests so it’s a great time to help them out. I’ve got some wise words to help you do that and a fun craft project for you to make your own colourful birds.
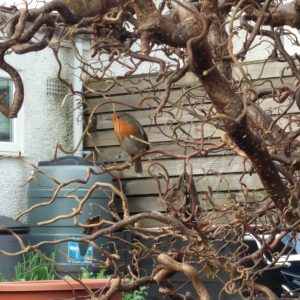
A robin came to visit our garden
Feed the birds
Just like me, lots of birds have favourite foods so the type of food you put out will make a difference to the type of birds that visit your garden.
The clever people at the Royal Horticultural Society have made up this list:
- Insect cakes for tits
- Berry cakes for finches
- Finely chopped animal fat and grated cheese for small birds, such as wrens
- Sparrows, finches and nuthatches enjoy eating the seeds from sunflower heads. Also, leave seed heads on herbaceous plants overwinter
- Niger seed for goldfinches
- Peanut cakes for starlings
- Fruit for thrushes and blackbirds. Scatter over-ripe apples and raisins on the ground for them
Remember that the feed should not be in bigger chunks. If the mummy and daddy birds feed chunks to their babies it could cause them to choke.
The plants that you grow can also provide berries or seeds for birds. Native berry producing plants you might have in your garden include blackberry, elderberry and hawthorn. Bird friendly plants someone might have planted include crab apples, honeysuckles, and sunflowers.
As I told you in my Big Garden Birdwatch blog, where you put the food will also affect the types of birds that you see. Finches, sparrows and tits like hanging bird feeders. These are best placed over paved or decked areas so you can sweep away and mess and prevent scavengers like rats taking advantage of the feed too. Bird tables are good for robins, sparrows and doves. Just don’t put them too close to trees were predators could jump from whilst birds were feeding. Blackbirds thrushes, and wrens don’t have the 3 second rule and are happy to eat their food from the ground.
Shelter the birds
To help the birds make homes in which to have their baby birds, you can hang up a nesting box. It’s best to do this on a wall rather than tree if you can as it makes it safer for the baby birds as cats and other animals can’t get to it. A north or north-east direction is ideal as it is less likely to get too hot.
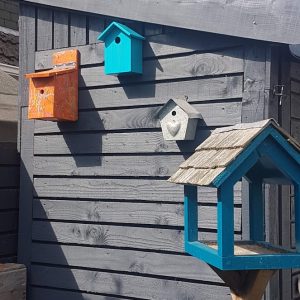
We have several bird boxes to choose from
Make your own bird
How about making your own colourful spring bird? (thanks to Happy Hooligans for the idea.)
- paper plates
- card for beak
- googly eyes (or darker card for eyes)
- white paper
- crafting decorations such as feathers, crumpled tissue paper, shiny cellophane
- paint
- glue

Tilda is trying to steal my lovely bird plates!
Do You Know Your Onions?
I love onions, I especially love them in my Mummy’s stovies. We always grow loads of them in our garden and now is the perfect time for planting them. So, I thought I’d help you grow loads too.

This ickle onion will grow nice & big, just like me!
Getting ready to grow
You can grow them from seed or from immature onions called sets. Sets are easier to grow but fewer varieties are available as sets. So if you want to grow something a bit more unusual then you’ll have to grow from seeds. Your sets might be marked as “heat treated”. This just means they’ve been sitting somewhere lovely and warm for up to 20 weeks (kinda like an extended holiday). Heat treatment makes for a bigger yield as the time the onions will grow before “bolting” and becoming unusable gets longer. So it’s a good idea for beginners to use heat treated sets.
Onions prefer open, sunny and light, free-draining soil. So you might need to dig in some organic matter to help drainage if your soil is really heavy. Don’t plant onions in freshly manured soil though as you’ll just end up with very pretty and luscious green leaves but small bulbs. They also don’t like acidic soil so you might need to add lime to planting area well before planting.
How to plant
If growing from seed, sow the seeds 1/2 an inch deep in rows that are 10-12 inch apart from late February to early April. Thin the weaker plants to 4 inch apart. If you’re using sets then you can plant these from mid March to Mid April. Place the pointed end of the sets down into the soil so only the bottom part is covered. Space the sets 4 inches apart with rows 10-12 inches apart.
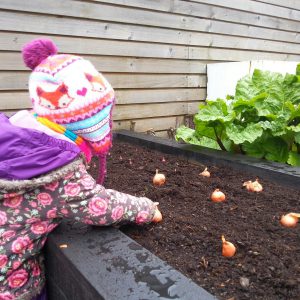
Make sure you space them out nicely like me
Whilst growing
Water when weather is dry and give an occasional feed with a general liquid fertiliser. Stop feeding from July to help prevent onion neck rot during storage. By planting your onions in a grid you make weeding easier as you can just hoe in both directions. Like me, onions don’t like competition for water so weeding is essential.
What to look out for
Several yucky fungal diseases can cause problems:
Rust disease produces rusty spots on both sides of leaves and reduces crop growth. No cure so you need to lift and destroy the crop.
Onion white rot causes the leaves to turn yellow and wilt and bulbs will have white fuzzy growths. Again no cure, you need to lift and destroy the crop.
Onion fly also cause leaves to yellow and prevent bulbs from developing properly. The fly larvae live in the soil and burrow into the bulb roots. Discard any affected bulbs.
Onion downy mildew also causes the leaves to yellow from the tips down and white mould develops on the affected leaves. Remove and destroy any affected bulbs.
Onion neck rot can occur during storage. To help prevent it, stop feeding from July, keep watering and don’t let the bulbs get wet after harvesting.
Harvesting & storing
Lift the onions as soon as they reach a useable size (normally between July and September) to use immediately. If you wish to store them wait until the foliage dies down naturally and then 2-3 weeks later you can lift them. Ease the bulbs up onto the soil surface and allow to dry there for another 2-3 weeks. If weather is a bit wet, dry them in a well ventilated shed or greenhouse. Once the skins are completely dry they can be stored in a light, cool, well ventilated place.
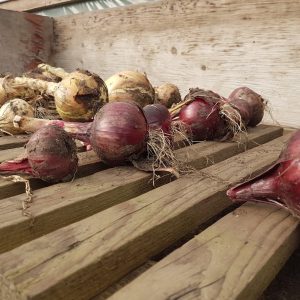
Make sure you dry out your onions then store them
What varieties to try?
Mummy and Daddy like to grow Sturon brown onions and Red Barons are our red onion of choice. We also grow “Golden Gourmet” shallots. The brainy people at Which? have done a trial of load of different types of onions to see which grow the most and biggest onions.
“Centurion” was the best buy brown onion and “Fen Red” the best red onion. Both gave more than 3kg of onions from 30 sets. Other good options were “Autumn Gold”, Turbo and “Red Arrow”.
So let’s get planting so we can all make yummy stovies come the autumn!
The “Lulu Burt Best of 2014 Awards”
Mummy says we’ve started a New Year called 2015 and it will be the year of the Sheep in the Chinese calendar. That’s fab as both me and my BFF Euan LOVE our toy sheep (both called Baa Baa!). I had an amazing time in 2014 so am hoping 2015 will be just as exciting. Here are my favourite things from 2014, otherwise known as the “Lulu Burt Best of 2014 Awards”.
Best product I used in garden
I had lots of fun last Spring using the fabby kids gardening tools from Twigz. I used them to grow veggies and flowers from seed and to look after the seedlings and plants as they got bigger. My favourite item was the watering can.
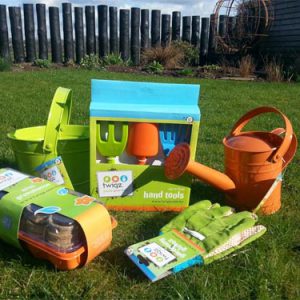
Twigz do a wonderful range of garden tools for children
Best things I grew (apart from taller that is!)
Regular readers will know that I LOVE a big bright sunflower. I even gave them away in the party bags from my birthday party last year. Two of my others faves to grow are tomatoes and potatoes. Imagine my excitement at discovering the TomTato plant. It grows tomatoes above the ground and potatoes below, all at the same time, cool huh? The big crop of sweet tomatoes was really, really yummy but the crop of potatoes didn’t stretch very far when it came to feeding a growing girl. It still wins the prize for yummy sweet tomatoes and being really different.
Best books I reviewed
The contest for best book was a close run thing, I gave 5 Lulu Burt gold stars to 2 fun books in 2014. So in this category we have a tie between fellow blogger Dawn Isaac’s “101 Things for Kids To Do Outside” and “Findus, Food and Fun” from Hawthorn Press.
Both books have really fab activities that little-uns like me can do.

The book is PACKED full of lots
(well 101 to be precise) of awesome ideas
Best places I visited
This is a no brainer. It just has to be Provost Park in Bridge of Allan. I (Lulu Ann Burt, aged 2.5 years) was the very important person who got to open the newly designed park. Mummy and Daddy were involved in this design project even before I was born (I still can’t believe anything of importance happened before I arrived!) It was great to see the site being turned into a low maintenance, Victorian themed place to meet friends or just relax.

Me officially opening MY park!
Best things I’ve made
Mummy tells me it is better to give a gift than to get one. This year I had lots of fun making presents for Mummy on Mothers Day and Daddy on Father’s day. Since I’m just little I didn’t have many pennies to spend so made do with up-cycling things from our kitchen.
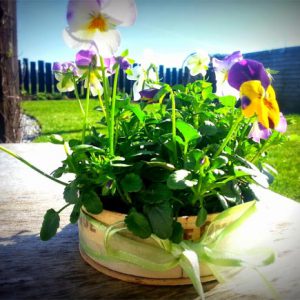
Pansies in cheese boxes makes a lovely gift

My decorated tin can planters
Best thing that happened in 2014
BIG DRUM ROLL PLEASE……. the overall, most wonderful and exciting thing that happened to me in 2014 was that I became a big sister. My very cute and cuddly (but not very good at playing hide and seek yet) little sister Tilda was born in November 2014. I can’t wait until she is old enough to do some gardening with me!

Tilda and I – double cuteness!
Wow, I did have a very busy year. What did you get up to in 2014? I’d love to hear all about your adventures. Let’s have even more in 2015!
Lulu xx
Big Fun with the RSPB Big Garden Birdwatch
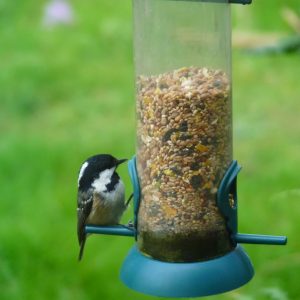
A coal tit came to visit
What is the Big Garden Birdwatch?
The Big Garden Birdwatch is a survey of the birds you can see in your garden or nearest green space and has been running since 1979- that’s so old (almost as old as Mummy and Daddy). It helps brainy conservationists learn how healthy the countryside is and if the numbers of any bird types are dropping so we can give them extra help.
Did you know that gardens make up about 4% of the UK’s land and that birds come into our gardens for food and shelter when conditions in the countryside get really hard?
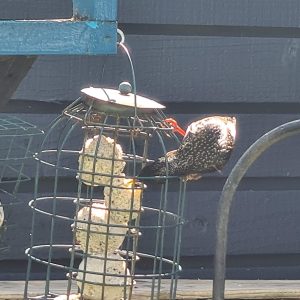
Starlings love the fat balls in our garden
What do you need to do for the Big Garden Birdwatch?
This year’s Big Garden Birdwatch is happening on January 24th and 25th and is really, really easy to be part of:
- Get your Mummy or Daddy to help you register online
- Spend one hour watching and recording the birds that come to your garden (it doesn’t matter what time of day)
- Submit your results online
- Feel all smug that you’ve helped gather super important information to help the birds
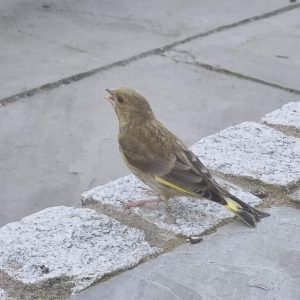
A beautiful greenfinch in our garden
What you might see in your garden
I recently reviewed the fabby RSPB book on how to identify the different birds you might see in your garden and how to make a trendy bird feeder to encourage them. But you don’t need to have that book as the Big Garden Birdwatch website has great pictures of each of the different birds you might expect to see in your garden.
The birds you might see will depend upon the food they can find in your garden and the type of feeder you use.
Blue tits, and Great tits like seeds in hanging feeders.
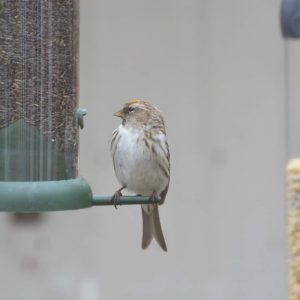
This common redpoll came for a visit
Blackbirds and wrens like their food to be scattered on the ground.
House sparrows and Bullfinches aren’t fussy and will eat food from any location.
The Big Garden Birdwatch website even has a super cool live bird counter that you can use on a computer or smartphone. It has hints and tips and lots of fun facts to learn whilst your doing your important work.
If you prefer furry or scaly creatures to birds then you’ll be happy to hear than you can also count the number of squirrels, hedgehogs, badgers, deer, grass snakes or slow worms.
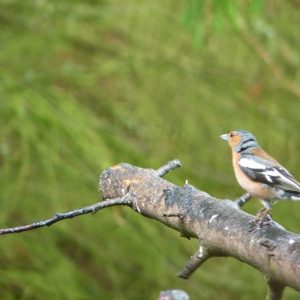
A beautiful chaffinch
I’d love to hear what birds you see in the Big Garden Birdwatch.
Happy bird spotting!
A Snail, A Snail, The Teacher Turns Pale…
Unlike many gardeners (and teachers), I LOVE snails. I love finding them in the garden, I love drawing them and I love reading about them in my favourite book The Snail and the Whale. In this blog I tell you a few facts about the banded snail, how to make your very own Snail Race as well as a lovely paper plate snail.
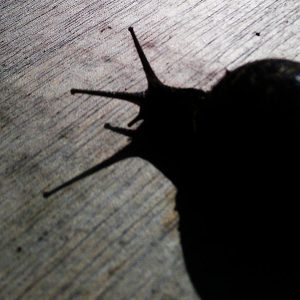
Head out and do some snail hunting at dusk
Banded Snail Facts
- There are 2 common banded shell snails in the UK – one is brown-lipped and one is white-lipped. The colours refer to their shell openings though, not their actual lips!
- Snails hide during the day in damp places and come out in wet weather or at night.
- Banded snails hibernate in the winter.
- Banded snails have two pairs of tentacles on their head which can be retracted. The longer, upper pair have the snail’s eyes at the very end of them!
Snail Race
- Snails
- Chalk
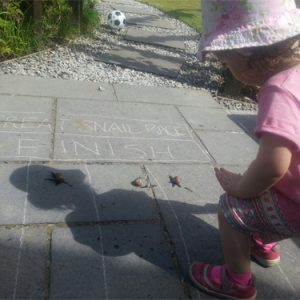
We have plenty of snails which we can race!
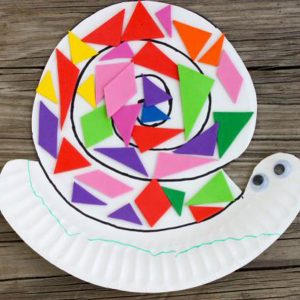
Make A Paper Plate Snail
Book Review: Findus, Food & Fun
In my latest blog, I am reviewing a new book from Hawthorn Press called “Findus, Food and Fun”. Read on to see what I think of it along with a crafty idea taken from the book…
Do you remember that I reviewed “Findus Plants Meatballs” back in May of this year? It got a lovely 4 star review from me. Well, the clever people at Hawthorn Press (hi Meredith!) have sent me their latest book in the Findus series, which is called “Findus, Food & Fun”, to review – can it go even better?
Each month features several projects, many of them seasonal and loads of them are outdoor projects and things to do in the garden so immediately I am interested! Even some of the indoor projects can be given a gardening twist as you will see below (although many are already garden and nature related). From nature activities to foraging, baking to crafting this book is perfect for kids like me. Here are some of my favourite things about this book:
- There are wonderful illustrations throughout the book making it bright and colourful.
- It features Findus the cat who I already love and who features in LOADS of books
- There are loads of projects to try each month
- It is packed full of fascinating facts on all sorts of subjects
- A lot of the projects just use up things you have lying around the house from old socks to beans, lollipop sticks to old bottles.
I have already tried out one of the projects which I have featured below but there are loads more I will be trying out including:
- Chocolate leaf garnish (pretty and yummy!)
- Rowanberry necklace
- Suet bell for birdies
- Magic tulips
I was so excited to get this book that I decided to make a project straight away. After a good read, I chose to make the “yarn pompoms” from page 56. I just gave them a Lulu-style twist to make them even more relevant to me and my blog…
Flower Pom Poms
You will need:
- A pom pom maker or some cardboard
- Wool (4 colours)
- Scissors
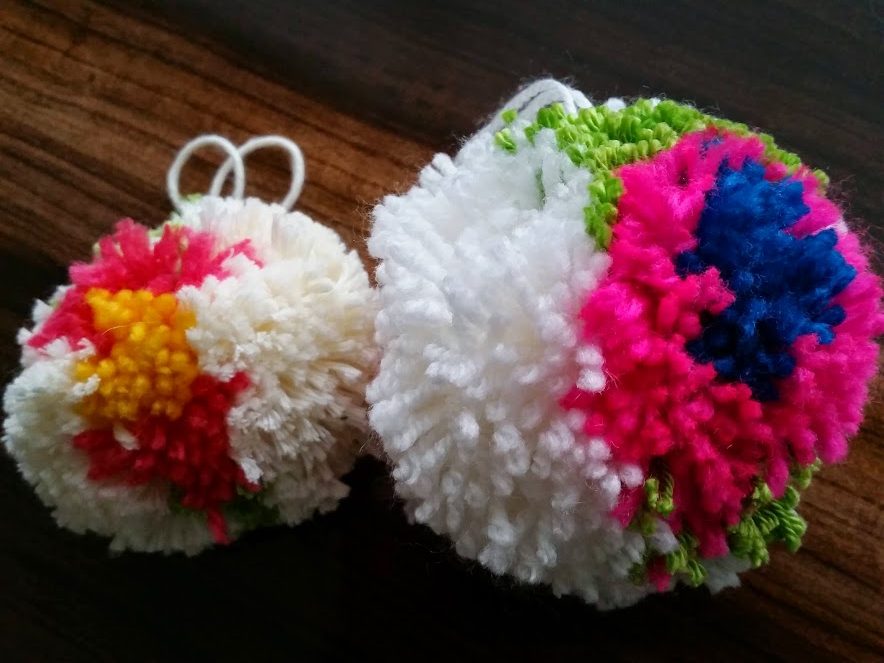
To make:
1. I used a special pom pom maker to make my poms poms. They are inexpensive and make life easier but if you don’t have one, you can make your own. Just cut two identical circles from cardboard with a hole on the inside.
2. Choose your first colour which will be the inside of your flower. I like a nice bright colour for this bit. My pom pom making kit works in two halves. If you are using a cardboard circle imagine a line down the middle and you will be doing the same on each half. Take your first colour and wrap it around the centre of each half several times.
3. Take your second colour (another nice bright colour) and do the same over the top and a little to the sides of the first colour.
4. Next is your leaf so choose a nice green and do some green to each side of your coloured flowers i.e. 4 bits of green.
5. Finally, take your base colour (I used cream) and cover the whole thing until it is all covered and there is no space for any more yarn.
6. Now ask an adult to help. If you are using a pom pom maker join the two halves together. Cut around the edge of your pom pom between each piece of cardboard or the two pieces of pom pom maker.
7. BEFORE you remove your cardboard or pom pom maker, make sure you take a piece of yarn and tie between the two halves really tightly and create a loop to hang your pom pom from.
8. Give your pom pom a little tidy with the scissors.
And there you have it, a beautiful flower pom pom. They are nice to hang up around the house, add as an accessory to a bag or a present or as a Christmas decoration. You could also make lots of them to make a fun Christmas wreath for indoors or sew them onto some fabric to make a wonderfully soft rug.
I highly recommend Findus, Food & Fun. Maybe you could ask Santa for it for Christmas?
Happy reading and making everyone.
Lulu xx
Nasturtiums: The Life Cycle
Nasturtiums. It’s a hard word to spell (and say!) but it’s a super easy plant to grow. From sowing to collecting the seeds I explain the life cycle of the nasturtium and share some interesting facts including the hilarious meaning behind the name!…
Nasturtium facts:
- Nasturtiums can be trailing, climbing or even dwarf varieties. I don’t think he was one of the Seven Dwarfs though…
- Nasturtiums are annual flowers which mean they complete their life cycle in one year. Don’t worry though they are easy to reproduce…
- The poorer the soil the more flowers your nasturtium plant will produce!
- Nasturtiums are great companion plants in the garden! They are known to deter aphids, whiteflies, cucumber beetles and other pests from roses, tomatoes, cucumbers, cabbage and other plants.
- You can eat nasturtiums – the flowers are a good source of Vitamin C and iron and look pretty on your plate. The leaves taste lovely and peppery and are great in salads.
- The name nasturtium means “nose twister” in Latin, referring to people’s reaction upon tasting the flowers!

Nasturtiums are easy to grow and taste and look great
How to grow nasturtiums:
To grow nasturtiums is super easy. You can plant the seeds straight into the ground, or you can make an earlier start and sow them indoors. Once your seedlings are bigger and all risk of frost has passed, plant your little nasturtium plants outdoors. I always plant some with my bush tomatoes which I grow in pots. They are great for keeping pests away and look sooooo pretty too.
How to collect nasturtium seeds:
After the flowers die away you will be left with a little green seed. Pick these and pop them into an envelope or paper bag and store in a cool, dark place over winter. Next Spring you will have free seeds to grow your nasturtiums again.

Collecting nasturtium seeds for next year is really easy!
You could also leave the seeds to fall into the surrounding ground and you will see them start growing there again the following year. How easy is that? Easy to grow, great for companion planting, you can eat them AND they look pretty. Why would you NOT want to grow them?
Lulu xx
Pumpkins – Lanterns and Mini Pies
Hey everyone, it’s Halloween this week. What are you dressing up as? I am going to be a cat and I have a brilliant cat joke to share with you later! As well as dressing up and trick or treating (or guising as we call it up here in Scotland!) with your friends it’s also pumpkin time! In my special Halloween blog I share some perfect pumpkin facts, let you see this year’s lantern and share a wonderful pumpkin recipe (ooh and I’ll maybe squeeze in a wee book review while I am here too!…)

Me and my Jack Skellington pumpkin
Pumpkin Facts
- Most of the pumpkins we see and use as lanterns or for eating are orange but did you know they can be yellow, white, green and even red!
- Carving Halloween lanterns is a tradition that originates from HUNDREDS of years ago in Ireland (that is even older than M&D!) They were originally made from turnips or potatoes which is waaaay harder to carve than a pumpkin!
- Pumpkins are a member of the gourd family (isn’t that a funny word!) which also includes melons, cucumbers and courgettes!
- The heaviest recorded pumpkin weighed in at a massive 1,810 lb 8 oz!
- If you want to grow your own pumpkin you should plant your seeds in late May.
Carving pumpkins is a lot of fun and I love seeing them lit up in the dark evenings. Here is ours this year:

Doesn’t my pumpkin lantern look great all lit up!
Book Review
The very lovely people at the RHS sent me a copy of their “Grow It, Eat It” book. It is perfect for little gardeners like me who love growing their own fruit and veg. Not only is it packed full with tips on how to grow all sorts, from tomatoes and aubergines to spinach and strawberries, it also features lovely recipes using what you have just grown.
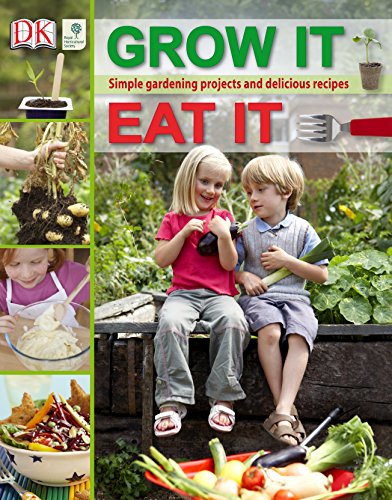
Some of my favourite recipes are carrot and orange muffins and potato fish cakes. I am definitely going to try the sunflower bread soon too which you bake in flower pots, how cool! It’s a perfect book for all weathers and all times of year so I definitely recommend adding it to your collection. My “Lulu’s Rating” for this book is:
Today, to keep with the Halloween theme, I have chosen to share one of the recipes from the book which is…
MINI PUMPKIN PIES
You will need:
- 500g pumpkin
- 1 tbsp oil
- 375g puff pastry
- 1tbsp plain flour
- 90g treacle
- 1 egg
- 3 egg yolks
- 300ml milk
- 1/2 vanilla pod
- pinch of salt
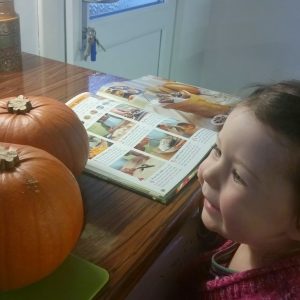
Wow, two pumpkins!
2. Shape the puff pastry into 16 small balls then roll them until about 6cm in diameter and press into a bun tin.

Roll out your pastry balls
3. Place parchment paper into each pastry and fill with baking beans. Bake for 15mins.
4. Pour the milk into a pan. Add the vanilla seeds and heat until almost boiling. Leave to cool a little.
5. Lightly beat the egg yolks, whole egg and treacle in a bowl. Add flour and salt and beat until smooth. Add the milk mixture.

Mixing it up!
6. Pour the smooth mixture into a pan and bring to the boil, stirring all the time until thickened. Remove from heat and stir in pumpkin puree.
7. Spoon the mixture evenly into the pastry cases. Bake in the over for 20-25 mins until just firm and slightly puffed up.

Ready for the oven
A yummy, healthy treat to impress your friends with this Halloween.

The mini pumpkin pies
Oh and I almost forgot, here is my Halloween joke:
What is a cat’s favourite colour?
PURRple of course!
Happy Halloween everyone!
Lulu xx
Perfect Potatoes with Twigz
Our lovely friends at Twigz have supplied us with some awesome gardening equipment which I have used ALL year. One of my favourite things to grow is potatoes. Here I tell you a little about what I have grown, how my Twigz tools have helped and also a crafty project if you have a left over potato…
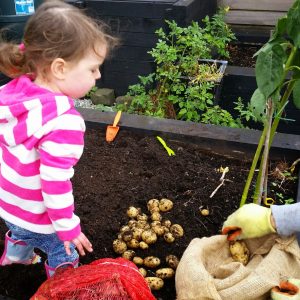
Me getting stuck into the tattie harvesting with some help from Twigz
Way back in March, I told you about 10 Easy Peasy Veg to Grow this year. Did you manage to grow any? One of the things I grew was potatoes, Maris Peer potatoes to be precise. They are really easy peasy to grow. You need to:
- Collect your seed potatoes in your handy Twigz bucket
- Clear/weed the area you want to plant the potatoes in using your Twigz hand tools

Twigz do a wonderful range of garden tools for children
- Dig holes using your Twigz trowel to plant your seed potatoes in.
- As the potatoes grow and you see the green leaves sprouting, cover them up (it’s called “earthing up”) until they get so high you can’t cover them any more.
- Keep your potatoes well watered while they are growing using your Twigz watering can.
- Keep the area around the potatoes well weeded
- Once the foliage has died back you can dig the potatoes up (time to get that trowel and bucket at the ready again!)
- Eat (yummy. Twigz need to make a knife and fork set for this part!)

Our trug full of lovely perfect potatoes
So there you have it, easy peasy potatoes in one year. They store really well through winter too, just keep them in a hessian bag in a cool, dark spot. (The hessian bag is perfect for the sack race come Spring time too!)
Potato Stamping

Potato stamping fun
- A potato
- Paint
- Sharp knife (and a grown up to help)
- Paper
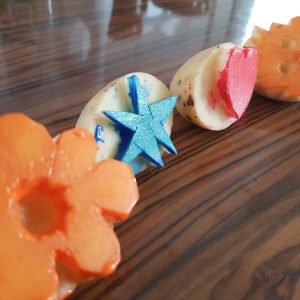
We cut some cool shapes
Lulu’s Sunflower Competition: The Results Are In…
Hey everyone. Do you remember waaaay back in February I launched “Lulu’s Sunflower Competition“? Well, it has been a busy old summer with some of my friends better than others at growing their sunflowers! But the decision has been made and we have a winner. Read on to find out who it is and to see some lovely sunflower photos…

A host of golden…sunflowers!
Despite being the expert in all things gardening, I somehow didn’t win this competition! Must have been that one time I let M&D water my sunflower. Anyway, I still made a good effort and here is a picture of me gazing up at my sunflower:
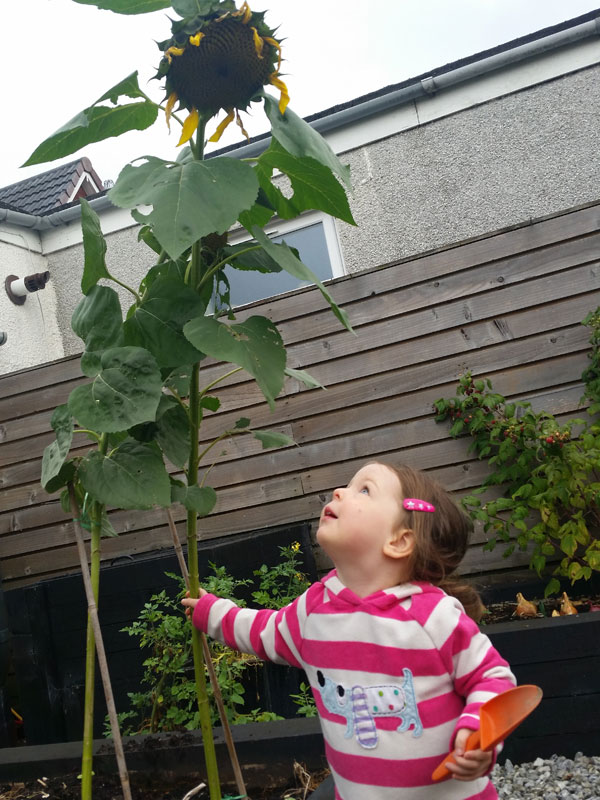
Mummy, who has stolen my sunflower’s petals?
But there can only be one winner of our sunflower competition (well it’s actually two) and this year it is…drum roll please…Jamie and Ollie Norton!!! Here is Ollie with the winning sunflower. It is soooo tall it is higher than the shed and his Daddy needed to hold him up to see it properly!

Ollie and the winning sunflower
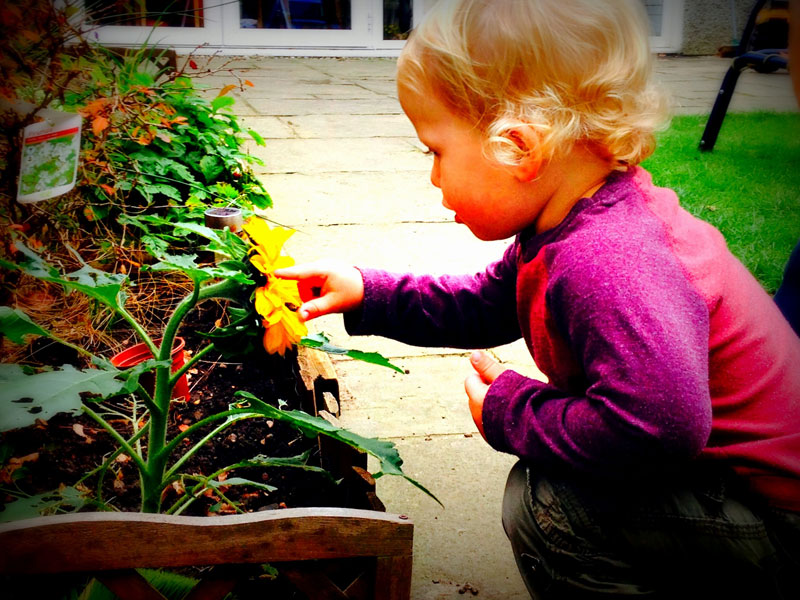
Ollie with his dwarf sunflower
Lulu


