Sowing The Seeds Of Love
Tuesday, 25 February 2014
Hi everybody! It’s less than a month ’til the official start of Spring which is super-exciting! Already plants are pushing through the ground, buds are appearing on shrubs and slowly the garden is waking up from its winter sleep. Let’s have a big stretch everyone as it’s time to dust down your seed trays, rummage through your seed boxes and get sowing. If you’ve never sown seeds before, don’t worry, I will talk you through the process, making it super-easy. Plus you don’t have to have any fancy equipment as I have some neat alternatives to share with you. Come on, let’s do it…

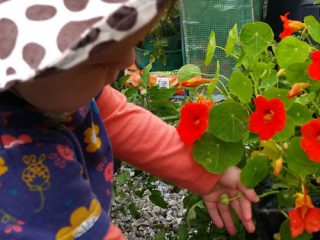
Collecting nasturtium seeds for next year is really easy!
Step One – Organise your equipment
If you are a professional like me you will have lovely seed trays to grow your seeds in. But I think it’s cool to grow them in other things which are lying around the house. I will tell you more about them later. But first things first, make sure you give your trays, cells and covers (or whatever you are using) a good old clean. It gets rid of nasty bugs which could affect your seeds. It’s just the same as us washing our hands before we eat, right?
Step 2 – Fill your containers with compost
It’s important to use a good compost which is meant for sowing seeds to give them the best possible start. This sort of compost is lighter and holds water better which means the seeds can grow more easily. Read your packets in case your seeds have special instructions. We used Verve Sowing and Cutting Compost (it has to be the 12L bags) as it’s a Which Best Buy.
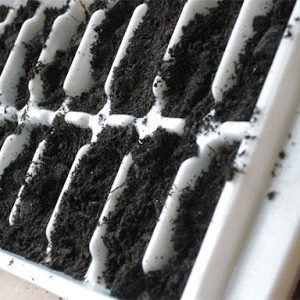
Fill your seed trays
Step 3 – Sow Your Seeds
Remember to read your packet and find out when and how your seeds are to be sown. Some like to sit on the top, some like a light covering. We have sown some of ours slightly early but we don’t have a heated propagator so that will be fine. Some of the seeds are teeny-tiny (like a Pontipine!) so you have to be really careful when you are handling them. I like the pumpkin and courgette seeds as they are big (like me!)
Step 4 – Label & Cover
Make sure you label your trays clearly so that you know exactly what is growing there. You could write the names or draw a picture of what it will look like. It’s important to label as whilst I love growing courgettes in the middle of our flower beds some people might not want their broccoli in a hanging basket 😉 Cover your trays to create a humid environment for the seeds to germinate well. Remember to keep the trays well watered and in a sunny spot.
Alternative Trays
If you don’t have seed trays there are lots of alternatives you can use such as plastic bottles, yogurt pots, tin cans, egg cartons, juice cartons, old boots, milk cartons or any old flower pots you have sitting around. To use a bottle, cut the plastic bottle in half long-ways (ask a grown-up to do this) to create a lid which you can easily flip up to water. Remember to put drainage holes in the bottom.
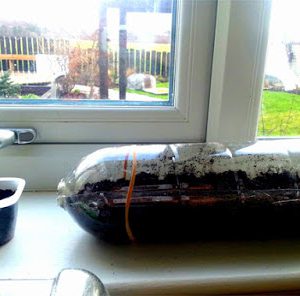
Use a juice bottle as a seed tray
So there you have it! And already, even in just a few days I can see my seeds starting to push through the soil. I have a selection of pretty flowers growing such as nasturtiums, poppies, sweet peas and cosmos as well as loads of different veg from courgettes and pumpkins to tomatoes (OK, technically a fruit) and broccoli. How exciting! Once your seedlings have developed their first true leaves and are large enough to be handled, carefully pot them into their own small pots. Be careful to handle them by the leaves or you may damage the stem.
Give on, give sowing some seeds a try. I promise you it’s waaaay more fun, more tasty, cheaper and better for the environment than relying on supermarket produce.
Hugs & kisses,
Lulu xx
Search Blog
Recent Blog Posts

Beautiful Barca
We were lucky enough recently to visit beautiful Barcelona for a long weekend. We did of course do the usual...

Essential Lawn care
With spring fast approaching our garden maintenance team are at the ready to help keep your gardens in tip top...

Spring Forward!
Now that we are occasionally getting some sunny days, it is the perfect time to “Spring Forward” and start venturing...

Garden Trends for 2024
Welcome to our first blog of 2024 and what better way is there to kick off the new year than...

Top 5 Jobs For The Autumn Garden
With Halloween and Bonfire Night now behind us we are safely in the realms of autumn with the glorious carpets...