Free Upcycled Garden Bunting
Our play house bunting was start to look a little sad and faded so we needed something new and colourful to add some pizzazz to the play house. We had been given some plastic wallets recently which we have no use for in the office but we knew they would come in handy for a crafty project sometime. So we decided to turn them into some upcycled garden bunting and create a fun and free addition to the garden. Here’s how…
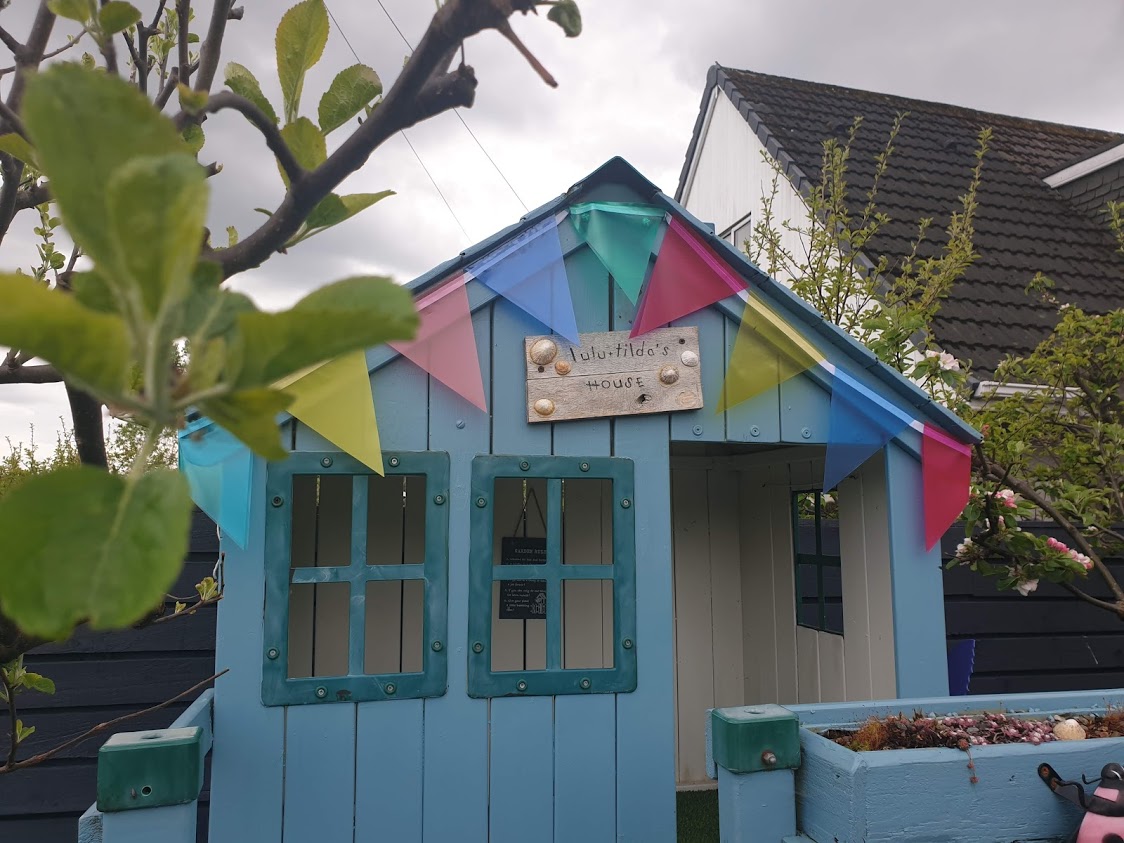
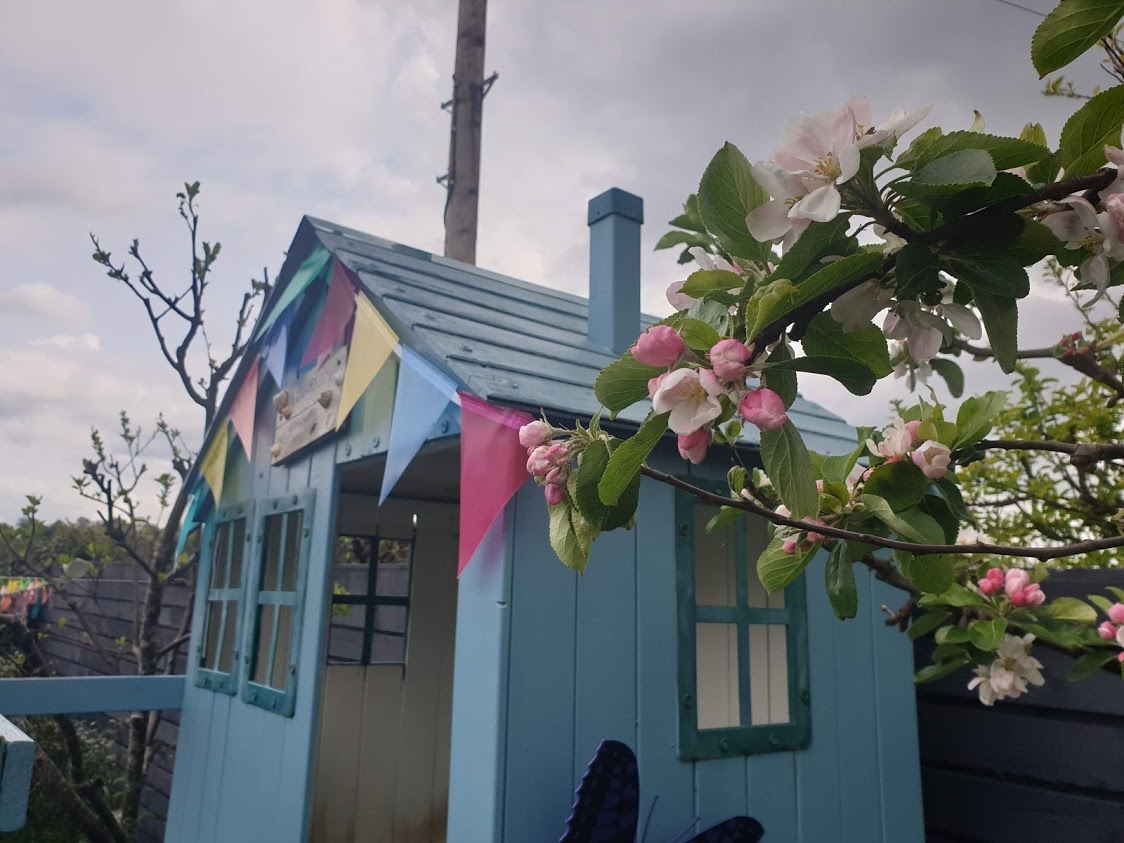
The playhouse bedecked in its upcycled garden bunting
You will need:
- Plastic wallet
- A piece of cardboard
- Pencil
- Ruler
- Scalpel or Scissors
- Bias binding or string
- Thread or staples
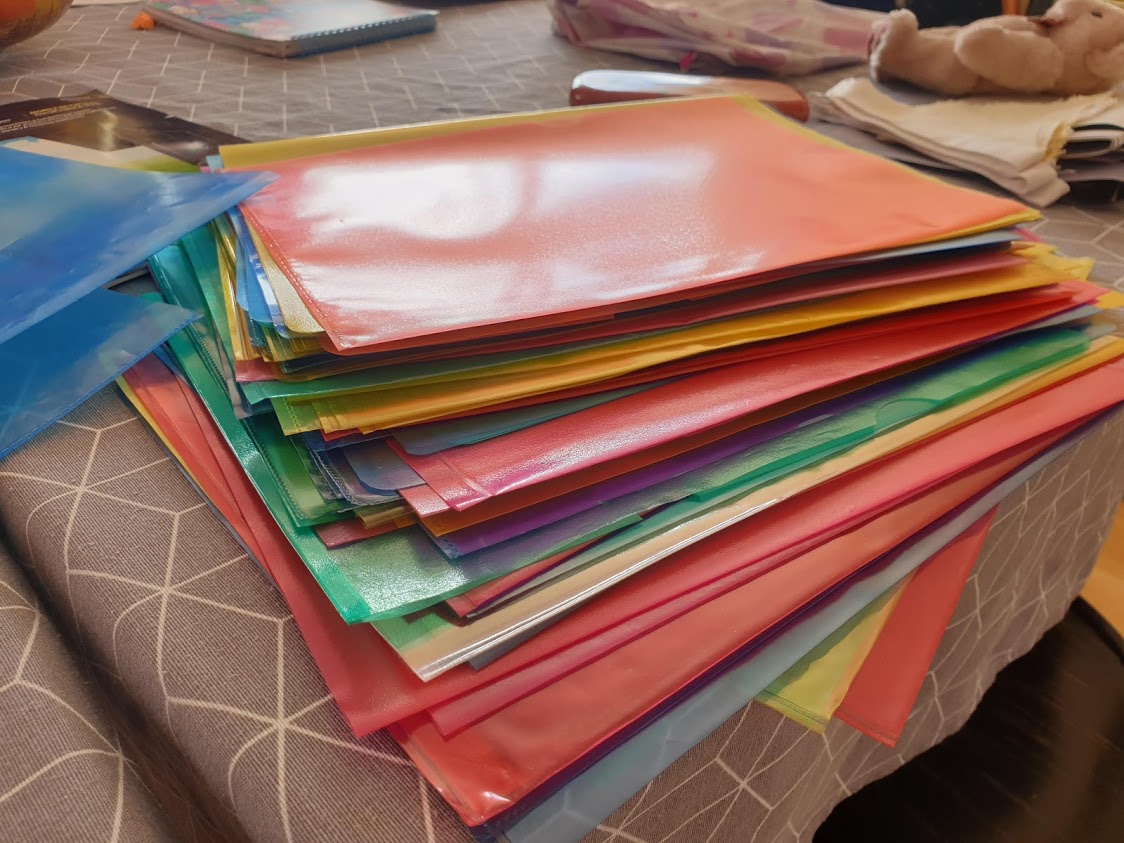
Old plastic wallets can be upcycled into garden bunting
To make:
- Make your triangular template using your cardboard, ruler and pencil
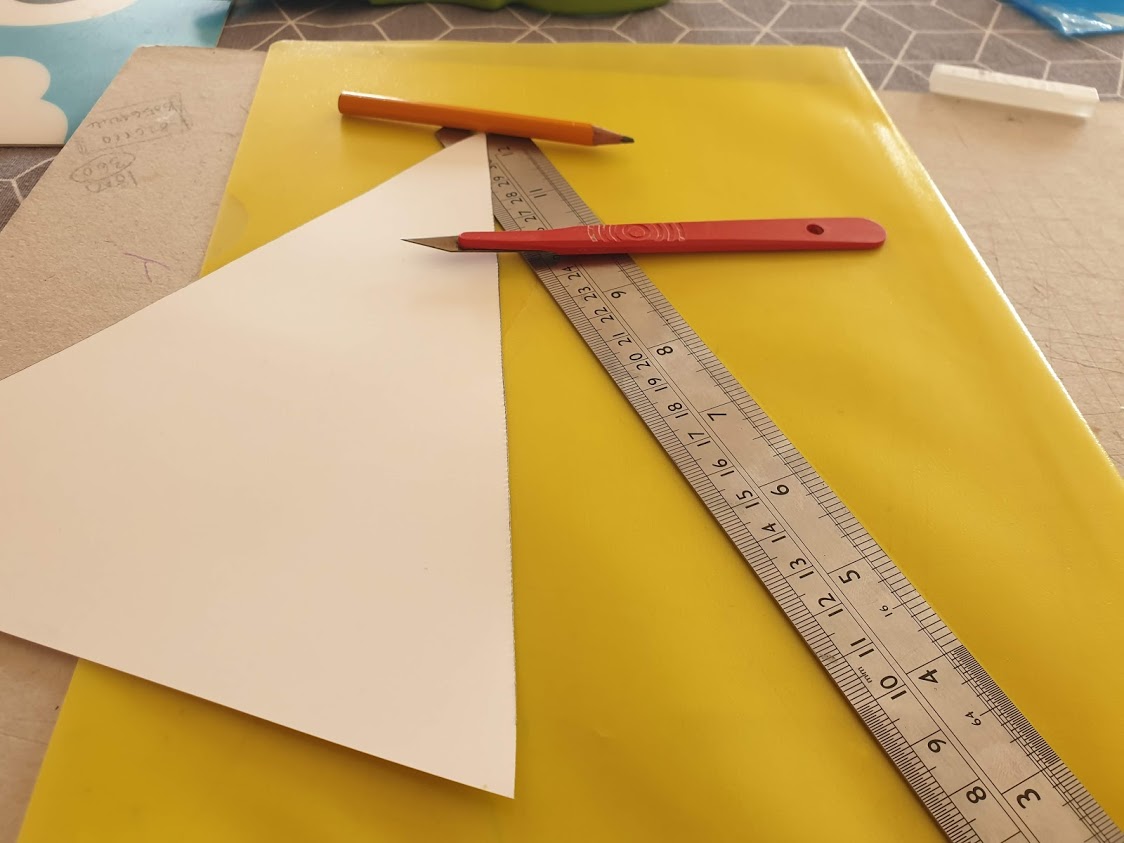
Make your cardboard template
2. Draw round your template onto your plastic wallet. We used the bottom of the folder that is joined together as the top of our bunting so that we had double thickness and stronger colour
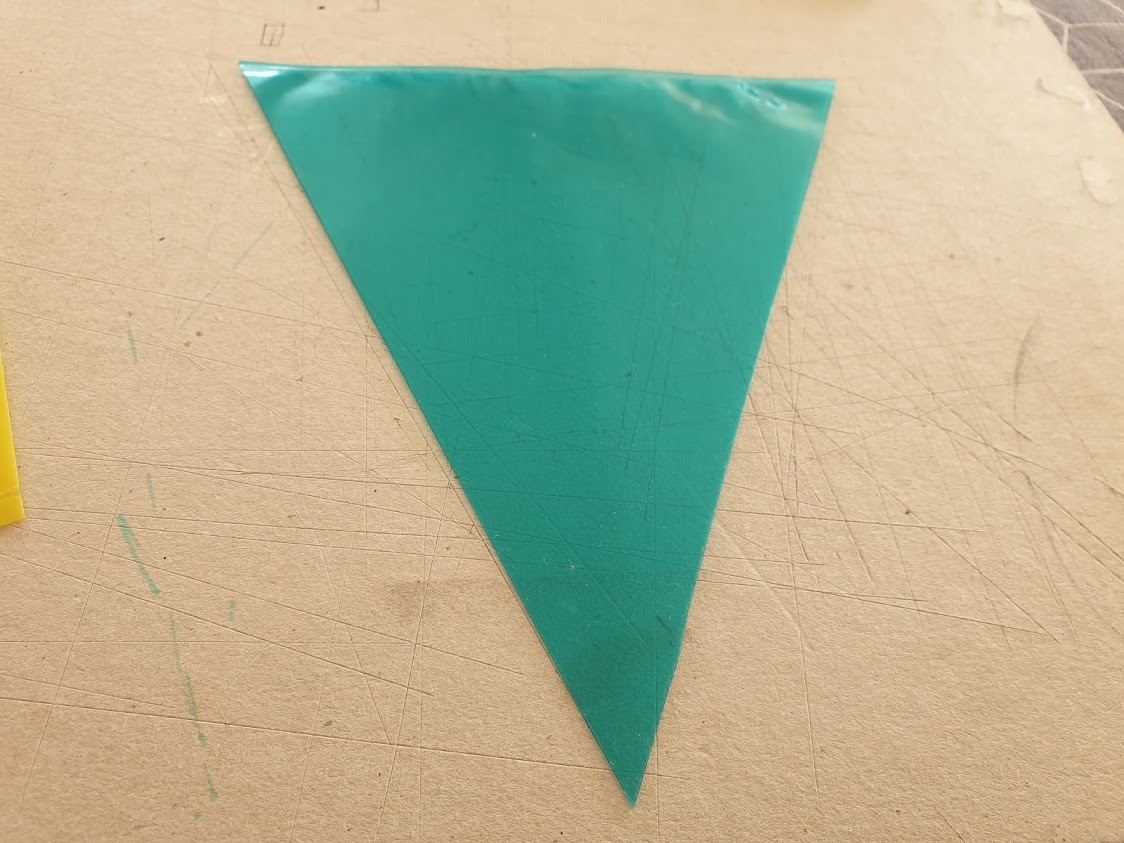
Make your bunting out of the plastic wallet
3. Cut out your triangle – we used a scalpel but you could just use scissors. Don’t cut your joined end.
4. Repeat until you had all your bunting made
5. Add your bias binding or string through the middle of each triangle and either sew or staple them down.
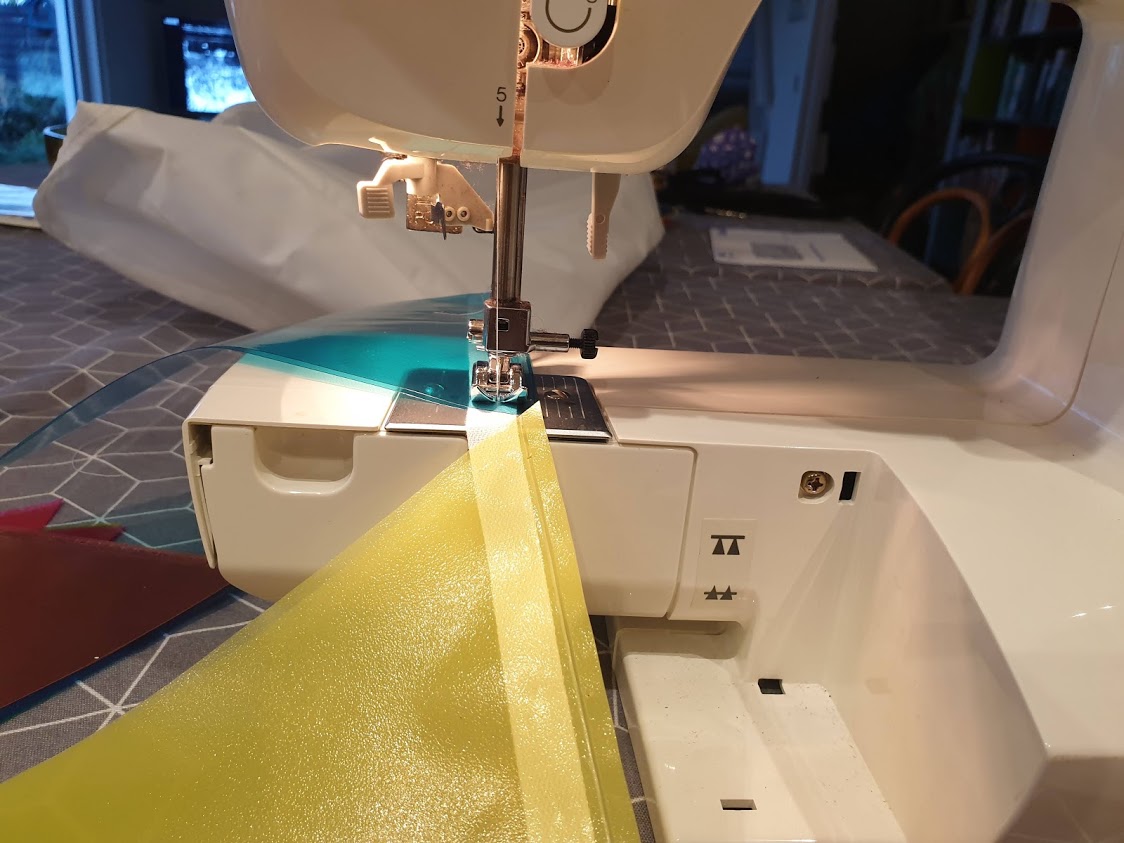
You can sew or staple your bunting together
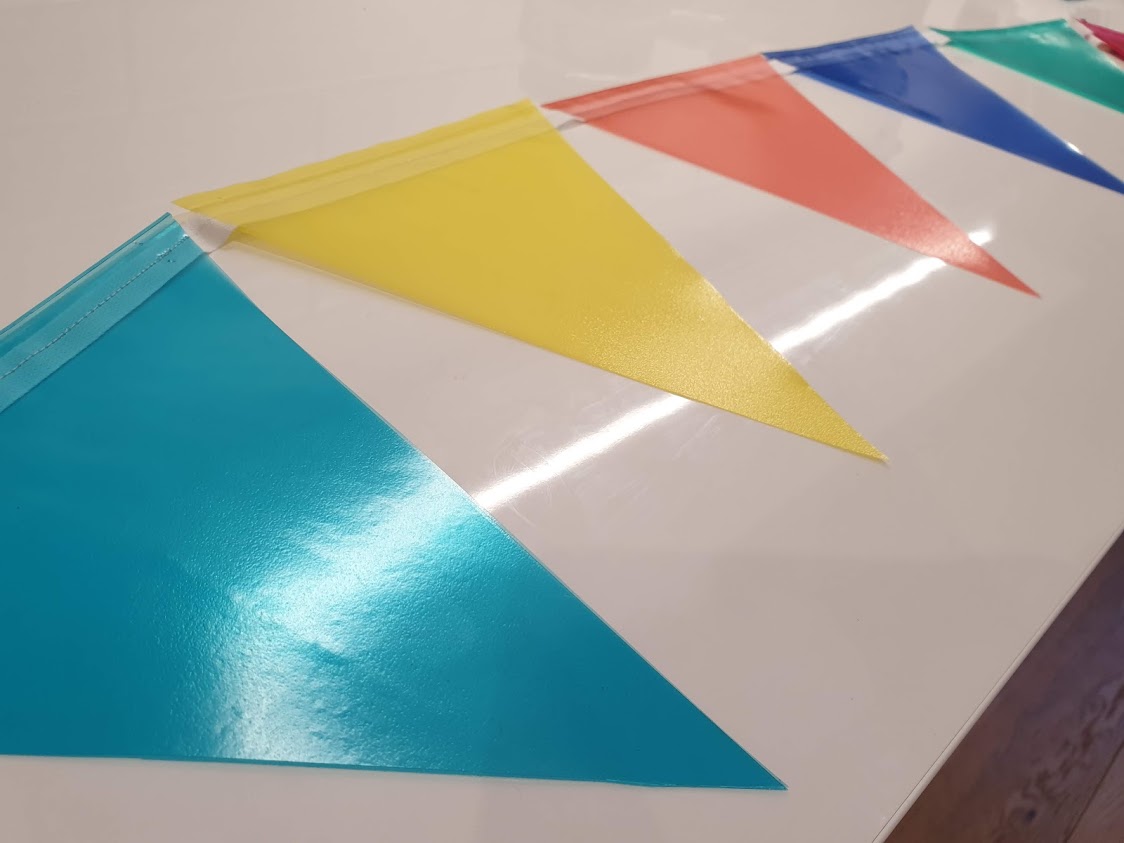
The bunting looks so pretty and colourful
6. Add to your garden.
Pretty upcycled bunting for the garden
Aren’t they a pretty addition. We have lots of folders left, I wonder what we will make with them next!
Mama Vialii!
Lulu’s Garden Double Book Review
Hi everyone! The lovely people at Hawthorn Press recently sent us two of their books to review. I know how you love to read about gardens and things to do so I have read, pondered, laughed, crafted and generally got a good feel for what they are all about. Want to hear what they are? Well read on Macduff…
Findus Plants Meatballs by Sven Nordqvist
Findus is a cat so I immediately liked this story as I have THREE cats. None of them are called Findus though and to be the best of my knowledge none of them have planted meatballs! Now, I think I should point out that this is a fiction book (that means it’s a made up story!) Or at least I think it’s a made up story, you can never be quite sure… The Findus series originates from Sweden and there is a wide range of stories featuring Findus. I love this one as it centres on the garden. Farmer Pettson is busy sowing his vegetables which inspires Findus to do a bit of planting of his own. Chaos ensues and it is VERY funny to see what happens to the vegetable patch. I hope the same doesn’t happen to our own veg patch mind you! There are lots of lovely pictures in this book too. I would definitely recommend this book as a fun read for everyone!
Lulu’s Rating: 4 lovely glittery stars
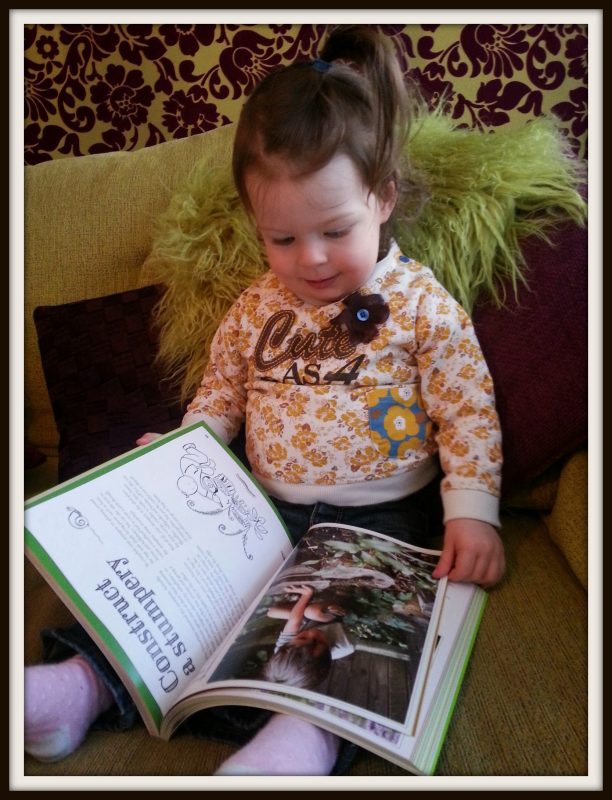
Gardening with Young Children by Beatrys Lockie
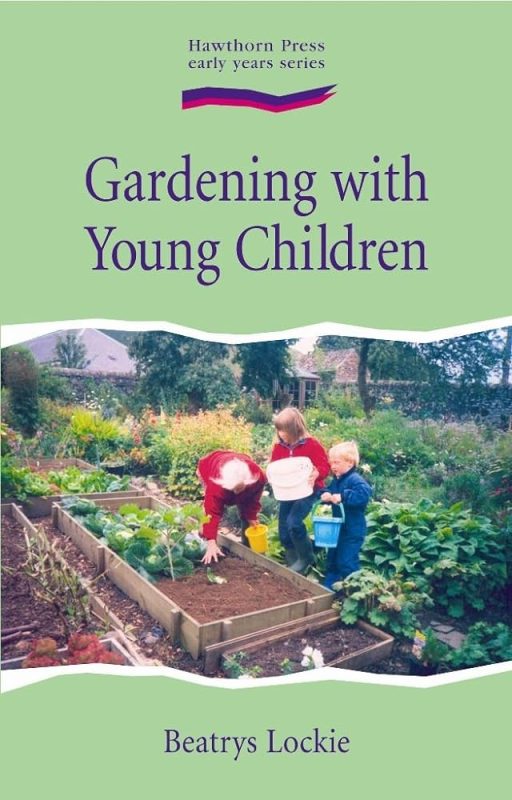
Gardening with Young Children is a guide to how to encourage kids like me to get outdoors, engage with nature and learn to garden. It is full of practical advice on what to grow and when. There is lots of information on wildlife as well as plenty of recipes and projects to make. There are poems and songs in the book too which breaks it up and makes it quite different from all the other books on this subject. The book feels a lot more old fashioned in terms of style than many of its competitors and I think if it had new photographs and lots of colour pictures it would be a lot more engaging for children and grown ups. There is a lot of useful content and it would be a useful reference book but sometimes it can be a bit dry and hard to read. However, it is worth the struggle on as there is a lot to learn and some lovely projects to try. I have shown you my step-by-step guide to one of my favourite projects below.
Lulu’s Rating: 2 twinkly stars
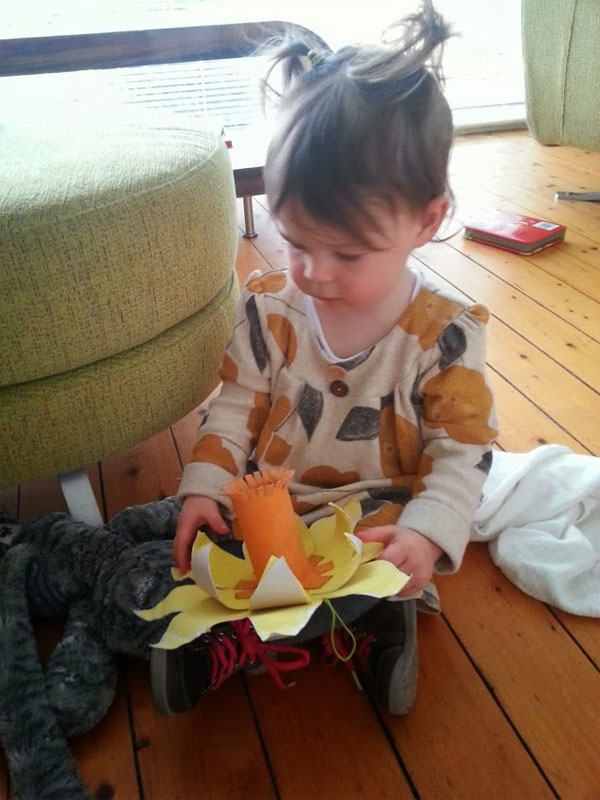
Make a Garden Crown
- Some corrugated cardboard
- Scissors
- Staples and a paper clip
- Paint
- Leaves
To make:
1. Get some card board (make sure its is corrugated.)
2. Bend it round your head to get it to the right size. Hold it in place with a paper clip.
3. Take the crown off, ask a grown-up to cut off any excess cardboard to get the height of crown you want and ask them to staple the edges together securely.
4. Now it’s time to decorate your crown. I painted it funky colours but you could add glitter, shapes or even go into the garden to find other things to stick onto your crown such as leaves, berries or flowers.
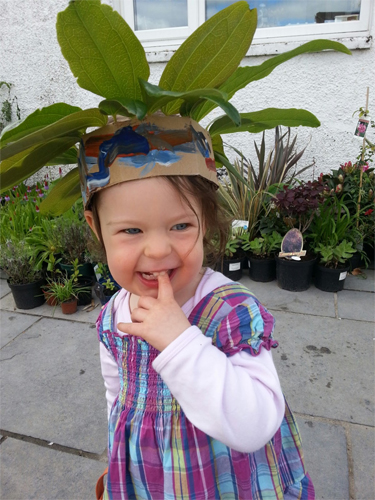
Princess Lulu and her magic crown!
Thanks to Beatrys Lockie for the inspiration for this lovely craft project.
I hope you have enjoyed reading my book reviews and my Garden Crown project and it has inspired you to get outside and do some projects of your own (and to read a nice book!)
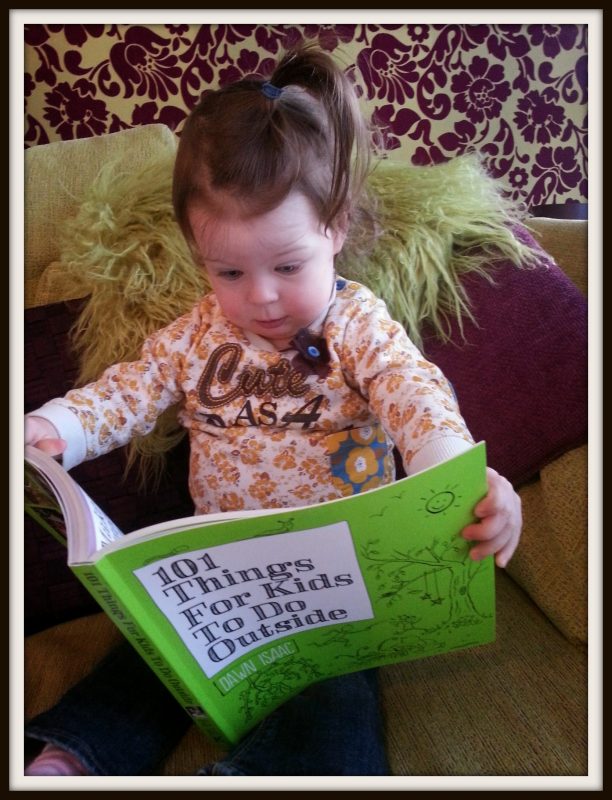
Book Review: 101 Things for Kids To Do Outside by Dawn Isaac
Next week a new book will be launched and I was lucky enough to be sent a sneaky preview copy so that I can tell you, my lovely readers, all about it. It’s written by a fellow blogger called Dawn Isaac (she is very clever and is also a garden designer like M&D) and is called “101 Things for Kids To Do Outside”. Could it be any more perfect for me and my super-duper blog? Here’s what it’s about, the sort of things you will find inside and what I think of it…
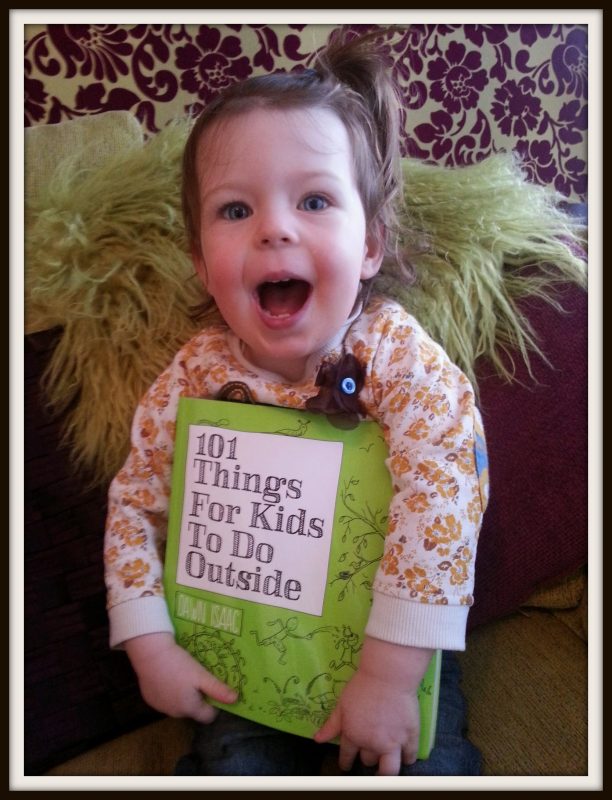
Clutching my special preview copy
Dawn Isaac has three kids of her own so she knows a thing or two (well 101 actually) about kids and how to have fun. She is firmly of the same mindset as me that it’s waaay more fun to head outside than to be stuck inside watching TV (although that can be fun too).
The book has been split into four seasons so frankly there is no excuse to not head outside, whatever the time of year. There are also projects for people who don’t have a garden. Just head outside to parks, woods, public gardens, wherever.
The book is PACKED full of lots (well 101 to be precise) of awesome ideas
Here are some of the things I just love about this book:
- There are lots of lovely big pictures for every single project so you can see how it is built and what the final project should look like.
- On every project it clearly lists all the materials you need so you can see quickly what you need to get or you can quickly choose a project where you already have everything you need. Loads of the projects just use the sort of things you will have lying about the house.
- The book is filled with lots of tips (like really awesome ones on how to make games messier, yay!)
- There are lots of ideas you can use as gifts throughout the year (home made gifts are so much nicer to give and receive.)
- There are lots of fun cartoons throughout the book.
- There is a great mix of quick and easy projects (that can be done in about an hour) as well as some which you can spend a bit more time on.
- It’s a great reference for things to do at parties or on play dates (your friends will think you are the coolest person ever having all these projects up your sleeve.)
- There’s a great mix of games, gardening and craft projects – exactly what my blog is all about.
There are lots of cool projects – do you want to hear some? But sshhh, don’t tell anyone else OK?
What’s in the book…
The lovely people at Kyle Books (hello Hannah!) have given me permission to tell you about some of these projects over the course of the year so watch out for these in future blogs. A few which have already caught my eye and I think are brilliant ideas are:
- Grow a potato tower (it uses old tyres and is a brilliant way of “earthing up”)
- Go on a bear hunt (hide and seek for all ages)
- Brew your own plant food (it’s like a witches brew and stinks, yay!)
- Make a twig plant pot (I think this would be an awesome Mother’s Day project, watch this space…)
- Make outdoor bunting (perfect for garden parties, if only we were having one soon Daddy that we could try this at…)
- Make a butterfly feeder (it involves painting so I am in!)
- Hold a snail race (I LOVE snails!)
- Make autumn crowns (as a princess I insist on this project!)
I hugely recommend “101 Things for Kids To Do Outside” . I think it would be a WONDERFUL gift to give friends for Easter (or drop hints to your grown up to buy it for you!) It will last a whole lot longer than a chocolate egg. This book is loads of fun for kids of all ages. The only thing you will need to watch out for is your grown up trying to steal it.
Lulu rating: 5 big shiny stars!
Hugs & kisses,
1. I would like to write a book when I am a big girl. Perhaps when I am three…
A (Light) Bulb Moment – Planting Spring Bulbs
Now is the perfect time of year to get outdoors, plant some bulbs and then sit back and wait for a Spring Spectacle! Here are my top tips for planting spring bulbs. I have also included a wonderful craft project, perfect for children who love gardening and art, so you can make your own daffodil to brighten up your home through winter while you are waiting on the real ones to spring to life.
Be Prepared
Now, I ain’t no Boy Scout (I will be joining Beavers when I’m bigger though!) but when it comes to bulbs I agree with their motto “Be Prepared”. Bulbs like well drained soil so if you have heavy soil add a bit of grit to the area when you are planting. A small handful at the bottom of your planting hole is always a good idea too. And make sure you have given your garden a good old weed and tidy before you plant your bulbs too in order to give them the best possible start.
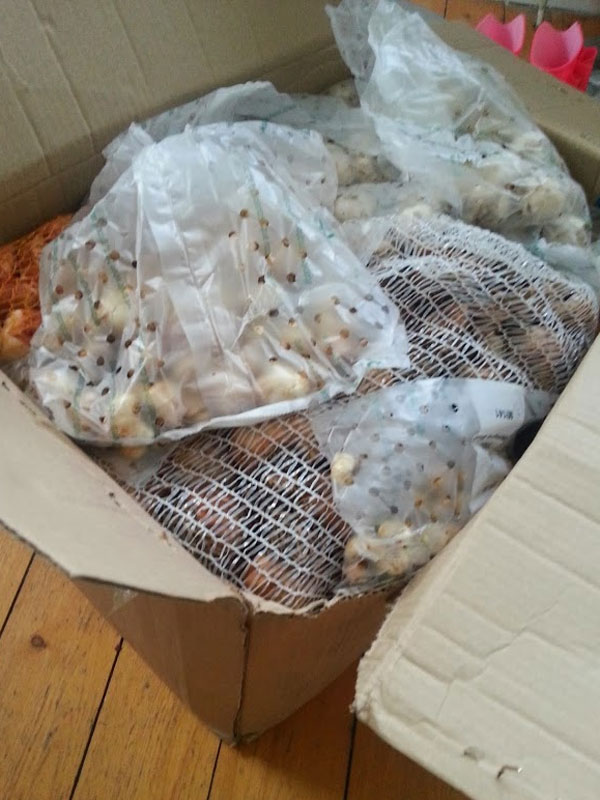
That’s a BIG box of bulbs to plant!
No Soggy Bottoms
Now, a bit like in “Great British Bake-Off”, we don’t want any soggy bottoms on our bulbs. Give the bulbs a squeeze before you buy them and make sure they are nice and firm. If you are digging out old bulbs from the shed, discard any that are soft, mouldy or shrivelled.
The Only Way Is Up
It might sound silly but plant your bulb the right way up. The top is the pointy end. The bottom is the round, hairy end (bit like my Daddy, tee hee). If you are not sure plant them on their side as they will turn themselves round the right way as they grow (aren’t plants clever?!) Some small bulbs such as fritillaria are often best planted on their side, especially in heavy soil, to stop water getting into the bulb and causing it to rot before it has become established.
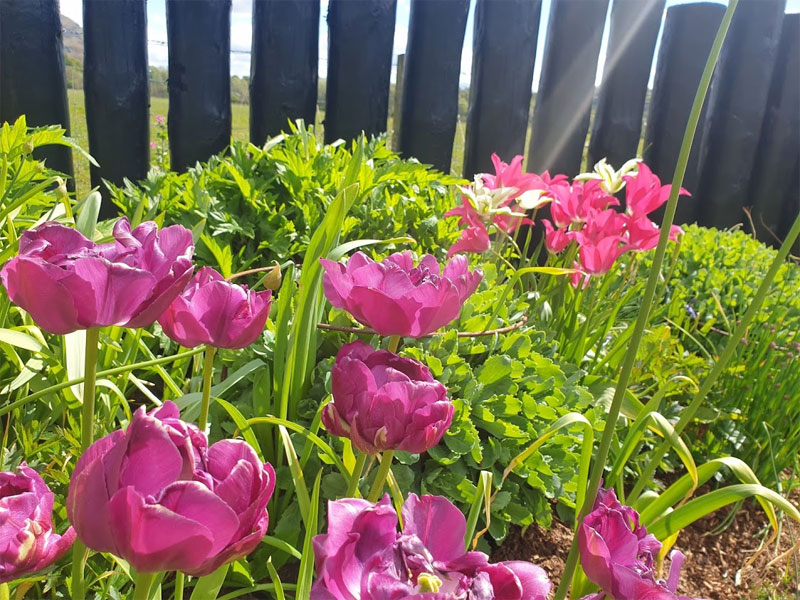
Beautiful tulips in the sunshine
Label ‘Em
It’s not just our nursery/school stuff that needs labels on them, plants need labels too. A little discreet wooden label won’t be offensive and will help you avoid putting a fork through your prized Allium bulbs 🙁
Dig Deep
As a general rule, plant bulbs two to three times their own depth and around two bulb widths apart. Replace the soil after planting, breaking down any large clumps and firm in gently, making sure there are no air spaces around the bulbs.
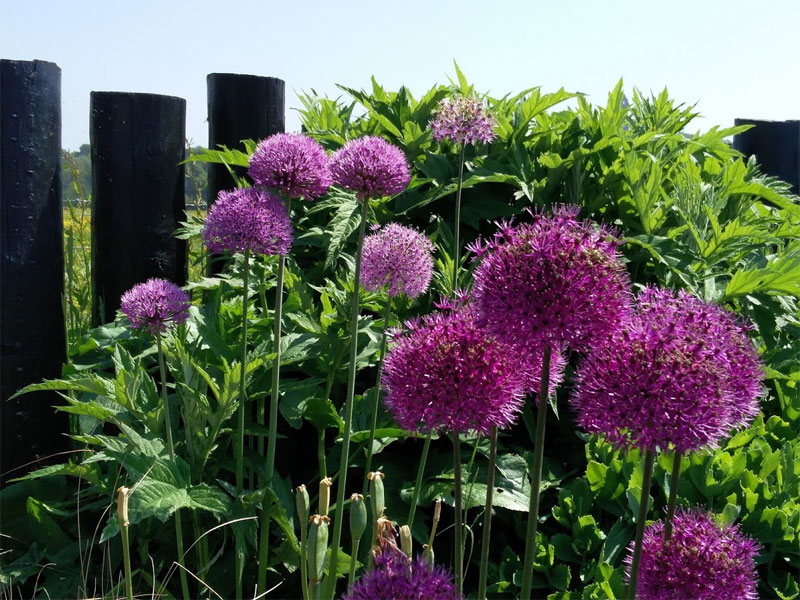
Allium Purple Sensation
Repeat After Me
After flowering, remove the seed head and wait for the foliage to yellow and die back, then lift the bulbs, clean off any soil and store in boxes or net bags in a cool, dry place. Remember to label them too! Next year you will have lovely, fresh bulbs and you can start again. You can leave the bulbs in the ground but they will eventually start to rot and die.
So there you go, a cheap and easy way to create a wonderful display in Spring and brighten up our days. But it will be a while before these beauties are ready so in the meantime M&D and I have put our heads together and come up with a wonderful craft project inspired by one of the most popular bulbs – the Narcissus. Or Daffodil to me and you!:
Make A Paper Plate Daffodil
You will need:
- Two Paper Plates
- Toilet Roll Tube
- Pencil
- Scissors
- Selection of yellow and orange paints and papers
- Glue
- String or ribbon
To make:
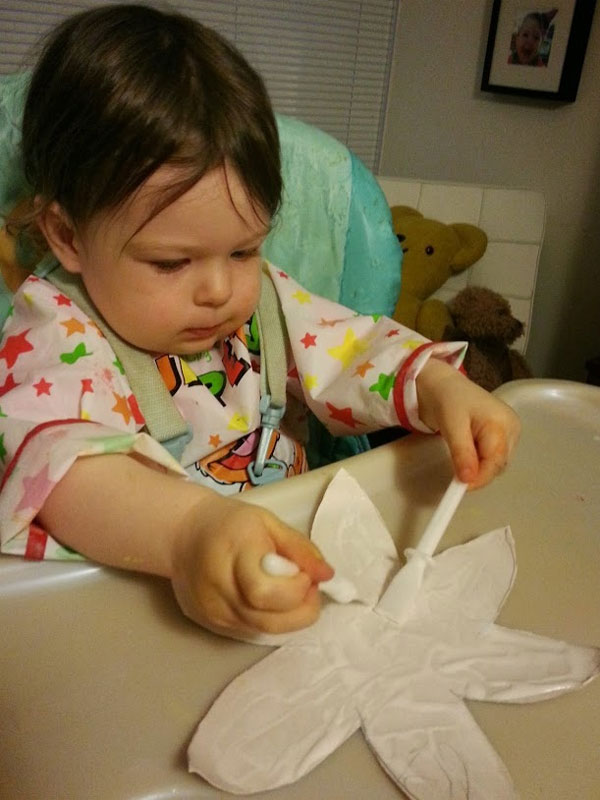
1. Take one of your paper plates and on the reverse side draw the outline of your daffodil shape. Ask your grown up to cut this shape out, then paint it a lovely bright yellow.

Painting the flower is a lot of fun
2. Take the other plate and draw a similar daffodil shape but slightly smaller and this time draw it on the correct side of the plate. You can paint this one the same colour, or add on some coloured paper to give a different texture. We chose some lovely yellow crepe paper to glue onto the plate.
I liked adding the glue to the flower
3. Stick your two plates together. You will now have a lovely 3D effect because the plates have been used opposite ways:

Stick the two flowers together
4. You now need to make the daffodil’s trumpet! To do this get a toilet roll tube. Ask a grown up to cut approx 2cm deep slits, approx 1.5cm wide, at one end of the tube (you will have roughly 9 “tabs” when you have finished. On the other end cut lots of slits to make a fringe effect. Once this has done paint the inside and out orange:
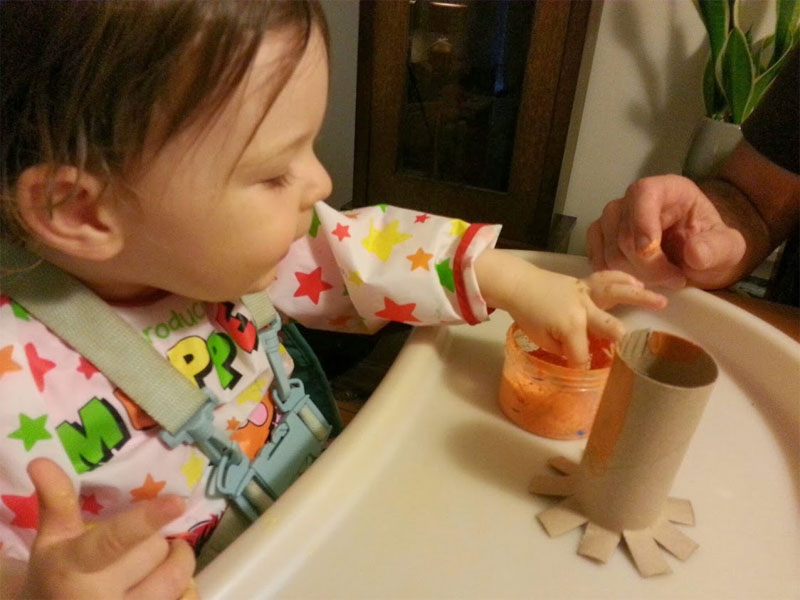
Yay, more painting!
5. Once the trumpet is dry glue the tabs and stick it in the middle of your petals and glue a loop onto the back to hang it up:
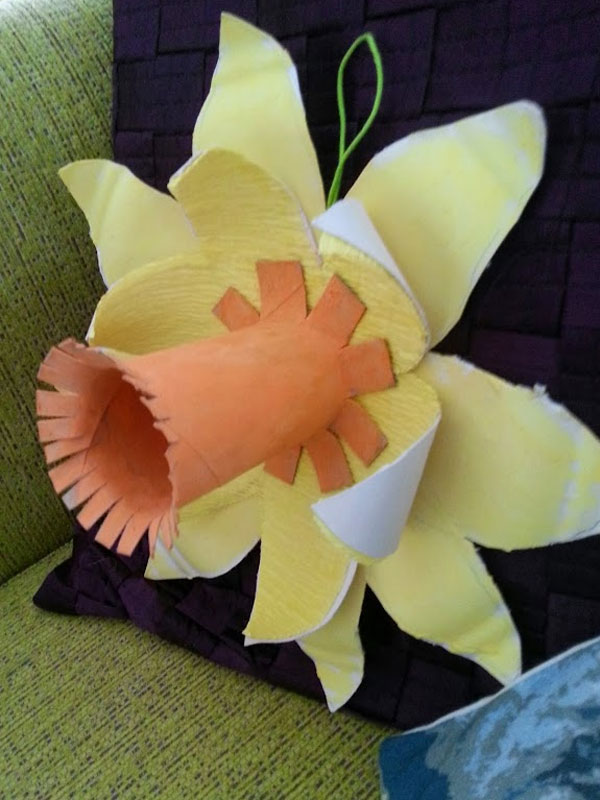
The finished daffodil to keep us cheery all winter ;
If you need any more advice on bulbs or would like to contact us about getting some planted in your own garden then please get in touch.
Lulu
Save The Snail!
Most gardener’s don’t like snails but I have a confession to make. I, Lulu Ann Burt love them! There, I said it! ‘Nails (as I call them) are funny creatures and I love hunting for them in the garden. I say Save The Snail! Trouble is they love eating the scrummy plants in the garden as much as we do! It’s important to try and help look after our prized plants so here are a few of my top tips on being snail-savvy in the garden as well as a brilliant project to make your own snail which won’t eat any of your prized hostas!
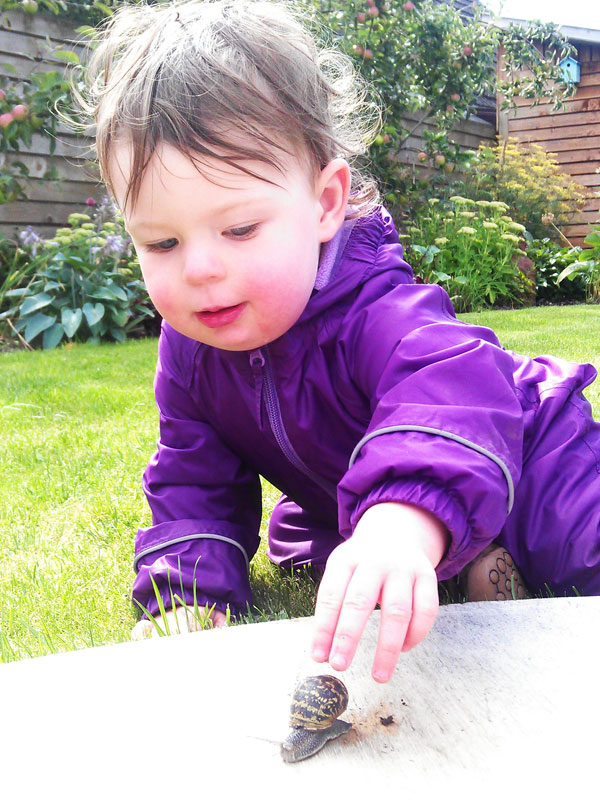
Me and my friend the ‘Nail
As I love snails very much and as M&D feel very strongly about being organic we don’t recommend putting down slug and snail pellets in the garden. These can be eaten by other animals or even children and can be very dangerous (as well as not very nice way to treat my friend the snail!) Here are some better ways to deal with them…
Ooh ooh, ouch!
Snails hate to crawl over anything scratchy so putting a ring of something like crushed egg shells or grit around the plants they most like to eat helps deter them. Watch out for any foliage that falls into the ring as that can be used as a bridge by the canny creatures.
Ring a ring of hostas
If you have your prized plants in pots which the snails are attacking, try putting a copper ring around the pot – the snails won’t want to crawl over it and your plants stay safe.
Snail hunting!
This is my favourite method – snail hunting! Swap your spade for a torch and get out at dusk and collect the pests yourselves. You will be amazed at how many of the wee beasties you will find!
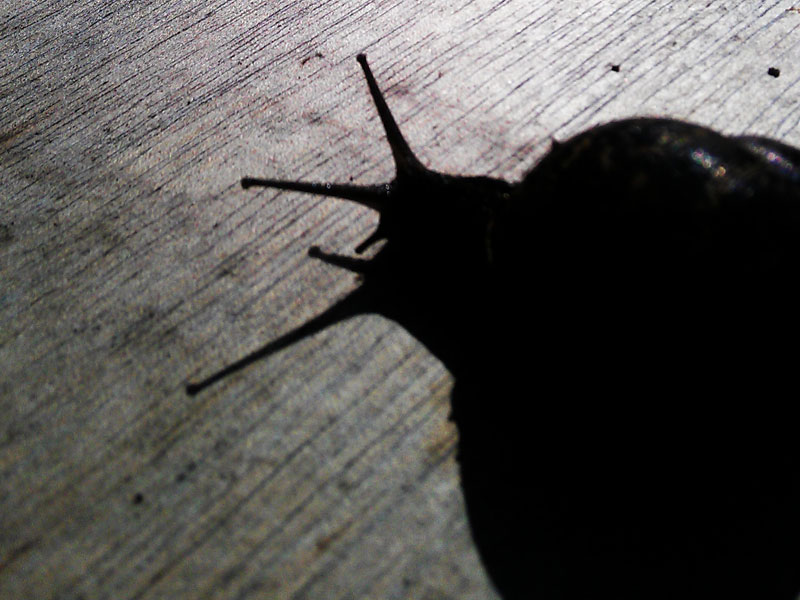
Head out and do some snail hunting at dusk
Pull on the (fox)gloves
Sometimes you need to box clever and choose plants which snails wouldn’t have at their beastly banquet. Choose plants with scented leaves such as alliums, fennel and rosemary, plants with textured leaves such as lambs ears and lavender or plants such as ferns, foxgloves and camellias. All beautiful but relatively safe from unwanted intruders.
Cheers
A method well known in the gardening world is setting beer traps for snails. If your grown-up can spare some of their well earned bottle at the end of a day’s hard graft in the garden, ask them to sink a rinsed out empty can with some beer in it, into the ground. Snails are attracted to the smell and fall in the can and can’t get back out making it easy for you to dispose of them.
Nematodes
Some gardeners turn to a biological solution in the fight against snails. A naturally occurring nematode (a tiny worm) can be introduced into the gardener by adding it to a watering can. They contain bacteria which attacks and kills snails. It lasts for about six weeks and doesn’t affect anything else in the garden. Despite the name no toads are used in this method!
Nema-toads
As you can see there are lots of ways of tackling snails but I think one of the best ways is to attract beneficial wildlife that feasts on snails. If you have space for a wildlife pond you can attract frogs and toads which love a slug supper. Creating a log pile or leaving a corner of old leaves may mean a hedgehog sets up home in your garden and it will repay you by eating up these foe. Or make a bug hotel or encourage birds into the garden to help you in your efforts.
So, now you know how to keep snails out of your garden why not bring one into the house instead with this wonderful craft idea:
Make A Paper Plate Snail
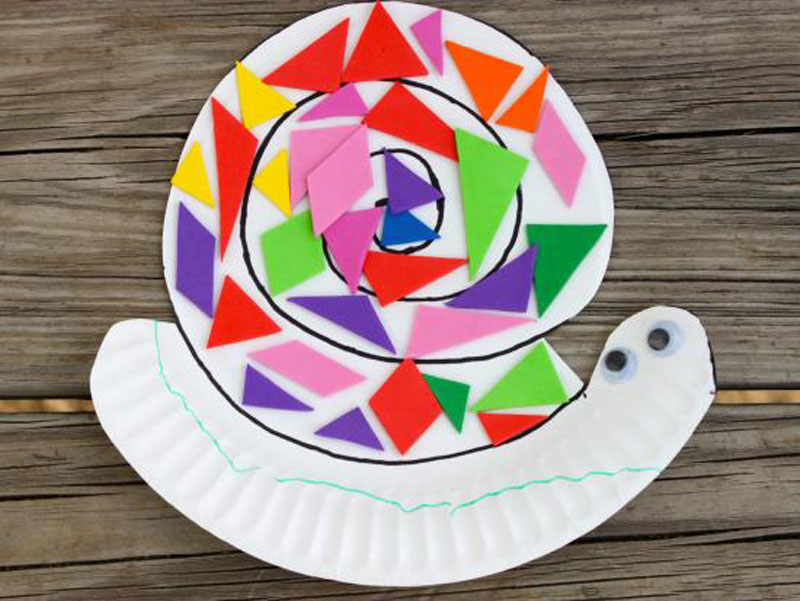
Make A Paper Plate Snail (Image courtesy of Kiwi Co)
You will need:
- A paper plate
- A marker pen
- Scissors
- Coloured paper or stickers
- Glue
- Paint
- Googly eyes (optional)
- Pipe cleaners (optional)
To make:
1. Draw this shape on the paper plate:
2. Cut off the top part of your paper plate to make the snail shape:
3. Use your coloured paper or stickers to stick shapes around the shell. Make your snail as funky and colourful as you wish. I liked learning about the different colours and shapes we were using as we did it
4. Finally paint the body, stick on (or draw on) your eyes and if you wish, add some pipe cleaners to make the feelers. And there you have it – a paper plate snail! All the fun but your hostas will stay safe 😉
You can make themed snails too if you wish. Grandma and I made a lovely festive snail for Christmas!
Remember to email me photos of your snail creations or if there are other garden animals you would like to learn about and see a craft project on then let me know!
For more tips on garden pests visit our blog:
Vialii Guide To Top Garden Pests And Diseases
Lulu
Thank you to Kiwicrate for the inspiration for this craft project