Essential Lawn care
With spring fast approaching our garden maintenance team are at the ready to help keep your gardens in tip top condition throughout the coming season. From weeding to pruning, grass cutting to strimming, they are a talented bunch who know how to care for your garden properly. However, if you want some insider essential lawn care tips to help you look after your own grass, here are some of our trade secrets…

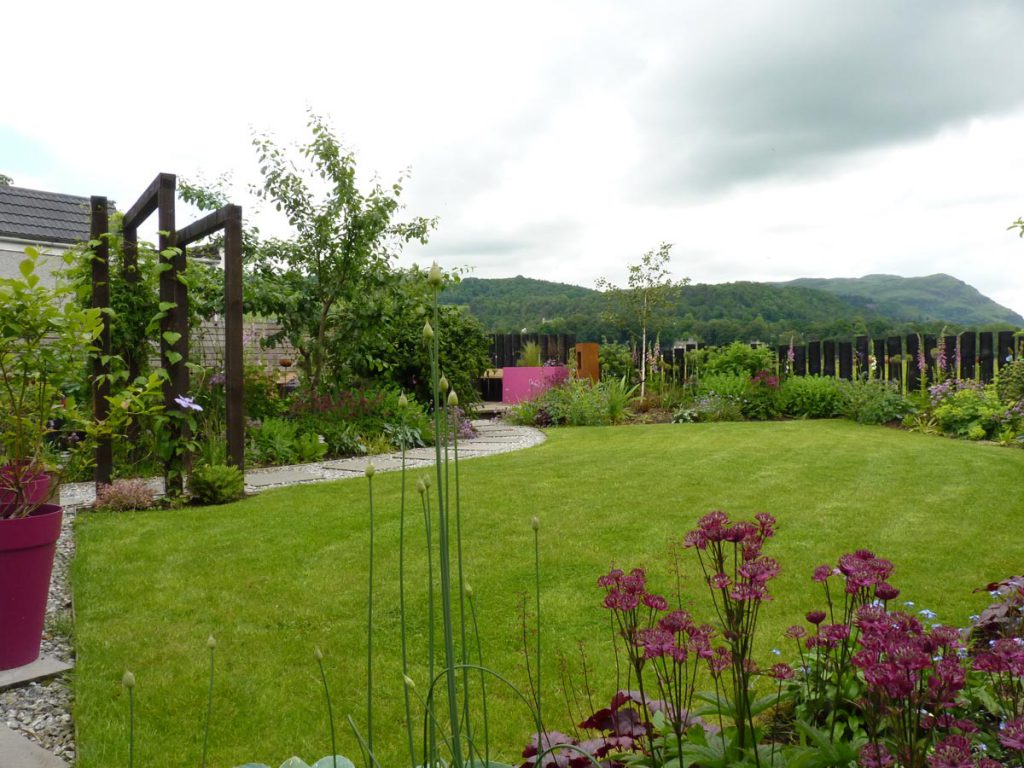
Our professional maintenance team can look after all your lawn needs
The essential tasks
The immediate effect of the essential tasks such as mowing, watering, feeding and weeding is to keep the lawn looking attractive, but there is also a vital long-term effect. The vigour of the desirable grasses is maintained and increased so that unwelcome invaders such as weeds, moss and some diseases find it harder to gain a foothold.
Mow regularly
The number one essential task is correct mowing. This means beginning and ending at the proper time with the blades set at the correct height. Blades must be sharp and properly set.
Water
Water before the lawn turns brown: The first effect of drought is a loss of springiness and a general dullness of the turf. Look for these signs after about 7 days of dry weather during the summer. Water copiously; a light sprinkling every day can do more harm than good.
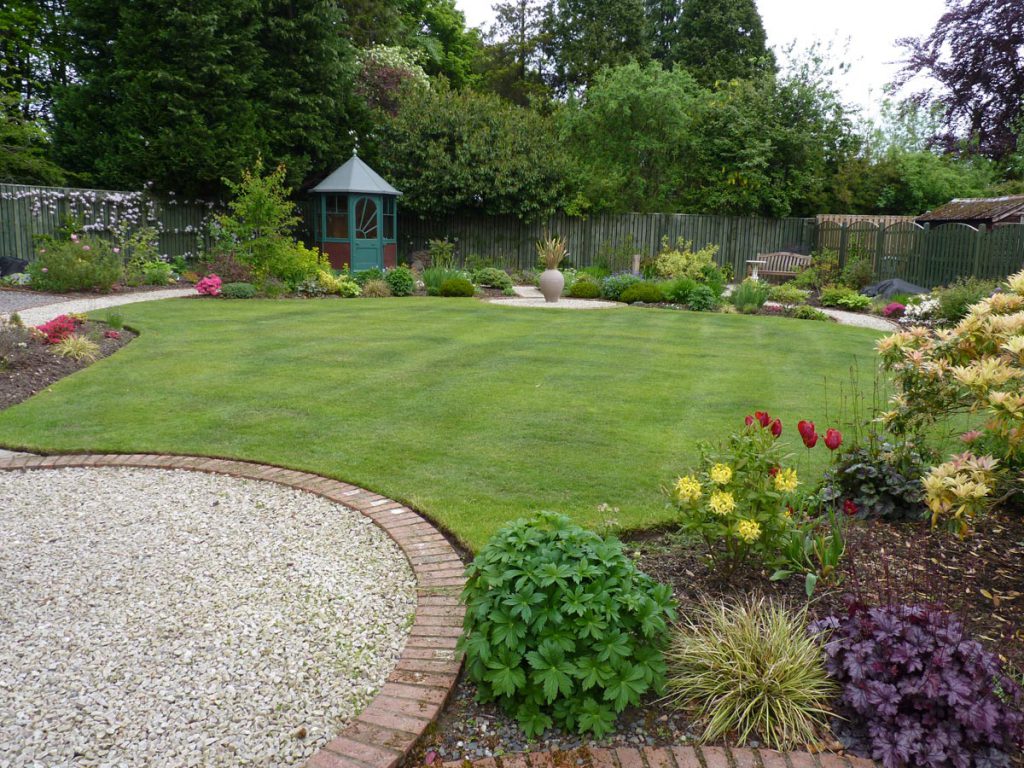
With a lot of TLC you can have a lovely lawn to enjoy
Trim the edges
A lawn with overgrown grass at the edges can be an eyesore. Make sure the mower can reach right up to the edge then trim around the edges. Make sure edging tools are clean and sharp.
Feed
Feeding is key to your essential lawn care tips. Feed with nitrogen-rich fertiliser in spring or early summer: The constant cropping of the grass foliage is a serious drain on the nutrient reserves in the soil, so a routine feed is essential at the early part of the growing season. Autumn feeding to build up the root system and increase disease resistance is a useful procedure. Ensure that you choose a treatment that is intended for autumn use.
Nice edging gives the lawn a sharp look
Rake
Rake during the spring and again in the autumn: Raking the lawn with a spring-tine rake has several benefits. The build-up of thatch is prevented and surface debris is removed. The removal of fallen leaves in autumn is essential – never leave them on the lawn surface over winter. Raking up creeping stems of weeds before mowing helps with their control.
Remove worm casts
Worm casts should never be ignored. When squashed underfoot the surface is rendered uneven and the bare earth makes an ideal seed bed for weeds. When casts appear scatter them with a besom or stiff broom before mowing and removing the clippings using a grass box. Using a treatment such as Castclear can help prevent worm casts without harming the worms.
Weed killing
Kill weeds and moss when they appear: Don’t wait until the problem gets out of hand. Occasional weeds can be pulled out by hand and occasional patches of moss indicate that the growing conditions have to be improved. By keeping on top of weeds and moss you can avoid the need to add nasty chemicals to the lawn.
Aerate the lawn
The lawn is aerated by driving a fork or other spiked instrument at intervals so as to relieve compaction – drainage is improved and new growth is stimulated. Aerate at least once a year if the ground is badly compacted and moss is present.
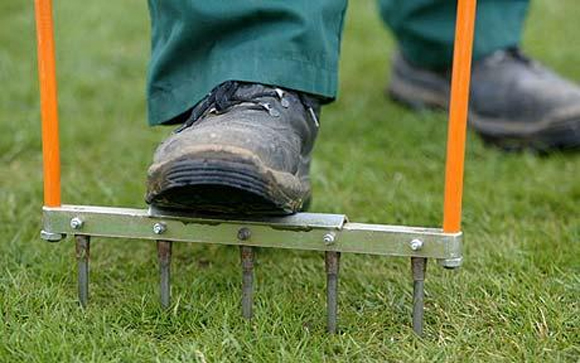
Aerating your lawn will help keep bogginess at bay
Top dress the lawn
Top dressing is the application of a bulky mixture, usually made up of peat, loam and sand. This dressing should be ap[plied every autumn, and it is an essential technique if you want a really first rate lawn. The vigour of the grass is improved and minor hollows are removed.
For more essential lawn care tips read our blog Grass-ias.
Hopefully the above will be of use to you but should you require any help with your lawn please do not hesitate to get in touch.
Vialii
Free Upcycled Garden Bunting
Our play house bunting was start to look a little sad and faded so we needed something new and colourful to add some pizzazz to the play house. We had been given some plastic wallets recently which we have no use for in the office but we knew they would come in handy for a crafty project sometime. So we decided to turn them into some upcycled garden bunting and create a fun and free addition to the garden. Here’s how…
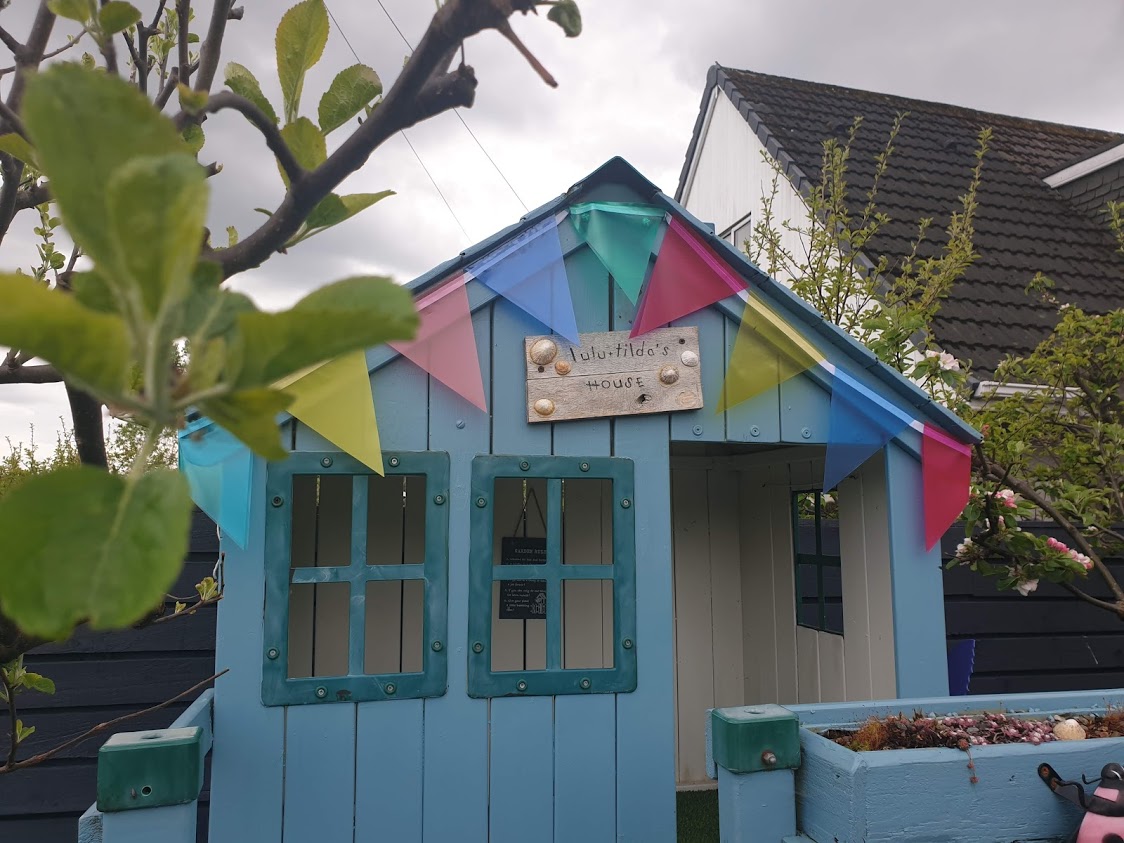
The playhouse bedecked in its upcycled garden bunting
You will need:
- Plastic wallet
- A piece of cardboard
- Pencil
- Ruler
- Scalpel or Scissors
- Bias binding or string
- Thread or staples
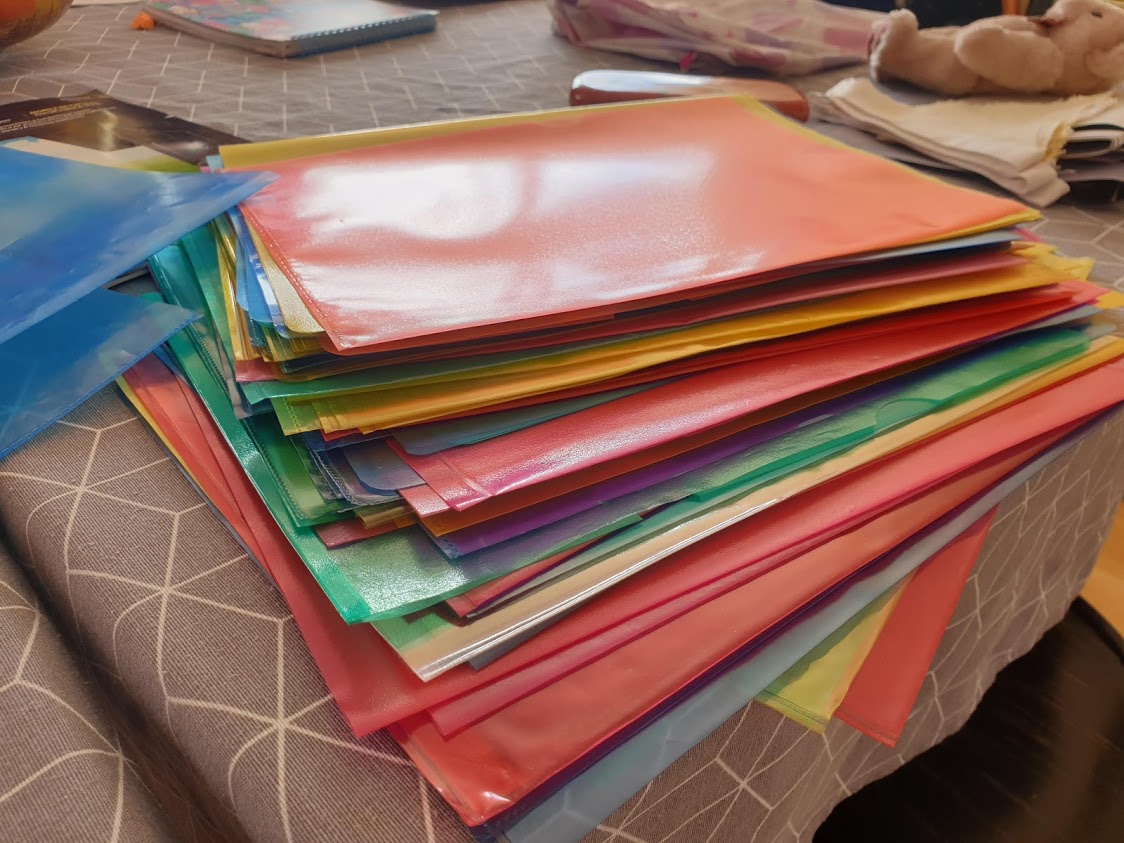
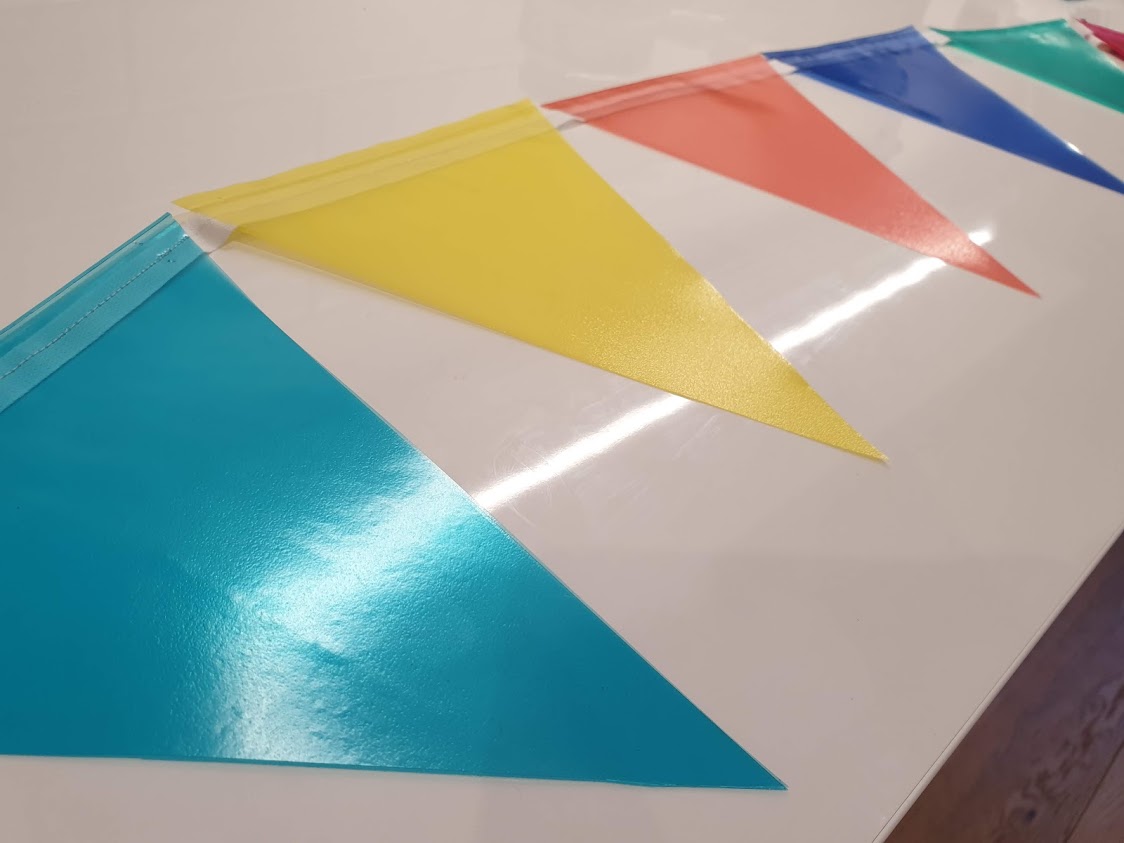
Old plastic wallets can be upcycled into garden bunting
To make:
- Make your triangular template using your cardboard, ruler and pencil
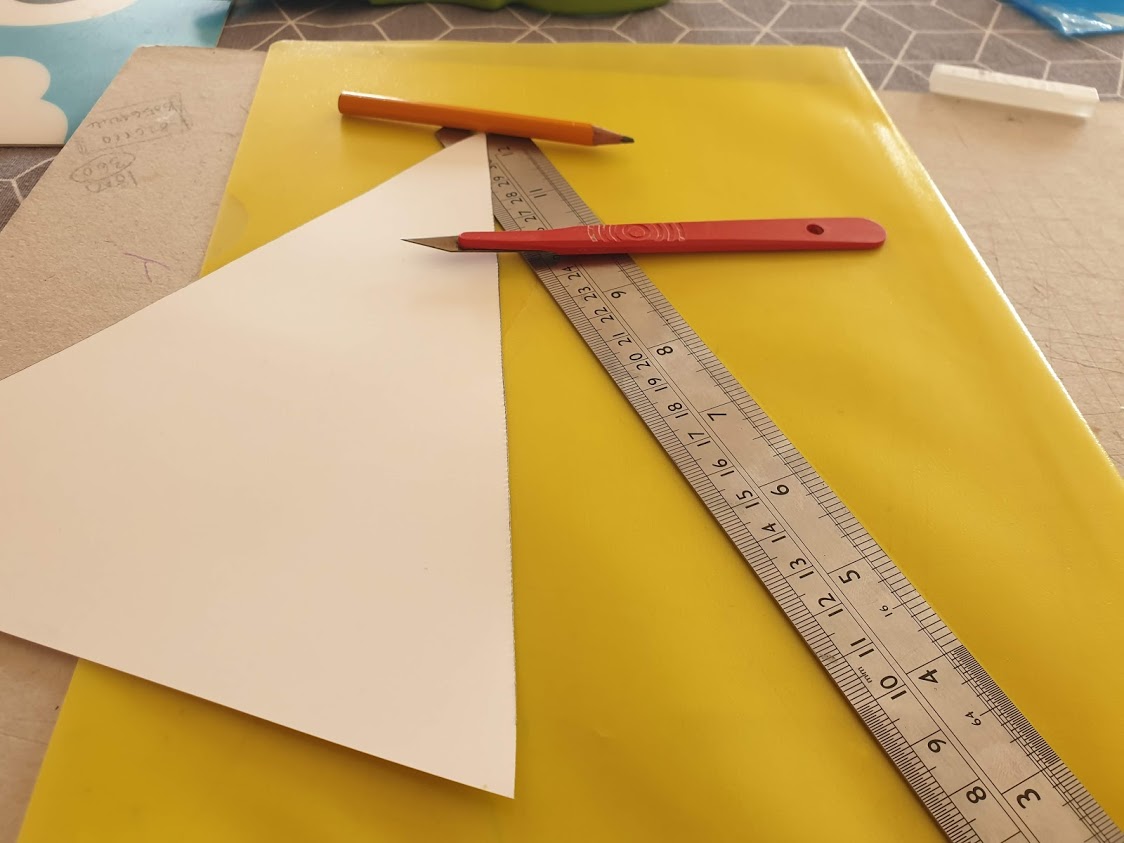
Make your cardboard template
2. Draw round your template onto your plastic wallet. We used the bottom of the folder that is joined together as the top of our bunting so that we had double thickness and stronger colour
Make your bunting out of the plastic wallet
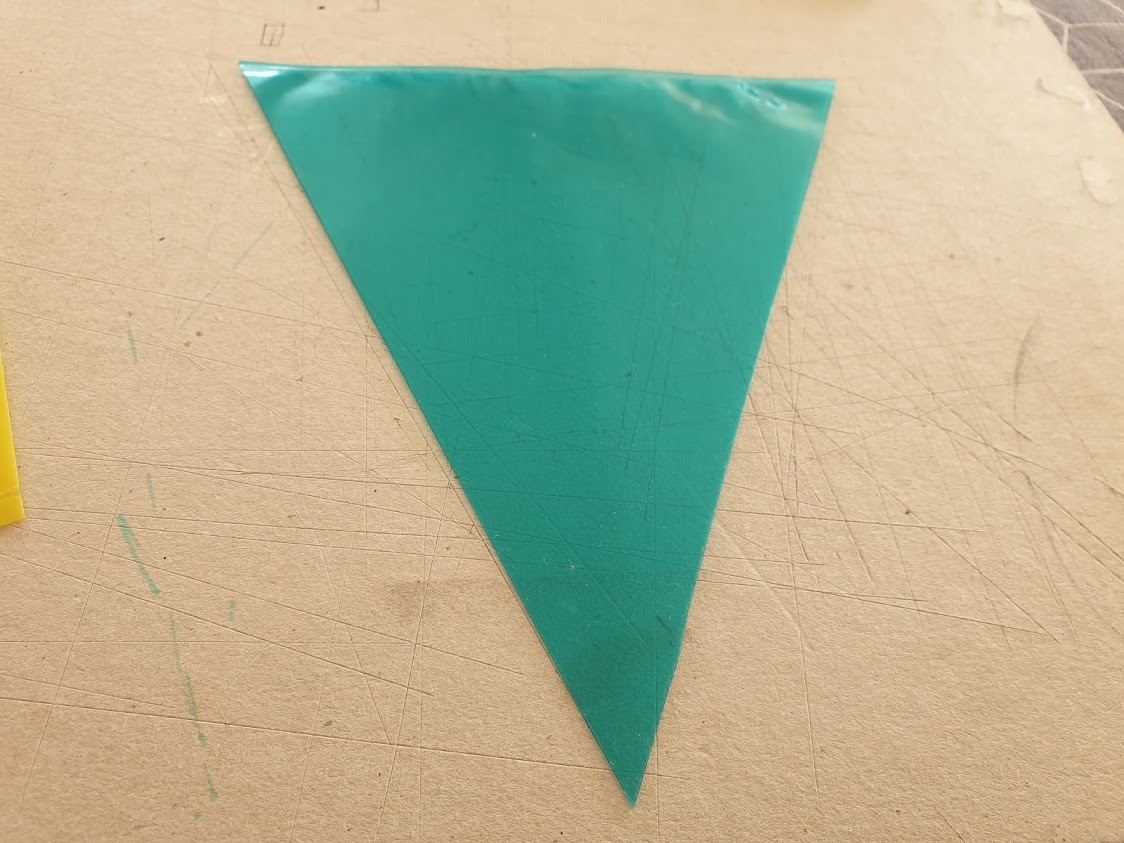
3. Cut out your triangle – we used a scalpel but you could just use scissors. Don’t cut your joined end.
4. Repeat until you had all your bunting made
5. Add your bias binding or string through the middle of each triangle and either sew or staple them down.
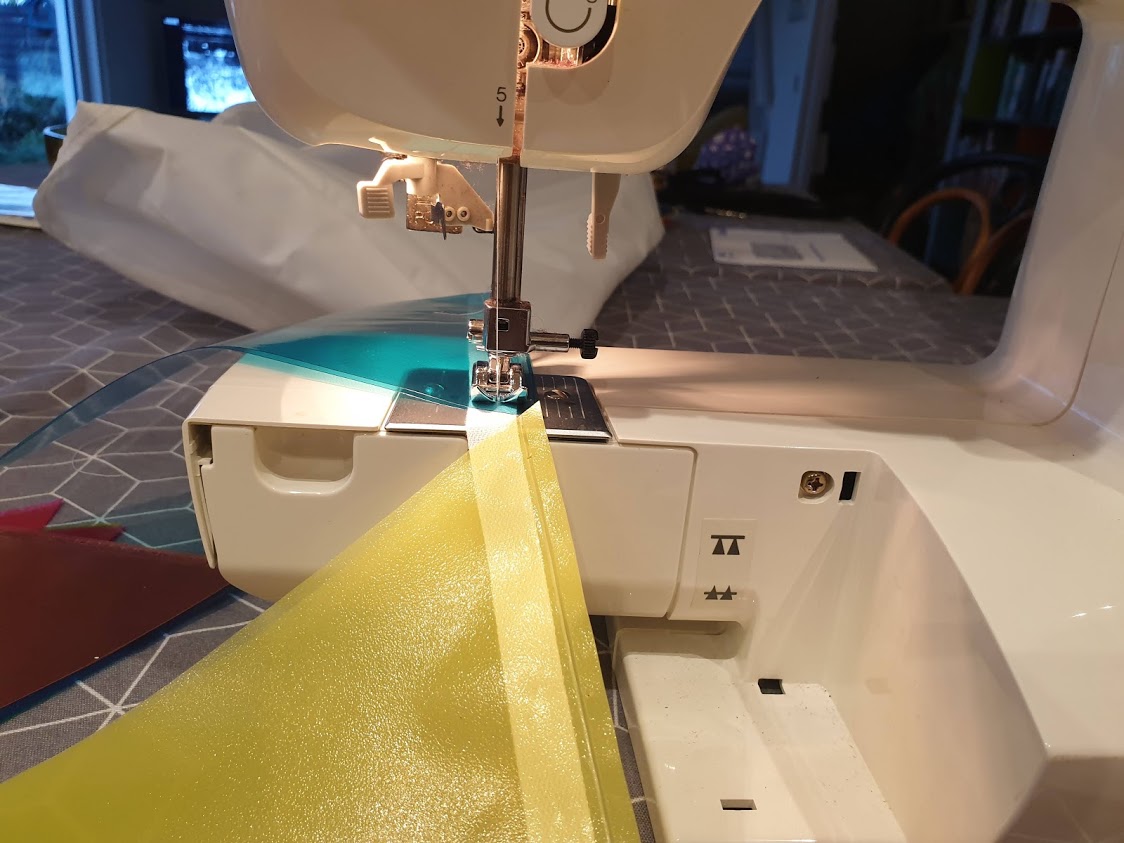
You can sew or staple your bunting together
The bunting looks so pretty and colourful
6. Add to your garden.
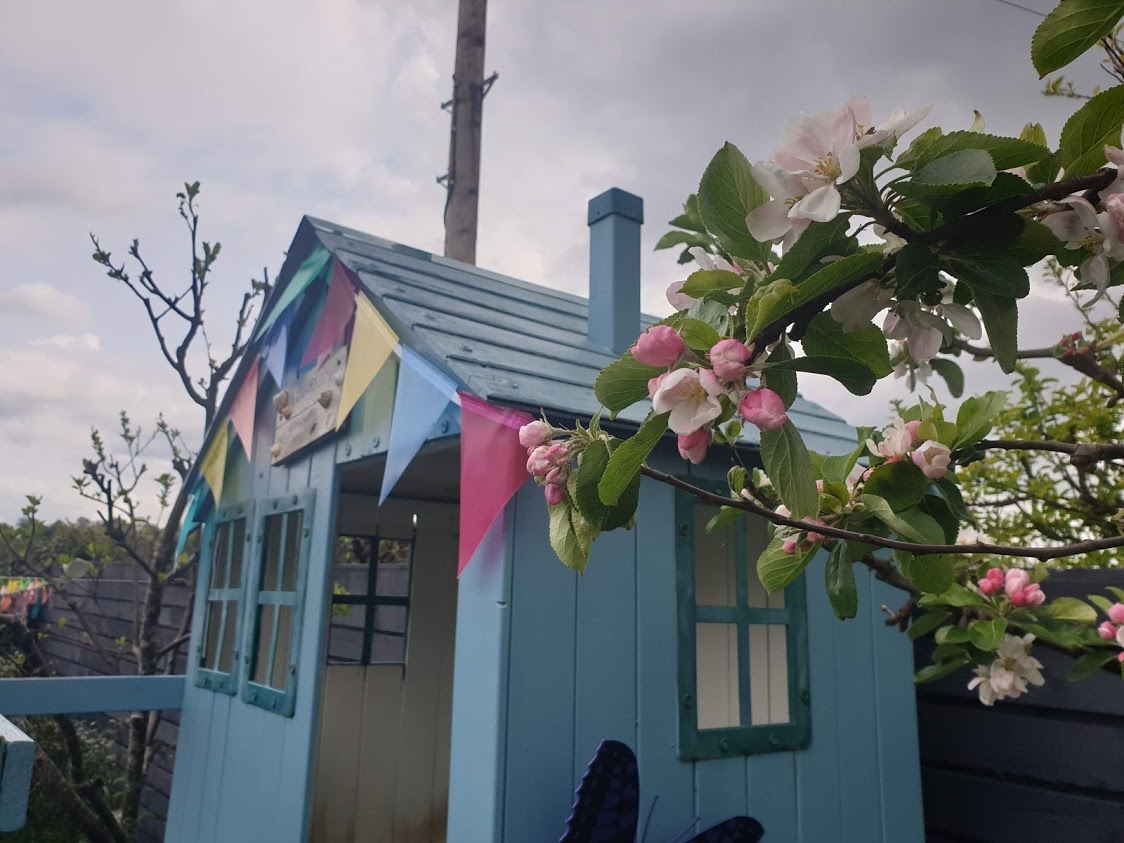
Pretty upcycled bunting for the garden
Aren’t they a pretty addition. We have lots of folders left, I wonder what we will make with them next!
Mama Vialii!
Our Top 5 New Year Garden Resolutions
Happy New Year everyone! We hope you have had a lovely time over Christmas and are well rested and looking forward to 2019. It’s the perfect time to make plans for the year ahead and have good intentions and to help you, we have collated our top 5 new year garden resolutions to help raise the standards in your garden in 2019…
Get Composting
Reducing and recycling have been buzz words for the last few years and we are always trying to reduce the amount of waste we generate. A great way to help with this is to have a compost heap in the garden. Throw all your fruit and veg peelings on there, egg shells, garden waste, grass clippings and by this time next year you will have a lovely compost to use in your garden.
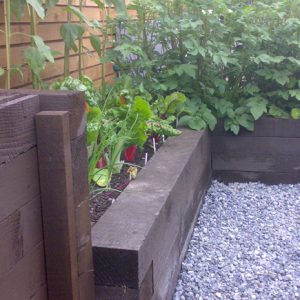
Our home allotment has raised beds and a home made compost bin to match
Lawn TLC
Our lawns put up with a lot throughout the year so it’s worth giving them a little TLC so they have the best chance of flourishing. There are a few things you can do which will really help:
- Scarify – that means removing the moss from your garden. You can use a machine to do it or just some good old fashioned effort with a rake will do the job too.
- Feed – give your lawn a Spring feed to help it grow nice and strong.
- Aeration – use a special aeration tool or even just a garden fork to reduce the compaction in your lawn and allow your garden to grow stronger.
Why not just choose one of them to tackle this year and we can help with some of the other ones and you can be happy that you helped make a big difference to your lawn this year.

Care for Wildlife
Do just one thing (or more if you wish!) to encourage wildlife into your garden -if we all do that then it will make a HUGE difference. It could be something simple like add a wildlife friendly plant to your garden or a bird feeder. Or you could do something bigger like sow a wildflower meadow or build a bug hotel.

Plant A Tree
There’s an old saying, “The best time to plant a tree is 20 years ago”. The second best time is now. If you have small children like me and Tilda, we definitely recommend doing it now – you can see the tree grow alongside them. Make sure you plant a tree appropriate for the size of your garden. If you want help with that please get in touch.
Spend More Time Relaxing Outdoors
There are always LOTS to do in the garden but make a resolution to spend more time relaxing outdoors this year. It will be good for your health and for those around you.

I love lounging on a lovely lawn!
Here’s to a happy and healthy 2019 in the garden.
Lulu & Tilda
Vialii Guide to Kids Gardening Gifts for Christmas 2018
Every year it seems to get harder and harder to get gifts for the kids which are actually useful and something they will like for more than five minutes and not awful for the environment. Well, worry ye not, we have pulled together some ideas we think you will all love in our Vialii Guide to Kids Gardening Gifts for Christmas 2018…
Grow Your Own Mini Dinosaur Garden
Yup, you heard us! The dino lover in your life will be blown away by this creative gift. It comes with a pop up scene and you can grow your own “grass”. Available from Not on the High Street.
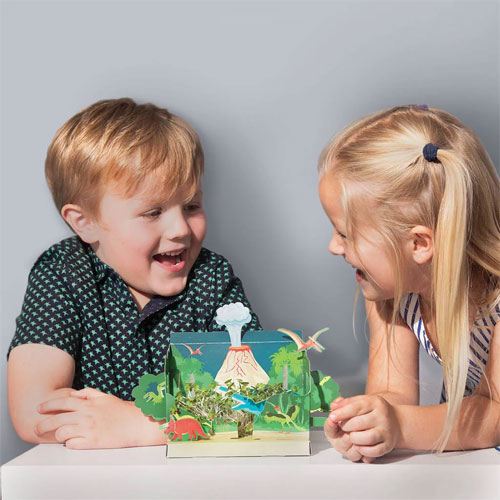
Raaaaar! Grow your own dino garden!
Little Gardener’s Mini Greenhouse
This lovely little greenhouse will be fun to build for your little ones then you can plant the various seeds that come with it. It is reusable so environmentally a good gift this Christmas. Available from the Ethical Superstore.
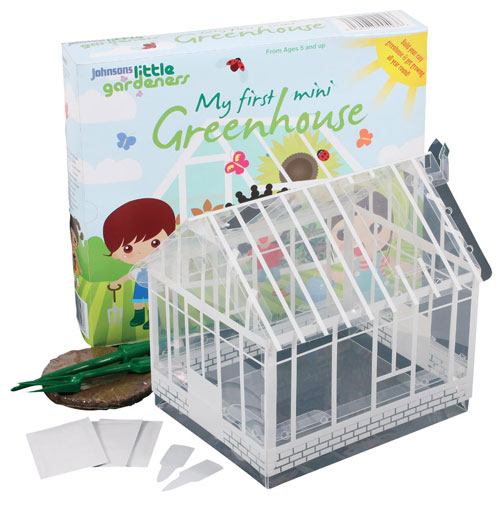
My first greenhouse!
Make Your Own Insect House
This fab wee kit comes flat packed, Ikea style! Make your insect home and then find the perfect corner of your garden to locate it. Available from Garden Divas.

Make your insect house
Peter Rabbit Wellie Socks
We LOVE Peter Rabbit here at Vialii Towers so these Peter Rabbit socks are perfect for us! Available in Peter Rabbit or Lily Bobtail designs from eBay and other retailers.

Cosy and cute Peter Rabbit tootsies!
Apprentice Gardener Tool Set
If you are serious gardeners like us then you will need a proper set of tools. This set from Spotty Green Frog will help you have your garden flourishing in no time!
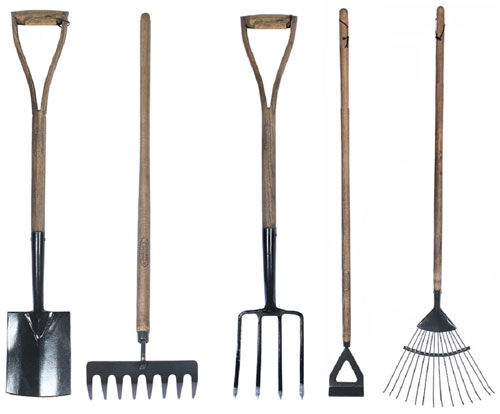
Get a head start on your career as apprentice gardener
Wildflower Glass Terrarium
How gorgeous is this little glass terrarium. It comes with all you need to grow your very own wildflower meadow. Beautiful! Available from Prezzy Box.
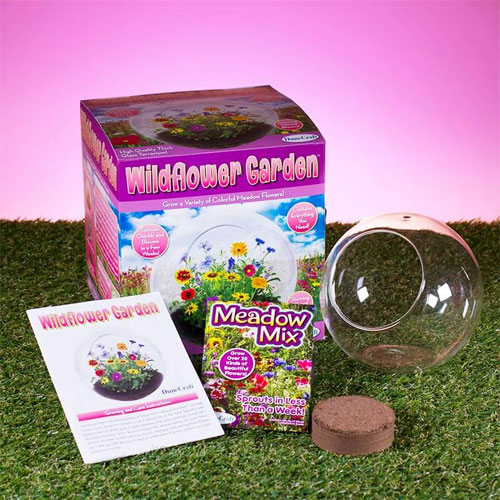
A beautiful terrarium of your own
Botanist Case
This stunning case would make any wannabe botanist proud. It contains a magnifying glass, notebook, 3 storage boxes for collecting specimens and a wooden flower press. The perfect way for your little ones to explore the natural world. Available from various suppliers including Trouva.
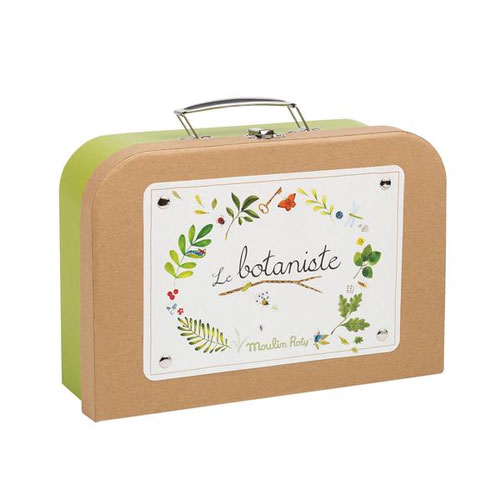
Be the most stylish botanist on the block!
Hope that helps round off your Christmas shopping. You a festive period full of fun and frivolities! See you in 2019!
For inspiration from previous gift blogs read:
Vialii Guide to Christmas Gardening Gifts 2017
Vialii Guide to Christmas Gardening Gifts 2016
Merry Christmas!
Lulu & Tilda xx
Make An Autumn Wreath
With all the leaves changing colour and falling from the trees, we were inspired to make an autumn wreath for my bedroom door. It’s a great craft project for children of all ages (and mummies and daddies!) and it sure adds a lovely splash of colour to your home. Here’s what you need and how to make it. It’s super easy!

You will need:
- Some thick card to make your ring
- Some autumnal coloured paper
- Glue
- An autumn leaf
- A pencil
- Scissors (you might need a grown up to help with some of the cutting)
To make:
1. Choose a pretty autumn leaf which will be your template. We chose a lovely maple leaf as it’s such a pretty shape.
2. Draw around the leaf on your coloured paper – lots of times!
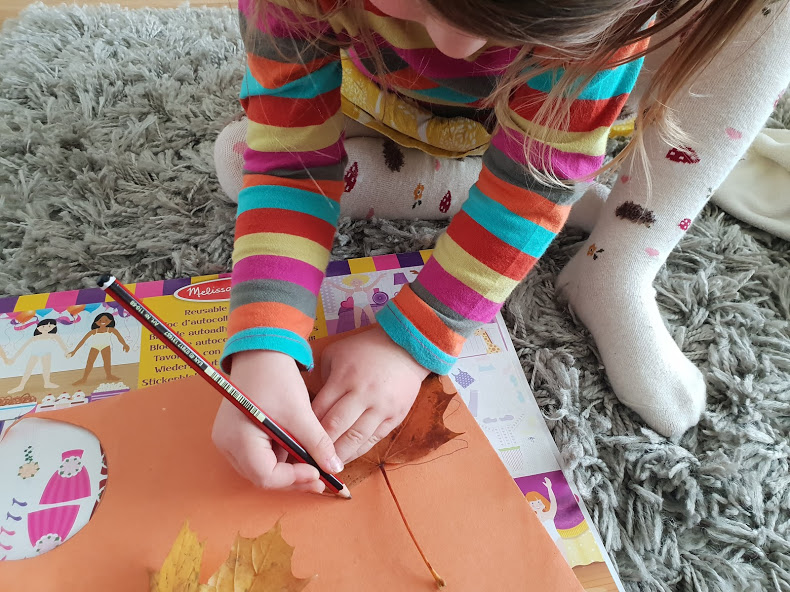
3. Cut out your leaves. Be careful with the sharp scissors!

4. Draw the veins of the leaves on your cut outs so they look realistic!
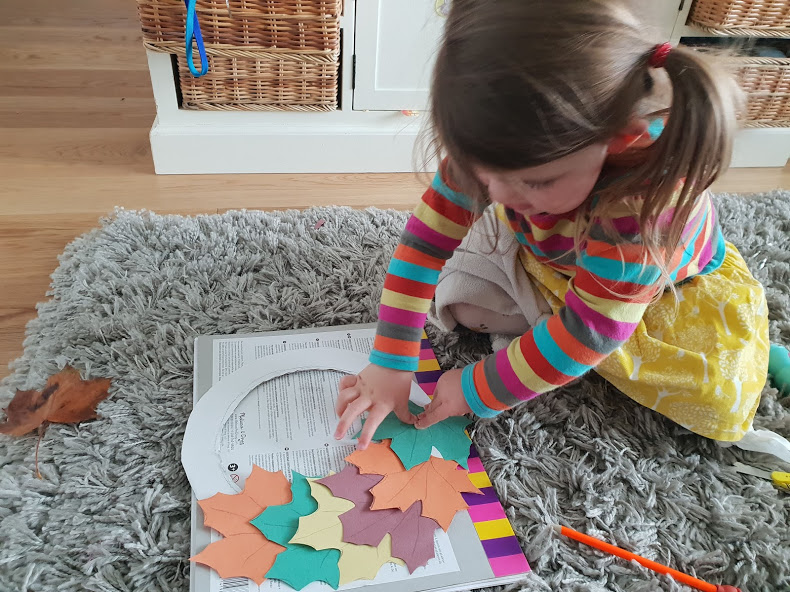
5. Cut out your ring to the size you want – we used a dinner plate to make the size we wanted. A grown up might need to help with this as thick card can be tricky to cut.

6. Glue your paper leaves onto your ring so that they overlap each other.
7. Now it’s ready you just need to hang your wreath on your door!
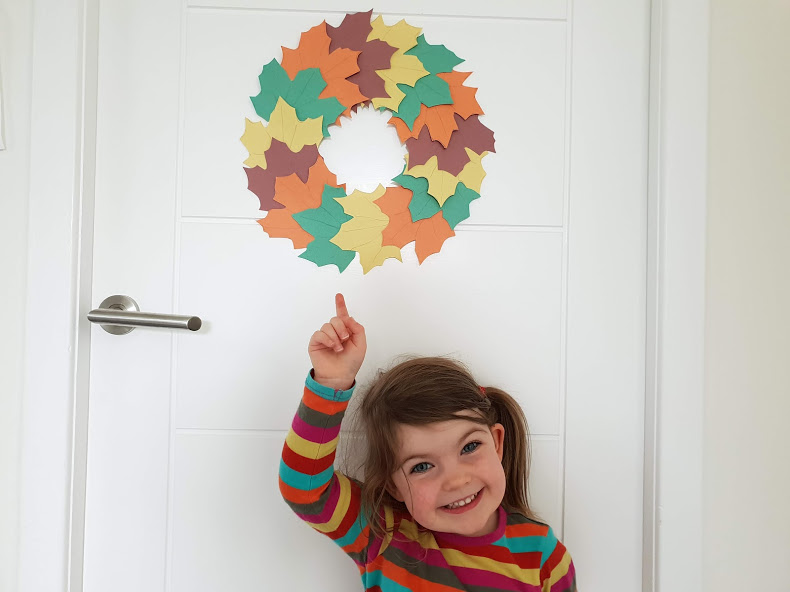
You could use real leaves if you wished although they wouldn’t last as long.
Happy wreath making!
Tilda x
Darn Good Nature Art
Hey everyone. I went for a fun ramble along the Darn Walk during the school holidays. The Darn Walk if you have never been is a pretty walk along the River Allan which links Bridge of Allan and Dunblane. I decided to collect from nature along the way and make a nature art picture when I got home.
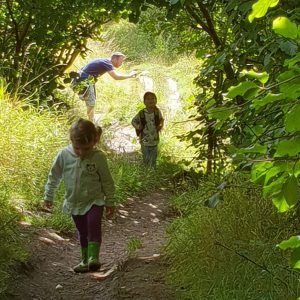
We all enjoyed our ramble along the Darn Walk
One of the many cool things to see along the way on the Darn Walk is a cave which is said to have inspired the writer Robert Louis Stevenson for Ben Gunn’s cave in Treasure Island. There is a fab pirate bench beside it too!

Ben Gunn’s cave at the Darn Walk
We loved playing at the river, collecting treasure, speaking to the horses and watching the golfers on our amble up to Dunblane! I took lots of pics along the way too!

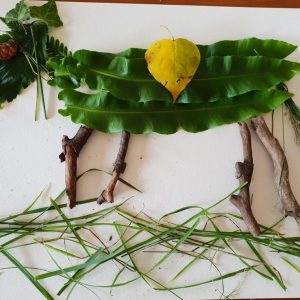
And here’s the horse I made with what I found on the walk. Why don’t you go on a walk, see what you can find and make a picture up with your own treasure!
Happy rambling!
Lulu x
Make Your Own Bug Hotel
My recent blog “Make Your Own Bird Feeder” was all about helping birds. This one is all about helping the bugs which are an important part in keeping our gardens healthy. As we landscape our gardens with beautiful seating areas, carefully manicured lawns and garden sculptures there are less and less habitats for wildlife. We recently made a really cool bug hotel at school with help from M&D. Here are my tips on how to make your own bug hotel…
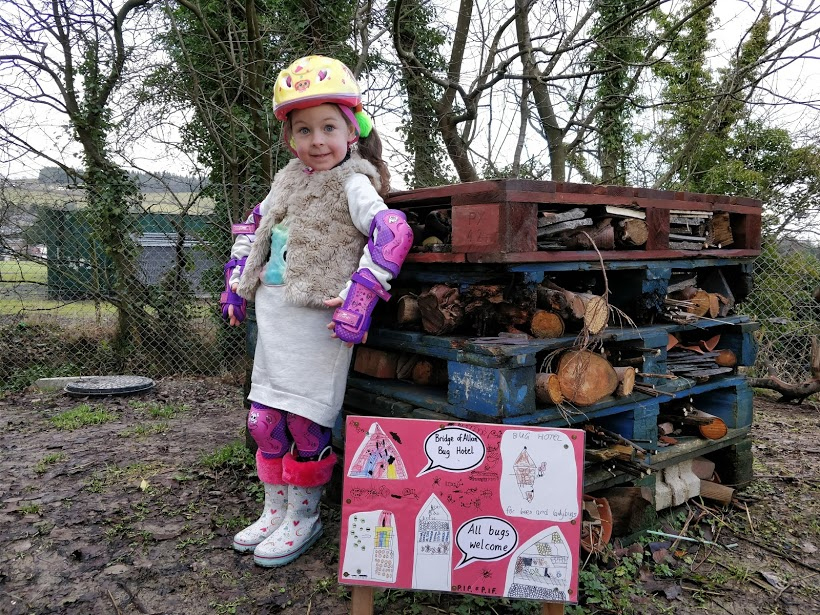
Our school bug hotel complete with the sign we made
You will need:
- 4 or 5 old pallets
- old bricks & slates
- old tin cans
- bamboo canes
- corrugated cardboard
- dried leaves, moss, sticks, pine cones and old herbaceous stems
- logs

Our bug hotel, doesn’t it look great?
To make:
1. Choose a quiet corner of your garden where the bugs won’t be disturbed too much and away from your veg beds
2. Carefully stack the pallets on top of each other with the help of a grown up
3. Now is the fun part, fill your bug hotel, adding the larger items such as bricks and logs first (it’s good to drill holes in the logs first too)
4. Roll up the cardboard and slot it into some gaps.
5. Fill your tin cans with various items such as cut down bamboo canes, collections of plant stems or old leaves and moss then add them to your bug hotel with the open end facing out
6. Stack slates up and slide them in
7. Fill all the gaps with leaves, moss, pine cones and sticks.
Once your bug hotel is finished it will be a beautiful feature in your garden as well as a 5 star hotel for your creepy crawly friends to check into. Keep filling up any gaps as the garden materials start to decay down.
And remember to give your hotel a name. Our favourite is the Grand Bug-and-Pest Hotel but we also love Bug-ingham Palace and Edin-bug Castle! What will you call yours?
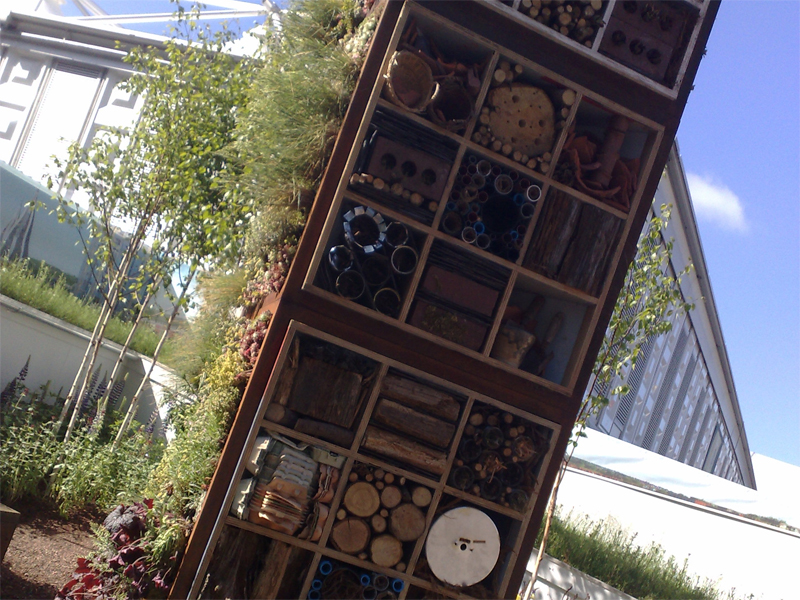
A bug hotel at Chelsea Flower Show
It’s not just us that loves bug hotels, they have even featured at the Chelsea Flower Show too!
Lulu x
Dye Your Easter Eggs Naturally
We had a fun early Easter over at our BFF Euan’s house and it even snowed! We have NEVER rolled our Easter eggs in the snow before! This year we decided we would try and dye our eggs naturally which was a lot of fun and had some interesting results. In this blog we tell you what you need and how to try it home.

Dye your easter eggs naturally this year
You will need:
- Eggs (white ones work best)
- Shredded beetroot (1 cup per cup of water)
- Shredded red cabbage (1 cup per cup of water)
- Spinach (1 bag per cup of water)
- Turmeric (2 tablespoons per cup of water)
- White Vinegar
- Bowls
How to dye your Easter Eggs naturally:
1. Hard boil your eggs
2. Boil your “dyes” (the spinach, beetroot, cabbage and turmeric) in separate saucepans with the water. Bring to the boil, turn down the heat and simmer for 15-30 mins.

Boil up your dyes
3. The dye is ready when it is a few shades darker than you want your eggs to be. Set the dyes aside to cool.
4. Strain the dye.
5. Add the vinegar.
6. Add an egg to a small bowl then cover the egg with the dye. Make sure the egg is completely submerged. Repeat for each colour.

Add your boiled eggs to your natural dyes
7. Put the eggs (still in the dye) in the fridge to set and until the desired colour is reached. Note that they will fade a bit once rinsed.
8. To achieve a stronger colour, do several soaks, drying them between each dye.
9. Once you have finished add a little oil to the eggs to give them a shiny finish.

Oiling your eggs make them lovely and shiny
10. Roll them down a hill!

A snowy day for rollng Easter Eggs!
Our favourites were the beetroot and the cabbage. The spinach didn’t work very well at all for us. Play around with different patterns. We loved our half coated ones which looked really cool.

The half coated red cabbage dyed egg, doesn’t it look awersome!
Happy Easter everyone, hopefully it won’t be as snowy when you are rolling your Easter eggs.
Lulu & Tilda xx

What We’re Growing in 2018
We LOVE this time of year as we see all the bulbs pushing through in the garden and the weather (hopefully) starts to improve. We have BIG plans to grow lots of lovely things in our garden this year to supplement the fruit trees, rhubarb, raspberries and blueberries we already have growing. Here’s what we’re growing in 2018 in our veg garden:
VEGETABLES
- Rocket ‘Speedy’ -Rocket has become hugely popular in the last few years, and we have to say its warm, peppery flavour works well with so many other salad ingredients. As its name suggests, this is a fast grower and one of the very best strains available.
- Shallot ‘Vigarmor’ – This modern French variety is well worth growing. Firm, pink flesh and a coppery tinge to the skin make these banana shaped bulbs very attractive as well as being crammed with flavour. High yields and a good storer too.
- Garlic ‘Solent Wight’ – This superb, softneck strain yields large, high quality bulbs with a fragrance which is both long and strong.
- Onion ‘Hercules’ – Gives high yields of almost spherical bulbs with rich, golden skins and firm, well flavoured flesh. Hercules shows very good resistance to bolting and will keep for several months.
- Onion ‘Red Baron’ – Onion Red Baron AGM is the best red-skinned variety, the attractive, crimson-skinned bulbs when sliced reveal contrasting red and white rings, making it most attractive on the plate. Red Baron has a lovely, robust flavour and is a remarkably good keeper.
- Leeks ‘Porbella’ – Remarkable for its heavy yields of very upright shanks, which can be lifted from October right through to February, Porbella stands in good condition for months and shows good resistance to rust.
- Lettuce ‘Salad Bowl Mixed’ – These widely grown varieties are two of the very best loose-leaf lettuces. Simply cut and come again.
- Carrot ‘Nandor’ – This high quality Nantes hybrid has superb resistance to carrot fly. Quick maturing and can withstand variable weather conditions which make this an ideal variety for the UK climate.
- Chard ‘Perpetual Spinach’ – Worthwhile spinach-alternative which does not run to seed even on dry soils. High yields of large, dark, fleshy, tasty leaves produced over several months.
- Onion (Spring) ‘White Lisbon’ – Regarded by many as THE spring onion, it is a fast grower and has a great taste.
- Radish ‘Solito’ – A new red radish, crunchy and with a delicious flavour. This variety will mature in just over three weeks. Very uniform and up to 40mm in diameter. Has a fine tap root, good tolerance to cracking and high resistance to Fusarium.
- Courgette ‘Tuscany’ – Well suited to the UK climate, this vigorous variety produces few spines so it’s easier to pick. It has resistance to powdery mildew and yields a large supply of very dark straight fruits. Has firm flesh and excellent flavour.
- Beetroot ‘Bulls Blood’ – Grow as cut-and-come-again salad leaves with a mild beetroot flavour. The deep red foliage can be cut back to the ground three or four times and the colour intensifies as autumn approaches. The roots can also be eaten.
- Beetroot ‘Boltardy’ – Beetroot Boltardy can be sown earlier than most other varieties with little fear of bolting. The roots are deep red and of good quality and flavour, yielding well in most soils. Boltardy is a multigerm variety, so each seed which germinates successfully will produce several plants.
FRUIT
- Strawberry ‘Mara des Bois’ – Imagine the intense perfume and rich flavour of wild strawberries combined with the fruit size of modern varieties and you have strawberry Mara des Bois! The medium size fruits of this ever-bearer strawberry are a true treat and one which no strawberry fan will be able to resist. Truly scrumptious!
FLOWERS
We’re also growing a few flowers from seed too to add to our pretty garden:
- Cosmos ‘Sensation’ – Cosmos grows densely with large single pink, red and white flowers. Good for the back of the border and as a cut flower.
- Sweet Pea ‘Cupani’ – Believed to be the original sweet pea which was sent to England from Sicily in 1699 – or very closely akin to it – this eye-catching bicolour remains one of the most beautiful sweet peas you can grow. Grow a little piece of history, smell the fragrance of those blooms and you will understand why sweet peas became so popular.
As you know from our last blog, “Growing Potatoes” we will also be growing three different varieties of potatoes this year.
I’d love to hear what you plan to grow in your garden this year…
Lulu & Tilda xx
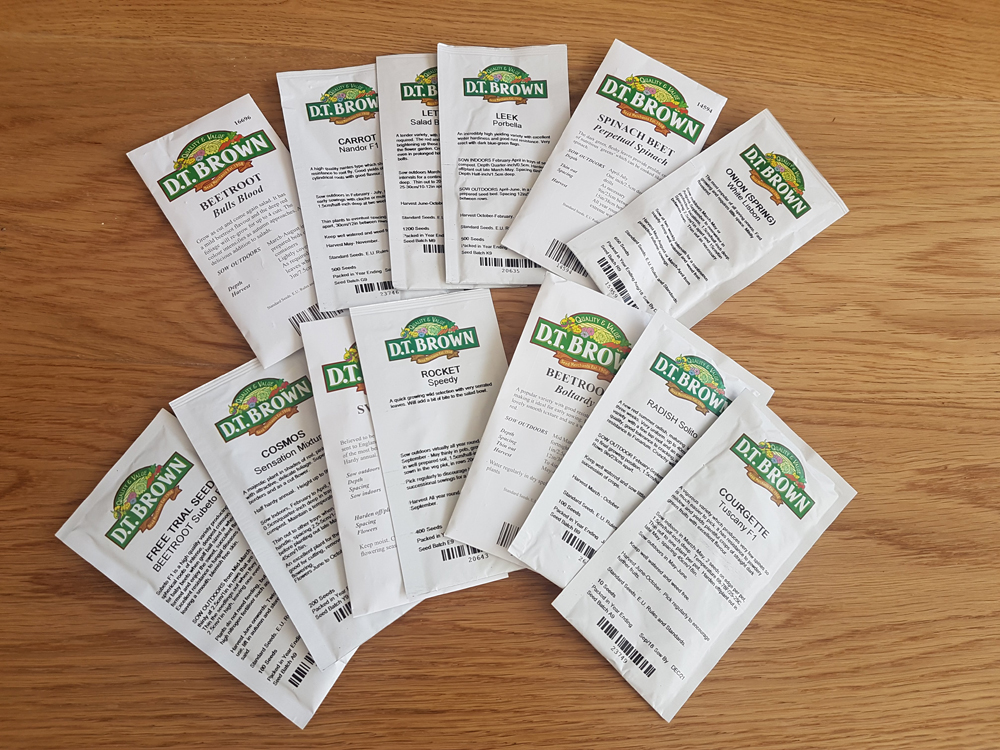
Thanks to DT Seeds who we purchased this year’s seeds from and for all their great plant descriptions.
Growing Potatoes
It was Potato Day in my neighbouring village of Dunblane at the weekend so we popped up with M&D to have a look. It was a busy old gathering of people and we bumped into friends, colleagues and clients while we were there! So, what happens at Potato Day and what has it got to do with growing potatoes, I hear you say?…
Potato Day
Well, Potato Day is a gathering of people who are selling a huge range of different varieties of potatoes. From your early potatoes to salad potatoes there was a variety to suit your garden. You could buy a bulk bag of your favourite variety or just individual tubers of ones you haven’t tried before to suit your allotment size. There was also a stall selling lots of seeds and onion sets so you could get your whole GYO area sorted out for the season ahead.

Potato Day in Dunblane
Our Picks
We opted to go for 3 different varieties of potatoes this year. We normally only choose one as we don’t have lots of space so it was a real treat to be able to choose individual tubers and get the exact quantities we wanted. You can also look at each tuber and make sure none are soft, mouldy or shrivelled. We chose:
1st Early – Arran Pilot. A very early traditional potato, the most popular potato grown in the UK in the 1930s! A new one to us.
2nd Early – Maris Peer. A great tasting early potato. We grow this potato lots and we love it!
Salad potato – International Kidney. This one makes a very tasty salad potato with a waxy texture. Another new one for us to try.
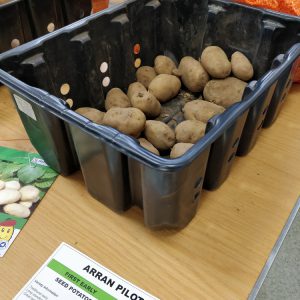
A great choice of potatoes
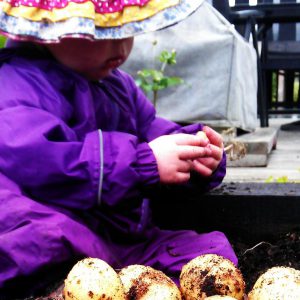
What next…
You need to “chit” your potatoes before you can plant them in the ground. Chitting means sprouting the tuber – putting it, most eyes upright, in a light, cool but frost-free place at about 10C. Old egg cartons are a great holder for your potatoes while they are chitting. Chitting potatoes gives you a quicker and slightly larger harvest.
Once you have healthy, short, green shoots, about an inch long, they are ready to be planted in the ground. Rub off all but 3 or 4 of the healthiest shoots at the top of your potatoes.
Dig straight, shallow trenches, two to three feet apart, in prepared soil. Plant seed potatoes 12 inches apart and cover with about 3 inches of soil. When the shoots reach 10 to 12 inches tall, use a hoe or shovel to scoop soil from between rows and mound it against the plants, burying the stems halfway.

Potato chitting
Your first early potatoes should be ready to dig up around June/July with the second earlies about a month later. If you choose maincrops they will be ready from August through to October.
Happy potato growing!
Lulu & Tilda xx
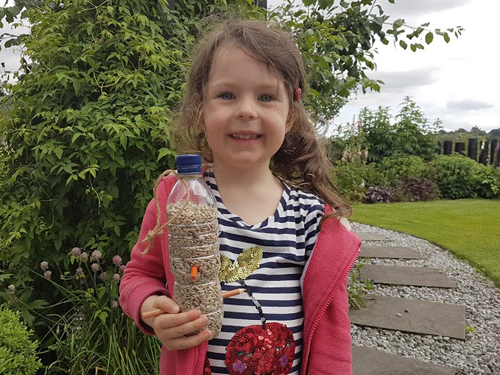
Make Your Own Bird Feeder
It’s been a busy start to 2018 for me as I turned 6 and started going to Beavers. On my very first week there we made a cool bird feeder from an old bottle which made me think I should show you how to make your own bird feeder using some things from around the house. It’s still really cold outside so our feathered friends need as much help as possible and it’s a great craft activity for half term!
You will need:
- A plastic water bottle
- Scissors
- Two old pencils or sticks
- Some string
- Bird food
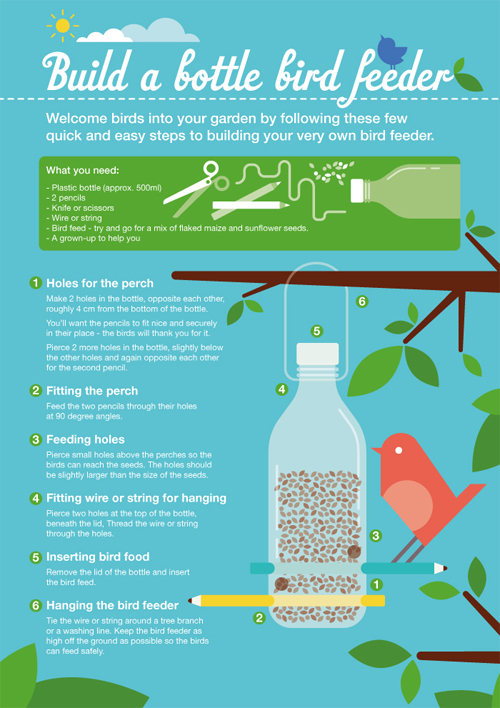
Original image from Money Matters blog (www.sainsburysbank.co.uk/money-matters/ )
To make:
1. Carefully add 2 pairs of holes in the bottle where the pencils will be pushed through. Make sure that each pair of holes are the same height. You may need a grown up to help with making the holes as it can be tricky.
2. Push your pencils/sticks through to make perches for the birds.
3. Add some small holes above each perch so that the birds can access the bird food (not too big though or the seeds will fall out)
4. Tie string round the top which you will use to hang it up
5. Fill with bird seed and put your lid back on (to keep your seed dry)
6. Now it’s ready to hang outside!
We have ours hanging in our apple tree and can see it easily from the house and watch birds coming for their tea!
Enjoy making yours.
Lulu x
Wildlife Friendly Reindeer Food
As Christmas creeps ever closer it’s time to think about making sure Santa’s reindeer can find your home on Christmas Eve by sprinkling some reindeer food in your garden. PLEASE don’t sprinkle reindeer food that has normal glitter in it though as it can be really harmful to wildlife and birds if they ingest it. Why don’t you make your very own wildlife friendly reindeer food so that you know that it will be nice and safe and the reindeer are sure to guide Santa safely to your door:

Us with reindeer in Lapland
You will need:
- Rolled oats
- Cake sprinkles or coloured sugar
- Edible glitter
- Cellophane bags (sandwich bags will do)
- Card to make a label
- Pipe cleaners, googly eyes and a red pom pom (optional)
- Glue or sellotape
To make:
1. Mix the oats, sprinkles and edible glitter together in a bowl
2. Carefully spoon them into your bag and seal
3. Make your “Reindeer Food” label. You may want to add this little poem:
“Sprinkle this magical reindeer food on your lawn at night
The moon will make it sparkle bright
As Santa’s reindeer fly and roam
This will guide them to your home”
4. Add your label to your bag. If you like use a brown pipe cleaner to make antlers and add googly eyes and a red pom pom for a nose to turn your bag into Rudolph.
5. On Christmas Eve sprinkle your reindeer food around your garden leading to your door.
6. Go to bed and don’t wake up til Christmas morning.
Fingers crossed you are all on the Nice List and get lots of pressies!
Merry Christmas!
Lulu & Tilda xx
Grow Your Own Strawberries
We just love growing our own fruit and you can pretty much find us in our raspberry patch at this time of year, catching the end of those rosy jewels! But we think we would like to grow some more strawberries for next summer. Did you know what now is the perfect time to plant them? Here is what you need to do to grow your own strawberries…

I’ve only got eyes for yummy strawberries!
You will need:
- A window box of plant pots
- Compost
- Gravel/pebbles
- Strawberry seeds/plants
To grow your strawberries:
- Add the gravel or pebbles to the bottom of your containers for drainage
- Add some compost leaving space for your seeds/plants
- Carefully plants your seeds or plants
- Add compost to the top
- Put your pot in a sunny, sheltered position and keep well watered
Here is a wonderful visual from the people at Sainsbury’s bank which shows you what you need to do…
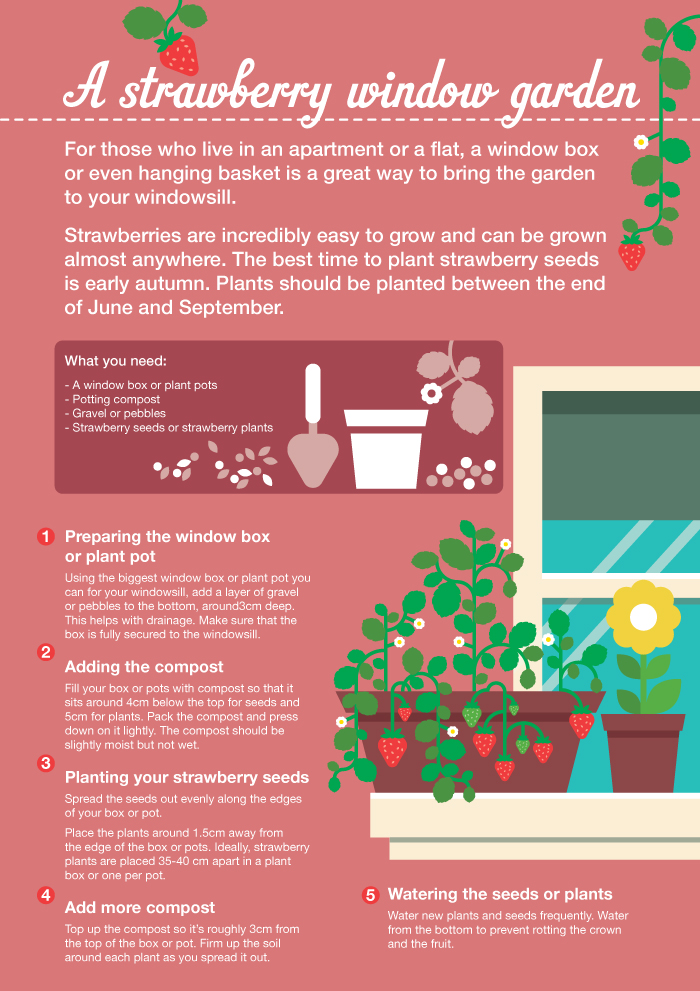
By next summer you will be picking the delicious fruit from your windowsill!
Enjoy!
Lulu & Tilda x
Deadly v Woody Nightshade
We have heard a lot of chat recently about deadly nightshade and fears that it is appearing in domestic gardens. However, in many instances it is actually a completely different plant called Woody Nightshade which is growing. It evens grows out of my school hedge! Whilst it’s not as toxic as it’s deadly namesake, its berries should still never be eaten. In fact NO berries should ever be eaten unless a responsible adult says it’s OK (or it comes in a punnet from Waitrose!) If you are worried about what is in your garden or just want to learn more, here are some images of the two plants and some interesting facts to correctly identify whether they are deadly or woody nightshade…
The name
They are both members of different genera – Atropa and Solanum – but of the same family, the Solanacea.
Deadly Nightshade is Atropa belladonna. Despite its deadly potential, belladonna literally means ‘beautiful lady’ coming from its use to promote pupilar dilation, a proven way to increase attractiveness apparently!
Woody Nightshade’s latin name is Solanum dulcamara. It actually belongs to the same family as the humble potato and tomato. Don’t let that fool you into eating it though!
The flowers
The flowers of Deadly Nightshade appear as a single flower while the Woody plant’s flowers grow in clusters:

Deadly v woody nightshade
The berries
The unripe berries show a clear difference: the Atropa belladonna has a single berry while the berries of the Solanum dulcamara hang in clusters. The ripe berries are even more distinctly different, in colour, shape and structure:
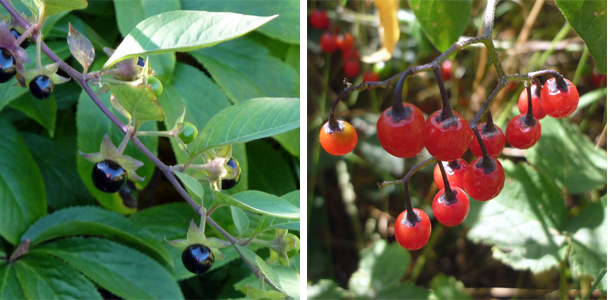
Deadly v woody nightshade
The effect
Deadly Nightshade: Symptoms may be slow to appear but last for several days. They include dryness in the mouth, thirst, difficulty in swallowing and speaking, blurred vision from the dilated pupils, vomiting, excessive stimulation of the heart, drowsiness, slurred speech, hallucinations, confusion, disorientation, delirium, and agitation. Coma and convulsions often precede death! Yikes! There have been differing opinions on what is required to be digested in order to cause poisoning, some saying half a berry, others saying 20+. To make it simple just never eat any! Or the root which is even more toxic!
Woody Nightshade: It contains solanine, an alkaloid glycoside. It increases bodily secretions and leads to vomiting and convulsions. The strength of its actions is said to be very dependent on the soil in which it grows with light, dry soils increasing its effects. Though the berries are very attractive the bitter taste is a disincentive for the majority of people, especially children. There have been no recorded deaths from eating the berries from this plant in recent years but it will likely give you a very sore tummy and need medical attention if consumed.
If you want to learn more about poisonous plants we hugely recommend a visit to the Poison Garden at Alnwick Gardens. Their Fairy Garden is awesome too! If you are still unsure which plant you have in your garden and want some advice then please get in touch.
And remember, no eating dubious berries you find!
Lulu & Tilda
Double Book Review: “Growing Perfect Vegetables” & “The Salad Garden”
This week I have had my head in the books as I have two new books to review for you! So I better crack on and tell you about them:
Square Foot Gardening: “Growing Perfect Vegetables”
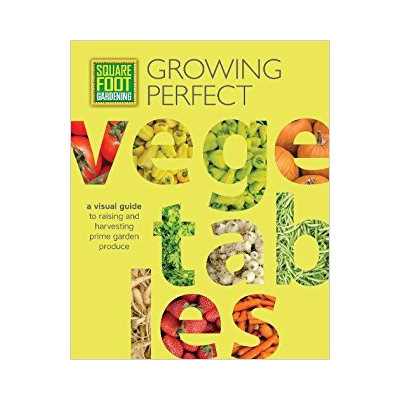
Square Foot Gardening (commonly referred to as SFG) is a planting method that was developed by American author and TV presenter Mel Bartholomew in the 1970s. It’s a simple way to create easy-to-manage gardens with raised beds that need a minimum of time spent maintaining them. This book is a very visual guide to raising and harvesting vegetables at their optimum. I loved this book as it was really easy to read and is packed full of lovely inspiring photographs. It takes you through examples of what to grow in your SFG, how to know when they are ripe and an easy to read table telling you when to sow your veg and when they will be ready to eat. There are also some tips at the back about growing other vegetables which don’t strictly work in a SFG such as perennial fruits. The SFG theory is a great way of getting into growing veg as it only takes up a small space, it’s easy to manage and, crucially, easy to see when things are ripe and ready to use. This book tells you all you need to get you started on the road to becoming your own wee allotment expert. My star rating is:

Available now in paperback, RRP £11.99
“The Salad Garden” by Joy Larkcom
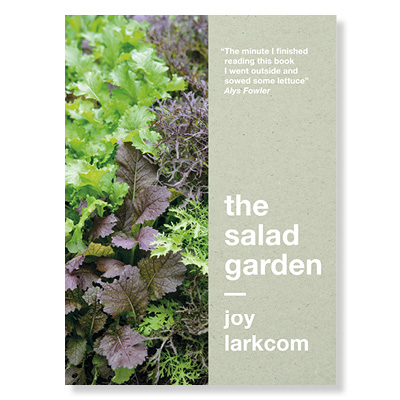
When “The Salad Garden” was first published in 1984, it was held in high esteem by gardeners, chefs and even professional growers. It has now been updated and released to suit the modern market. Consideration has been given to being able to garden in smaller spaces like on patios, window boxes (or a square foot garden!), new varieties of salads are included and the recipes have been given a modern twist too. It’s not just salad leaves that are covered in this book, there are peas, tomatoes, fennel, flowers, root vegetables and much more. I think this book suits a more serious garden who wants to learn a lot more about a wide range of salad. There is a lot of great information about how to grow each vegetable and recommended varieties. It’s just a little less colourful and user friendly than the SFG book but has a LOT of useful information packed into it. My star rating is:

Available now in paperback, RRP £16.99
Happy reading (and growing!)
Lulu xx
Our 9 Favourite Ways To Slay The Slug!
We love our garden but sadly slugs do too! This year we have LOADS of slugs and snails in the garden. Our latest blog gives you some tips on how to deal with them.
With a little help from your friends
One of the most effective ways to help deal with the slugs in your garden is to encourage wildlife that likes to have a munch on some slugs. Invite hedgehogs, blackbirds, toads, newts and songthrush along for a slap up meal!

Help from a hog
Garlic
Slugs are a bit like vampires and hate the smell & taste of garlic. Leave a barrier of chopped up garlic around the vegetables that slugs like to munch on. For non edible plants like hostas you can spray them with a home made garlic spray to keep them safe.
Egg Shells
This is a common one but did you know you can bake the shells in the oven for 20 minutes to make them more effective. Mix them with your garlic pieces for the ultimate protection!
Wool Pellets
We have had unreliable results with wool pellets so definitely combine them with something else like the garlic or the slugs will put up with the uncomfortable journey for a munch on your prized courgette!
Vaseline
This is effective when applied liberally around a pot. For plants in the ground you can use an old plastic pot with the bottom cut off, place over your plant and push well into the ground and then cover in vaseline.
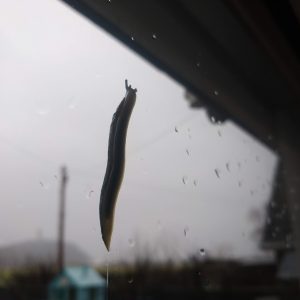
A slug going for a wander up our patio door!
Copper tape
This can be pricey if you have lots of pots but it is an effective way of keeping slugs at bay. They get an electric shock when their slimy bodies crawl over the tape.
Beer traps
Sink a pot into the ground and fill with some of your big person’s beer. Slugs will be attracted and fall into the beer trap. Empty and refill every few days. Always ask a grown up to help!
Nematodes
In spring, water in these microscopic parasites into the soil. They will kill your slugs and keep the numbers down for the rest of the year.
Slug hunting
Our favourite way is to get a tub and go slug hunting with all our friends!
We never recommend using slug pellets as they can really harmful to pets, children and the environment.
Good luck!
Lulu & Tilda xx
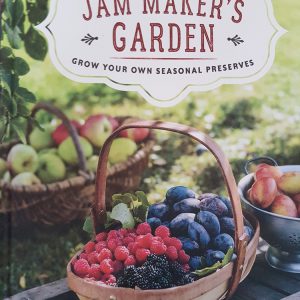
The Jam Maker’s Garden: An Interview by Lulu Burt
I LOVE fruit. I love growing it. I love eating it. And I love cooking with it. So I was really pleased to be sent a copy of “The Jam Maker’s Garden”. I was also really lucky to be able to ask the clever author, Holly Farrell, some pretty cool questions all about her book. So read on to find out what I asked her as well as a lovely idea for a teacher’s gift…
So Holly, what is your favourite fruit to grow in the garden?
Probably raspberries, though it changes as each new fruit comes into season!
Yum, I love raspberries, they are my favourite too. What would you say the easiest fruit would be for beginners to grow?
Strawberries- they’re easy to come by and easy to grow. Plus you get a lifetime’s supply of new plants from the runners off the first plants.
If you have a teeny garden, what sort of fruit would you recommend trying?
Strawberries are the smallest plants, but currants only take about a square metre of space for masses of fruit and breeders are always bringing out new, more compact plants like raspberries for pots.

Yes, we have a lovely little pot packed full of strawberries in our garden which hardly takes up any space at all. Now, in Scotland we finish up for our school holidays next week (woo hoo!) I think making something home-made would be a lovely present for a teacher at the end of term, what would you recommend making?
For the end of June, strawberry jam, for July definitely raspberry. Adding a little twist like strawberry and thyme or raspberry and rose pelargonium really makes it personal. A hand designed label would be nice too!
Ooh, they sound lovely and really different. What’s your favourite recipe in your book?
I can never answer that question! Every season brings it’s own favourites, and I’m greedy!
Ha ha, I’m sometimes greedy too! What’s your top tip for making jams?
Don’t worry too much about the technicalities- follow the recipe and it’s hard to go wrong.
We hear a lot about how sugar is bad for us these days. Does that mean we shouldn’t eat jam too?
We should absolutely be careful about how much sugar we eat – half a jar on toast every day would not be good! I’m not a nutritionist or a dietician but I think with some common sense jam can be enjoyed as the delicious treat that it is.

Yup, I definitely agree Holly! Now, final question, what do you grow in your own garden?
I have a relatively small courtyard garden and everything is either edible or can be used as cut flowers. I’ve got raised beds with the usual veggies, lots of herbs, currant bushes, raspberries and strawberries and some fruit trees in large pots, amongst other things!
Thanks for that Holly. I LOVE the fact that everything in your garden can be used somehow.
The Jam Maker’s Bible by Holly Farrell is out now, RRP £17.99. It is a lovely hardback book packed with amazing photos by Jason Ingram. There are deelish recipes for every kind of fruit you can imagine as well as great tips for growing them. If you like jam then this is one for you!
Lulu x
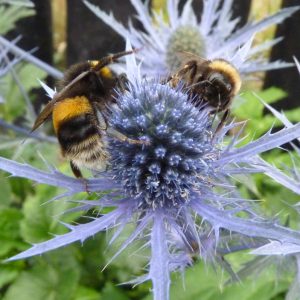
Get The Buzz – Planting for Bees
There are many reasons why bees are so very important to us, but one fact really stands out to us and makes us appreciate how hugely important our buzzy friends are:

The bees loving the echinops in our garden
1. Lavender
A favourite with so many of our clients. It loves dry, sunny positions so if you don’t have the correct sort of soil in your borders consider having a pretty pot filled with lavender on a sunny corner of our patio where you can enjoy the
sights, smells and buzzy sounds from it!
2. Catmint
Nepeta is loved by cats and bees alike! It is similar to lavender with its pretty flowers and silvery blue leaves and gives off a lovely aromatic scent as you brush past.
3. Verbena
We love verbena, particularly verbena bonariensis. It grows really easily, even in our heavy clay soil and gives statuesque height to the border. You may need to give the plant a bit of support if your garden catches the wind and be warned, this plant does like to self seed. It provides beautiful winter interest if it’s not cut down in Autumn.
4. Sedum
continues to provide interest through the winter. It’s easy to split and create new plants so if you know a friend who has some then go ask for a piece now!
5. Eryngium
interest if you don’t cut it down after it has flowered.
6. Buddleja
Probably best known for attracting butterflies but bees are also partial to a buddleja. The long cone-like flowers prove too irresistible for them.
7. Sunflowers
Now, who can resist the big yellow smiley face of a sun flower? It’s the perfect plant to get kids involved in gardening. Get them to have a competition with their friends to see who can grow the tallest plant and use it to explain to them the importance of encouraging bees into the garden.
8. Hebe
Hebes are a great structural shrub which can be a lovely alternative to buxus in your garden if you are looking for a rounded shape to provide an interesting form. But bees love their flowers too making it a well rounded (excuse the pun) plant for the garden.
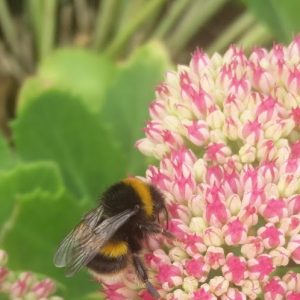
A bee on sedum
9. Foxgloves
We regularly see foxgloves growing profusely at the sides of the road so it shows just how easy they are to grow. They will self seed furiously so once you have them you will get free plants forever. Bees just love snuggling up inside one
of the bell like flowers and having a nice big feed.
10. Heathers
Again, a plant we often see growing in the wild in Scotland and if you have acidic soil in your garden you will be able to grow these well and keep our fuzzy friends happy.
If we have whetted your appetite, then there are literally THOUSANDS of plants* which bees will love and there will be plenty to suit your garden and soil. The perfect for pollinators list published by the RHS gives you more information than you could ever wish for.
How To Grow Potatoes
My latest blog tells you all you need to know to grow the perfect potatoes in an easy to follow guide. It’s gotta be simple, I’m only 5 right!
Lulu growing potatoes
How to grow potatoes…
- Buy some seed potatoes
- Chit your potatoes on a window sill as soon as you buy them. Chitting just means letting the wee “eyes” grow a bit longer which gives them a head start for when you pop them in the ground.
- Plant them in the ground about 20cm deep and about 30cm apart.
- “Earth up” your potatoes as soon as shoots start to appear, raking up the soil around them and covering them back up, protecting them from the sunlight. You will need to do this 2-3 times in the growing season.
- Feed your potatoes every week, they will grow big and strong, just like me.
- Early varieties will be ready in 8 weeks, main crops in the summer. Gently move soil aside to pick your potatoes, you don’t need to pick them all at once and they taste best freshly picked.

Our potato crop
Top tips:
- You can grow potatoes anywhere. Veg beds, compost bags, specialist potato bags, old tyres, tall pots, whatever you have to hand.
- Potatoes need drainage so if you have clay soil then dig in some gravel. You are planting in pots, raise the pots and make sure they have drainage holes.
- Potatoes like sunshine (like me!) so don’t grow them in a shady corner.
- Always water the base of the plant not the foliage.
- Remove flowers when they appear to put more energy into the tuber the plant is creating.
- Dig up your potatoes on a dry day and leave them to dry in the sun for an hour.
Lulu x
8 Best Apple Trees to Grow in Scotland
Our latest blog is short (like Tilda!) and sweet (like me!) If you don’t already have an apple tree in your garden then pop along to your nearest garden centre and make sure you have one fruiting away in your garden this summer. If, like us, you live in Scotland, you want to choose a variety perfect for our climate. Here are my favourite 8 apple trees to grow in Scotland…

A teeny Lulu munching a home grown apple
Egremont Russet
The Egremont Russet is a cultivar of dessert apple, of the russet type. It has a rich, nutty flavour and crisp, firm and fairly juicy flesh.
Discovery
Discovery is best known because it produces some of the earliest apples in the UK. The cropping time is mid to late August and lasts for about a month into September.
Discovery apples
Fiesta
Fiesta is a modern cultivar of domesticated apple which is often marketed as Red Pippin.
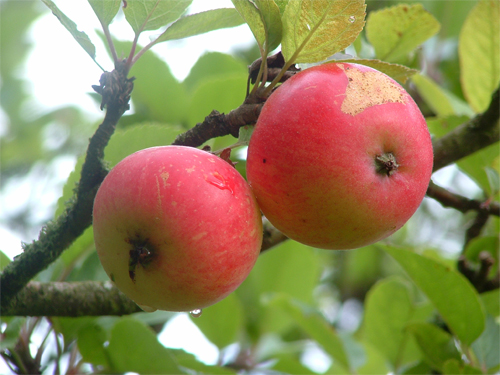
James Grieve
The multi-tasking James Grieve fulfils every apple expectation: it juices beautifully, cooks perfectly and is so refreshing to eat.
James Grieve
Katy
Katy is a great choice for newcomers to growing apple trees because disease resistance is high and it requires only minimal pruning. It grows well all over the UK but is especially valuable in cooler parts where it shrugs off late frosts with ease.
Laxtons Superb
‘Laxton’s Superb’ is a heavy-cropping, late-season, dessert apple with a sweet flavour and firm flesh.
Spartan
Attractive, crunchy, sweet, easy to grow, and with the characteristic delicate wine- like flavour of the McIntosh family of apples (or so mummy says!)
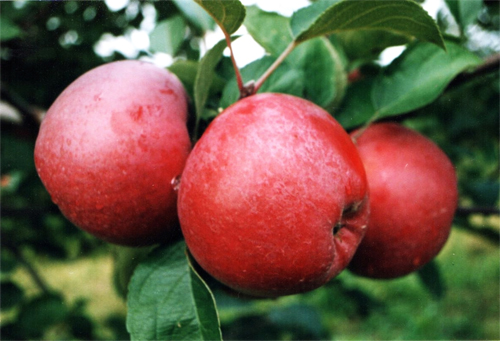
Spartan apples
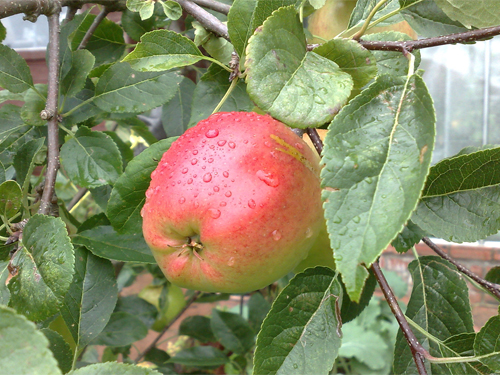
Sunset
Sunset is a popular Cox-style apple, recommended as one of the best alternatives to Cox’s Orange Pippin as it is much easier to grow.
So there you go, there’s no excuse not be crunching on your very own home-grown apples this autumn!
Lulu & Tilda xx