Bonkers for conkers!
Did you know that it’s national conker day today? It’s also the day of the World Conker Championship. What better excuse to go out conker hunting as well as making a lovely choccy version of the conker…
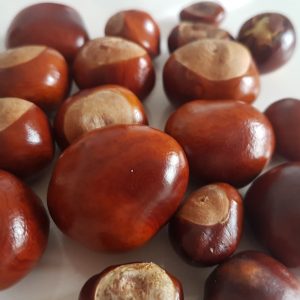
Bonkers about conkers!
Cool conker facts:
- The conker is the seed of the horse chestnut tree.
- To play with conkers there are various tips to prepare them including putting them in the oven or soaking them in vinegar.
- Before horse chestnuts were used to play conkers, snail shells were used!
As well as playing with the conkers, you can also make chocolate conkers to share with your friends.
Chocolate Conkers
You will need:
- 450g Oreo cookies or chocolate bourbon biscuits (1)
- 225g full fat cream cheese
- 450g chocolate (milk or dark chocolate, or both)
To make:
1. Put the biscuits in a plastic food bag and smash with a rolling pin until they are crumbs (if you have a food processor use it instead as it will be a lot faster.)
2. Put the cream cheese in a bowl and gradually mix in the biscuit crumbs, stirring it really well until everything has combined.
3. Shape the mixture into small conker.
4. Put the ‘conkers’ on a tray lined with greaseproof paper and put them in the fridge for
least two hours to chill.
5. Melt the chocolate in a bowl and dip the chilled ‘conkers’ into it making sure they’re fully coated (for different shades of brown, dip some in milk chocolate and some in dark.)
6. Set them out on a tray lined with greaseproof paper and put them back in the fridge for the chocolate to set.
7. You can leave your chocolate conkers as they are, or make a spiky green outer shell out of marzipan (dyed with food colouring).

Chocolate conkers, yum!
There you have it, yummy conkers. Just don’t mix them up with your real conkers as they won’t last long on a bit of string! And the real ones won’t taste nice, even covered in chocolate.
Hugs & kisses,
1. You can also use ginger nuts, they are yummy in this recipe.
2. A big thank you to Nature Detectives for the chocolate conker idea.
I Declare Provost’s Park Officially Open!
I had an awesome day yesterday as I, Lulu Burt, (aged two and a half) had the great honour of officially opening Provost’s Park in Bridge of Allan! M&D have been working on the re-design of the Park from even before I was born (wow!) but it was really worth the wait to see the finished park and see so many people come out for the opening. Here are some pics from my big day along with a little bit about the park and the new design…

I unveil the plaque with Gavin Drummond
and declare Provost’s park officially open!
The site of the park used to be a church, waaaaay long ago. Even before M&D were born! The corner beside the toilet has been made into the Ecclesiastical (fancy name for church) garden to reflect this and features pews from a village church as well as ecclesiastic type planting.

The crowds gather in Provost’s Park
A Victorian theme was chosen for the new park to reflect Bridge of Allan being a Victorian spa town.
Lots of seating and wide paths in the park was important so locals and visitors can use the garden comfortably.
Low maintenance planting that tied in with the Victorian theme was important so that the park remains easy to manage by the wonderful Friends of Bridge of Allan who look after it.
A clever lady called Claire Gibbons designed the screens around the toilet block. They feature lovely details from around the village such as the bridge, heron, Paterson’s clock and a church window.
The entertainment on the day was from:
- Beaconhurst School who had a brilliant folk band. Like properly awesome. I loved dancing to them.
- Dance Connection who had pretty ballerinas in tutus and wellies at the actual opening and then there were lots of dance performances in the church hall after. Carla is the teacher – she is very talented and I go to her classes too. They are LOTS of fun!
- A slide show of old photos and the BofA Coronation film, put together by the lovely Janie Meikle Bland.
- A talk from Malcolm Allen who is a local historian and expert on all things BofA
- Lovely tea and biscuits from the wonderful Friends of Bridge of Allan.

The plaque with my name on it

Me, M&D. What a proud day!
Brambly Blog
Hey everyone. It’s the time of year when the hedgerows are bursting with brambles (aka blackberries) and us bramblers (namely my BFF Euan and myself) are to be found with purple fingers and tell tale purple mouths! It’s good fun going hunting for brambles and seeing how many you can get past your mouth and into your tub. In this latest brambly blog I tell you some wonderful bramble facts as well as sharing a lovely recipe which uses them up (along with a few apples from my garden), yum!

Brambling with my pal Euan
Did you know…
- Blackberries (or brambles) are not actually true berries. They are “aggregate fruits”.
- The thorny stems of the bramble were used as “barbed wire” by ancient Britons!
- There are over 400 micro-species of brambles across the UK
- What do you get if you cross a Bramble and a Raspberry? No, it’s not a joke. You get a Loganberry!
- Brambles are a valuable source of food for wildlife and especially birds so make sure you leave a few on the hedgerow for our feathered friends.
- Brambles are really invasive so if you want to grow them in your garden make sure you keep them well pruned.
Top tips for brambling:
- We recommend long sleeved tops when brambling too so you don’t get scratched by the jaggy stems.
- Be careful where you are picking your brambles – you don’t want to pick them off a hedgerow at the side of a busy road as they will likely be polluted from traffic fumes, yuck!

Sampling the crop as we go!
Bramble and Apple Pie
- 150g cold salted butter, cut into cubes
- 275g plain flour
- 30g icing sugar
- 1 large egg, beaten
- 1/2 tablespoon water
For the filling:
- 300g – 500g freshly picked brambles
- 200g – 300g apples
- 120g brown sugar
- Beaten egg or milk, to glaze
Yum Plum!
If you live anywhere similar to us, you will be seeing an explosion of plums on trees and trug-fulls of yummy plums being traded around the neighbourhood at the moment! If you want to grow plums, my latest blog gives you a few tips along with a lovely cake recipe to put them into if you have any left over…
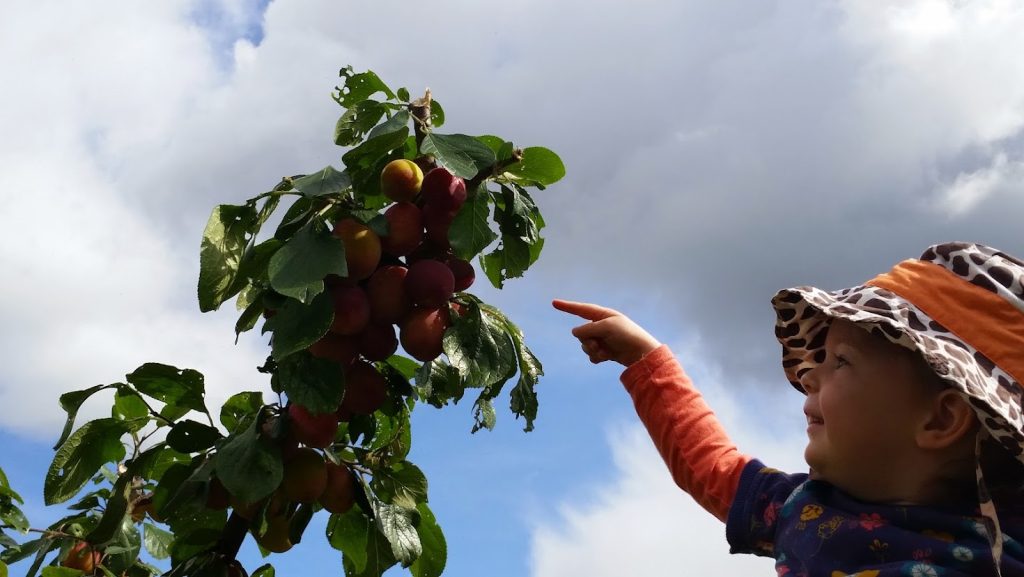
Our tree, laden with plums!
Plum Facts
- They are super easy to grow and reward you with a large crop of juicy plums, perfect for eating straight off the tree or for making jams, cakes and desserts, yum!
- Literally any garden can fit a plum tree. The trick is to carefully choose your root stock so you get one that will suit your size. Any good garden centre (or clever gardeners like Vialii) can advise what variety to choose. You can also grow them as standards or espaliers (along a wall) if that suits your garden better.
- If you only have space for one plum tree, make sure it is self-fertile in order to get fruit. Once the fruit has set on your tree, it’s best to thin them out to avoid congestion and allow the ones left to grow big and healthy (and not overload the poor tree!)
- You should only ever prune your plum tree (or a cherry tree) in Summer to avoid the risk of Silver Leaf infection or bacterial canker.
So, now you know lots about plums you will soon have soooo many you won’t know what to do with them all! One of the things we like to do is bake (and eat!) cakes so why not try out this recipe from the clever people at BBC Good Food…
Plum, Hazelnut & Chocolate Cake
Ingredients:
- 175g butter, plus extra for greasing
- 500g plums
- 175g light muscovado sugar
- 175g self-raising flour
- 175g ground hazelnuts
- 3 eggs
- 1 tsp baking powder
- 50g dark chocolate (70 per cent cocoa), chopped
- 2 tbsp hazelnuts
- 2 tbsp redcurrant, damson or plum jelly
To make:
1. Ask a grown up to heat oven to 180C/fan 160C/gas 4.
2. Butter and line the base of a round 20cm cake tin.
3. Halve and stone 4 plums, set aside for later, then roughly chop the remaining plums.
3. Put the sugar, butter, flour, ground hazelnuts, eggs and baking powder into a large bowl and beat with a wooden spoon or electric hand mixer for 1-2 mins, until smooth and light.
4. Stir in the chopped plums and chocolate, then tip into the prepared cake tin and smooth the top.
5. Arrange the halved plums over the top of the mixture, pressing them down lightly, then scatter over hazelnuts.
6. Bake for 40-50 mins until the top is golden and the cake feels firm to the touch. Cool in the tin for 10 mins, then turn out, remove the paper and cool on a wire rack.
7. Heat the jelly, then brush over the top of the cake before serving.
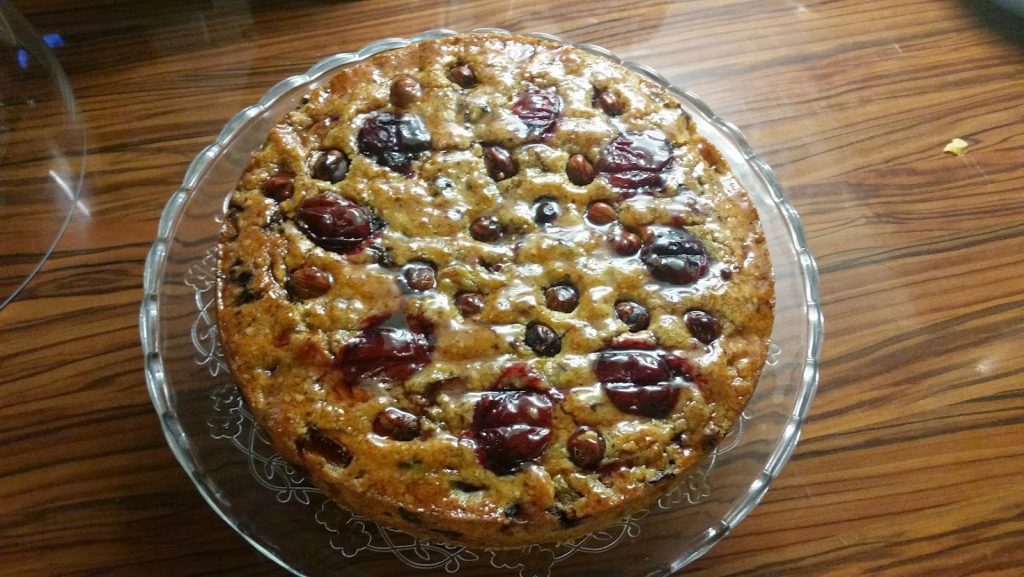
Yummy Plum, Hazelnut & Chocolate Cake
And there you have it. Yum Plum!
Feed The Birds, Tuppence a Bag…
I love birds. They can fly for one thing, which is pretty cool. They are also great friends to us gardeners. In my latest blog I am reviewing a super book all about garden birds from the cool people at the RSPB. I have also created a trendy bird feeder which is soooo easy for you to make at home.
Book Review: My First Book of Garden Birds (RSPB)
The lovely people at the RSPB do an incredibly important job in protecting our feathered friends. They kindly sent me their “First Book of Garden Birds” so I could read it and, more importantly, tell you all about it.
The first thing you notice before you even open the book are the beautiful bird illustrations on the cover. These continue throughout the whole book making it beautiful and colourful as well as educational.
The book is split into interesting sections. “Birds in your garden” tells you some basic information on what its important to do to look after the birds in your garden and to encourage more in.
The “Guess Who” section is my favourite. You are given lots of clues about common garden birds and a beautiful illustration and you have to try and recognise them. It’s a great introduction to bird spotting for littlies like me and you don’t even need to venture outside with binoculars and waterproofs!
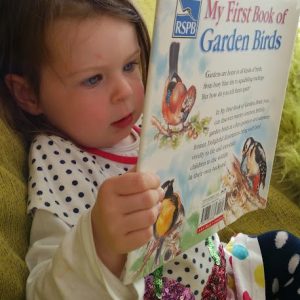
Loving reading My First Book of Garden Birds
There is also an explanation about some of the terms used when talking about birds such as plumage and markings so you can talk like an expert!
At an RRP of £6.99 for a hard backed copy, this book is great value and a wonderful introduction to the world of birds. It’s a must for all young readers who like the outdoors and nature.
One of the things that this lovely book tells you about is how important it is to feed the birds in your garden. I have created this awesome bird feeder from an old drinks carton. Read on to find out how…
You will need:
- Empty juice carton
- Scissors
- Paints, glue and things to decorate your feeder
- String or ribbon
- Pencil or doweling

My lovely new bird feeder!
Cor-gette!
I love my seasonal veg. It tastes so yummy when it’s picked from the garden and is on your plate a matter of minutes later. This week my blog is all about courgettes. From how to grow them to a super yummy courgette cake recipe it’s ripe for the reading!

Cor-gette!
Funny Courgette Facts
- The courgette is called zucchini in America
- It is part of the gourd family along with pumpkins and squash
- If you let a courgette grow bigger it will become a marrow!
- You can also eat the flower of the courgette
- The biggest courgette ever recorded was over 1.76m long! Wowser!
Growing Courgettes
Waaaaay back in Spring I told you all about how to grow seeds. One of the ways that we spoke about was using the Twigz mini greenhouse. I used mine to plant a range of lovely veg and flowers and one of those was courgettes.
Over the months the seedlings have been nurtured from mini greenhouse to bigger greenhouse to bigger pots. Make sure you water them LOTS along the way. I have loved using my colourful Twigz tools to help me dig holes, rake soil, water the plants and carry compost to help make my courgettes grow well. My courgette plant now sits happily on the edge of one of our raised veg beds and it has been giving us some lovely courgettes.
There are all sorts of lovely things you can do with courgettes such as adding them to pasta sauces, soups, tarts, making frittata or even pickling them! But one of my favourite things to do with courgettes is to make cakes with them, yum! Here’s my courgette muffin recipe (1) – it tastes so good you won’t believe it has lots of fruit and veggies in it!
Courgette Muffins
You will need:
- 50g courgettes
- 1 apple, peeled and cored
- 1 orange, halved
- 1 egg
- 75g butter, melted
- 300g self-raising flour
- ½ tsp baking powder
- ½ tsp cinnamon
- 100g golden caster sugar
- handful of sultanas
- 1 tub soft cheese mixed with 3 tbsp icing sugar, to make icing
To make:
1. Brush the muffin tin with oil or add some muffin cases. Ask your grown-up to switch the oven to 190C/ 170C fan/gas 5.
2. Grate the courgettes and put them in a large bowl. Grate the apple and add to the bowl. Squeeze the orange and add the juice to the bowl.
3. Break the egg into a bowl. Stir the butter and egg into the courgette and apple mix.
4. Sieve the flour, baking powder and cinnamon into the bowl. Add the sugar and sultanas.
Mix with a spoon until everything is combined, but don’t worry if it is lumpy.
5. Spoon the mixture into the tin. Ask your grown up to put it in the oven and cook for 20-25 mins.
6. Cool in the tin, then spread some icing on each.
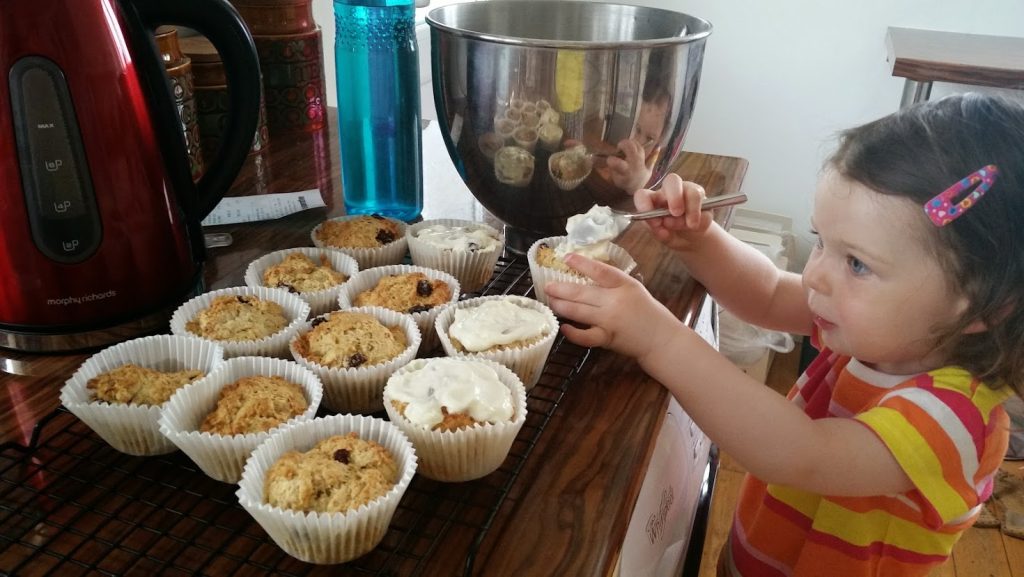
Yummy courgette muffins
If you haven’t already grown them this year make sure they are on your list for next year. Super easy, versatile and tasty. Cor-gette!
1. Thanks to the clever people at BBC Good Food for the recipe for the Courgette Muffins
Beautiful Butterflies
I love butterflies (unlike my Auntie Kathleen!) They are so pretty and great for the garden too. This week we have been releasing butterflies at nursery which is great fun. In my latest blog I tell you some fluttery facts as well as three (yes three) cool butterfly related things I have been doing in my garden. Come on, join in…
Fluttery Facts
Now, we have all heard that butterflies are good for the garden and we should try and encourage them in. But do you know why?
- Like bees, butterflies are essential for pollination. The diet of adult butterflies consists mostly of nectar from flowers. While gathering nectar, the butterflies pick up pollen on their feet and wings and transfer it to neighbouring flowers and plants, continuing the life cycle of many plants that other animals depend on for survival.
- As caterpillars, some butterflies eat aphids in addition to leaves, removing the destructive aphids and helping to control their population. Some adult butterflies eat rotten fruit, helping to break it down and assisting in the composting process.
- They provide great pleasure to people in the garden which is an added bonus.
Upcycle Your Own Butterfly Garden
M&D love to do a bit of upcycling and I have decided to have a go myself. Daddy recently had to replace the wheels on his trailer. He used the old tyres to make this funky container for our deck:
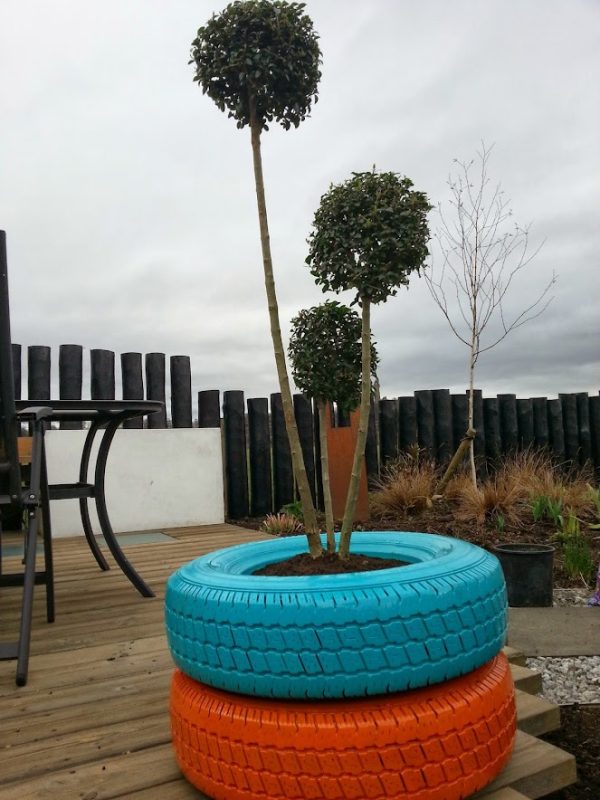
The tyres were turned into a funky planter
So we were left with the wheel rims and I was sure we could do something cool with them too. We turned them upside down, found a pot which fitted perfectly in the hole in the middle and then filled the pot and the ridge of the wheel with compost.
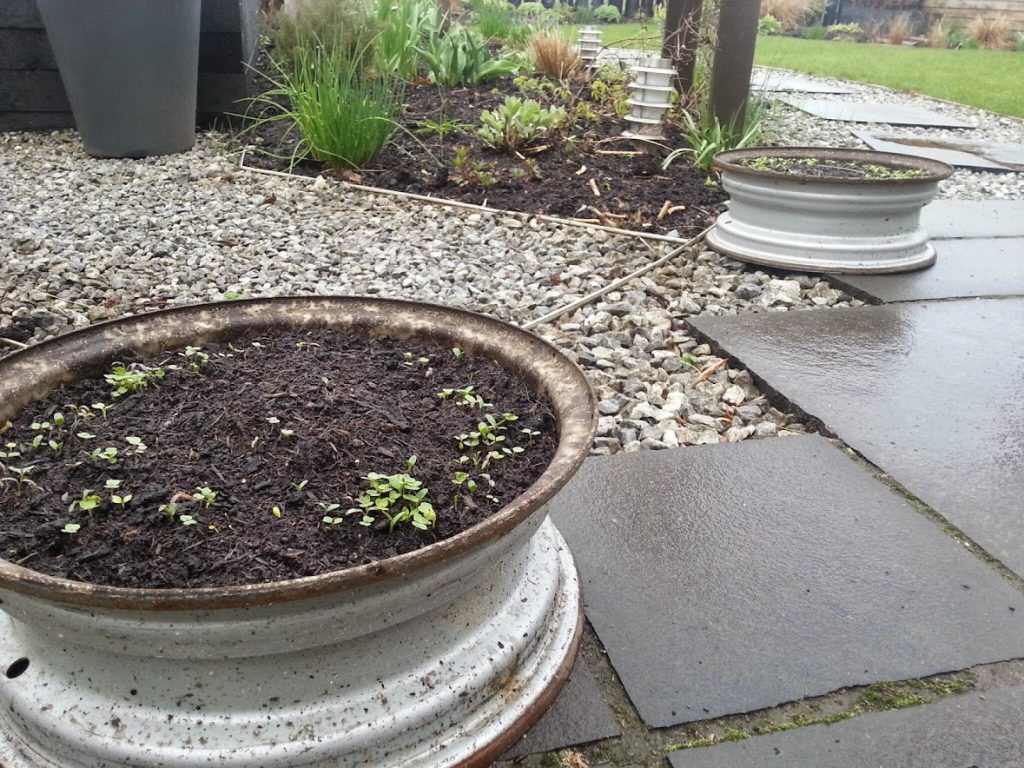
We sowed butterfly seeds in the rims!
We got a packet of butterfly seeds and sowed these and waited for the magic to happen. We didn’t have to wait long – soon our wheels were filled with pretty flowers to attract both bees and butterflies!
Kabloom – Throw a Butterfly Bomb!
The wonderfully clever people at kabloom make really cool “seedboms”. Not only do you get to throw a bomb in your garden (that doesn’t happen every fay, does it?!) it is filled with lots of lovely seeds which grow into pretty flowers which attract butterflies.
Kabloom have a great range of different types of “bombs” and they make lovely gifts too. You can even buy a catapult to sling your bomb with – cooooool! I will be telling you more about the “Catnipbom” in a future blog.
Butterfly Clothes Pegs
Anyone who knows me knows I love a good ole craft project. And what better than to take advantage of this lovely summery weather and to make it in the garden. Here’s how:
You will need:
- A wooden clothes peg
- Paint & brushes
- Card
- A pencil
- Scissors
- Colouring in pens, sequins or whatever you want to use for decorating your butterfly
- Glue
- Googly eyes
- A pipe cleaner
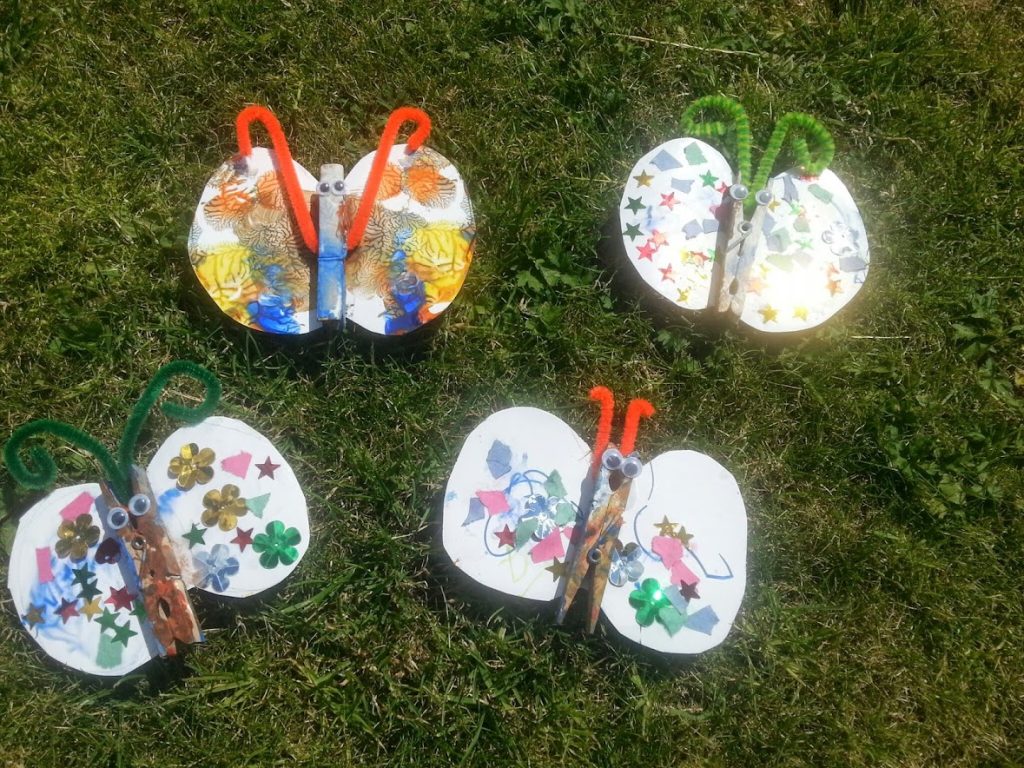
Our pretty butterflies in the sunshine
So, have I persuaded you to love the butterfly yet Auntie Kathleen?…
Summer Garden Games For All
Here in lovely Scotland the school holidays are well under way and, with other parts of the UK set to follow suit very soon, I have decided to give you some great ideas for games you can play in the garden this summer. I’ve loved playing all these games but they are also suited for all ages of kids (yup, you grown up ones too!) and there is a nice mix of free games as well as some lovely games you can buy with your holiday money…
Duck Skittles
The lovely people at BigJigs sent me a set of Duck Skittles so I could try them out and tell you all about them. First of all they come in a handy box so you can keep them nice and tidy. They are made of a lovely wood and painted really nice colours.
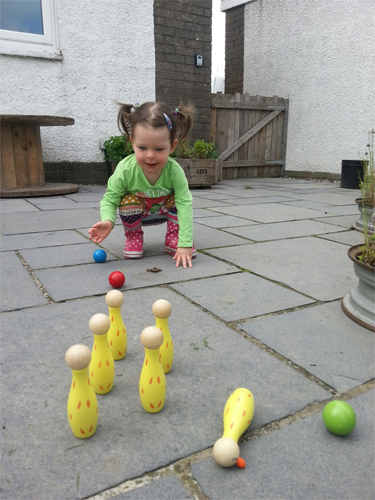
Duck skittles are really quacking!
The balls are nice wood too and painted bright colours. The object of the game is to see how many skittles you can knock down. You can play this game by yourself or with friends, it’s fun either way.
Duck Skittles are available from Big Jigs and cost £12.99. There are other designs you can choose from too such as frogs and princesses. Lovely!
Bear Hunt
This is a brilliant game and one which can be adapted to suit whatever age or theme you want. We chose bears ‘cos they are super cute, we have lots of bears and who doesn’t like going bear hunting? All you need is someone to hide a selection of bears around your garden.

We’re going on a bear hunt…
Like Duck Skittles, you can play yourself and just see if you can find them all or invite a friend along to see who can find the most. I played with my BFF Euan and let him win ‘cos I am nice like that 
Garden Croquet
Another great quality game from BigJigs is this garden croquet set. Again it’s all made from lovely wood and it comes in a handy carry case so you can easily take it on holiday, over to a friend’s house or to the park. You get four croquet mallets and matching balls, pegs and lots of hoops.
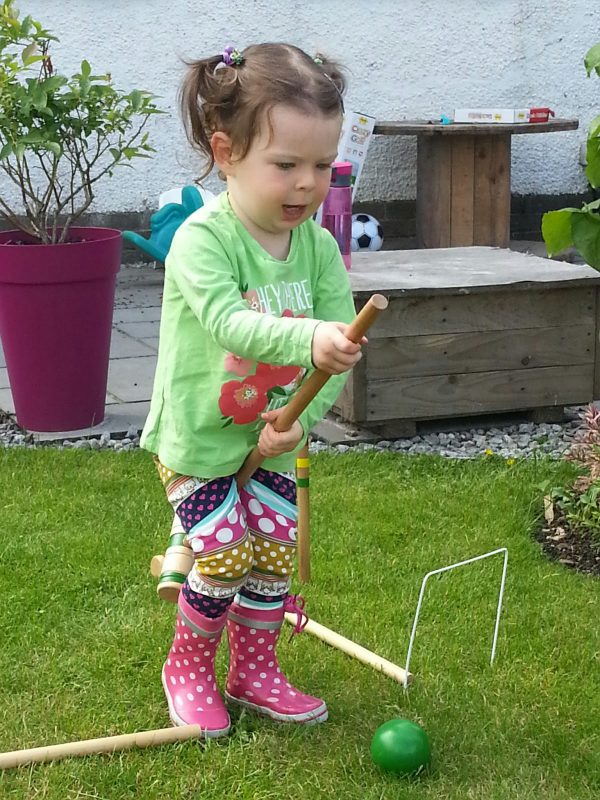
Anyone for a game of croquet?
If you’ve never played croquet before you don’t know what you are missing! You set up the little hoops (I call them tunnels) all round your lawn and the object of the game is to hit your ball through each hoop in turn using your mallet. The winner uses the least amount of shots to get around the course. Get practicing those “Dambusters” and “Deathrolls”
Garden Croquet is available from Big Jigs and costs £20.99.Oh and if you get fed up with croquet the mallets make awesome hobby horses!
Water Painting
I really love to paint but sometimes it can make a real mess (part of the fun if you ask me!) A perfect solution to this dilemma is to take the painting outdoors and swap the paint for a bucket of water.
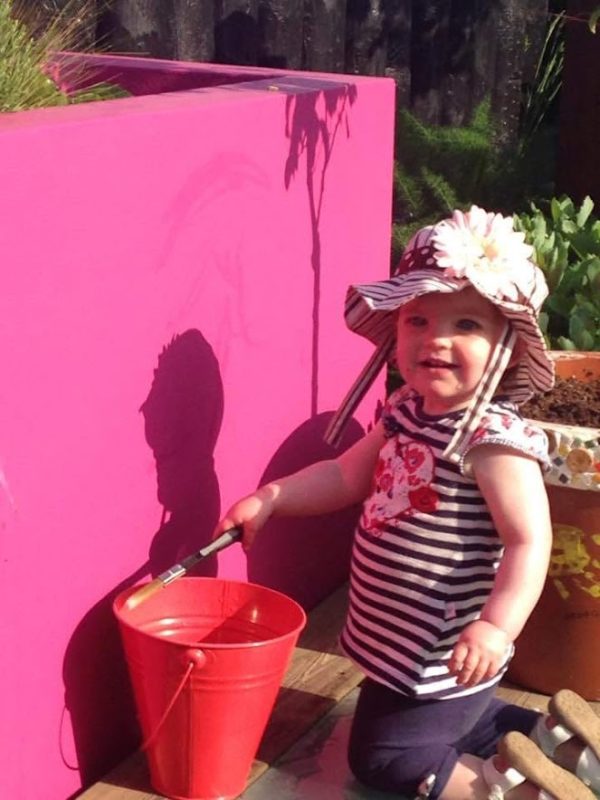
Tilda doing some water painting
All you need is a bucket, brush and some paving slabs or a rendered raised bed or wall to paint on. It is loads of fun (playing with water always is!), the sun quickly dries up your painting so you can keep going all day and you never get in a row for making a mess. Perfect!
Crazy Golf
You’ve got to love a game of crazy golf, an essential part of any childhood summer holidays. If you aren’t heading to the seaside this summer, don’t worry, you needn’t miss out. You can play crazy golf in your very own back garden thanks to the clever people at BigJigs. It may not have a windmill as a central feature but it is made of great quality wood and contains all you need for a perfect round of golf.
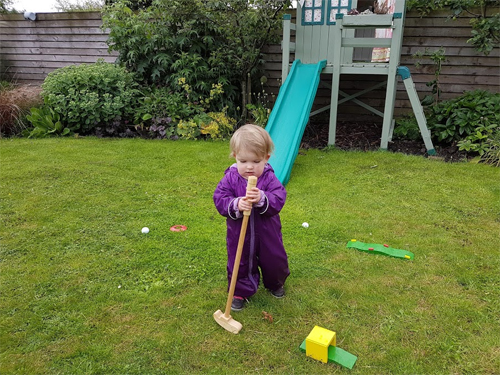
You don’t have to be crazy to play crazy golf. But it helps!
From the wooden clubs and obstacles to the holes and score charts, everything has been thought of and is great quality. The clubs are perfectly sized for children and won’t be easily broken. Some of the obstacles can be quite hard to get over so it may be better suited for slightly older children than me although i still had lots of fun hitting the balls and managed to get it through the tunnel all by myself. Is it too late to enter the Ryder Cup?…Crazy Golf is available from Big Jigs and costs £23.99.
For more ideas of fun things to do this summer check out my 19 great ideas for summer fun in the garden blog or visit Bigjigs website for a wide array of quality toys.
Happy holidays everyone.
Daddy’s Day Tin Can Planters
Hey everyone. It’s Father’s Day this Sunday which means we all need to be extra nice to our lovely daddies. I think it’s nice to make something personal for Daddy’s Day so I have come up with a really cool project which you can easily personalise to your own Daddy. Or if you are strapped for time you can keep it plain and very simple. And it can cost absolutely no money too which is even better! Here’s my Tin Can Planters for Father’s Day…
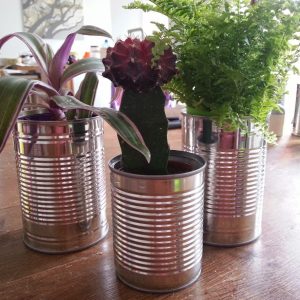
Plain tin can planters look great too
Make Your Own Tin Can Planter
You will need:
- An empty, clean tin can
- Hammer and a nail
- Something to cover the can with
- Glue
- Spray varnish & gloves
- Compost
- Plant or seeds
To make:
1. Find a tin can which you like the size and shape of. I chose some different sizes to make a nice collection but one can look just as good. Ask a grown up to make sure its all nice and clean and that there are no sharp edges.
2. You will need drainage holes in your can so ask a grown up to turn it upside down and using the hammer and nail add a few holes to the bottom.
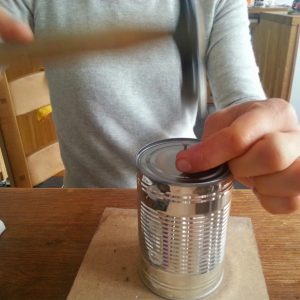
Be careful not to hit your fingers Auntie Alison!
3. Now you can personalise your tin can with whatever you want. Some ideas include one of your own drawings, paintings or hand prints, a relevant piece from a magazine or newspaper or some nice wrapping paper.
4. Carefully measure your paper so that it wraps perfectly around your tin can with a little bit extra for gluing down.
5. Glue the edges of your paper so they stick well to the tin can.
6. Take your tin can outside and ask a grown up to spray it all over with spray varnish. This will waterproof the paper so the planter can sit outside and not be ruined. Remember to use gloves when spraying and always spray outside or in a very well ventilated area.
7. Once the varnish has dried you can fill your can with compost and plant your seeds or plants. We always have some lovely plants and seeds that are perfect for adding to a mini planter kicking around the garden or shed and you can easily divide some plants such as sempervivums to create new free plants! Herbs are a lovely addition or dwarf plants and cacti can look great too.

My decorated tin can planters
If you are struggling for time you can skip steps 3-6 and keep your tin cans with the plain metal finish which looks great. If you find teeny plants in pots (some garden centres sell them) you can skip the drainage holes and compost part too and just pop the pots straight into the tin cans. Remember they will rust if they go outside so they would be better kept on the windowsill with herbs or indoor plants. Or you could paint them bright colours or varnish them if you want to place them outside.
So, there you go, a Daddy’s Day tin can planter, a lovely memento for years to come.
Lulu xx
A big thank you to Apartment Therapy for the inspiration for this blog.
Midgie Mayhem!
Us gardeners have a lot to deal with in the garden. From slugs and snails to fungal diseases and mossy lawns there is always something for us to fight. But here in Scotland one of the BIG issues (which is ironic as they are so teeny weeny!) is the midgie. It strikes fear into the hearts of all of us outdoor adventurers. So what are they, why are they so annoying and what can we do to fight back?..
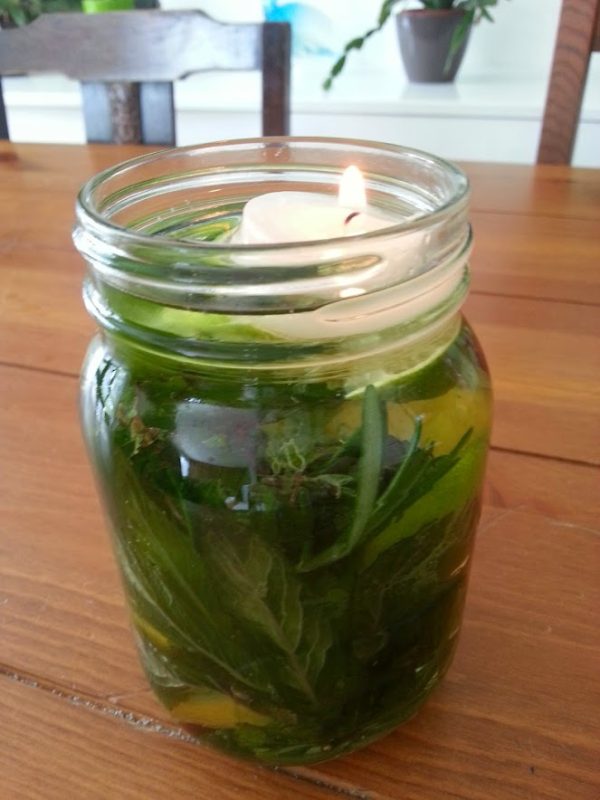
I’ll show you how to make this beautiful midgie candle
The Facts:
- The highland midge (midgie to me and you) also has a fancy-dan scientific name. It’s the Culicoides impunctatus. Why don’t you drop that into conversation next time you are out in garden and impress your friends
- The midgie is most commonly found in North West Scotland from late Spring to late Summer (er, hold on a minute, is that not where we are going on our holibags this year Mummy?!) but can be found in many areas across the UK.
- It is the female midgie that is responsible for biting us (no comments please boys!)
- Midgies are most active just before sunset. They become less active after sun set and when winds are above 6mph.
- Midgies are like little mini draculas and suck blood from the skin which then causes the itching and swelling (yuck!)
- Midgies zone in on us by smelling the carbon dioxide we exhale.
- Research has shown that a swarm of midgies can cause around 3000 (yes, 3000!) bites in an hour and up to 40,000 midgies can land on an uncovered arm during that same time frame. Yikes!
How to escape the midge
- Sit in the sun – midgies prefer shady spots (I know, I know, it’s Scotland but we can but hope!)
- Avoid sitting out in early morning and late evening, the midgies’ favourite munching times!
- It is claimed wearing light coloured clothes can help keep midgies away (although they are determined blighters and that alone won’t be your saviour!)
- You can get an anti midgie hat to wear (although it won’t do much for your street cred!)
- If you have a particularly bad problem with midgies in your garden you could consider a midgie machine. Manufacturers claim these are very effective (and many users back this up) although M&D had one and returned it as it didn’t catch any in our garden! Some camp sites have these in their grounds to make your stay more comfortable.
- Use a midge repellent. My mummy (who, like me, midgies love dearly) swears by Skin So Soft from Avon. However, there is a lovely new product which has just arrived on the market too. It’s called “Midge Magic” and it’s handmade in Scotland (so they understand the midgie issue!) by the clever people at Yumm Naturally in Crieff. It is made with 100% natural ingredients and is deet free. Not only does it keep midgies away but it also smells lovely and keeps your skin lovely and soft. It’s fine for littllies like me to use although pregnant ladies (like my Mummy!) should avoid using it during their first trimester.
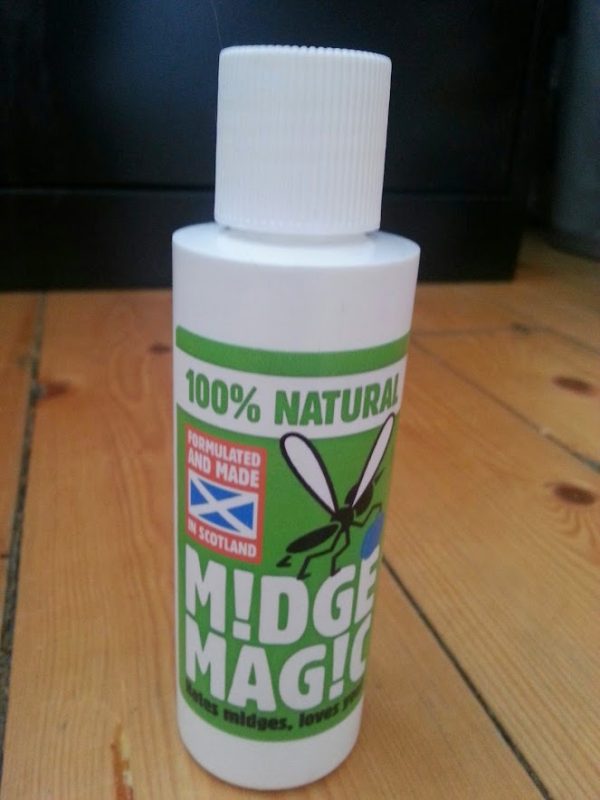
The clever people at Yumm have created this
brand new product (and they understand midgies!)
- Make a midgie candle. I love this idea as it’s totally natural, smells awesome, looks pretty and is lots of fun to make. Here’s how…
Make A Midgie Candle
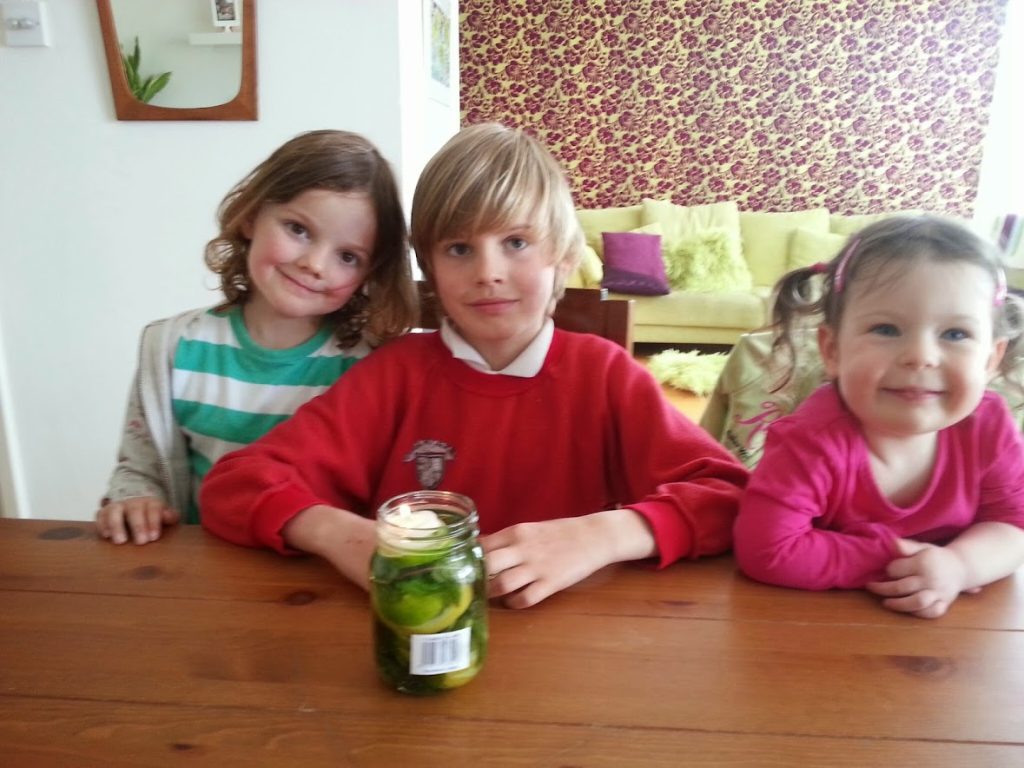
I was joined by my clever friends Dylan
& Maisie to help make our midgie candle
- An empty, clean jar
- Citronella oil
- Lime
- Lemon
- Rosemary
- Mint
- Knife
- Cutting board
- Floating candle
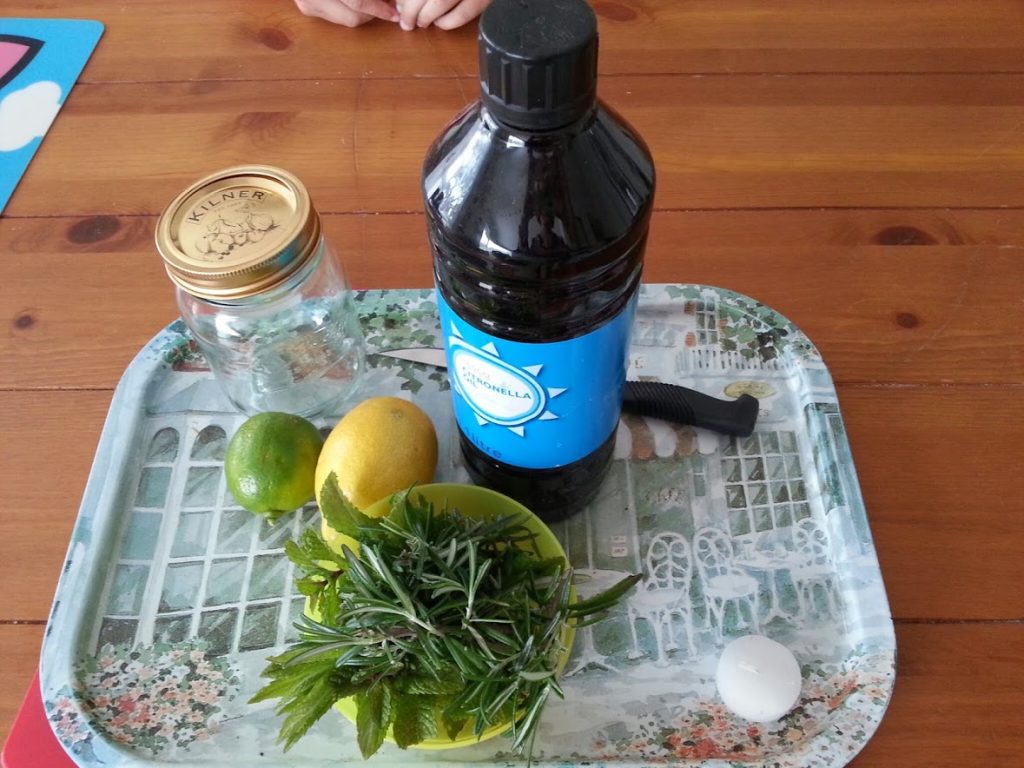
What you need to make your midgie candle
2. Ask a grown up to slice the lemon and lime.
4. Layer the lemon, lime, mint and rosemary so that you have lots packed into your jar and it looks pretty.
5. Carefully pour the citronella oil over the top.
6. Add the floating candle (1)
7. Ask a grown up to light your candle and keep the midgies away! (2)
Product Review: Twigz
As you all know I have very green fingers (and not just when I have been painting!) I love trying out the latest plants, products and books on the market and telling you what’s worth buying. Recently I have been trying out a range of garden tools aimed at cool kids like me. Here’s what I think of them…
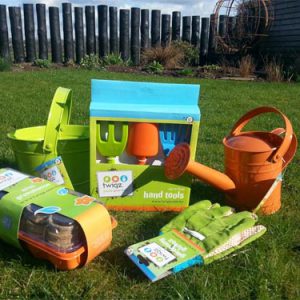
Twigz do a wonderful range of garden tools for children
I was sent a colourful range of products as you can see from the pic I took above in my own sunny garden. There are certain requirement for children’s gardening tools – here’s what I look for:
- Good quality. The tools need to be properly robust if they are going to survive the hard work us mini gardeners put them through.
- Good fit. Extra thought needs to be given to make sure the products fit children, are the right dimensions, feel comfortable etc.
- Look good. We may be gardeners but that doesn’t mean we look any less cool when we are out in the veg patch!
Metal Bucket
Watering Can
Hand Tools
Mini Greenhouse
Gardening Gloves

Lulu’s Garden Double Book Review
Hi everyone! The lovely people at Hawthorn Press recently sent us two of their books to review. I know how you love to read about gardens and things to do so I have read, pondered, laughed, crafted and generally got a good feel for what they are all about. Want to hear what they are? Well read on Macduff…
Findus Plants Meatballs by Sven Nordqvist
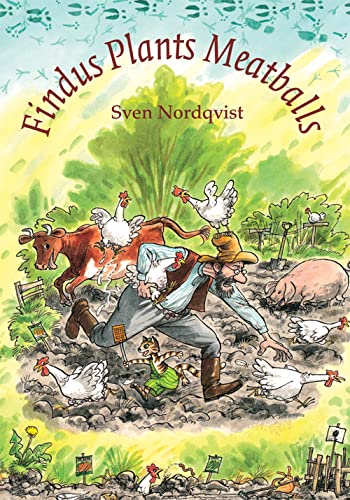
Findus is a cat so I immediately liked this story as I have THREE cats. None of them are called Findus though and to be the best of my knowledge none of them have planted meatballs! Now, I think I should point out that this is a fiction book (that means it’s a made up story!) Or at least I think it’s a made up story, you can never be quite sure… The Findus series originates from Sweden and there is a wide range of stories featuring Findus. I love this one as it centres on the garden. Farmer Pettson is busy sowing his vegetables which inspires Findus to do a bit of planting of his own. Chaos ensues and it is VERY funny to see what happens to the vegetable patch. I hope the same doesn’t happen to our own veg patch mind you! There are lots of lovely pictures in this book too. I would definitely recommend this book as a fun read for everyone!
Lulu’s Rating: 4 lovely glittery stars
Gardening with Young Children by Beatrys Lockie
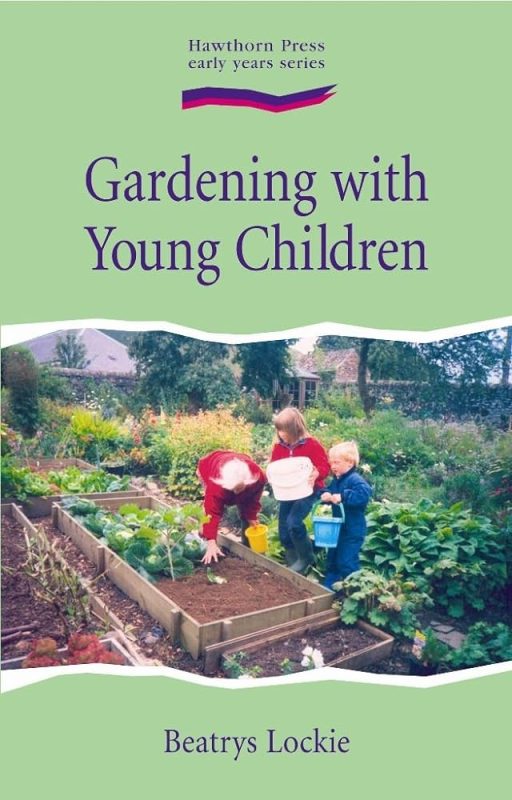
Gardening with Young Children is a guide to how to encourage kids like me to get outdoors, engage with nature and learn to garden. It is full of practical advice on what to grow and when. There is lots of information on wildlife as well as plenty of recipes and projects to make. There are poems and songs in the book too which breaks it up and makes it quite different from all the other books on this subject. The book feels a lot more old fashioned in terms of style than many of its competitors and I think if it had new photographs and lots of colour pictures it would be a lot more engaging for children and grown ups. There is a lot of useful content and it would be a useful reference book but sometimes it can be a bit dry and hard to read. However, it is worth the struggle on as there is a lot to learn and some lovely projects to try. I have shown you my step-by-step guide to one of my favourite projects below.
Lulu’s Rating: 2 twinkly stars
Make a Garden Crown
- Some corrugated cardboard
- Scissors
- Staples and a paper clip
- Paint
- Leaves
To make:
1. Get some card board (make sure its is corrugated.)
2. Bend it round your head to get it to the right size. Hold it in place with a paper clip.
3. Take the crown off, ask a grown-up to cut off any excess cardboard to get the height of crown you want and ask them to staple the edges together securely.
4. Now it’s time to decorate your crown. I painted it funky colours but you could add glitter, shapes or even go into the garden to find other things to stick onto your crown such as leaves, berries or flowers.
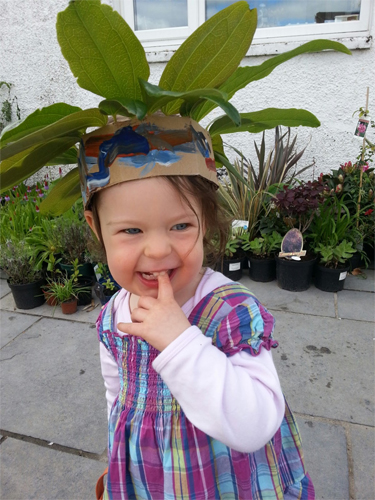
Princess Lulu and her magic crown!
Thanks to Beatrys Lockie for the inspiration for this lovely craft project.
I hope you have enjoyed reading my book reviews and my Garden Crown project and it has inspired you to get outside and do some projects of your own (and to read a nice book!)
Awesome Blossom
I just LOVE this time of year. There is pretty blossom sprouting everywhere! In our front garden we have pretty blossom on a tree called Amelanchier ‘Ballerina’ (it was named after me I think!) and our lovely old cherry tree. It’s a cheery sight to welcome you home. But do you know why trees have blossom? And why does it only last a few weeks? Well, read on to find out why and also, how to make a lovely Spring blossom card.

Look, I have plum tree blossom
coming out of the top of my head!
What is blossom?
Blossom is simply flowers on fruit trees. But did you know that EVERY single tree in the world has flowers? Just that some have flowers so teeny or so hidden away that it’s impossible to see!
Why do trees blossom?
Fruit trees need to attract pollinators (e.g. bees) to help it set fruit. The bees flit from flower to flower, transferring pollen between flowers to ensure pollination.
Why does blossom not last long?
It only takes the pollinators a short amount of time to pollinate the trees so then the blossom falls off. It’s a pity as it’s soooo pretty.
Even though the blossom isn’t around for long, don’t worry as I have a lovely project up my sleeve where you can recreate blossom and make a lovely Spring Card.
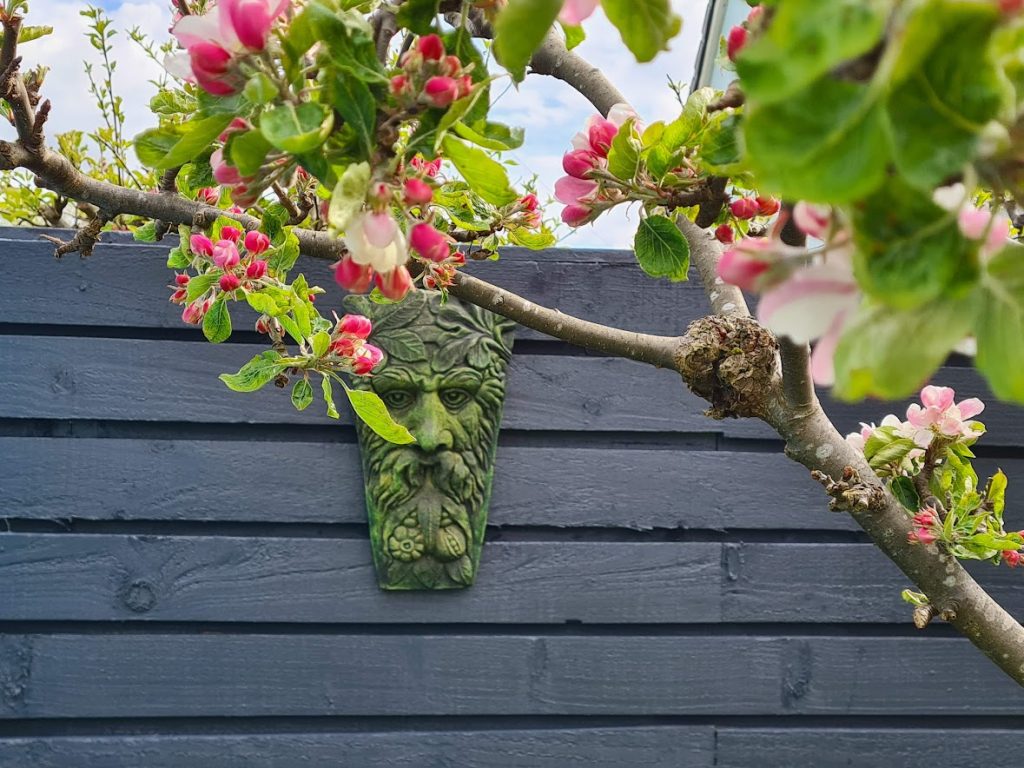
Blossom on our apple tree
Make Your Own Blossom Card
You will need:
- White card
- Paint
- Cotton wool
- Pen/crayon
To make:
1. Fold your piece of white card to make a card shape.
2. Use your pen or crayon to draw a tree trunk and branches on the card.
3. Dip your cotton wool into some pink paint and dab it around the top of your tree to make blossom.
4. Add grass (and flowers if you wish) to the bottom. Ta dah! A simple project which means you can have lovely blossom to look at for a lot longer.
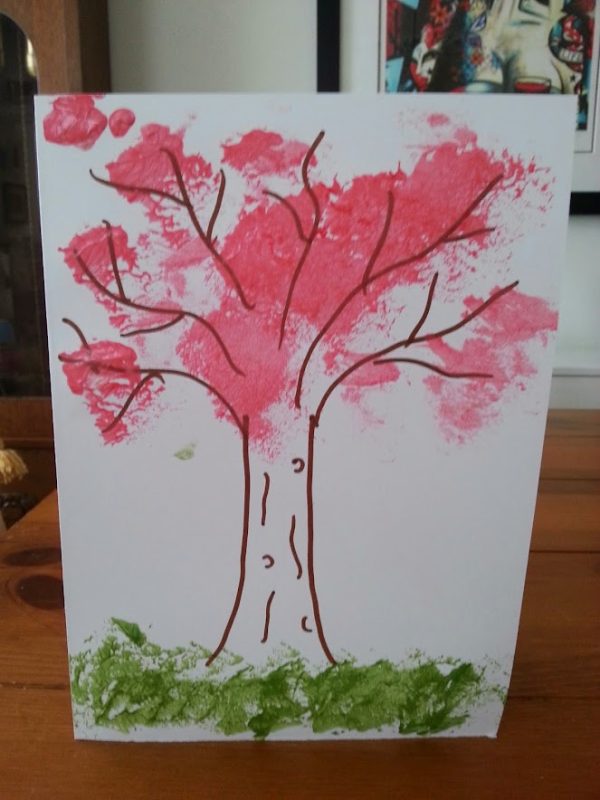
My blossom card
Make Your Own Easter Basket
Hey everybody. Easter is almost here so I decided to combine two of my favourite activities (gardening and doing crafty stuff of course!) and come up with a suitably eggs-citing project for my latest blog. So read on and find out how to make your very own Easter Basket for free!
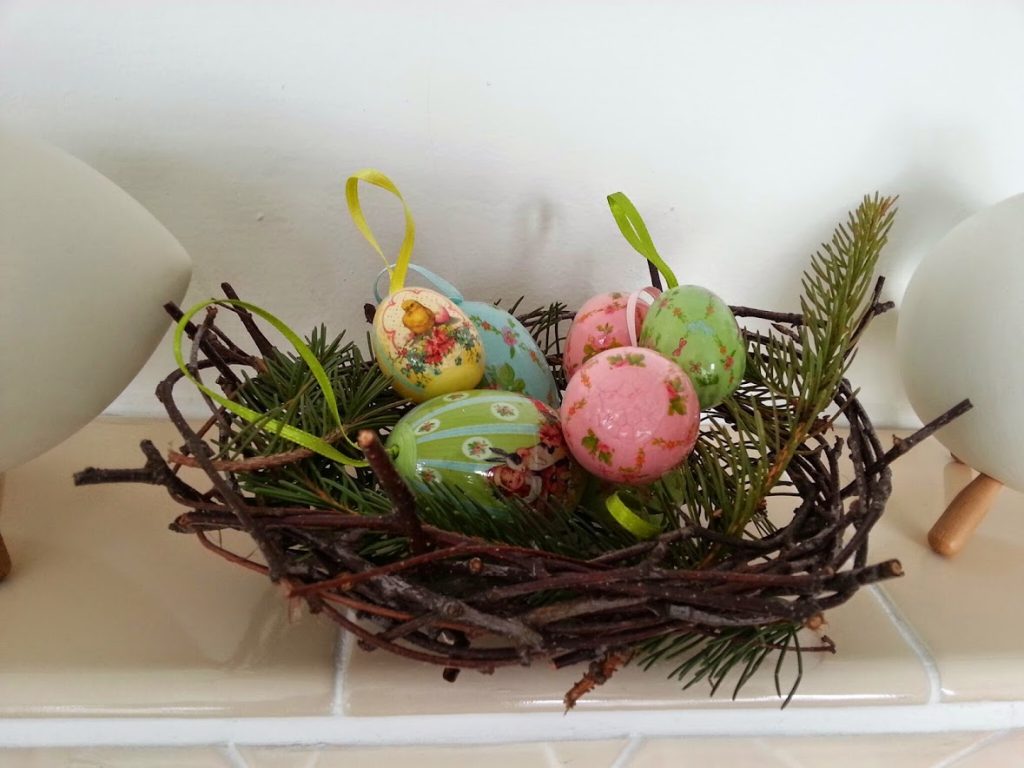
My Easter twig basket
Easter Twig Basket
You will need:
- Some twigs
- Some string
- Some pine needles/feathers/grasses etc to decorate
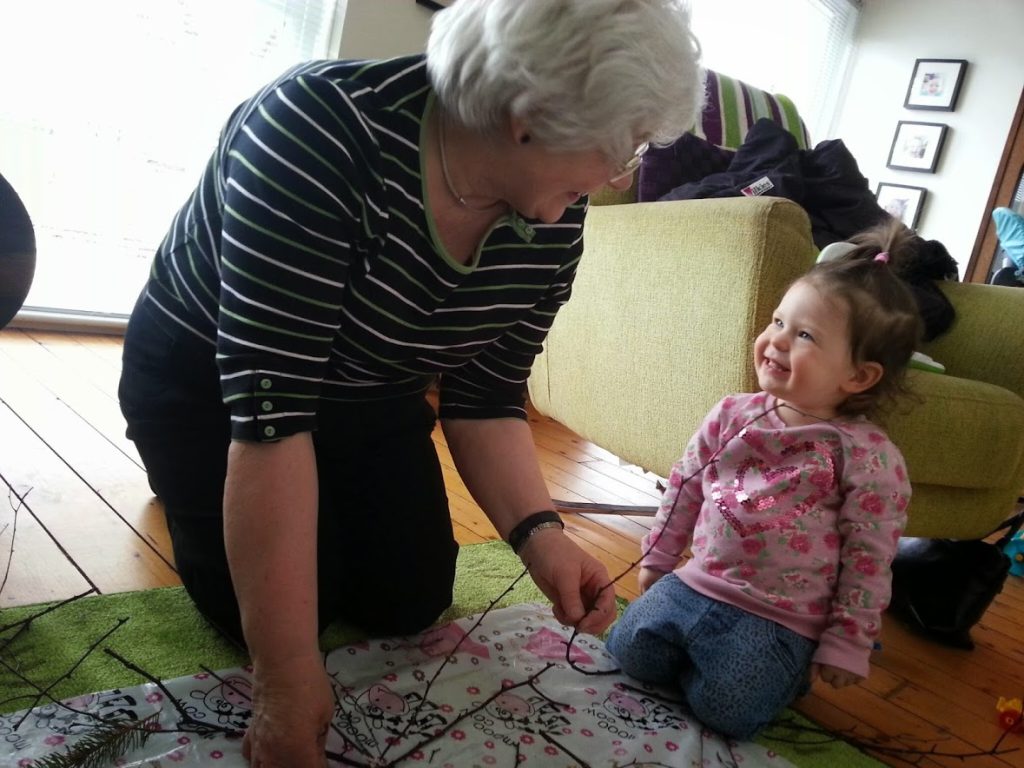
I kept a close eye on Grandma as she made
the star shape to make sure she got it right!
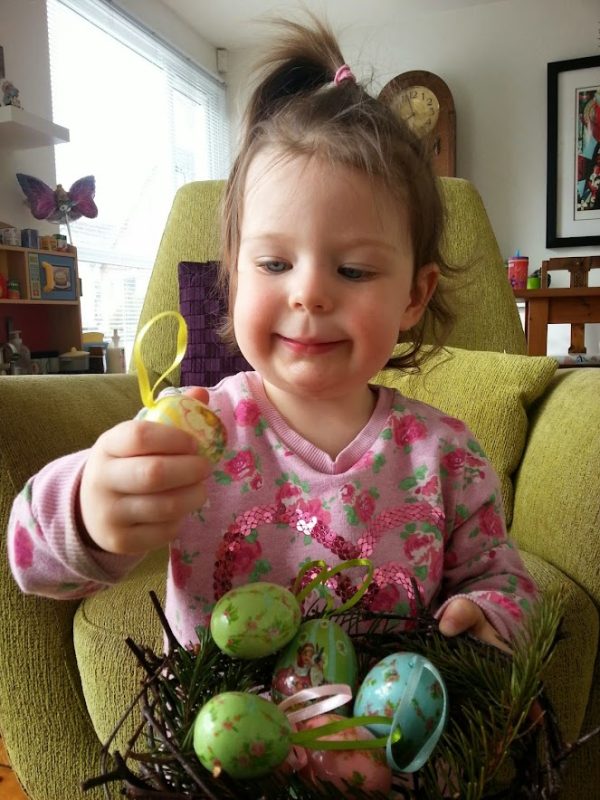
I filled my basket with some pretty Easter eggs
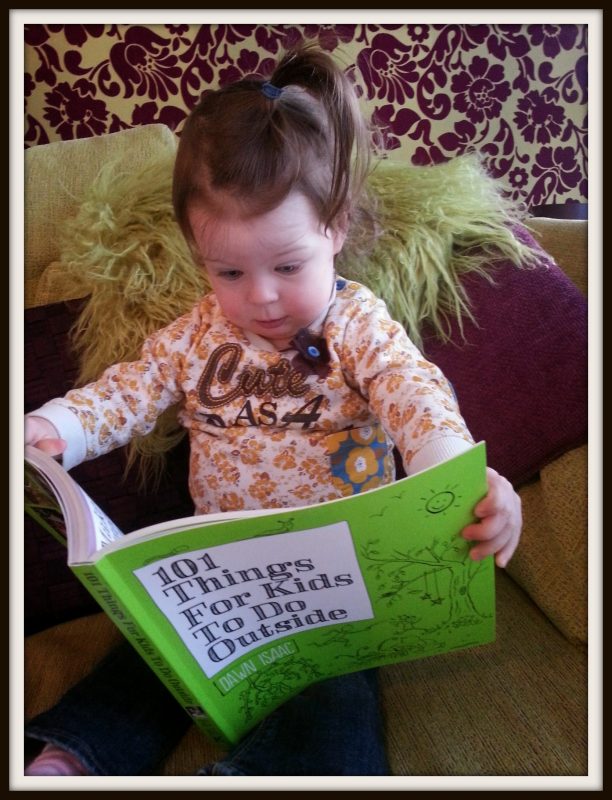
The book is PACKED full of lots
(well 101 to be precise) of awesome ideas
Daft on Daffodils
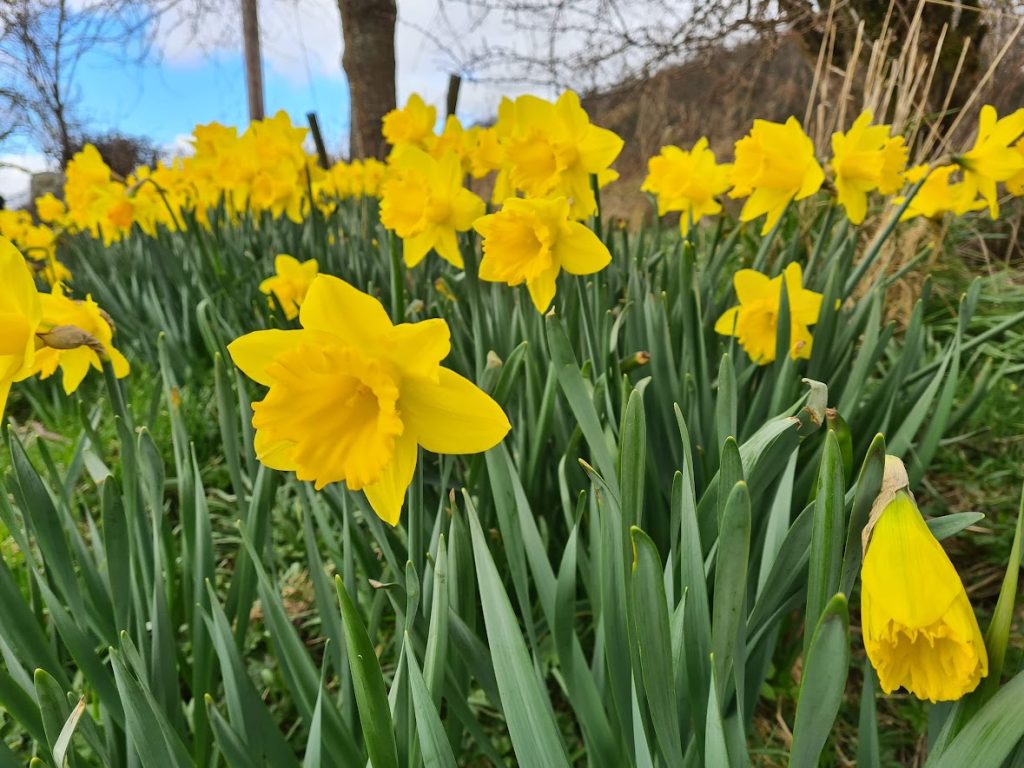
Daffodils always make me smile
Paper Plate Daffodil
You will need:
- Two Paper Plates
- Toilet Roll Tube
- Pencil
- Scissors
- Selection of yellow and orange paints and papers
- Glue
- String or ribbon
To make:
1. Take one of your paper plates and on the reverse side draw the outline of your daffodil shape. Ask your grown up to cut this shape out, then paint it a lovely bright yellow.
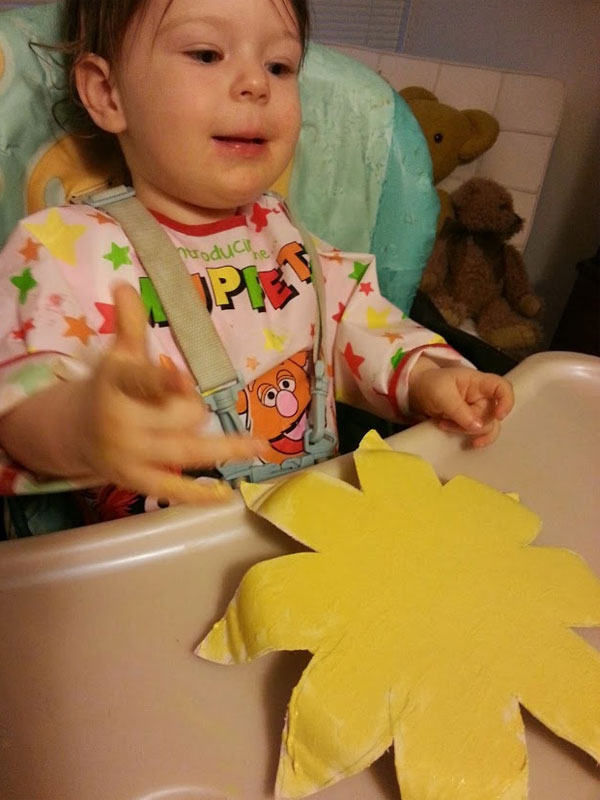
Painting the flower is a lot of fun
2. Take the other plate and draw a similar daffodil shape but slightly smaller and this time draw it on the correct side of the plate. You can paint this one the same colour, or add some coloured paper to give a different texture. We chose some lovely yellow crepe paper to glue onto the plate.
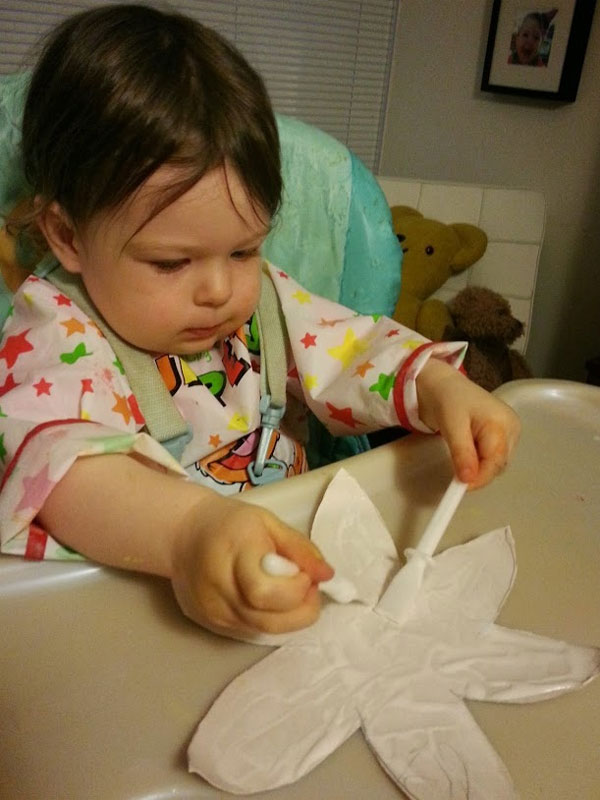
I liked adding the glue to the flower
3. Stick your two plates together. You will now have a lovely 3D effect because the plates have been used opposite ways:
4. You now need to make the daffodil’s trumpet! Root-toot-toot! To do this get a toilet roll tube. Ask a grown up to cut approx 2cm deep slits, approx 1.5cm wide, at one end of the tube (you will have roughly 9 “tabs” when you have finished. On the other end cut lots of slits to make a fringe effect. Once this has done paint the inside and out orange:
5. Once the trumpet is dry gently fold back the fringing. Then glue the tabs at the opposite end and stick the trumpet in the middle of your petals and glue a loop onto the back to hang it up:
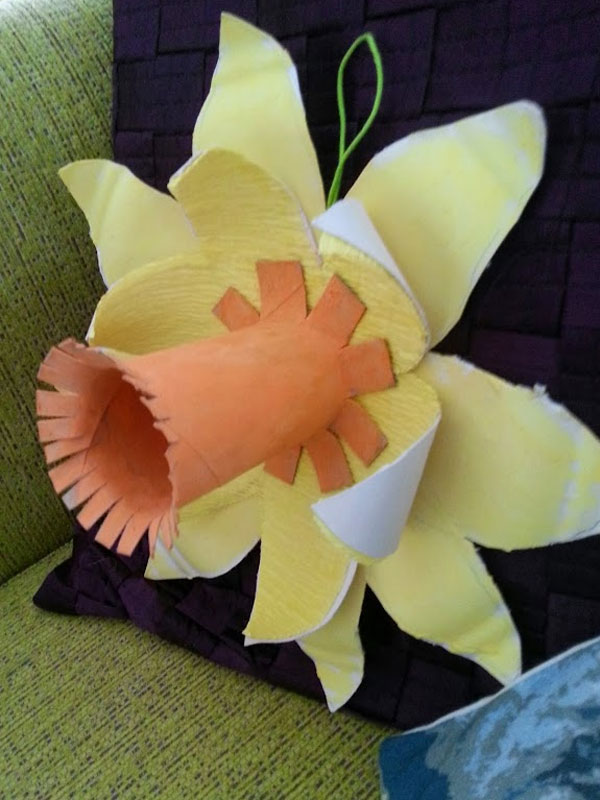
The finished daffodil to keep us cheery all winter ;
If you need any more advice on bulbs or would like to contact us about getting some planted in your own garden then please get in touch.
Hugs & kisses,
Lulu xx
10 Easy Peasy Veg To Grow This Spring
You have seen in recent weeks I have been busy sowing seeds and getting a good head start for Spring. However, I know some of you maybe don’t have the time, space or even the inclination to get involved with the whole propagating indoors malarkey. Don’t worry though, there are LOADS of easy PEASy vegetables you can grow straight into the garden. Here is the “Lulu’s Garden” Top Ten veg to grow this Spring. Oh, and a quick and easy craft project to make your own plant labels too!

These teeny tiny sets will grow into big onions!
1. Beetroot
Beetroot is really easy to grow and yummy to eat. And it makes your hands go funky colours 

Gather your sets, seed potatoes and seeds
in a funky bucket like this one from Twigz (2)
2. Radish
Radish grow super fast, even faster than me! You just need a small area and just follow the same rules as beetroot and you will have some funky radishes to add to your salads in just a few weeks.
3. Peas
That’s right, I told you it was easy-PEASy! Sow your seeds, leaving some space between each one. Peas will need some support so they scramble upwards so add some canes and string. You can buy special varieties which are bushier and perfect for growing in pots too if you have less space.
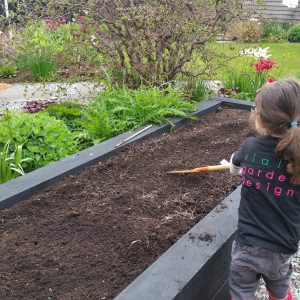
Make sure you weed and prepare your
veg beds before you sow your seeds
4. Lettuce
Like radish, lettuce grows really fast and you will have your own salad in just a few weeks. I like sowing a mixed salad with different types of leaves in it and you just cut some when you need it and it keeps on growing. How clever is that?!
5. Tomatoes
Regular reader will know all about what keen tomato growers we are. We have all sorts of wonderful tips in our Tasty Tomato blog. You can grow them in a greenhouse but if you don’t have space go for a bush or tumbler variety which grows brilliantly in pots or even hanging baskets!
6. Potatoes
We all love potatoes don’t we? I love digging them up at the end too. Loads of fun! Growing them is dead easy, just plant them deep in the soil and cover up with soil. As the leaves come through keep “earthing up” (covering over with soil, lot’s of fun!) ’til they are way high in the air! You can grow them in a bag on your patio too if you don’t have a veg patch.
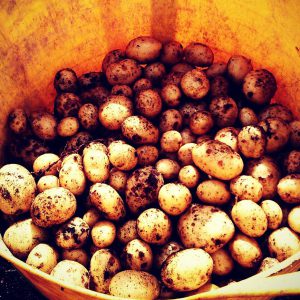
Our potato crop
7. Spinach
Spinach is another easy one to grow, just like lettuce. You can add it to salads or any of your cooking. Apparently it makes you really strong like Daddy too!
8. Courgettes
Courgettes are great to grow and I like to grow them in among our flowers rather than in the veg patch. They have lovely big leaves and funky yellow flowers (which you can eat too) and then the lovely courgettes appear. Make sure you water around (not over) the plant so the courgettes don’t rot. And watch out how quick they grow too or you will have marrows before you know it!
9. Onions
Onions are the basis of most meals we cook so we need a LOT of them. From pastas and risottos to pies and curries they are an essential ingredient which are really easy to grow. Growing them from teeny onion sets is really simple and they need very little attention other than some watering and weeding as we go. We always grow both white and red onions as well as shallots.
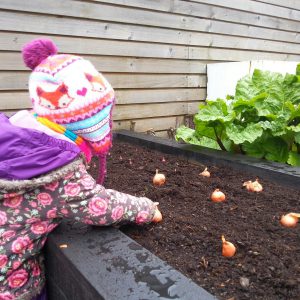
Make sure you space your onion sets out nicely like me
10. Spring Onions
You can’t have a spring veg list without Spring Onions can you?! Another one where you grow seeds in a row and thin out as seedlings come through. A lovely addition to salads and all sorts of cooking.
If you have never grown anything before why not choose just one thing off this list and give it a try? Whether it’s salad in a window box, tomatoes in a pot or potatoes in a bag there is always space to give it a bash. Let me know what you choose to grow this year and even better, send me some pics!
And don’t forget to label what you have sown so you remember what will be coming up. Forget expensive plant markers, why not make your own out of old lollipop sticks (1)…
- Lollipop sticks
- Paint
- Marker Pen
- Varnish
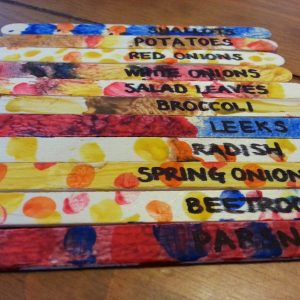
Make your own plant labels
To make:
1. Paint your lollipop sticks funky colours and leave to dry. You could draw pictures of what you are growing, add glitter or even make little people out of them too!
Easy to Grow Veg That’s Hard to Buy
So come on, join in and in just a few months you will be harvesting lots of lovely, home grown goodies.
1. Thank you to the wonderful, clever people at the RHS for the idea to make your own plant labels. For more cool projects like this read the fabulous “RHS Garden Projects” book.
2. Also, a BIG shout out to the cool people at Twigz who have designed a great range of garden tools for children, some of which you can see me using in this blog. I will tell you lots more about them in future blogs…
An Upcycled Gift for Mummy’s Day
Hellllooooo everyone! I am sure you are all remembering that it’s Mother’s Day this Sunday. I certainly am ‘cos my Mummy is awesome and I will be spoiling her ALL day! In my experience (of which I have packed a lot into my whole two years!) mummies like handmade gifts which are made with love (and sparkly, expensive presents too but that’s not for this blog!) So, here is a great idea of a lovely gift you can make for this weekend. And the best bit is you have to eat some yummy cheese first!
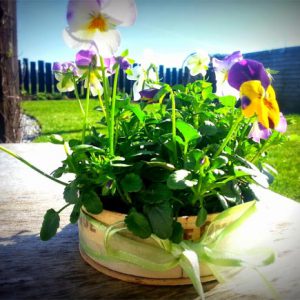
Pansies in cheese boxes makes a lovely gift
Pansies in Cheese Boxes
You will need:
- Scrummy camembert in a wooden box
- Glue
- Some pansies
- Ribbon
To make:
1. Eat the yummy cheese!
2. To make the box a little deeper I took the top off the lid and glued the sides of the lid to the the sides of the bottom. I glued the leftover top to the bottom just to make it a little more robust (and to have a nicer finish.)
3. Ask a grown up to drill a few drainage holes in the bottom of your cheese box.
4. Fill with pansies and get your hands mucky!
5. Tie a pretty ribbon around the outside of the box.
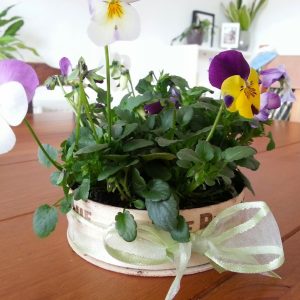
Isn’t this the cutest gift?
Alpines such as sempervivum would also look lovely in this little handmade pot.
A big thank you to the lovely people at Kyle Books for sending me a copy of their Gifts from the Garden book by Debora Robertson which features this lovely project.
I hope you all have a lovely day with your mummies on Sunday.
Book Review: 101 Things for Kids To Do Outside by Dawn Isaac
Next week a new book will be launched and I was lucky enough to be sent a sneaky preview copy so that I can tell you, my lovely readers, all about it. It’s written by a fellow blogger called Dawn Isaac (she is very clever and is also a garden designer like M&D) and is called “101 Things for Kids To Do Outside”. Could it be any more perfect for me and my super-duper blog? Here’s what it’s about, the sort of things you will find inside and what I think of it…

Clutching my special preview copy
Dawn Isaac has three kids of her own so she knows a thing or two (well 101 actually) about kids and how to have fun. She is firmly of the same mindset as me that it’s waaay more fun to head outside than to be stuck inside watching TV (although that can be fun too).
The book has been split into four seasons so frankly there is no excuse to not head outside, whatever the time of year. There are also projects for people who don’t have a garden. Just head outside to parks, woods, public gardens, wherever.

The book is PACKED full of lots (well 101 to be precise) of awesome ideas
Here are some of the things I just love about this book:
- There are lots of lovely big pictures for every single project so you can see how it is built and what the final project should look like.
- On every project it clearly lists all the materials you need so you can see quickly what you need to get or you can quickly choose a project where you already have everything you need. Loads of the projects just use the sort of things you will have lying about the house.
- The book is filled with lots of tips (like really awesome ones on how to make games messier, yay!)
- There are lots of ideas you can use as gifts throughout the year (home made gifts are so much nicer to give and receive.)
- There are lots of fun cartoons throughout the book.
- There is a great mix of quick and easy projects (that can be done in about an hour) as well as some which you can spend a bit more time on.
- It’s a great reference for things to do at parties or on play dates (your friends will think you are the coolest person ever having all these projects up your sleeve.)
- There’s a great mix of games, gardening and craft projects – exactly what my blog is all about.
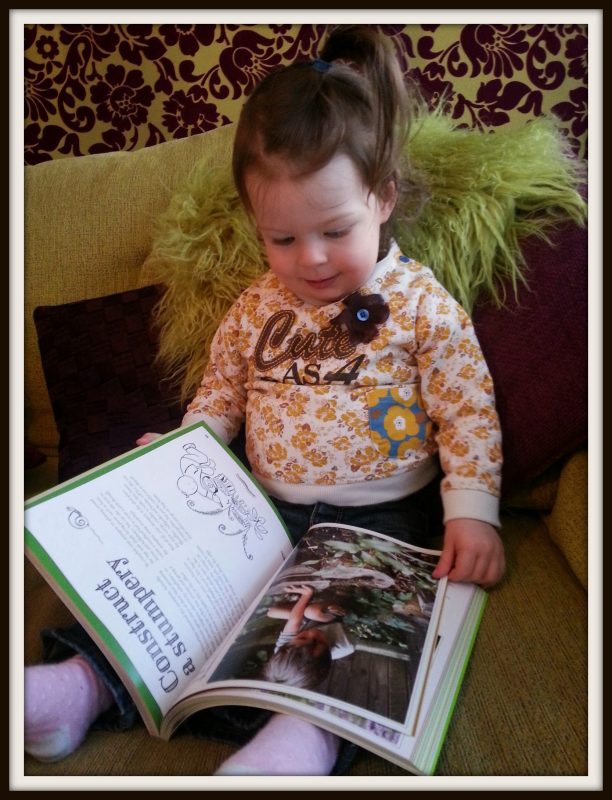
There are lots of cool projects – do you want to hear some? But sshhh, don’t tell anyone else OK?
What’s in the book…
The lovely people at Kyle Books (hello Hannah!) have given me permission to tell you about some of these projects over the course of the year so watch out for these in future blogs. A few which have already caught my eye and I think are brilliant ideas are:
- Grow a potato tower (it uses old tyres and is a brilliant way of “earthing up”)
- Go on a bear hunt (hide and seek for all ages)
- Brew your own plant food (it’s like a witches brew and stinks, yay!)
- Make a twig plant pot (I think this would be an awesome Mother’s Day project, watch this space…)
- Make outdoor bunting (perfect for garden parties, if only we were having one soon Daddy that we could try this at…)
- Make a butterfly feeder (it involves painting so I am in!)
- Hold a snail race (I LOVE snails!)
- Make autumn crowns (as a princess I insist on this project!)
I hugely recommend “101 Things for Kids To Do Outside” . I think it would be a WONDERFUL gift to give friends for Easter (or drop hints to your grown up to buy it for you!) It will last a whole lot longer than a chocolate egg. This book is loads of fun for kids of all ages. The only thing you will need to watch out for is your grown up trying to steal it.
Lulu rating: 5 big shiny stars!
Hugs & kisses,
1. I would like to write a book when I am a big girl. Perhaps when I am three…
Myths or Musts?
There are so many tips, adages and “old wive’s tales” to do with gardening that a lot of the time you just take it as gospel that it’s the right thing to do. Some are so in-grained into us that even our favourite TV presenters (personally I love Monty!) pass on these tips – but are they always right? From tea and coffee to singing and weeing (!) read on to find out which tips are true and which are myths that are about to be well and truly Lulu busted!

Watering in the middle of the day scorches leaves
Scientists in Budapest have researched this and found that watering in the middle of the day does NOT scorch leaves. Having said that, you still shouldn’t do it as it is wasteful (as the water evaporates more quickly) and it can encourage some fungal diseases. So it’s a bad thing to do but for different reasons.
Weeing on the compost heap helps
Well, have you ever heard the like?! It wouldn’t be a very comfy potty would it?? The theory is that because wee contains nitrogen then it helps breakdown the items you are composting quicker. Whilst it is true that nitrogen helps, if you add the proper balance of green waste (and coffee grounds!) to your compost heap the job is already being done and adding more nitrogen rich matter won’t speed things up any more. So there is no need to nip outside next time you are caught short.
Coffee grounds help deter slugs & snails
If you are like my Daddy then you will have plenty of left over coffee grounds kicking around. Some say that putting these around your prized hostas will keep slugs and snails at bay. US Scientists have shown that spraying plants with a solution which is as strong as a cup of coffee deters slugs, however there is no evidence this applies to coffee grounds. This may be because there is a much lower level of caffeine in the grounds. In tests by Which there was limited success using grounds although there may be some due to the grittiness of the mixture. However you need to re-apply the grounds every day and after each time it rains so it is a high maintenance, limited result approach. And you need to drink a lot of coffee!The grounds are high in nitrogen though so add them to your compost heap with your green clippings.
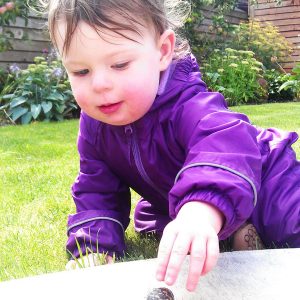
I’m off snail hunting
Singing to your plants helps them grow well
Back in the dark ages (1973 to be precise) a clever lady called Dorothy Retallack carried out an experiment to see if it helped to talk and play music to your plants. Bizarrely, ‘Easy Listening’ music seemed to boost plant growth whilst rock music appeared to hurt them and made them absorb more water! So whilst people may think you are mad, get out your Burt Bacharach CD and have a nice little chat with your prized dahlias
Adding gravel or crocks helps drainage in pots
Almost every gardening program tells you to do this so it must be true, right? Wrong! Tests have shown that adding crocks reduces the amount of space for roots and makes the soil more waterlogged. Your pots do need drainage holes and if you need better drainage then add grit or perlite to your compost.
Tea is a good fertiliser for your potted plants
Another myth about to be busted I am afraid! Tests show that much of the nitrogen in tea leaves cannot be absorbed by plants. Plus there are other things in tea which are OK for us humans such as manganese, fluorine and aluminium but which are harmful to plants. Stick to the liquid feeds which are specially formulated for plants. Like coffee grounds, you can add your used tea leaves to the compost heap instead.
So there you go, a few eye openers for all you budding gardeners out there. If you have your own zany tips to share with us then please get in touch!
Hugs and kisses,
Ladybird Love
People often say dogs are man’s best friend but not if he is a gardener. I reckon a gardener’s best friend has got to be the ladybird. I love them ‘cos:
a. They are pretty
b. They are fun to draw
c. They eat lots of bad bugs in the garden
In my latest blog I will regale you with lots of interesting facts on ladybirds, tips on how to encourage them into your garden as well as a cool craft project featuring our spotty friends. And I will even tell you about some funky ladybird flowers to grow…
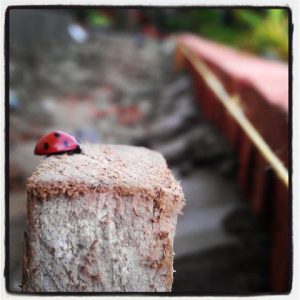
Did you know:
- There are over 5000 species of ladybirds worldwide.
- Most ladybirds feed exclusively on aphids (greenfly, blackfly etc.) which is why we gardeners love them so much. They can eat up to 5000 in a life-time! That’s a bug banquet!
- Ladybirds are more effective than poisonous chemicals.
- Their vibrant colours not only make them pretty to us but also acts as warning to predators.
- Not all ladybirds have spots – some have stripes!
- A common myth is that the number of spots on a ladybird’s back indicates its age. The most common ladybird in the UK has seven spots.
How to encourage ladybirds into your garden:
- Incorporate plants that ladybirds love into your garden. Plants such as tulips, lillies, fennel, dill, geraniums, angelica and cosmos are favourites.
- Make a ladybird house and a ladybird feeder. We will blog about how to do this soon.
- You can buy them online! Whatever next?! Wonder if you can add them to your grocery list?
Make Your Own Ladybird
You will need:
- Paper plate
- Card
- Pipe cleaners
- Googly eyes
- Scissors
- Glue
- Red and black paint


I added seven spots to my ladybird, the
most commonly found type in the UK

Add pipe cleaners to make the legs.

I do love a googly eye!

Hello little ladybug!
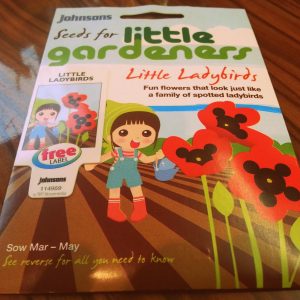
I am gonna do something funky
involving upcycling with these seeds.
So, there you have it. All the why’s and how’s of having a ladybird in your life.
