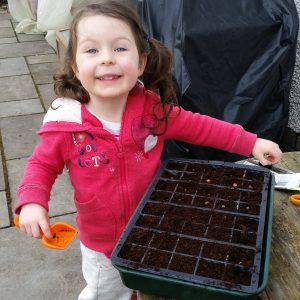
10 Super Easy Spring Veg To Grow
Saturday 19th March is the Spring Equinox and officially the first day of Spring yippee. That means sunnier days, lighter evenings and most importantly more time to play in the garden! It also means it’s time for me to get busy growing veg again so to help you along, here are my TEN easiest Spring veg to get growing…
Here we grow!
Before you start to grow any veg, take a minute to remove any weeds or large stones from your veg beds and give them a wee hoe over. If you haven’t already added a soil improver over winter now is a great time to add some nutrients to help your veg grow big and strong (just like me!). Done? OK, let’s go…
1. BEETROOT
This is one of my favourite root vegetables to grow as it is super-duper easy. Beetroot prefer a well drained soil so add some sand if yours is a bit sticky. Now, just sprinkle some seeds in a long row and gently cover. As the seedlings come through thin them out to allow big juicy beetroot to grow.
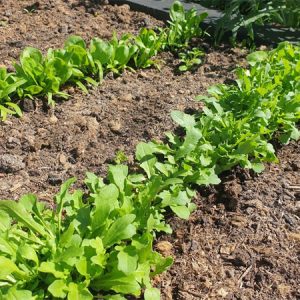
2. SALAD
Now under the heading of “Salad” I am covering lettuce leaves, rocket and spinach as they are all equally easy to grow. I especially love the “cut and come again” salad leaves as they just keep on growing the more you eat them. Wowsers!
3. RADISH
You have got your salad growing so you will need some radish growing with it. The best thing about radish is how quick it grows. Within a few days you will see it popping up. Sow successional rows so you always have radish to eat.
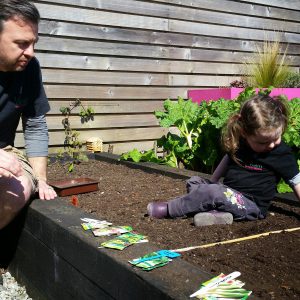
Prep your soil then sow your seeds in a nice neat row
4. PEAS
Another easy-peasy (ha, see what I did there?!) veg to grow and yummy to eat (it’s one of Tilda’s favourites!) If you don’t want to train big tall ones up lines then opt for a dwarf bush variety. I love popping the peas out of their pods!
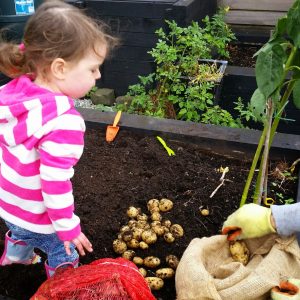
5. POTATOES
An absolute staple in our garden and super easy to grow. Buy some seeds potatoes and let them chit on your window sill for a couple of weeks before burying them deep in your veg patch. Cover over the leaves as they pop through (this is called “earthing up”) and you will have a yummy batch of tatties come summer!
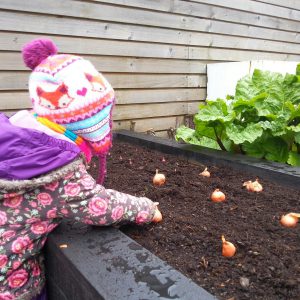
6. ONIONS
Another easy one, just buy onion “sets” which are teeny weeny onions and plant them in your veg area. They will soon grow into much bigger onions for you to pick.

Teeny weeny onion sets!
7. SWISS CHARD
Not only is swiss chard super healthy (it is full of vitamins and minerals) but it is also soooooo pretty. As well as growing it in your veg patch you can grow it in your flower beds where its colourful stalks will be a lovely addition to the garden.
8. TOMATOES
If you are an expert like me then you can grow a wide variety of tomatoes in your greenhouse. But here’s a secret tip, choose a “tumbler” or “bush” variety and they will be super happy growing in a pot in a sunny corner of your garden. The bonus is you don’t have to “pinch out” this type of tomato or tie them up as they grow. And they will give you the most delicious cherry tomatoes you have ever tasted! And much easier than going to the supermarket to buy them!
9. COURGETTES
This year I am growing both green and yellow courgettes. I have planted the seeds in little trays in the house and when they are a LOT bigger I will plant them outside in big pots where they will give me lovely courgettes all summer long. I’ll need to be fast though to beat the cheeky snails who love them too!

Here I am checking for courgettes
10. SPRING ONIONS
Well it wouldn’t be a Spring veg blog without a Spring Onion would it? Like beetroot, just sprinkle some seeds in a line and thin out the seedlings as they come through. Couldn’t be easier!
Happy growing readers!
Lulu xx
Love Local Mag
We were asked to contribute an article to Love Local Mag giving all the great reasons “why we should get outdoors…”
Introducing the Foody…
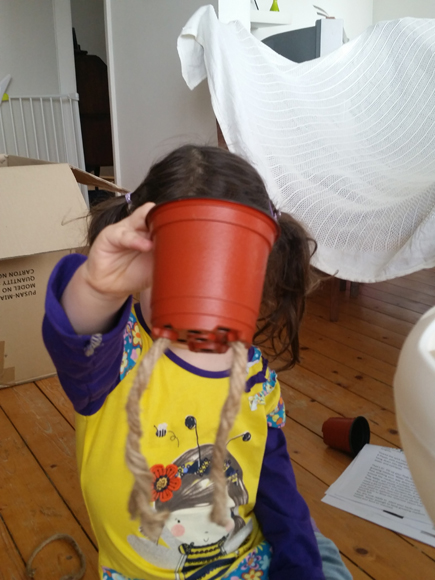
We were sent a weird but wonderful new contraption through the post this weekend and I had lots of fun showing M&D how to build it (they needed an expert like me to keep them right). Read on to find out what it is and what we are going to be doing with it…
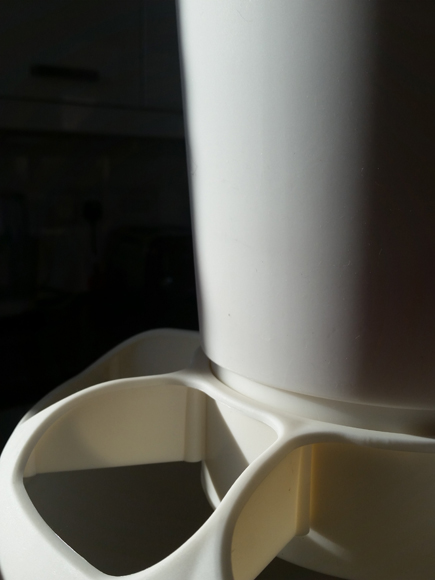
What in the world could this bed? A space ship?
A cup holder? Read on to find out more….
The Foody is a vertical growing system designed to provide the perfect environment to grow herbs, salads and flowers. It also only requires 10% of the water used in a traditional garden and can be used indoors or outdoors.

It’s a funky hat, that’s what it is!
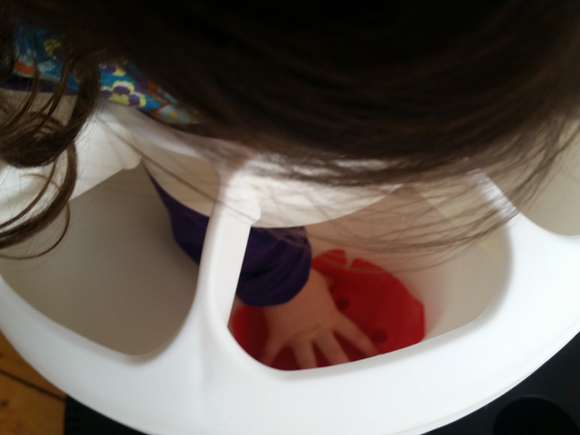
But Lulu, how does it work I hear you ask? Well, when you water the top pod the water slowly drains down to the reservoir in the bottom. Cleverly, there are six extra pots down there with wicks which can use this water too.
Lookee here, there are pots at the bottom and the
rope acts a wick to sook up all the water from below
As it can also be used indoors (and it looks pretty cool too) it means you can be growing salads and herbs all the year round, even up here in chilly Scotland!
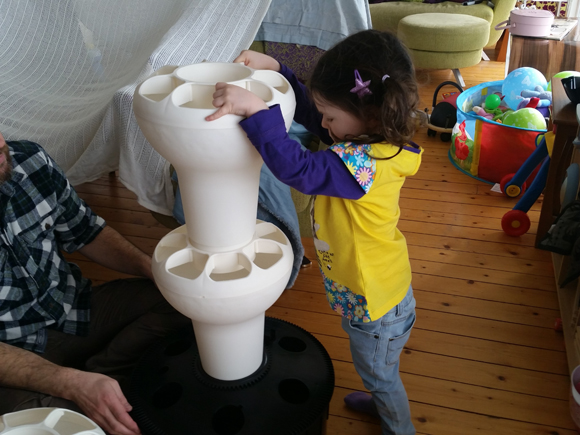
I start to add the towers on to our reservoir. You can choose a
Foody 3, 4 or 5 which have different levels to suit you
And if you really want to, you can even add a pump so that the watering is done automatically (watering is one of my favourite parts though as I get to splash in the water and look for fruit and veg at the same time!)
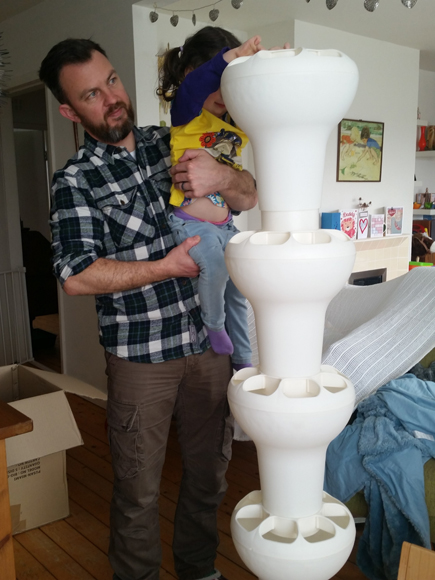
Wow, it’s getting tall now, I need a
little hand to reach up to add this pod!
The Foody is perfect when you have limited space and can be used in greenhouses, balconies, roof terraces, patios, you name it. And it cleverly rotates too so that you can make sure all sections get their share of the sun as required.
You get some material to add to the bottom of each pod to stop
any soil being washed down through the drainage holes
And as you can see from the pics it is super easy to put together. We’ll be trialing a selection of fruit and veg in our Foody 5 (you can grow all sorts in them and I will be growing strawberries, tomatoes, radish and tomatoes to name just a few) over the coming months and will keep you posted of our results.
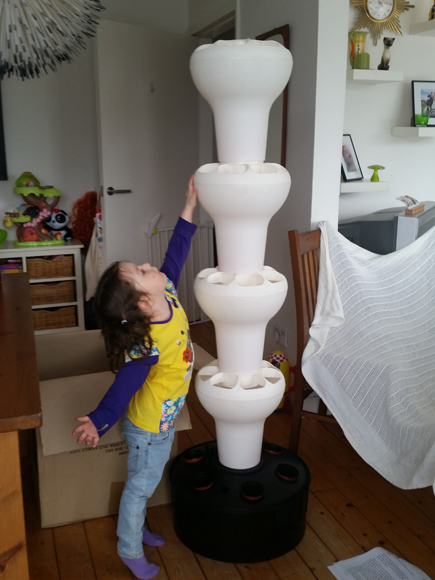
Wow, our Foody 5 is waaaaay tall!
For more information on the Foody go visit the lovely people over at LIFE.

Plus you get a free box for hours of fun!
Lulu xx
Sow Clever: Upcycled Seed Trays
It’s the perfect time of year to start growing veg from seed (let’s face it the weather isn’t really good enough to be outdoors all day just yet so sneaking indoors to do some seed sowing is a good thing!) But you don’t need expensive seed trays or propagators. Literally have a look around your house and you will find plenty ideas for free seed trays to use and sow clever…
Toilet roll tubes
We all have loads of these. We normally use them for craft projects but they make excellent planters for seeds. Cut them down a bit in size (you could easily make two pots from each tube) and sit them on a tray and fill with compost. Easy peasy.
Egg shells
You can even grow seeds, such as cress, in egg shells. Look at the funny haircuts above!!!
Egg cartons
And nothing need go to waste with an egg. We have used the egg shell and we can use the carton too. Perfect for growing seeds in.
Milk or juice cartons
Any sort of carton can be cut open (ask a grown up to do that bit) and filled with compost. Wonder if I can grow oranges in an orange carton?…
We grew some brilliant broccoli in this juice tray!
Paper cups
Get your mummy and daddy to save their coffee cups and recycle those party cups too. Perfect for growing veg.
Newspapers
Newspapers can be folded up to make little cups for growing seeds in. These are brilliant as they decompose in the ground so you don’t have to upset the teeny roots by taking them out of their pot.
Ice cube tray
Another great alternative to a seed tray. Just make sure you don’t pop it back in the freezer!
Bottles & Pots
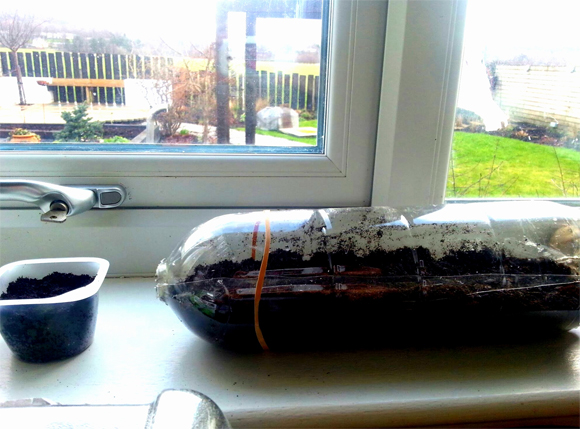
Old juice bottles or yoghurt or custard pots are other great ways to sow seeds. The bonus of using a juice bottle is that you can make a lid which then keeps the heat in and makes the seeds grow faster!
So there you go, not only do you save money on the veg you are growing you don’t even need to spend any money on pots to grow them in. Veg-tastic!
To learn more about how to grow seeds in any kind of tray then read my blog here.
Happy sowing,
Lulu xx
Turn Over A New Leaf for 2016
Happy new year peeps! It’s that time of year when we are all making new year’s resolutions. Some are vast and some are teeny. Make them realistic is what I say. So with that in mind Family Burt have made their new years resolutions for 2016 and have made them super-easy, garden-related ones to inspire you to get outside in the year ahead…

Time to turn over a new leaf
Lulu’s Resolution
Well, I LOVE eating fruit! My friends think I am crazy as I would rather have an apple than sweets but, you know, that’s because I’m sweet enough! So this year, my resolution is to grow a new fruit. I am thinking a little pear tree would be cute and I could grow it in a pot. But you could grow all sorts of fruit no matter what space you have. Already we have apple and plum trees but if you have less space why not grow blueberries and gooseberries in pots like me. Or if there is a corner of your garden that no-one uses why not pop a raspberry plant in there and by summer you will have lovely lush fruit. Yum!

I’ve always loved eating the apples in our garden
Mummy’s Resolution
Well, you are gonna just love Mummy’s resolution for this year. It’s to keep it simple in the garden! With a new extension on the horizon (yup, I have THAT many toys!) 2016 is going to be super busy. So instead of growing lots of plants indoor from seed, transplanting, getting the greenhouse going and so much more, Mummy is focusing on the basics. There will be tatties and onions galore (‘cos they are easy to grow and we eat lots of them!) as well as some other easy veg like beetroot and salad.
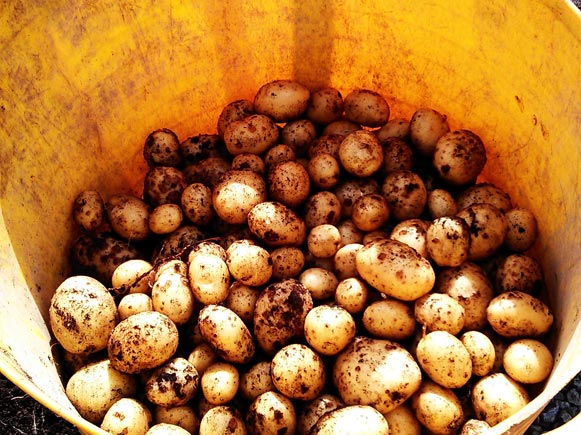
Mummy is going to grow more yummy potatoes like these in 2016
Tilda’s Resolution
My baby sister is almost walking now and by the time Spring is here she will be running around the garden. So her resolution is to get outdoors as much as she can and learn all about nature and feel the grass under her toes. From snail races to bubble popping the garden is going to be so much fun for me and Tilly B this year!

Tilda is planning on lots of outdoor fun in 2016
Daddy’s Resolution
With our impending extension Daddy will have to make some changes to our outdoor space. The garage is being demolished and will need to be emptied so Daddy is taking that opportunity to do some more upcycling including new sheds for garden storage.
It’s a busy year ahead for Daddy with lots of projects!
So what are your resolutions going to be for 2016?
Lulu xx
Coolest Garden Gifts For Christmas 2015
We know what little time you have, so we have done all the hard work for you and collated the MUST HAVE list of the coolest things for your garden to give you ideas for gifts for Christmas 2015. You will be very popular if you give someone these Christmas pressies this year…

What beautiful gifts will you be wrapping this year?
Lighting
Garden lighting is a great addition and can allow you to use and enjoy your garden for much longer. However, it can be quite pricey to wire it up but how about these super cool bluetooth solar lights instead. AND, they can be controlled by your smartphone too. Wowsers. £39.95

Bluetooth solar lights for the garden
Seating
There is something about the simplicity of these garden Kube Stools which we just LOVE. A row of them in different colours makes a fabulous focal point in the garden and they are easily moved to make sociable seating around the garden. £65.00
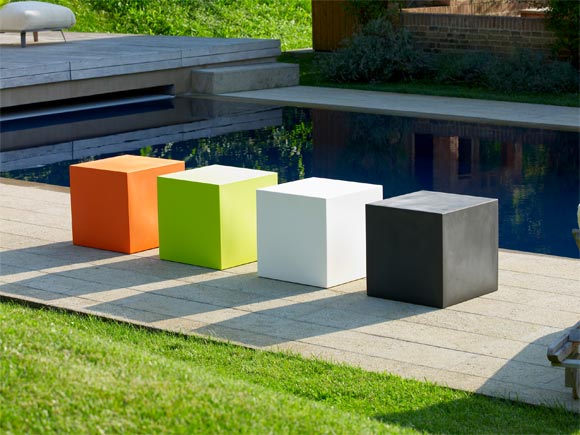
Kube Stools make a great focal point as well as being practical
Art
Garden art can encompass pretty much anything. We love the work of Heather Gray, a wonderful local sculptor based in South Queensferry, Scotland. This seed head is so delicate and echoes the wonderful forms we have in our garden. Prices vary depending on style and size but pop along to Heather’s website (check it out, great name!) for more information…
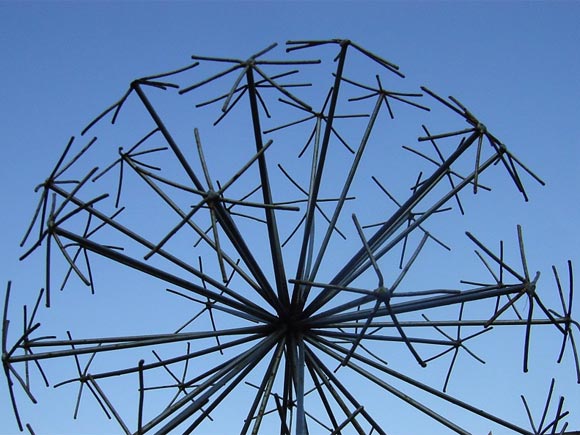
This allium seedhead sculpture would be a great focal point
Clothing
Forget Hunter wellies, these cool boots from BOGS look great and offer great protection in the garden. They even have a handy handle built in. Yes please Santa!
Prices start from £60
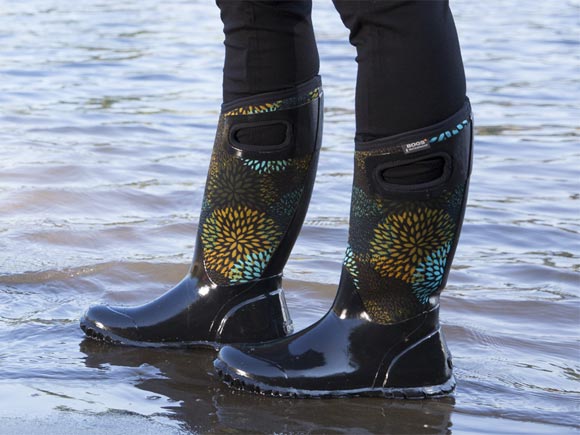
LOVE these cool wellies
Tools
Having beautiful tools can add even more enjoyment to your pottering outside. These colourful OXO watering cans are stylish and practical. They come in a wide range of colours and have a bendable spout.
From £65
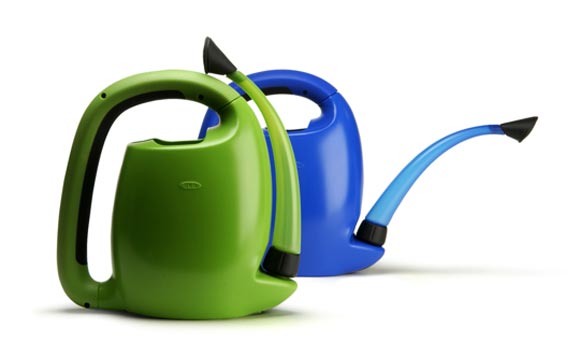
The OXO watering cans
Kids
It’s all about the kids at this time of year and there’s no reason they shouldn’t miss out on all the garden fun. One of the things our kids love doing is playing in a den and this Hideout Wigwam would be a very popular present for any kid this Christmas. £65
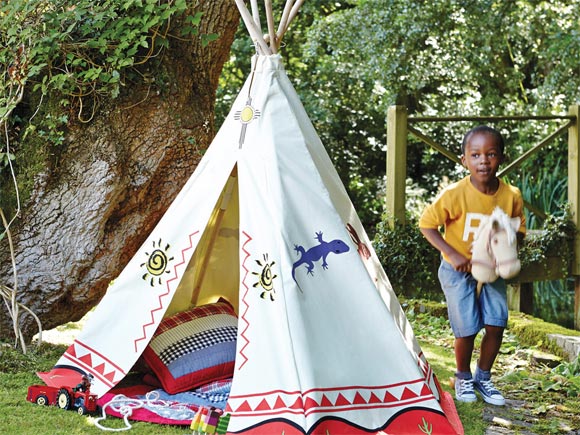
The Hideout Wigwam
For The Person Who Has Everything
Why not surprise them with a gardening gift voucher. Vouchers can be used towards absolutely any work in the garden from design to landscaping, grass-cutting to weeding. Just contact us to discuss what you would like.

A Vialii gardening voucher
Hope that helps with your Christmas 2015 shopping. Wishing you all a very Merry Christmas indeed.
All at Vialii
(Prices correct at time of publishing, December 2015)
How To Have Fun With A Baby In The Garden…
Hello everyone! Well, it’s a pretty momentous week here at Vialii Towers as my baby sister is about to turn 1!! Yes, can you believe it has been a whole year since I became a big sister? Well, I have learnt a LOT about babies in the last year and I have taken that knowledge along with my gardening expertise to give all you new parents the best list ever of how to have fun with a baby in the garden…
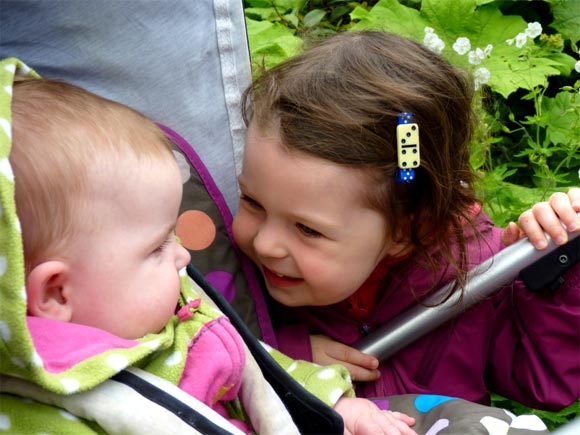
Me and my lovely sister Tilda
Swings and paddling pools and plastic toys are soooo obvious. And not everyone has the space or money for larger toys or want lots of horrible plastic in their garden. Here are my top tips:
POP, POP, POP!
One of Tilda’s most favourite things is bubbles and we will definitely have some at her birthday party! Whether it’s a bubble machine or just a simple pot and wand babies will love watching them fly away in the wind and learn to pop them.

Pop, pop, pop, can you see the bubbles…
WATER LOT OF FUN
You can spend a lot of money on a water table (and I am sure it will be lots of fun) but it doesn’t need to be that expensive. One of mine and Tilda’s favourite things is just a bucket of water and then use some paintbrushes to pretend to paint water pictures on the patio. It’s sometimes fun to bring out a toy tea pot too and fill it with water and have a picnic on the lawn. And we always love watering the plants too!
BEACH BABE
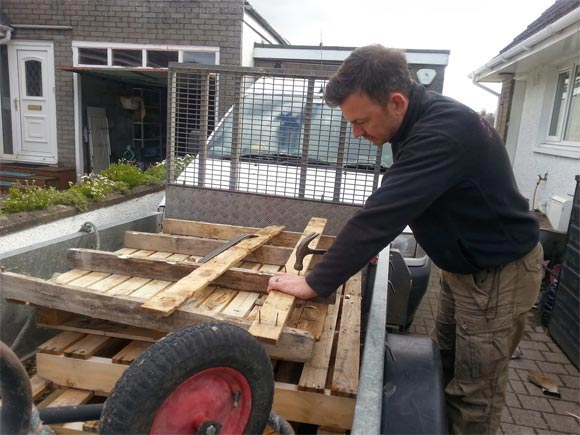
All kids love digging in the sand and babies are no different. They love the feeling between their hands and feet, just be careful they don’t eat it! We were lucky to be built our own sand pit by Daddy but you could use anything. An old baby bath would be perfect as an upcycled sand pit in the garden (or as a water table.) Add some treasure too like foreign coins, conkers, shells etc to be dug up.
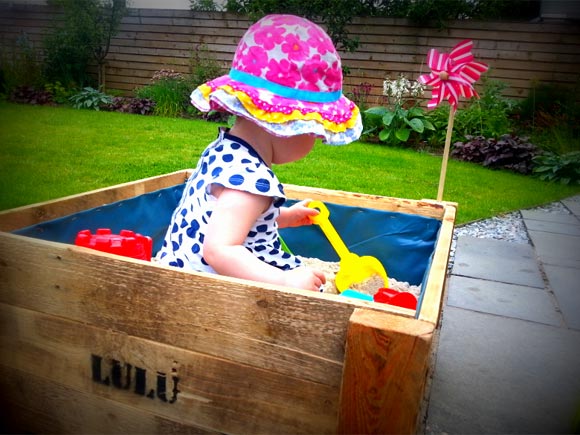
You can make a sandpit out of old pallets if you are clever like Daddy
HOME FROM HOME
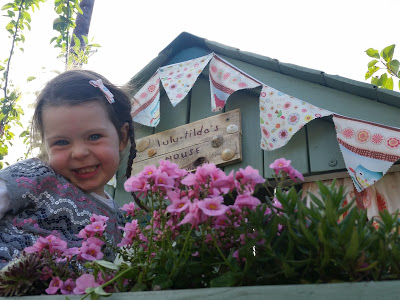
A playhouse is a wonderful addition to the garden and we were given a wonderful one by friends who didn’t need it any more and we gave it a bit of a makeover. Have a look on Freecycle or Gumtree to see who wants to get rid of an old playhouse. A lick of paint and some fabric to make curtains and bunting will easily transform it. Or for an even easier and cheaper solution, how about just draping a duvet cover or large blanket over the washing line and making a den? Brilliant!
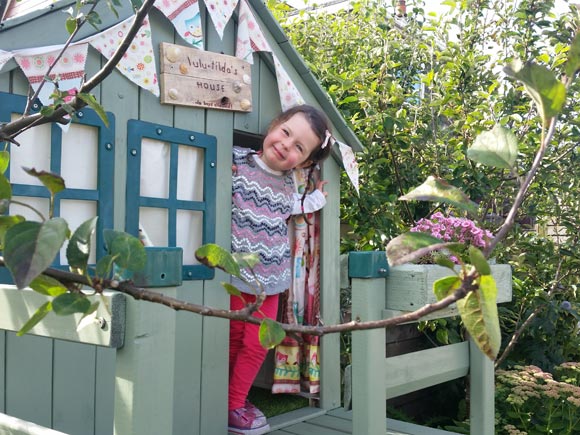
“Lulu & Tilda’s House”
GET THE GARDENING BUG
We don’t always have to resort to toys in the garden. Both Tilda and I have been keen gardeners from a very early edge and could probably use a trowel before we could even use a spoon! Let your babies explore the garden, dig in the borders and have fun getting dirty.
Now Tilda is a big girl, I might even let her do some blogs here too! Happy birthday Tilda, the most wonderful, loveliest, smiliest sister in the world! You’ve passed the test and you can stay!
Lulu xx
Halloween Leaf Ghosts!
It’s Halloween this weekend and I am sure some of you will be hosting Halloween parties or are just decorating your homes to be ghoulish and gruesome. Instead of spending a fortune on decorations from the shop, why not save money and have some fun by creating these amazing Halloween leaf ghosts using autumn leaves. It couldn’t be easier…
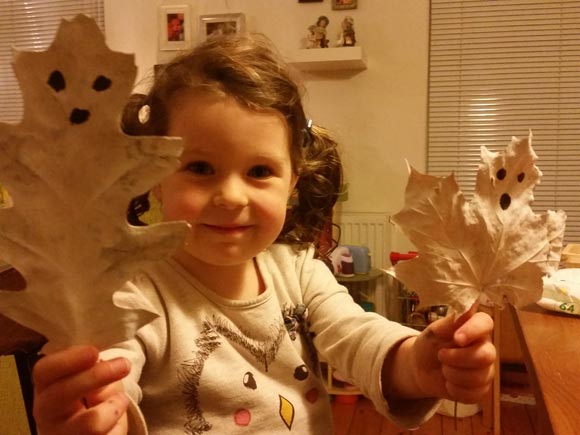
My leaf ghosts
1. Firstly head outdoors and choose some autumn leaves to make your ghosts with. We chose maple and oak leaves as we think they are the best ghost like shapes.
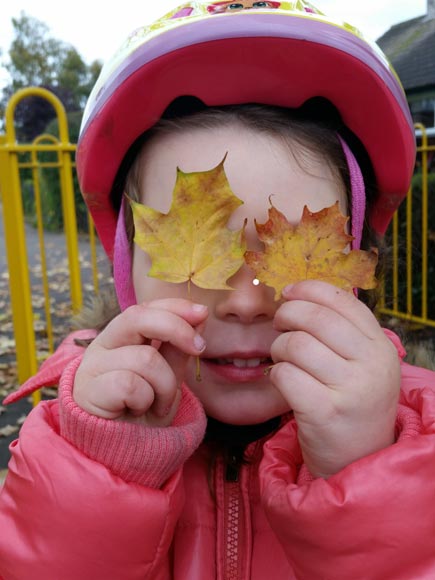
Acer leaves are great for this craft project
2. Make sure the leaves are nice and dry and then paint them white. It may take a few coats of paint to make them really nice and white.

Painting is ALWAYS fun
3. Once the paint is dry simply draw on eyes and a big ghosty mouth.
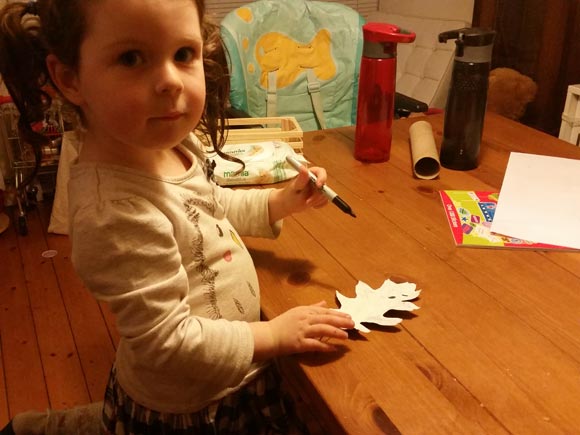
Carefully draw the eyes and mouth
We think if you made lots of these you could make a really fabulous mobile from these leaf ghosts, but remember to paint both sides of the leaf if you are doing this.

My ghost leaves look great with the other decorations I have made
Happy Halloween everyone!
Lulu xx
Garden Playhouses, The Vialii Way!
If you are an avid follower of our blogs (and why wouldn’t you be?!) then you will be aware that we love a wee upcycling project at Vialii. And these projects are my VERY favourites that we have ever tackled. Welcome to the Vialii Garden Playhouse Makeover!
I LOVE my new playhouse!
M&D are designing a garden for friends at the moment and tucked away in a corner of their garden, no longer used, was a playhouse which these (very lovely!) friends said we could have. As this saved Daddy the job of making our own playhouse, he now had the time and energy to help me and Mummy give it a bit of a makeover.
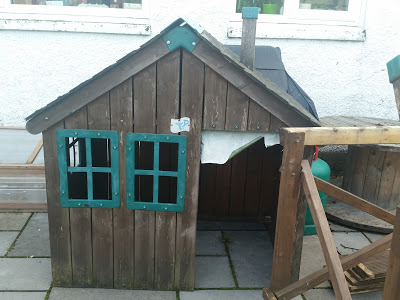
Before: the playhouse needed a bit of Lulufication (yes, that IS a word!)

Here I am busy painting my playhouse
We tucked the playhouse in one of our borders so that it doesn’t take up too much space. We just needed to move a few plants.
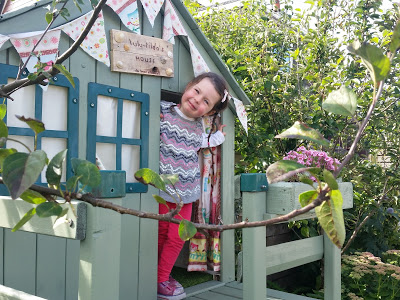
The new playhouse is tucked in the border between two apple trees
The view from inside is lovely, across the garden the fields and up to the Ochil Hills.
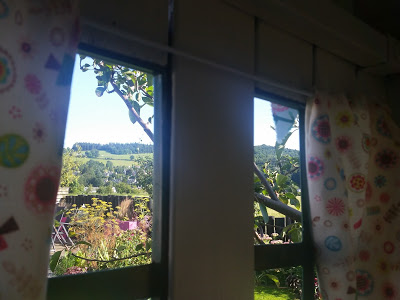
The view from inside my playhouse
My clever mummy made curtains for the windows and door and some bunting for inside and out. I hung a beautiful painting I made at nursery inside and Daddy laid some artificial grass inside which looks like a green furry rug!
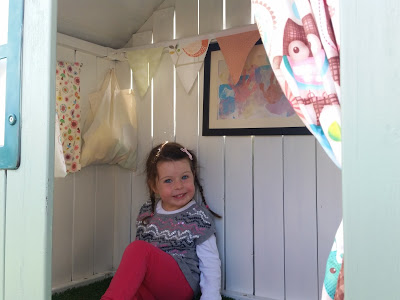
The inside all painted, my furry rug, artwork and curtains!

My new sign: Lulu & Tilda’s House, No Boys Allowed!
While we have been very busy at Vialii Towers, my BFF Euan has also been flying the flag for upcycled Vialii playhouses. His clever Daddy has made his from upcycled pallets. Here he is loving his wee house:
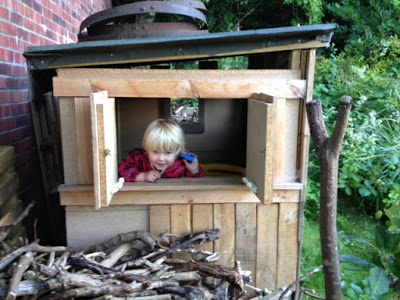
Peek-a-boo

Euan in his wonderful, upcycled playhouse
I’d love to see pics of your playhouses so feel free to share…
Lulu xx
There’s a worm at the bottom my garden
Actually there are loads of worms in my garden and I’ve called them all Wiggly Woo, it is pretty hard to tell them apart so I though the smart thing to do was give them all the same name. Mummy says that worms in our soil means the ground is good for growing things. But why is that? What do worms do? I’ve been finding out….
Just what am I up to?….
Worm facts
- Worms can eat up to 75% of their own body weight every day (even more than me!)
- Earthworms live for up to 15 years but some larger types of worms can live to 50 years (even older than my Mummy and Daddy…just!)
- Worms can have up to 5 hearts, depending on the type of worm.
- They use teeny tiny hairs to crawl- try looking for them with a magnifying glass.
- They don’t have eyes but their front end is more sensitive to light than their tail.
- The longest earthworm ever found was 6.7m long.
- Relatively speaking a worm is 1000 times as strong as us.
- Worms breathe through their skin. That’s why they come to the soil surface after rain- if they stayed underground they would drown.
- The sticky slime they produce helps them move through the soil. If they dry out they can’t breathe.
- A worm chopped half doesn’t become 2 worms. Just the head end will make a new tail. The tail end dies.
- Lots of other animals eat earthworms in the wild. Toads, foxes, moles, birds, snakes, slugs, and beetles do. Even some people eat worms (populations from China and New Zealand do). Wow, it’s tricky being a worm, isn’t it?!
What do worms do?
A really clever man, who found out lots of cool facts about animals and nature, named Charles Darwin, called earthworms “natures plough”. That’s because they mix up the soil with their burrowing. Whilst they burrow they eat decaying plants and then create worm poo (called casts). This is tiny and easily breaks down into the soil to give it lots of nutrients. Then bacteria and fungi feed on the poo (yuck!) and release the nutrients into the soil for new plants to use to grow. So by burrowing, the worms make nutrients available all through the soil and not just on top. Even more helpful in the garden, worms don’t eat living plants, they have to be already dead and decaying. They are hard workers, one acre of worms can contain 1 million worms and they can break down about 50 tonnes of soil. Worm tunnels also help to hold soils in place and stop water erosion.
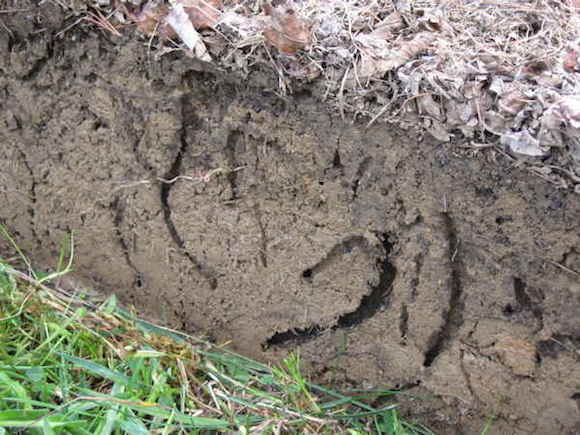
Earthworm tunnels helping to spread nutrients throughout this soil
Watch them in action
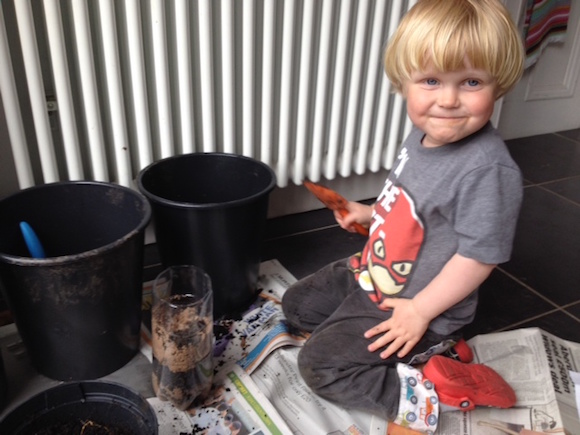
To find out more about what worms do in the soil you can make a temporary earthworm wormery. You’ll need:
- a clean 2L clear, plastic bottle
- safety scissors (& an adult to help)
- damp soil or compost
- damp sand
- water to dampen layers
- worm food- kitchen veg waste, dead leaves, shredded newspaper
- worms
- black card or paper
- an elastic band
Gently and carefully collect some worms from you garden. The best time to collect worms is after a heavy rain fall as they will come up to the surface. They are normally easy to find in shady spots below shrubs or stones. I found it easy to find and gather worms using my fab Twigz garden tools. They’re not just perfect for growing veg but also for all the important garden jobs I need to show Mummy how to do!
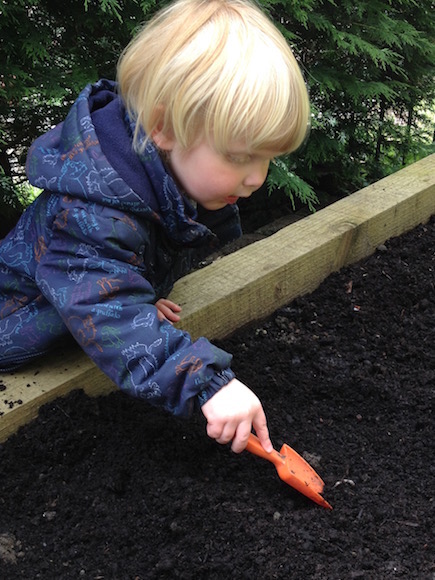
Carefully gather your earthworms
Cut the top 1/4 off the bottle and make a small slit in the side of the bit you’ve cut off top (to make it easier to slot back on as a lid)
Fill the bottle with a layer of sand then soil then sand then soil, then sand, soil, sand, soil.
Fill your bottle with layers of soil and sand
Add a few worms to the top and watch them burrow down.
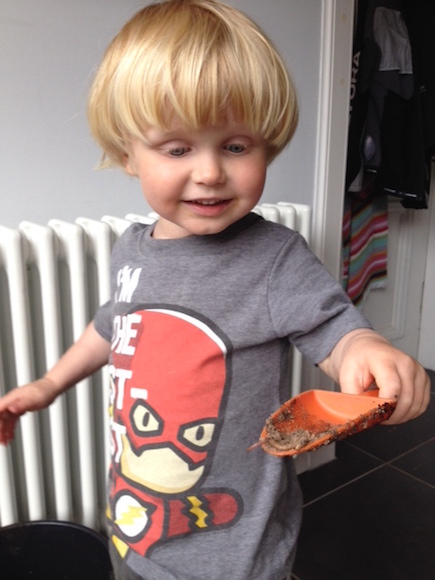
I very carefully lifted the worms using my Twigz trowel
Add food to the top (I used potato and carrot peelings and damp shredded newspaper) and wash your hands.

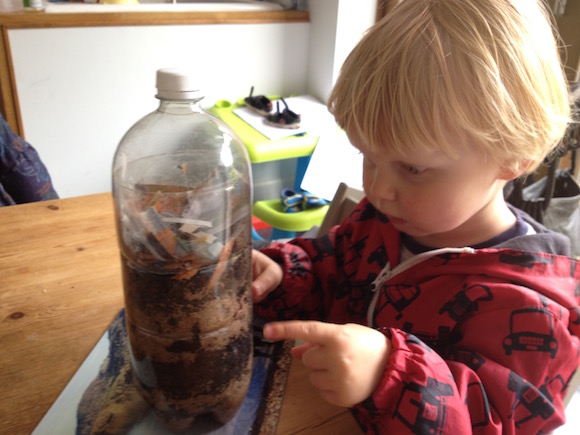
My complete wormery ready for wrapping up in dark paper
Wrap the black paper around the wormery and fasten with elastic band. This encourages the worms to burrow around the outside of the wormery where you can see them. Place in a warm place and you can remove the black paper each day to see the worms, what food they’ve eaten and how their burrowing has changed the wormery layers. After a week release the worms back into your garden.
Just 2 days later the worms have been busy mixing up the layers
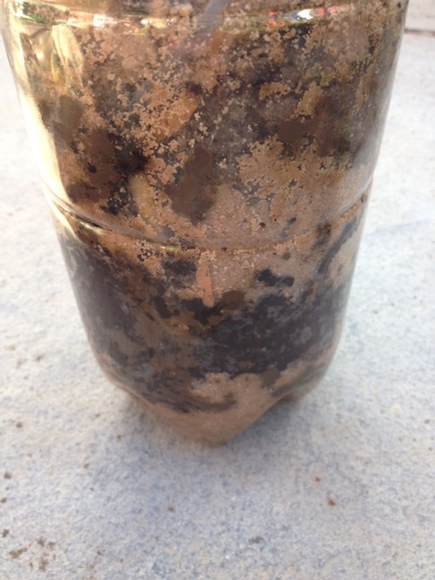
After a week the layers are mixed up with carrot down in the bottom compost layer
Composting wormeries
This temporary wormery is different from a composting wormery. Special worms that live above the ground in piles of decaying leaves/other garden waste are needed for that, not earthworms. If you keep them in a wormery the worms digest your kitchen and garden waste into a wonderful compost in around 3-6 months. Composting worms like to eat: coffee grounds and tea bags, fruit and vegetables peelings, cereals and bread, crushed egg shells. Composting worms don’t like: onions, citrus fruits, meat and fish, fats or greasy foods, dairy products, rice, pasta or cooked potatoes. Worms don’t like to be too cold and eat more when they are warmer. Don’t leave them in direct sunlight though or they will get too hot. It’s best to keep your composting wormery in a garage or shed in the winter. Make sure they stay moist but don’t make it too wet. You can add rainwater or dry bedding if you need to. They will sort out their own numbers and shouldn’t try to escape if wormery conditions are right.
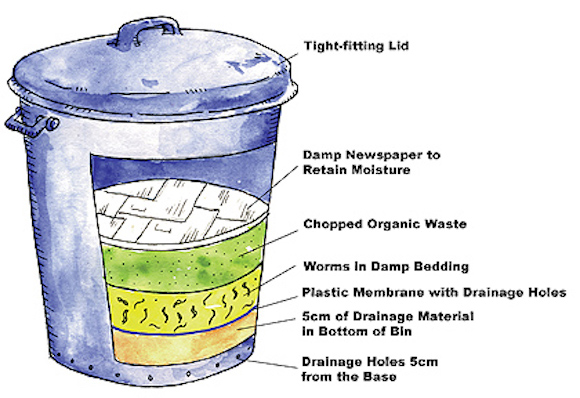
You can buy composting wormeries or make one from an old bin following these instructions
So next time you find Wiggly Woo or one of his friends in your garden, be happy as it’s great to know you’ve got some help in the garden.
To learn more about compost please read my blog all about it.
Big hugs,
Euan
If you’re not fast you’re last- in my garden anyway
If you’ve not yet started growing any seeds in your veg patch this year but would still love to have some yummy home grown goodies on your table this summer, don’t worry. It’s not too late as you can either buy small veg plants from garden centres or you can save money by growing heaps of different speedy veg from seed. Some are fab for little ‘uns like me to do all on my own but others were a bit more fiddly so I let Mummy feel all important and give me a hand.
Lulu is growing some veg too!
Let’s see the contenders in the race to be the fastest thing growing in my garden this June…
On Your Marks
The competitors stepping up to the mark are:
Broccoli Rabe “60 day”
This isn’t technically a broccoli but is a cousin of the turnip and mustard family. So it has a slight bitter taste. It’s also known as turnip broccoli, rapini and rappone. All of the plant is harvested and the stem, leaves and flower buds are eaten. Don’t be fooled by the 60 days in the name as it can be ready well before then and it will bolt (and go yucky tasting) almost overnight so harvest as soon as you see the flower buds form. You can store it in the fridge for up to 10 days before using. These were little seeds so Mummy only gave me a small amount in my hand at a time for sowing.
Turnip- “Purple Top Milan”
Just 6-10 weeks to mature but you can eat some of the leaves in salads before roots have matured. This is a good plant for growing in-between slower crops. Harvest when golf ball size to eat raw or when tennis ball size to cook. Another fiddly little seed so Mummy had to help me get these sown.
Dwarf bean- “Bobis d’ Albenga”
These are all stripy and remind me of the beans in Jack and the Beanstalk. The plants will grow to 50cm tall so they won’t win the prize for biggest thing in garden as I’m already way taller than that! They need just 9-12 weeks to grow and if you harvest them whilst no bigger than a pencil you can cook them whole, making them super easy for weaning babies and toddlers to munch on. The pods grow to about 12 cm long and they are stringless. The beans were really easy for me to handle as they’re nice and chunky.
Pea – “Kelvedon Wonder”
My Mummy remembers helping her Mummy harvest fresh peas from the pods a little girl and this is the first year we’ve tried growing any in our garden, so I have a really important job to do making sure Mummy does everything right. This variety is really good for June sowing and is ready in 12-13 weeks. Each little branch on the plant produces 2 pods so the plants should produce a really big harvest of tasty peas. It is also resistant to pea diseases such as pea wilt and downy mildew. Plant will only grow to 45 cm tall so good for smaller gardens. Cool fact- you can eat the pea flowers, shoots or vine tendrils and they all taste like young peas. The pea seeds were also easy for me to handle and sow all on my own.
Some fast growing veg!
Mangetout – “Shiraz”
We grew these purple mangetout peas last year. They were easy to look after and they produced heaps of pods, the more we picked the more the plants produced. Pods are ready about 12 weeks after planting when the peas are just starting to form. This variety is resistant to powdery mildew and will tolerate downy mildew. Plants grow to 1 metre tall so need supporting with canes or a trellis but they will be happy in a large pot on your patio with a cane wigwam for support. We ate them raw in salads or lightly steamed. Again these were easy for me to hold and sow without help from Mummy.
Salad Leaves
Easy peasy to grow. You can get loads of different mixes with plants such as pac choi, mustards, cresses as well as lettuces. I like the spicy, peppery ones best. These only take about 3 weeks to grow so these must be the bookie’s favourite to win the growing race. simply harvest a few leaves from each plant so you can keep going back and harvest more and more. These are teeny tiny seeds so mummy just gave me a few seeds at a time that I sprinkled over our compost in a container for our patio.
Last contender of all:
Me
I am a growing 3.5 year old boy after all, especially when I eat all of this home grown veg!!
Get Set
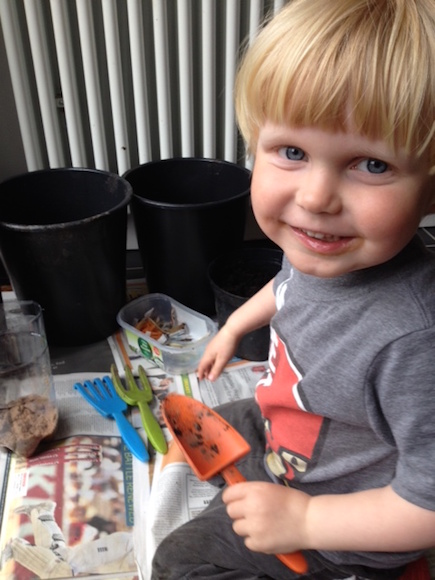
Before sowing seeds you need to remove any weeds and rake your soil to make it all nice and a fine. Lulu has a set of funky kids garden hand tools from Twigz which I’ve tried unsuccessfully to take home with me on several occasions. Mummy recently got me my own set. She said it was so I could finally “work for my dinner” but I didn’t know that food could be your boss! I found them really easy to grip and work with and I love the funky colours- orange just happens to be my favourite colour at present. I even let Mummy have a go with them and she thought they were really study and would put up with me using them for planting and as pretend airplanes, not like the sand pit rakes and trowels I had been using in the garden.
Go!
If you’re quick (get it?) you’ve just got time to get some of these seeds planted. They (except rocket) should be in the ground by the end of June as they don’t like it too hot:
Rocket
I love space rockets AND I love peppery salad leaves so a whole container of this might yet start on our patio. Again it is really easy to grow and it only takes about 4 weeks for a crop to be ready. Pick only 1 or 2 leaves from each plant to get the longest harvest- called”cut and come again”. Pinch out any flower buds when they appear to lengthen the harvest time. To stop plants bolting and becoming yucky tasting make sure to keep the ground well watered and grow bolt- resistant varieties such as “Skyrocket” which is also really fast growing-wooosh!
Prep your soil then sow your seeds in a nice neat row
Runner Beans
They like colder weather so are perfect for Scottish gardens. If you’re short on space you can even grow these in your flower borders as the plants produce lovely heart shaped leaves and pretty flowers. Also fab in containers but they do need supporting- make a wigwam out of canes. “Hestia” is a new dwarf runner bean variety. As it only grows to 45 cm tall it is great for containers and can easily be covered with a net to stop birds eating all your beans.
Outdoors Cucumbers
Radishes
These take only 3-4 weeks to crop but turn yucky and hard if you leave them in the ground too long so don’t get carried away and sow all your seeds at the same time. Sow some every week to spread out your harvest. Like runner beans, radishes don’t like too much heat so they are good for sowing in Spring and up until June. If you sow then in July you will need to be extra careful when watering- too much and their roots can split and rot, too little and they can bolt. Pick them when about 2cm in size and eat raw in your salads. You can keep them in your fridge for a week. “Sparkler” is a yummy type to try as it is reliable, easy and fast to grow.
So let’s get growing and see who/what can grow quickest in the next 2 months……
Quick update 2 months later and the first crop we got was broccoli rabe 60 days. It was yummy. Almost as yummy as the pigeons found our young pea plants! Peas now covered with a net and growing well.
Big hugs,
Euan xx
Do You Know Your Onions?
I love onions, I especially love them in my Mummy’s stovies. We always grow loads of them in our garden and now is the perfect time for planting them. So, I thought I’d help you grow loads too.

This ickle onion will grow nice & big, just like me!
Getting ready to grow
You can grow them from seed or from immature onions called sets. Sets are easier to grow but fewer varieties are available as sets. So if you want to grow something a bit more unusual then you’ll have to grow from seeds. Your sets might be marked as “heat treated”. This just means they’ve been sitting somewhere lovely and warm for up to 20 weeks (kinda like an extended holiday). Heat treatment makes for a bigger yield as the time the onions will grow before “bolting” and becoming unusable gets longer. So it’s a good idea for beginners to use heat treated sets.
Onions prefer open, sunny and light, free-draining soil. So you might need to dig in some organic matter to help drainage if your soil is really heavy. Don’t plant onions in freshly manured soil though as you’ll just end up with very pretty and luscious green leaves but small bulbs. They also don’t like acidic soil so you might need to add lime to planting area well before planting.
How to plant
If growing from seed, sow the seeds 1/2 an inch deep in rows that are 10-12 inch apart from late February to early April. Thin the weaker plants to 4 inch apart. If you’re using sets then you can plant these from mid March to Mid April. Place the pointed end of the sets down into the soil so only the bottom part is covered. Space the sets 4 inches apart with rows 10-12 inches apart.
Make sure you space them out nicely like me
Whilst growing
Water when weather is dry and give an occasional feed with a general liquid fertiliser. Stop feeding from July to help prevent onion neck rot during storage. By planting your onions in a grid you make weeding easier as you can just hoe in both directions. Like me, onions don’t like competition for water so weeding is essential.
What to look out for
Several yucky fungal diseases can cause problems:
Rust disease produces rusty spots on both sides of leaves and reduces crop growth. No cure so you need to lift and destroy the crop.
Onion white rot causes the leaves to turn yellow and wilt and bulbs will have white fuzzy growths. Again no cure, you need to lift and destroy the crop.
Onion fly also cause leaves to yellow and prevent bulbs from developing properly. The fly larvae live in the soil and burrow into the bulb roots. Discard any affected bulbs.
Onion downy mildew also causes the leaves to yellow from the tips down and white mould develops on the affected leaves. Remove and destroy any affected bulbs.
Onion neck rot can occur during storage. To help prevent it, stop feeding from July, keep watering and don’t let the bulbs get wet after harvesting.
Harvesting & storing
Lift the onions as soon as they reach a useable size (normally between July and September) to use immediately. If you wish to store them wait until the foliage dies down naturally and then 2-3 weeks later you can lift them. Ease the bulbs up onto the soil surface and allow to dry there for another 2-3 weeks. If weather is a bit wet, dry them in a well ventilated shed or greenhouse. Once the skins are completely dry they can be stored in a light, cool, well ventilated place.
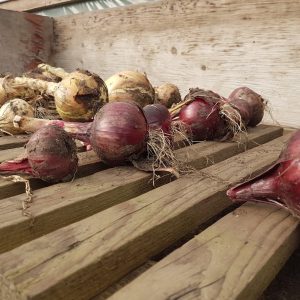
Make sure you dry out your onions then store them
What varieties to try?
Mummy and Daddy like to grow Sturon brown onions and Red Barons are our red onion of choice. We also grow “Golden Gourmet” shallots. The brainy people at Which? have done a trial of load of different types of onions to see which grow the most and biggest onions.
“Centurion” was the best buy brown onion and “Fen Red” the best red onion. Both gave more than 3kg of onions from 30 sets. Other good options were “Autumn Gold”, Turbo and “Red Arrow”.
So let’s get planting so we can all make yummy stovies come the autumn!
A Snail, A Snail, The Teacher Turns Pale…
Unlike many gardeners (and teachers), I LOVE snails. I love finding them in the garden, I love drawing them and I love reading about them in my favourite book The Snail and the Whale. In this blog I tell you a few facts about the banded snail, how to make your very own Snail Race as well as a lovely paper plate snail.
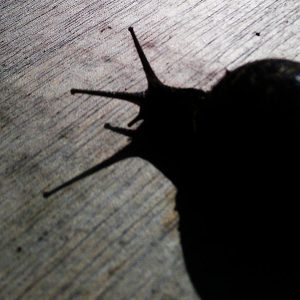
Head out and do some snail hunting at dusk
Banded Snail Facts
- There are 2 common banded shell snails in the UK – one is brown-lipped and one is white-lipped. The colours refer to their shell openings though, not their actual lips!
- Snails hide during the day in damp places and come out in wet weather or at night.
- Banded snails hibernate in the winter.
- Banded snails have two pairs of tentacles on their head which can be retracted. The longer, upper pair have the snail’s eyes at the very end of them!
Snail Race
- Snails
- Chalk

We have plenty of snails which we can race!
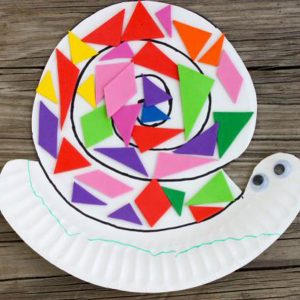
Make A Paper Plate Snail
Book Review: Findus, Food & Fun
In my latest blog, I am reviewing a new book from Hawthorn Press called “Findus, Food and Fun”. Read on to see what I think of it along with a crafty idea taken from the book…
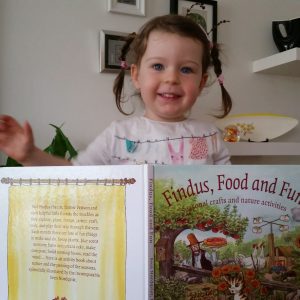
Do you remember that I reviewed “Findus Plants Meatballs” back in May of this year? It got a lovely 4 star review from me. Well, the clever people at Hawthorn Press (hi Meredith!) have sent me their latest book in the Findus series, which is called “Findus, Food & Fun”, to review – can it go even better?
Each month features several projects, many of them seasonal and loads of them are outdoor projects and things to do in the garden so immediately I am interested! Even some of the indoor projects can be given a gardening twist as you will see below (although many are already garden and nature related). From nature activities to foraging, baking to crafting this book is perfect for kids like me. Here are some of my favourite things about this book:
- There are wonderful illustrations throughout the book making it bright and colourful.
- It features Findus the cat who I already love and who features in LOADS of books
- There are loads of projects to try each month
- It is packed full of fascinating facts on all sorts of subjects
- A lot of the projects just use up things you have lying around the house from old socks to beans, lollipop sticks to old bottles.
I have already tried out one of the projects which I have featured below but there are loads more I will be trying out including:
- Chocolate leaf garnish (pretty and yummy!)
- Rowanberry necklace
- Suet bell for birdies
- Magic tulips
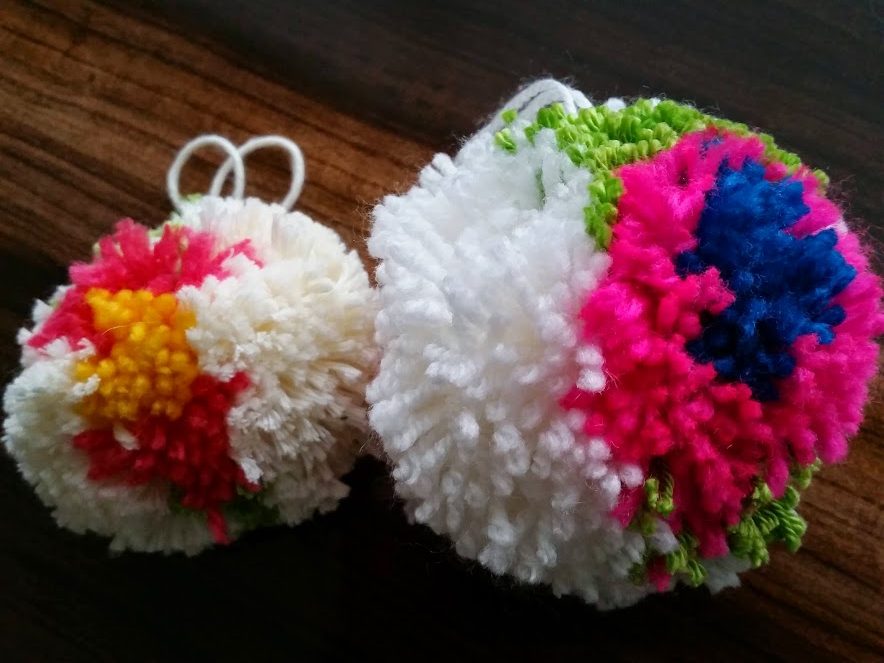
I was so excited to get this book that I decided to make a project straight away. After a good read, I chose to make the “yarn pompoms” from page 56. I just gave them a Lulu-style twist to make them even more relevant to me and my blog…
Flower Pom Poms
You will need:
- A pom pom maker or some cardboard
- Wool (4 colours)
- Scissors
To make:
1. I used a special pom pom maker to make my poms poms. They are inexpensive and make life easier but if you don’t have one, you can make your own. Just cut two identical circles from cardboard with a hole on the inside.
2. Choose your first colour which will be the inside of your flower. I like a nice bright colour for this bit. My pom pom making kit works in two halves. If you are using a cardboard circle imagine a line down the middle and you will be doing the same on each half. Take your first colour and wrap it around the centre of each half several times.
3. Take your second colour (another nice bright colour) and do the same over the top and a little to the sides of the first colour.
4. Next is your leaf so choose a nice green and do some green to each side of your coloured flowers i.e. 4 bits of green.
5. Finally, take your base colour (I used cream) and cover the whole thing until it is all covered and there is no space for any more yarn.
6. Now ask an adult to help. If you are using a pom pom maker join the two halves together. Cut around the edge of your pom pom between each piece of cardboard or the two pieces of pom pom maker.
7. BEFORE you remove your cardboard or pom pom maker, make sure you take a piece of yarn and tie between the two halves really tightly and create a loop to hang your pom pom from.
8. Give your pom pom a little tidy with the scissors.
And there you have it, a beautiful flower pom pom. They are nice to hang up around the house, add as an accessory to a bag or a present or as a Christmas decoration. You could also make lots of them to make a fun Christmas wreath for indoors or sew them onto some fabric to make a wonderfully soft rug.
I highly recommend Findus, Food & Fun. Maybe you could ask Santa for it for Christmas?
Happy reading and making everyone.
Lulu xx
Perfect Potatoes with Twigz
Our lovely friends at Twigz have supplied us with some awesome gardening equipment which I have used ALL year. One of my favourite things to grow is potatoes. Here I tell you a little about what I have grown, how my Twigz tools have helped and also a crafty project if you have a left over potato…
Me getting stuck into the tattie harvesting with some help from Twigz
Way back in March, I told you about 10 Easy Peasy Veg to Grow this year. Did you manage to grow any? One of the things I grew was potatoes, Maris Peer potatoes to be precise. They are really easy peasy to grow. You need to:
- Collect your seed potatoes in your handy Twigz bucket
- Clear/weed the area you want to plant the potatoes in using your Twigz hand tools
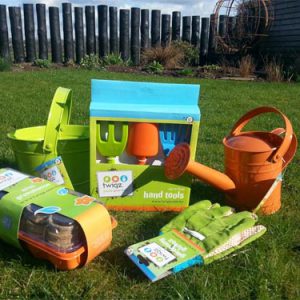
Twigz do a wonderful range of garden tools for children
- Dig holes using your Twigz trowel to plant your seed potatoes in.
- As the potatoes grow and you see the green leaves sprouting, cover them up (it’s called “earthing up”) until they get so high you can’t cover them any more.
- Keep your potatoes well watered while they are growing using your Twigz watering can.
- Keep the area around the potatoes well weeded
- Once the foliage has died back you can dig the potatoes up (time to get that trowel and bucket at the ready again!)
- Eat (yummy. Twigz need to make a knife and fork set for this part!)
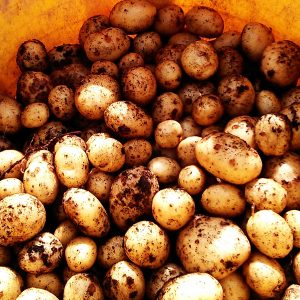
Our trug full of lovely perfect potatoes
So there you have it, easy peasy potatoes in one year. They store really well through winter too, just keep them in a hessian bag in a cool, dark spot. (The hessian bag is perfect for the sack race come Spring time too!)
Potato Stamping

Potato stamping fun
- A potato
- Paint
- Sharp knife (and a grown up to help)
- Paper
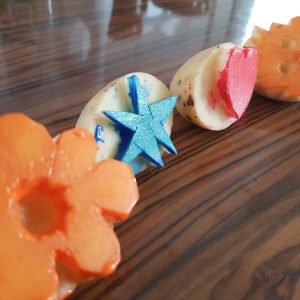
We cut some cool shapes
Lulu’s Sunflower Competition: The Results Are In…
Hey everyone. Do you remember waaaay back in February I launched “Lulu’s Sunflower Competition“? Well, it has been a busy old summer with some of my friends better than others at growing their sunflowers! But the decision has been made and we have a winner. Read on to find out who it is and to see some lovely sunflower photos…

A host of golden…sunflowers!
Despite being the expert in all things gardening, I somehow didn’t win this competition! Must have been that one time I let M&D water my sunflower. Anyway, I still made a good effort and here is a picture of me gazing up at my sunflower:
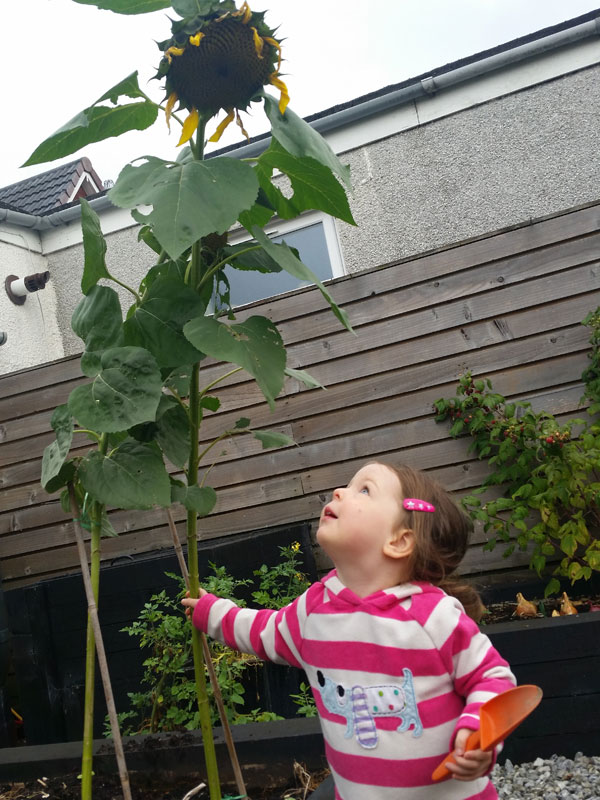
Mummy, who has stolen my sunflower’s petals?
But there can only be one winner of our sunflower competition (well it’s actually two) and this year it is…drum roll please…Jamie and Ollie Norton!!! Here is Ollie with the winning sunflower. It is soooo tall it is higher than the shed and his Daddy needed to hold him up to see it properly!
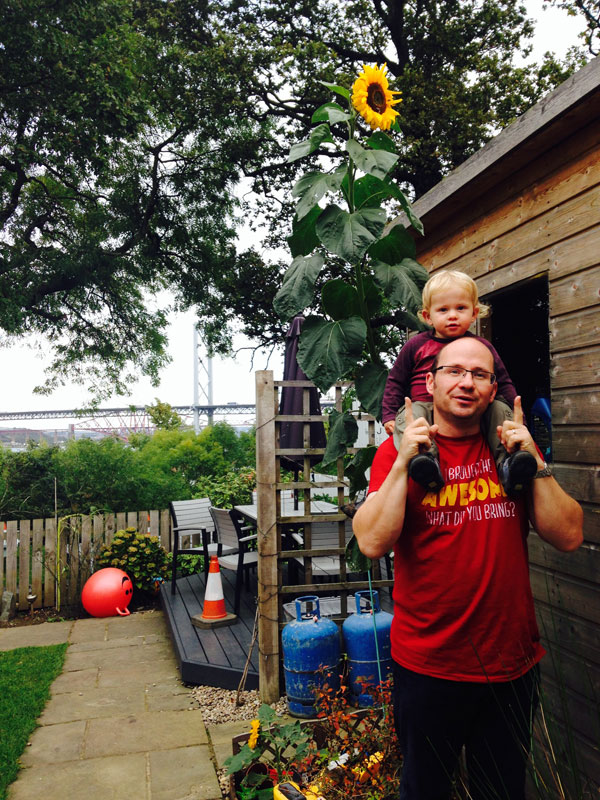
Ollie and the winning sunflower

Ollie with his dwarf sunflower
Lulu
Bonkers for conkers!
Did you know that it’s national conker day today? It’s also the day of the World Conker Championship. What better excuse to go out conker hunting as well as making a lovely choccy version of the conker…
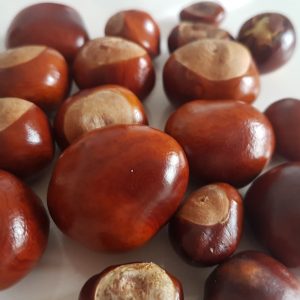
Bonkers about conkers!
Cool conker facts:
- The conker is the seed of the horse chestnut tree.
- To play with conkers there are various tips to prepare them including putting them in the oven or soaking them in vinegar.
- Before horse chestnuts were used to play conkers, snail shells were used!
As well as playing with the conkers, you can also make chocolate conkers to share with your friends.
Chocolate Conkers
You will need:
- 450g Oreo cookies or chocolate bourbon biscuits (1)
- 225g full fat cream cheese
- 450g chocolate (milk or dark chocolate, or both)
To make:
1. Put the biscuits in a plastic food bag and smash with a rolling pin until they are crumbs (if you have a food processor use it instead as it will be a lot faster.)
2. Put the cream cheese in a bowl and gradually mix in the biscuit crumbs, stirring it really well until everything has combined.
3. Shape the mixture into small conker.
4. Put the ‘conkers’ on a tray lined with greaseproof paper and put them in the fridge for
least two hours to chill.
5. Melt the chocolate in a bowl and dip the chilled ‘conkers’ into it making sure they’re fully coated (for different shades of brown, dip some in milk chocolate and some in dark.)
6. Set them out on a tray lined with greaseproof paper and put them back in the fridge for the chocolate to set.
7. You can leave your chocolate conkers as they are, or make a spiky green outer shell out of marzipan (dyed with food colouring).

Chocolate conkers, yum!
There you have it, yummy conkers. Just don’t mix them up with your real conkers as they won’t last long on a bit of string! And the real ones won’t taste nice, even covered in chocolate.
Hugs & kisses,
1. You can also use ginger nuts, they are yummy in this recipe.
2. A big thank you to Nature Detectives for the chocolate conker idea.
Brambly Blog
Hey everyone. It’s the time of year when the hedgerows are bursting with brambles (aka blackberries) and us bramblers (namely my BFF Euan and myself) are to be found with purple fingers and tell tale purple mouths! It’s good fun going hunting for brambles and seeing how many you can get past your mouth and into your tub. In this latest brambly blog I tell you some wonderful bramble facts as well as sharing a lovely recipe which uses them up (along with a few apples from my garden), yum!

Brambling with my pal Euan
Did you know…
- Blackberries (or brambles) are not actually true berries. They are “aggregate fruits”.
- The thorny stems of the bramble were used as “barbed wire” by ancient Britons!
- There are over 400 micro-species of brambles across the UK
- What do you get if you cross a Bramble and a Raspberry? No, it’s not a joke. You get a Loganberry!
- Brambles are a valuable source of food for wildlife and especially birds so make sure you leave a few on the hedgerow for our feathered friends.
- Brambles are really invasive so if you want to grow them in your garden make sure you keep them well pruned.
Top tips for brambling:
- We recommend long sleeved tops when brambling too so you don’t get scratched by the jaggy stems.
- Be careful where you are picking your brambles – you don’t want to pick them off a hedgerow at the side of a busy road as they will likely be polluted from traffic fumes, yuck!

Sampling the crop as we go!
Bramble and Apple Pie
- 150g cold salted butter, cut into cubes
- 275g plain flour
- 30g icing sugar
- 1 large egg, beaten
- 1/2 tablespoon water
For the filling:
- 300g – 500g freshly picked brambles
- 200g – 300g apples
- 120g brown sugar
- Beaten egg or milk, to glaze
Yum Plum!
If you live anywhere similar to us, you will be seeing an explosion of plums on trees and trug-fulls of yummy plums being traded around the neighbourhood at the moment! If you want to grow plums, my latest blog gives you a few tips along with a lovely cake recipe to put them into if you have any left over…
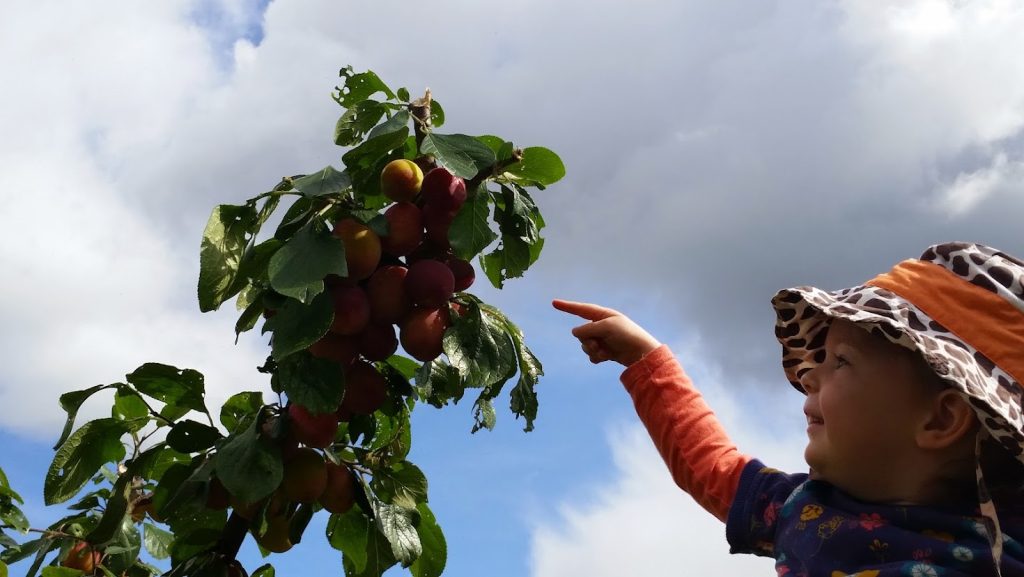
Our tree, laden with plums!
Plum Facts
- They are super easy to grow and reward you with a large crop of juicy plums, perfect for eating straight off the tree or for making jams, cakes and desserts, yum!
- Literally any garden can fit a plum tree. The trick is to carefully choose your root stock so you get one that will suit your size. Any good garden centre (or clever gardeners like Vialii) can advise what variety to choose. You can also grow them as standards or espaliers (along a wall) if that suits your garden better.
- If you only have space for one plum tree, make sure it is self-fertile in order to get fruit. Once the fruit has set on your tree, it’s best to thin them out to avoid congestion and allow the ones left to grow big and healthy (and not overload the poor tree!)
- You should only ever prune your plum tree (or a cherry tree) in Summer to avoid the risk of Silver Leaf infection or bacterial canker.
So, now you know lots about plums you will soon have soooo many you won’t know what to do with them all! One of the things we like to do is bake (and eat!) cakes so why not try out this recipe from the clever people at BBC Good Food…
Plum, Hazelnut & Chocolate Cake
Ingredients:
- 175g butter, plus extra for greasing
- 500g plums
- 175g light muscovado sugar
- 175g self-raising flour
- 175g ground hazelnuts
- 3 eggs
- 1 tsp baking powder
- 50g dark chocolate (70 per cent cocoa), chopped
- 2 tbsp hazelnuts
- 2 tbsp redcurrant, damson or plum jelly
To make:
1. Ask a grown up to heat oven to 180C/fan 160C/gas 4.
2. Butter and line the base of a round 20cm cake tin.
3. Halve and stone 4 plums, set aside for later, then roughly chop the remaining plums.
3. Put the sugar, butter, flour, ground hazelnuts, eggs and baking powder into a large bowl and beat with a wooden spoon or electric hand mixer for 1-2 mins, until smooth and light.
4. Stir in the chopped plums and chocolate, then tip into the prepared cake tin and smooth the top.
5. Arrange the halved plums over the top of the mixture, pressing them down lightly, then scatter over hazelnuts.
6. Bake for 40-50 mins until the top is golden and the cake feels firm to the touch. Cool in the tin for 10 mins, then turn out, remove the paper and cool on a wire rack.
7. Heat the jelly, then brush over the top of the cake before serving.
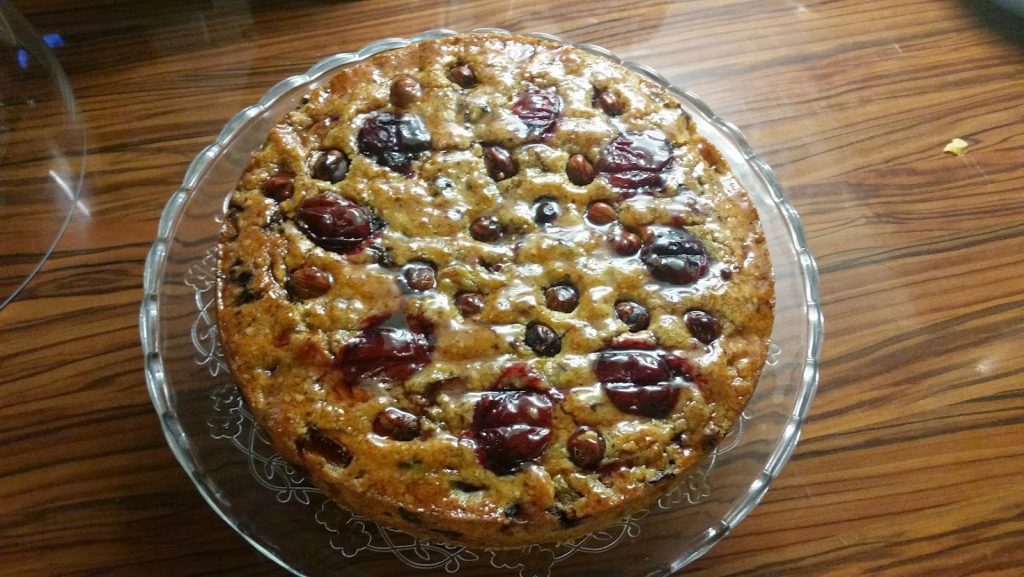
Yummy Plum, Hazelnut & Chocolate Cake
And there you have it. Yum Plum!
Feed The Birds, Tuppence a Bag…
I love birds. They can fly for one thing, which is pretty cool. They are also great friends to us gardeners. In my latest blog I am reviewing a super book all about garden birds from the cool people at the RSPB. I have also created a trendy bird feeder which is soooo easy for you to make at home.
Book Review: My First Book of Garden Birds (RSPB)
The lovely people at the RSPB do an incredibly important job in protecting our feathered friends. They kindly sent me their “First Book of Garden Birds” so I could read it and, more importantly, tell you all about it.
The first thing you notice before you even open the book are the beautiful bird illustrations on the cover. These continue throughout the whole book making it beautiful and colourful as well as educational.
The book is split into interesting sections. “Birds in your garden” tells you some basic information on what its important to do to look after the birds in your garden and to encourage more in.
The “Guess Who” section is my favourite. You are given lots of clues about common garden birds and a beautiful illustration and you have to try and recognise them. It’s a great introduction to bird spotting for littlies like me and you don’t even need to venture outside with binoculars and waterproofs!
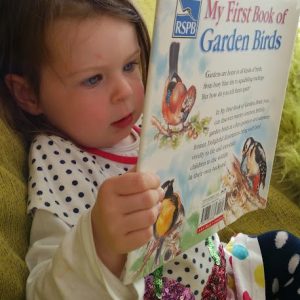
Loving reading My First Book of Garden Birds
There is also an explanation about some of the terms used when talking about birds such as plumage and markings so you can talk like an expert!
At an RRP of £6.99 for a hard backed copy, this book is great value and a wonderful introduction to the world of birds. It’s a must for all young readers who like the outdoors and nature.
One of the things that this lovely book tells you about is how important it is to feed the birds in your garden. I have created this awesome bird feeder from an old drinks carton. Read on to find out how…
You will need:
- Empty juice carton
- Scissors
- Paints, glue and things to decorate your feeder
- String or ribbon
- Pencil or doweling

My lovely new bird feeder!