Cor-gette!
I love my seasonal veg. It tastes so yummy when it’s picked from the garden and is on your plate a matter of minutes later. This week my blog is all about courgettes. From how to grow them to a super yummy courgette cake recipe it’s ripe for the reading!
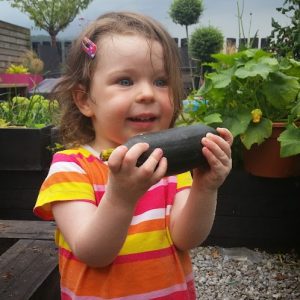
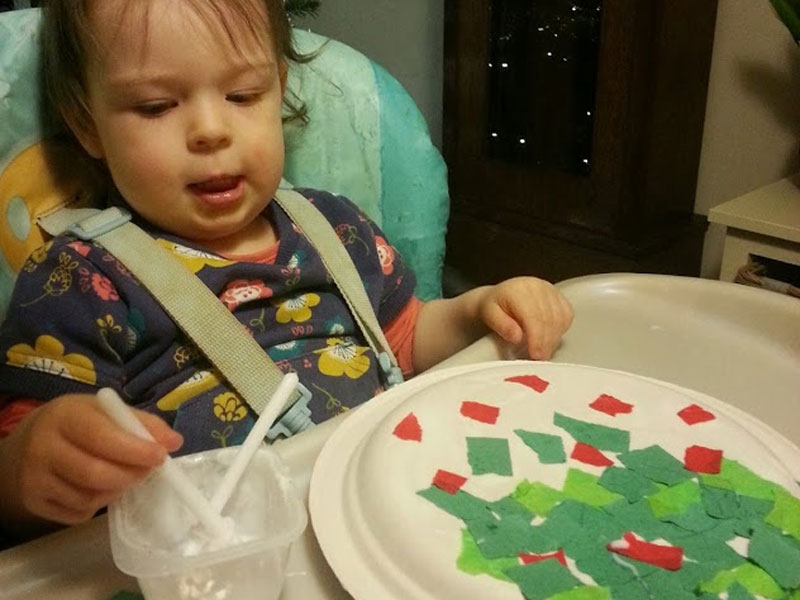
Cor-gette!
Funny Courgette Facts
- The courgette is called zucchini in America
- It is part of the gourd family along with pumpkins and squash
- If you let a courgette grow bigger it will become a marrow!
- You can also eat the flower of the courgette
- The biggest courgette ever recorded was over 1.76m long! Wowser!
Growing Courgettes
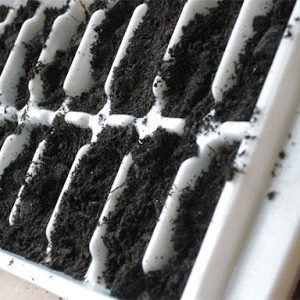
Waaaaay back in Spring I told you all about how to grow seeds. One of the ways that we spoke about was using the Twigz mini greenhouse. I used mine to plant a range of lovely veg and flowers and one of those was courgettes.
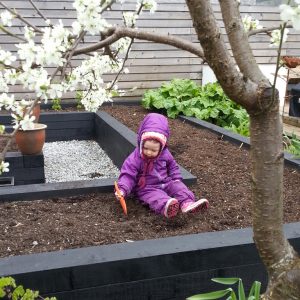
Over the months the seedlings have been nurtured from mini greenhouse to bigger greenhouse to bigger pots. Make sure you water them LOTS along the way. I have loved using my colourful Twigz tools to help me dig holes, rake soil, water the plants and carry compost to help make my courgettes grow well. My courgette plant now sits happily on the edge of one of our raised veg beds and it has been giving us some lovely courgettes.
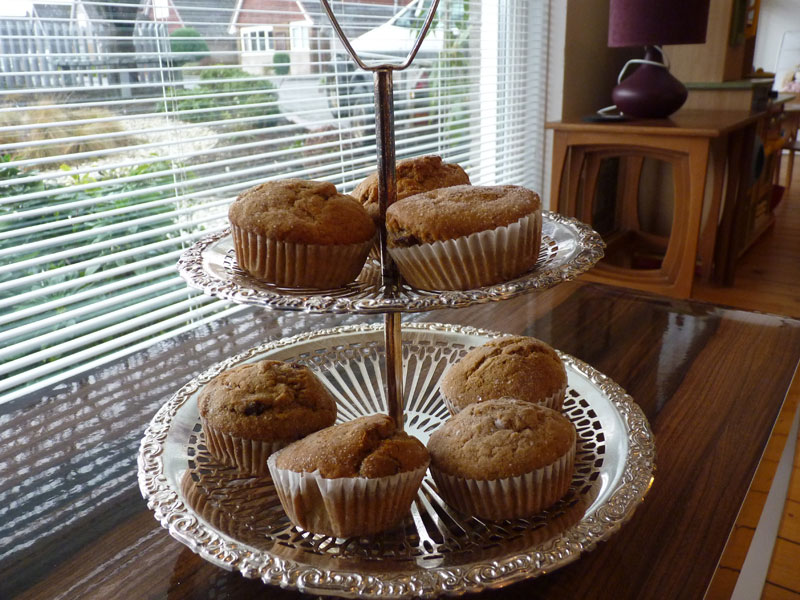
There are all sorts of lovely things you can do with courgettes such as adding them to pasta sauces, soups, tarts, making frittata or even pickling them! But one of my favourite things to do with courgettes is to make cakes with them, yum! Here’s my courgette muffin recipe (1) – it tastes so good you won’t believe it has lots of fruit and veggies in it!
Courgette Muffins
You will need:
- 50g courgettes
- 1 apple, peeled and cored
- 1 orange, halved
- 1 egg
- 75g butter, melted
- 300g self-raising flour
- ½ tsp baking powder
- ½ tsp cinnamon
- 100g golden caster sugar
- handful of sultanas
- 1 tub soft cheese mixed with 3 tbsp icing sugar, to make icing
To make:
1. Brush the muffin tin with oil or add some muffin cases. Ask your grown-up to switch the oven to 190C/ 170C fan/gas 5.
2. Grate the courgettes and put them in a large bowl. Grate the apple and add to the bowl. Squeeze the orange and add the juice to the bowl.
3. Break the egg into a bowl. Stir the butter and egg into the courgette and apple mix.
4. Sieve the flour, baking powder and cinnamon into the bowl. Add the sugar and sultanas.
Mix with a spoon until everything is combined, but don’t worry if it is lumpy.
5. Spoon the mixture into the tin. Ask your grown up to put it in the oven and cook for 20-25 mins.
6. Cool in the tin, then spread some icing on each.
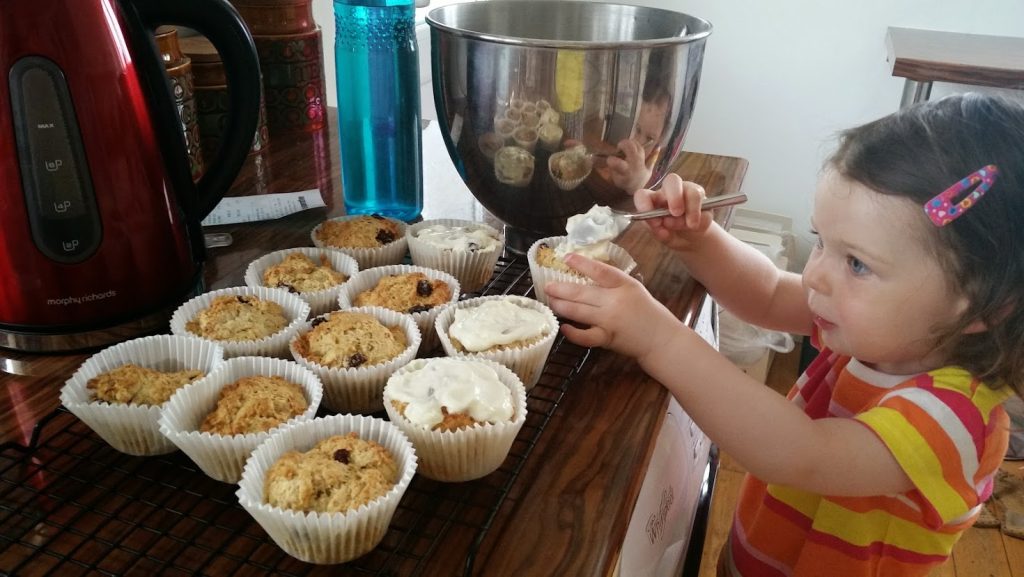
Yummy courgette muffins
If you haven’t already grown them this year make sure they are on your list for next year. Super easy, versatile and tasty. Cor-gette!
1. Thanks to the clever people at BBC Good Food for the recipe for the Courgette Muffins
Beautiful Butterflies
I love butterflies (unlike my Auntie Kathleen!) They are so pretty and great for the garden too. This week we have been releasing butterflies at nursery which is great fun. In my latest blog I tell you some fluttery facts as well as three (yes three) cool butterfly related things I have been doing in my garden. Come on, join in…

Fluttery Facts
Now, we have all heard that butterflies are good for the garden and we should try and encourage them in. But do you know why?
- Like bees, butterflies are essential for pollination. The diet of adult butterflies consists mostly of nectar from flowers. While gathering nectar, the butterflies pick up pollen on their feet and wings and transfer it to neighbouring flowers and plants, continuing the life cycle of many plants that other animals depend on for survival.
- As caterpillars, some butterflies eat aphids in addition to leaves, removing the destructive aphids and helping to control their population. Some adult butterflies eat rotten fruit, helping to break it down and assisting in the composting process.
- They provide great pleasure to people in the garden which is an added bonus.
Upcycle Your Own Butterfly Garden
M&D love to do a bit of upcycling and I have decided to have a go myself. Daddy recently had to replace the wheels on his trailer. He used the old tyres to make this funky container for our deck:
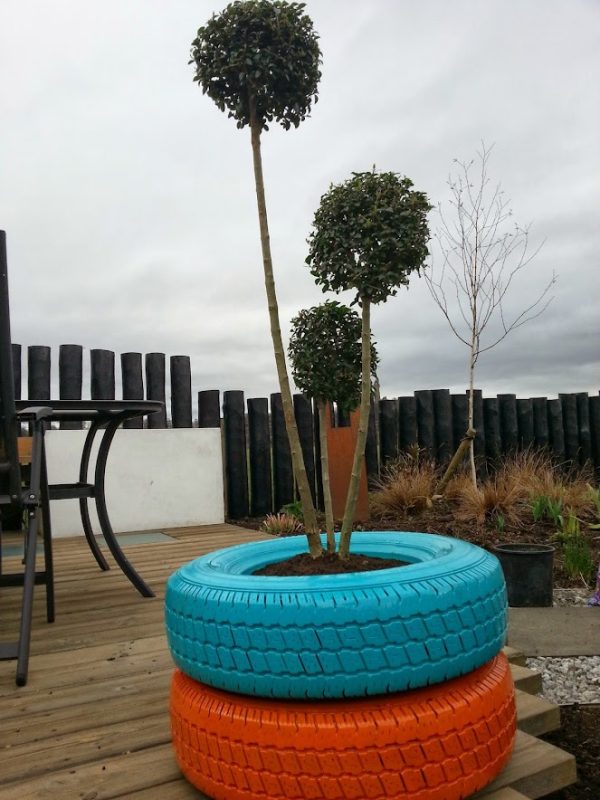
The tyres were turned into a funky planter
So we were left with the wheel rims and I was sure we could do something cool with them too. We turned them upside down, found a pot which fitted perfectly in the hole in the middle and then filled the pot and the ridge of the wheel with compost.

We sowed butterfly seeds in the rims!
We got a packet of butterfly seeds and sowed these and waited for the magic to happen. We didn’t have to wait long – soon our wheels were filled with pretty flowers to attract both bees and butterflies!
Kabloom – Throw a Butterfly Bomb!
The wonderfully clever people at kabloom make really cool “seedboms”. Not only do you get to throw a bomb in your garden (that doesn’t happen every fay, does it?!) it is filled with lots of lovely seeds which grow into pretty flowers which attract butterflies.
Kabloom have a great range of different types of “bombs” and they make lovely gifts too. You can even buy a catapult to sling your bomb with – cooooool! I will be telling you more about the “Catnipbom” in a future blog.
Butterfly Clothes Pegs
Anyone who knows me knows I love a good ole craft project. And what better than to take advantage of this lovely summery weather and to make it in the garden. Here’s how:
You will need:
- A wooden clothes peg
- Paint & brushes
- Card
- A pencil
- Scissors
- Colouring in pens, sequins or whatever you want to use for decorating your butterfly
- Glue
- Googly eyes
- A pipe cleaner
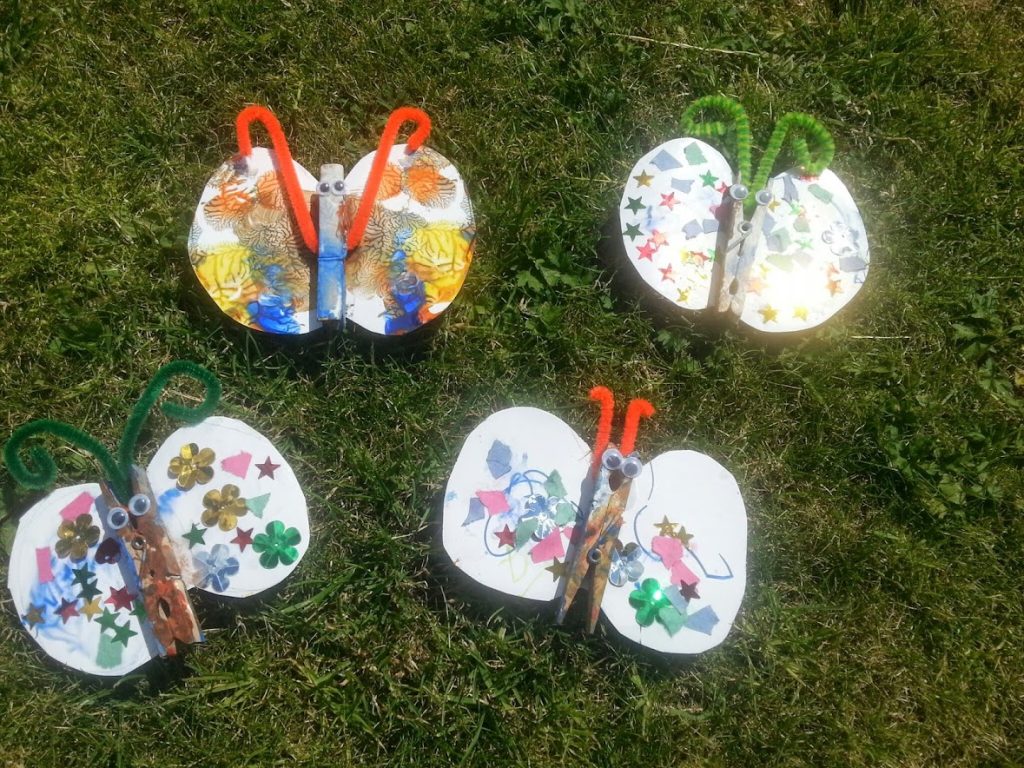
Our pretty butterflies in the sunshine
So, have I persuaded you to love the butterfly yet Auntie Kathleen?…
Summer Garden Games For All
Here in lovely Scotland the school holidays are well under way and, with other parts of the UK set to follow suit very soon, I have decided to give you some great ideas for games you can play in the garden this summer. I’ve loved playing all these games but they are also suited for all ages of kids (yup, you grown up ones too!) and there is a nice mix of free games as well as some lovely games you can buy with your holiday money…
Duck Skittles
The lovely people at BigJigs sent me a set of Duck Skittles so I could try them out and tell you all about them. First of all they come in a handy box so you can keep them nice and tidy. They are made of a lovely wood and painted really nice colours.
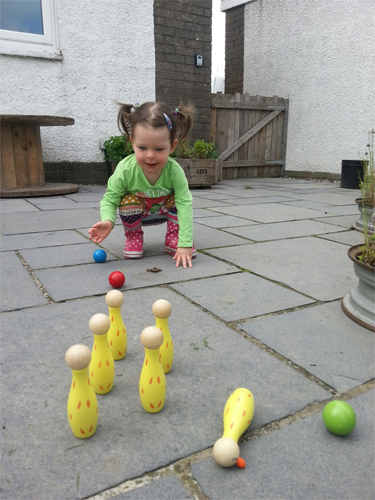
Duck skittles are really quacking!
The balls are nice wood too and painted bright colours. The object of the game is to see how many skittles you can knock down. You can play this game by yourself or with friends, it’s fun either way.
Duck Skittles are available from Big Jigs and cost £12.99. There are other designs you can choose from too such as frogs and princesses. Lovely!
Bear Hunt
This is a brilliant game and one which can be adapted to suit whatever age or theme you want. We chose bears ‘cos they are super cute, we have lots of bears and who doesn’t like going bear hunting? All you need is someone to hide a selection of bears around your garden.

We’re going on a bear hunt…
Like Duck Skittles, you can play yourself and just see if you can find them all or invite a friend along to see who can find the most. I played with my BFF Euan and let him win ‘cos I am nice like that 😉 For older children you can adapt the bear hunt into a Scavenger Hunt. Simply ask an adult to write a list of item to find in the garden (e.g. a seed head, a strawberry, a leaf, a bug etc.) The winner finds the most or is the quickest.
Garden Croquet
Another great quality game from BigJigs is this garden croquet set. Again it’s all made from lovely wood and it comes in a handy carry case so you can easily take it on holiday, over to a friend’s house or to the park. You get four croquet mallets and matching balls, pegs and lots of hoops.
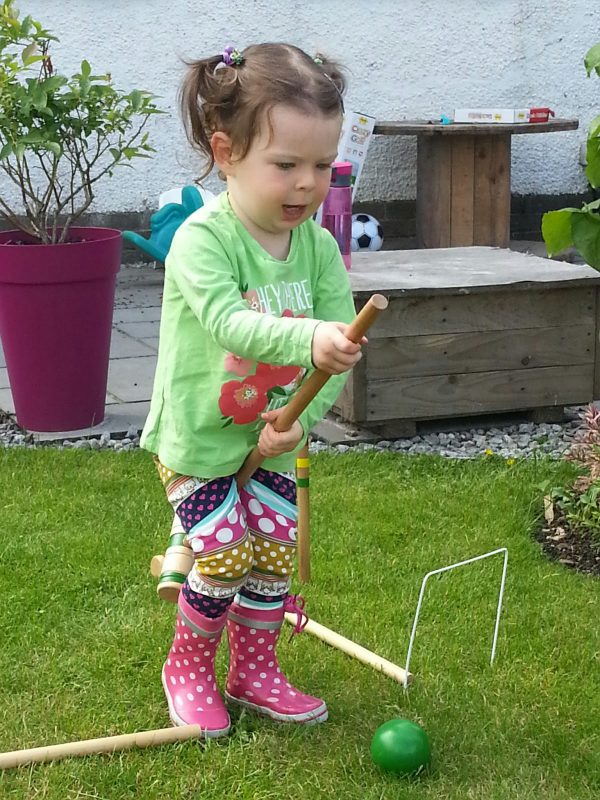
Anyone for a game of croquet?
If you’ve never played croquet before you don’t know what you are missing! You set up the little hoops (I call them tunnels) all round your lawn and the object of the game is to hit your ball through each hoop in turn using your mallet. The winner uses the least amount of shots to get around the course. Get practicing those “Dambusters” and “Deathrolls” 😉
Garden Croquet is available from Big Jigs and costs £20.99.Oh and if you get fed up with croquet the mallets make awesome hobby horses!
Water Painting
I really love to paint but sometimes it can make a real mess (part of the fun if you ask me!) A perfect solution to this dilemma is to take the painting outdoors and swap the paint for a bucket of water.
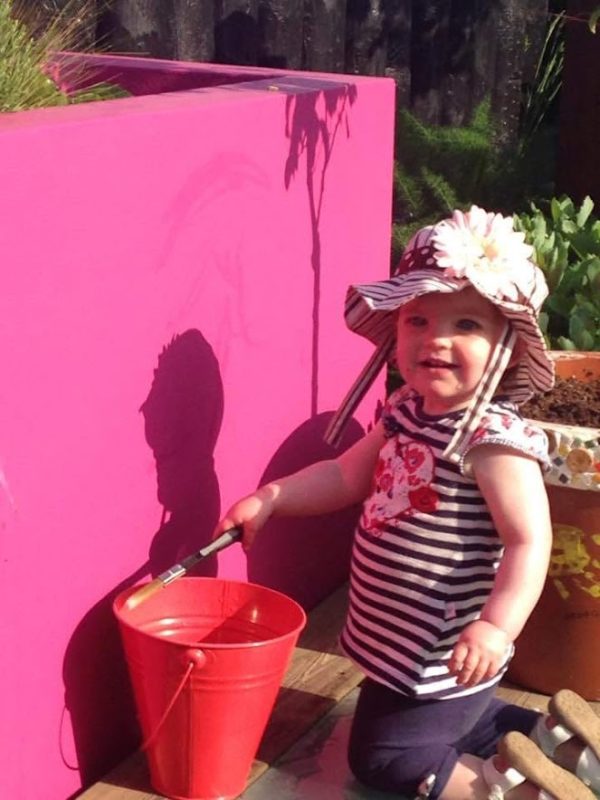
Tilda doing some water painting
All you need is a bucket, brush and some paving slabs or a rendered raised bed or wall to paint on. It is loads of fun (playing with water always is!), the sun quickly dries up your painting so you can keep going all day and you never get in a row for making a mess. Perfect!
Crazy Golf
You’ve got to love a game of crazy golf, an essential part of any childhood summer holidays. If you aren’t heading to the seaside this summer, don’t worry, you needn’t miss out. You can play crazy golf in your very own back garden thanks to the clever people at BigJigs. It may not have a windmill as a central feature but it is made of great quality wood and contains all you need for a perfect round of golf.
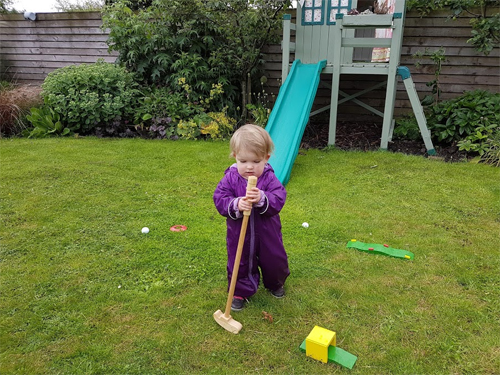
You don’t have to be crazy to play crazy golf. But it helps!
From the wooden clubs and obstacles to the holes and score charts, everything has been thought of and is great quality. The clubs are perfectly sized for children and won’t be easily broken. Some of the obstacles can be quite hard to get over so it may be better suited for slightly older children than me although i still had lots of fun hitting the balls and managed to get it through the tunnel all by myself. Is it too late to enter the Ryder Cup?…Crazy Golf is available from Big Jigs and costs £23.99.
For more ideas of fun things to do this summer check out my 19 great ideas for summer fun in the garden blog or visit Bigjigs website for a wide array of quality toys.
Happy holidays everyone.
Daddy’s Day Tin Can Planters
Hey everyone. It’s Father’s Day this Sunday which means we all need to be extra nice to our lovely daddies. I think it’s nice to make something personal for Daddy’s Day so I have come up with a really cool project which you can easily personalise to your own Daddy. Or if you are strapped for time you can keep it plain and very simple. And it can cost absolutely no money too which is even better! Here’s my Tin Can Planters for Father’s Day…
Plain tin can planters look great too
Make Your Own Tin Can Planter
You will need:
- An empty, clean tin can
- Hammer and a nail
- Something to cover the can with
- Glue
- Spray varnish & gloves
- Compost
- Plant or seeds
To make:
1. Find a tin can which you like the size and shape of. I chose some different sizes to make a nice collection but one can look just as good. Ask a grown up to make sure its all nice and clean and that there are no sharp edges.
2. You will need drainage holes in your can so ask a grown up to turn it upside down and using the hammer and nail add a few holes to the bottom.
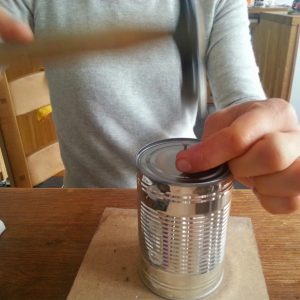
Be careful not to hit your fingers Auntie Alison!
3. Now you can personalise your tin can with whatever you want. Some ideas include one of your own drawings, paintings or hand prints, a relevant piece from a magazine or newspaper or some nice wrapping paper.
4. Carefully measure your paper so that it wraps perfectly around your tin can with a little bit extra for gluing down.
5. Glue the edges of your paper so they stick well to the tin can.
6. Take your tin can outside and ask a grown up to spray it all over with spray varnish. This will waterproof the paper so the planter can sit outside and not be ruined. Remember to use gloves when spraying and always spray outside or in a very well ventilated area.
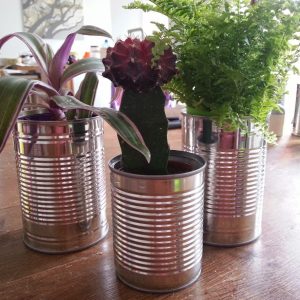
7. Once the varnish has dried you can fill your can with compost and plant your seeds or plants. We always have some lovely plants and seeds that are perfect for adding to a mini planter kicking around the garden or shed and you can easily divide some plants such as sempervivums to create new free plants! Herbs are a lovely addition or dwarf plants and cacti can look great too.

My decorated tin can planters
If you are struggling for time you can skip steps 3-6 and keep your tin cans with the plain metal finish which looks great. If you find teeny plants in pots (some garden centres sell them) you can skip the drainage holes and compost part too and just pop the pots straight into the tin cans. Remember they will rust if they go outside so they would be better kept on the windowsill with herbs or indoor plants. Or you could paint them bright colours or varnish them if you want to place them outside.
So, there you go, a Daddy’s Day tin can planter, a lovely memento for years to come.
Lulu xx
A big thank you to Apartment Therapy for the inspiration for this blog.
Product Review: Twigz
As you all know I have very green fingers (and not just when I have been painting!) I love trying out the latest plants, products and books on the market and telling you what’s worth buying. Recently I have been trying out a range of garden tools aimed at cool kids like me. Here’s what I think of them…
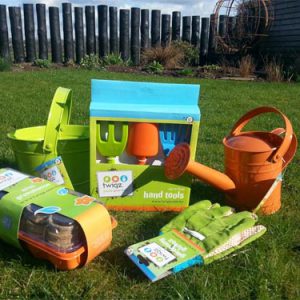
Twigz do a wonderful range of garden tools for children
I was sent a colourful range of products as you can see from the pic I took above in my own sunny garden. There are certain requirement for children’s gardening tools – here’s what I look for:
- Good quality. The tools need to be properly robust if they are going to survive the hard work us mini gardeners put them through.
- Good fit. Extra thought needs to be given to make sure the products fit children, are the right dimensions, feel comfortable etc.
- Look good. We may be gardeners but that doesn’t mean we look any less cool when we are out in the veg patch!
Metal Bucket
Watering Can
Hand Tools
Mini Greenhouse
Gardening Gloves

Awesome Blossom
I just LOVE this time of year. There is pretty blossom sprouting everywhere! In our front garden we have pretty blossom on a tree called Amelanchier ‘Ballerina’ (it was named after me I think!) and our lovely old cherry tree. It’s a cheery sight to welcome you home. But do you know why trees have blossom? And why does it only last a few weeks? Well, read on to find out why and also, how to make a lovely Spring blossom card.

Look, I have plum tree blossom
coming out of the top of my head!
What is blossom?
Blossom is simply flowers on fruit trees. But did you know that EVERY single tree in the world has flowers? Just that some have flowers so teeny or so hidden away that it’s impossible to see!
Why do trees blossom?
Fruit trees need to attract pollinators (e.g. bees) to help it set fruit. The bees flit from flower to flower, transferring pollen between flowers to ensure pollination.
Why does blossom not last long?
It only takes the pollinators a short amount of time to pollinate the trees so then the blossom falls off. It’s a pity as it’s soooo pretty.
Even though the blossom isn’t around for long, don’t worry as I have a lovely project up my sleeve where you can recreate blossom and make a lovely Spring Card.
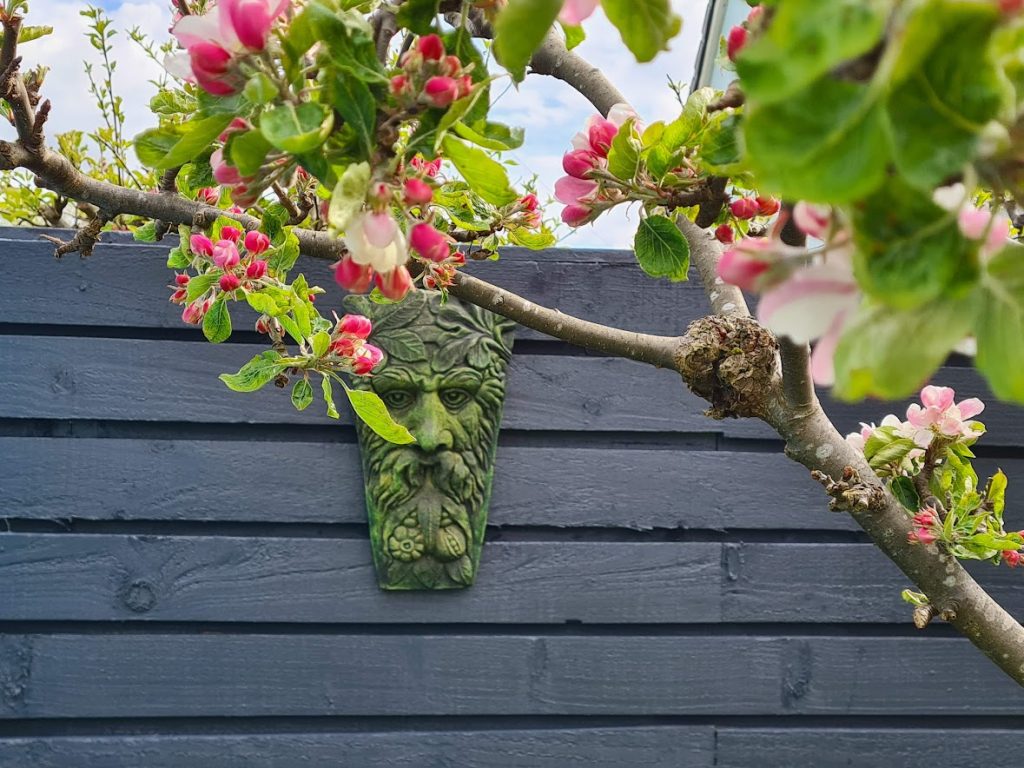
Blossom on our apple tree
Make Your Own Blossom Card
You will need:
- White card
- Paint
- Cotton wool
- Pen/crayon
To make:
1. Fold your piece of white card to make a card shape.
2. Use your pen or crayon to draw a tree trunk and branches on the card.
3. Dip your cotton wool into some pink paint and dab it around the top of your tree to make blossom.
4. Add grass (and flowers if you wish) to the bottom. Ta dah! A simple project which means you can have lovely blossom to look at for a lot longer.
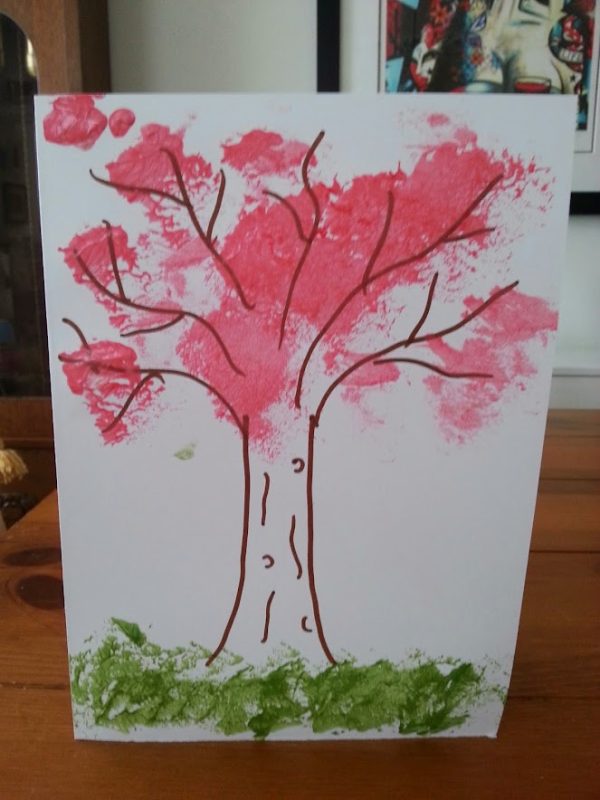
My blossom card
Make Your Own Easter Basket
Hey everybody. Easter is almost here so I decided to combine two of my favourite activities (gardening and doing crafty stuff of course!) and come up with a suitably eggs-citing project for my latest blog. So read on and find out how to make your very own Easter Basket for free!
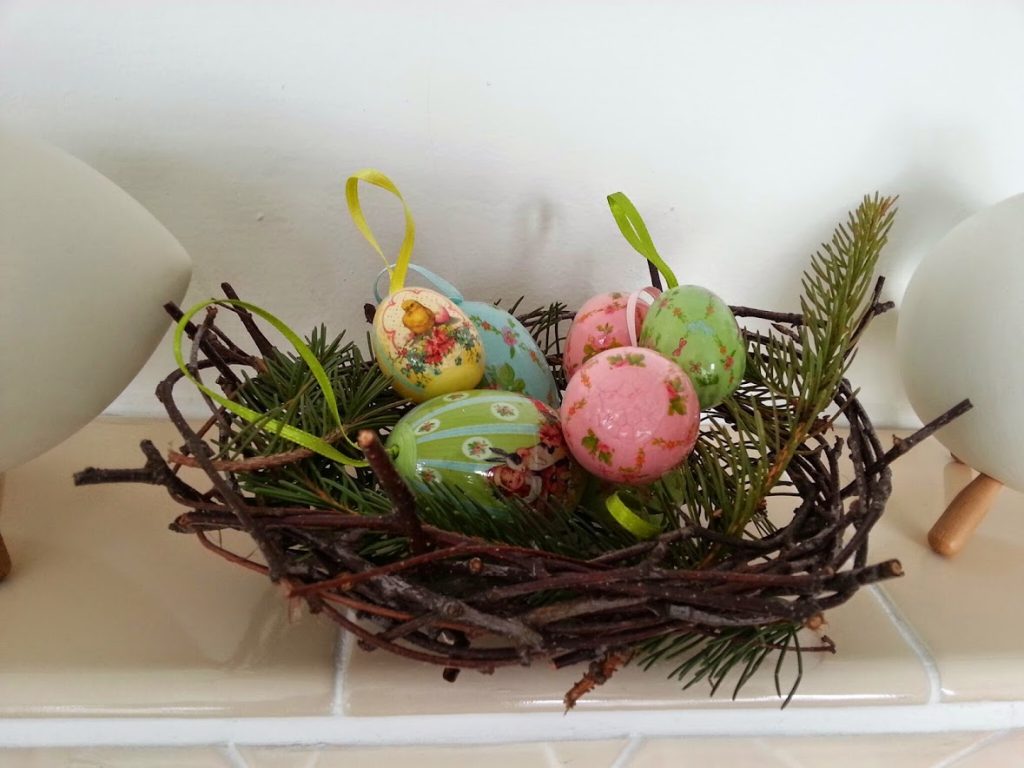
My Easter twig basket
Easter Twig Basket
You will need:
- Some twigs
- Some string
- Some pine needles/feathers/grasses etc to decorate
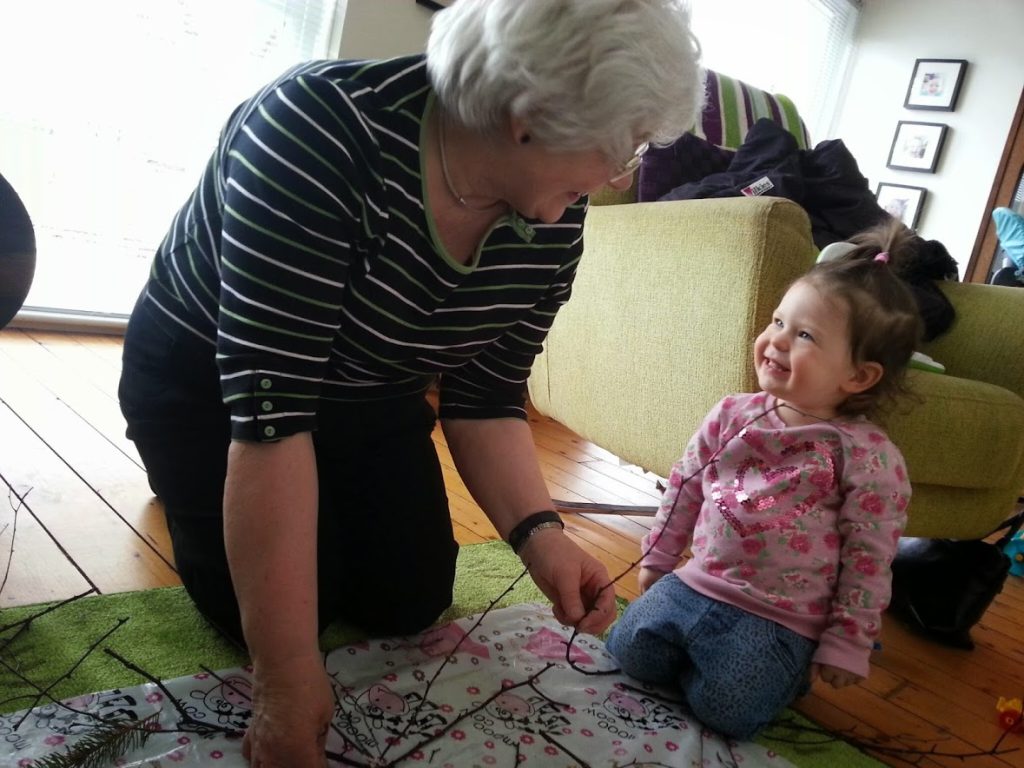
I kept a close eye on Grandma as she made
the star shape to make sure she got it right!
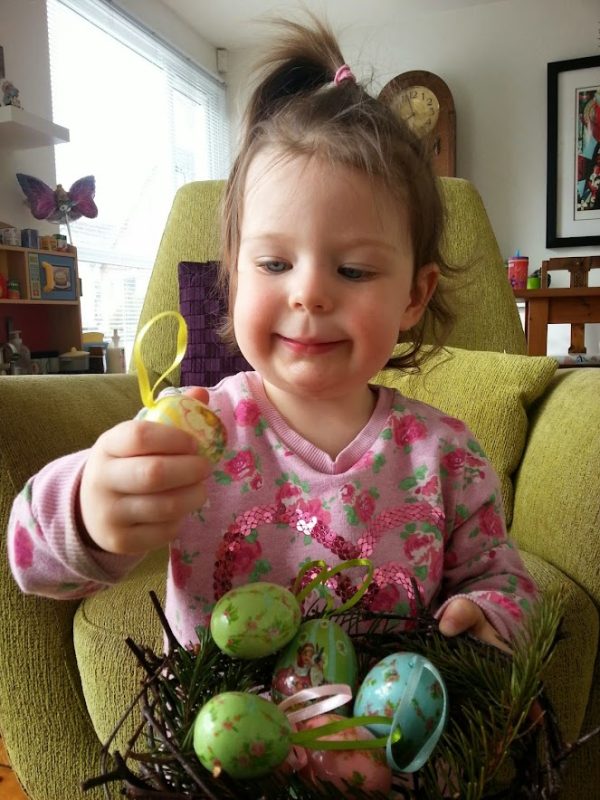
I filled my basket with some pretty Easter eggs
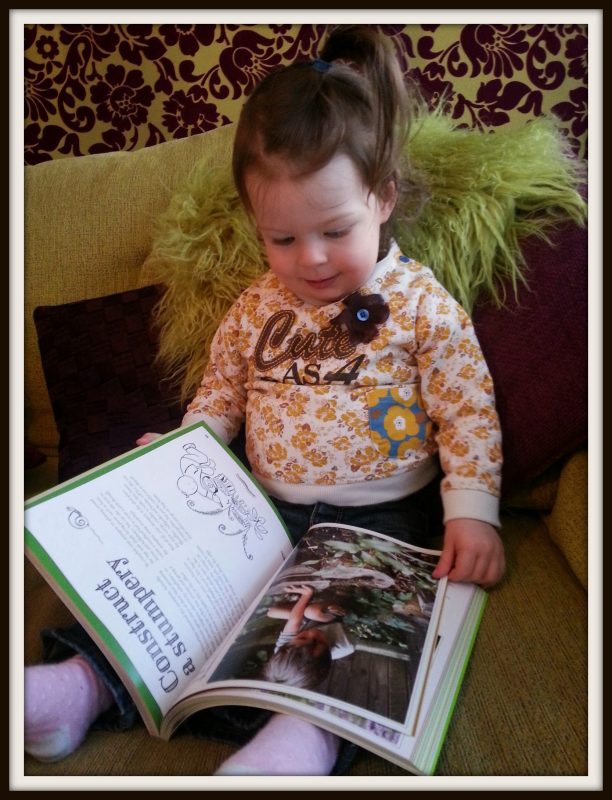
The book is PACKED full of lots
(well 101 to be precise) of awesome ideas
Daft on Daffodils
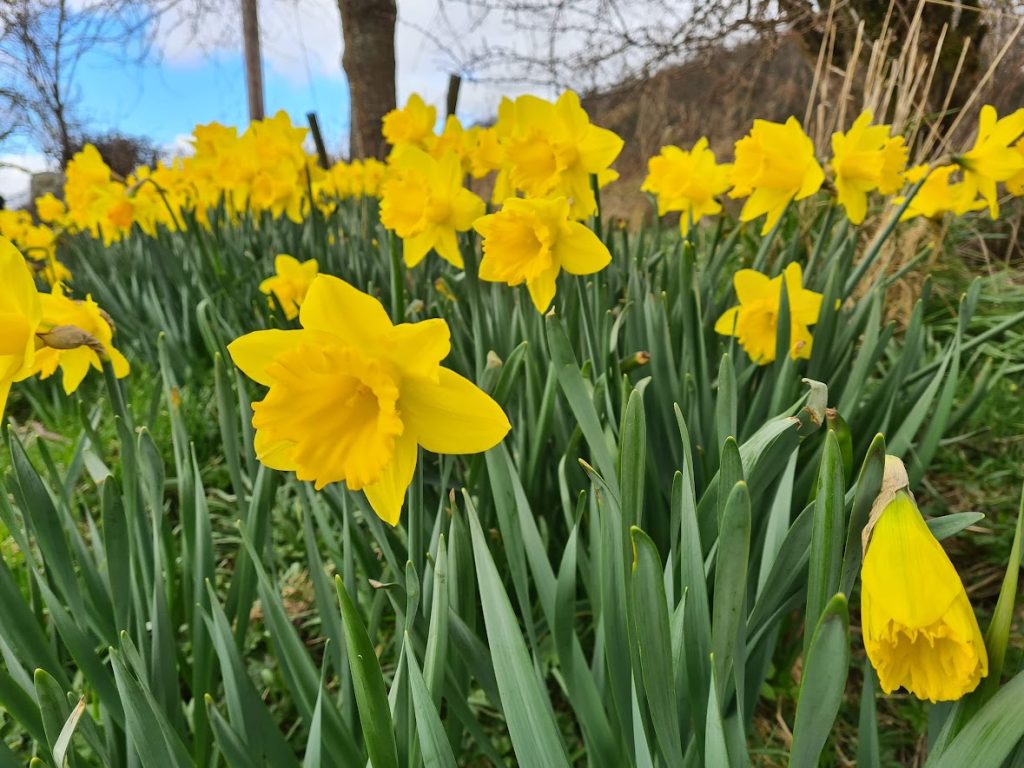
Daffodils always make me smile
Paper Plate Daffodil
You will need:
- Two Paper Plates
- Toilet Roll Tube
- Pencil
- Scissors
- Selection of yellow and orange paints and papers
- Glue
- String or ribbon
To make:
1. Take one of your paper plates and on the reverse side draw the outline of your daffodil shape. Ask your grown up to cut this shape out, then paint it a lovely bright yellow.

Painting the flower is a lot of fun
2. Take the other plate and draw a similar daffodil shape but slightly smaller and this time draw it on the correct side of the plate. You can paint this one the same colour, or add some coloured paper to give a different texture. We chose some lovely yellow crepe paper to glue onto the plate.
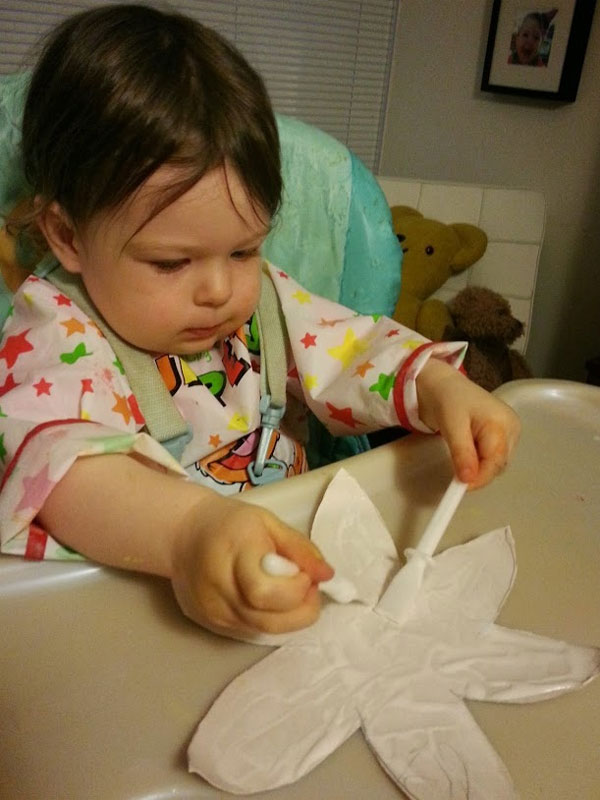
I liked adding the glue to the flower
3. Stick your two plates together. You will now have a lovely 3D effect because the plates have been used opposite ways:
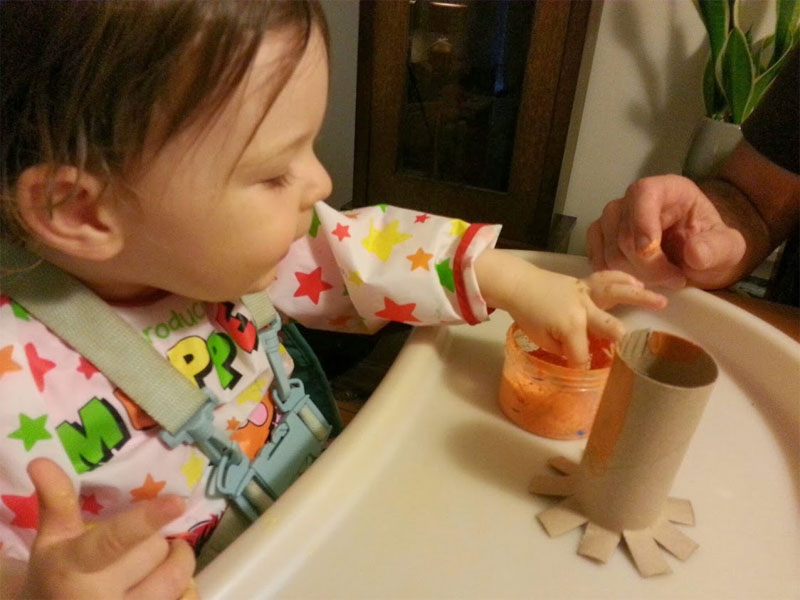
4. You now need to make the daffodil’s trumpet! Root-toot-toot! To do this get a toilet roll tube. Ask a grown up to cut approx 2cm deep slits, approx 1.5cm wide, at one end of the tube (you will have roughly 9 “tabs” when you have finished. On the other end cut lots of slits to make a fringe effect. Once this has done paint the inside and out orange:
5. Once the trumpet is dry gently fold back the fringing. Then glue the tabs at the opposite end and stick the trumpet in the middle of your petals and glue a loop onto the back to hang it up:
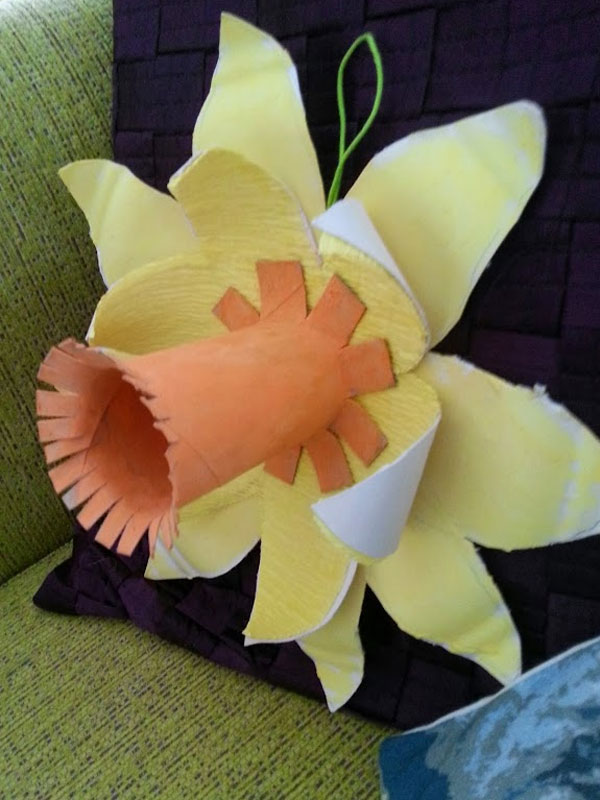
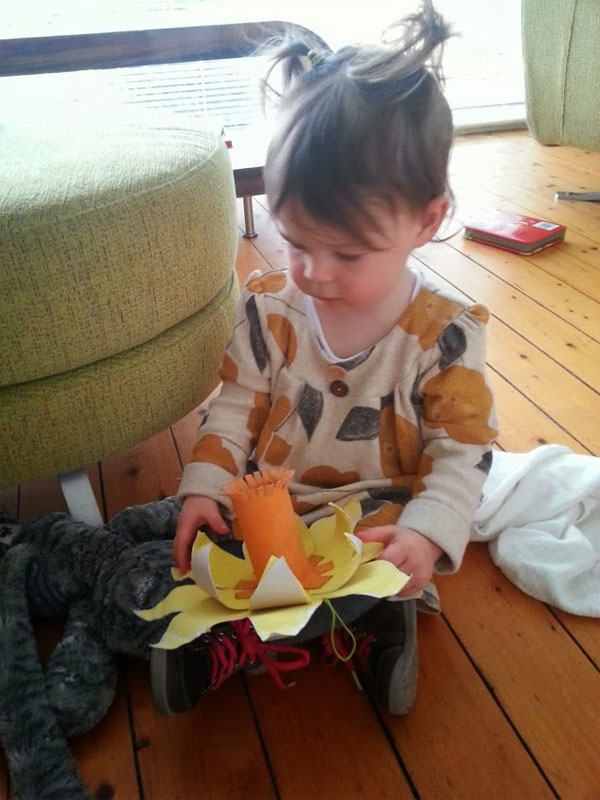
The finished daffodil to keep us cheery all winter ;
If you need any more advice on bulbs or would like to contact us about getting some planted in your own garden then please get in touch.
Hugs & kisses,
Lulu xx
10 Easy Peasy Veg To Grow This Spring
You have seen in recent weeks I have been busy sowing seeds and getting a good head start for Spring. However, I know some of you maybe don’t have the time, space or even the inclination to get involved with the whole propagating indoors malarkey. Don’t worry though, there are LOADS of easy PEASy vegetables you can grow straight into the garden. Here is the “Lulu’s Garden” Top Ten veg to grow this Spring. Oh, and a quick and easy craft project to make your own plant labels too!

These teeny tiny sets will grow into big onions!
1. Beetroot
Beetroot is really easy to grow and yummy to eat. And it makes your hands go funky colours 🙂 Just sow a row of seeds, cover them over and watch them grow. Remember to thin out those seedlings as they come up so you can make room for some lovely big beets.

Gather your sets, seed potatoes and seeds
in a funky bucket like this one from Twigz (2)
2. Radish
Radish grow super fast, even faster than me! You just need a small area and just follow the same rules as beetroot and you will have some funky radishes to add to your salads in just a few weeks.
3. Peas
That’s right, I told you it was easy-PEASy! Sow your seeds, leaving some space between each one. Peas will need some support so they scramble upwards so add some canes and string. You can buy special varieties which are bushier and perfect for growing in pots too if you have less space.
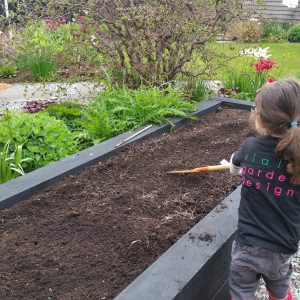
Make sure you weed and prepare your
veg beds before you sow your seeds
4. Lettuce
Like radish, lettuce grows really fast and you will have your own salad in just a few weeks. I like sowing a mixed salad with different types of leaves in it and you just cut some when you need it and it keeps on growing. How clever is that?!
5. Tomatoes
Regular reader will know all about what keen tomato growers we are. We have all sorts of wonderful tips in our Tasty Tomato blog. You can grow them in a greenhouse but if you don’t have space go for a bush or tumbler variety which grows brilliantly in pots or even hanging baskets!
6. Potatoes
We all love potatoes don’t we? I love digging them up at the end too. Loads of fun! Growing them is dead easy, just plant them deep in the soil and cover up with soil. As the leaves come through keep “earthing up” (covering over with soil, lot’s of fun!) ’til they are way high in the air! You can grow them in a bag on your patio too if you don’t have a veg patch.

Our potato crop
7. Spinach
Spinach is another easy one to grow, just like lettuce. You can add it to salads or any of your cooking. Apparently it makes you really strong like Daddy too!
8. Courgettes
Courgettes are great to grow and I like to grow them in among our flowers rather than in the veg patch. They have lovely big leaves and funky yellow flowers (which you can eat too) and then the lovely courgettes appear. Make sure you water around (not over) the plant so the courgettes don’t rot. And watch out how quick they grow too or you will have marrows before you know it!
9. Onions
Onions are the basis of most meals we cook so we need a LOT of them. From pastas and risottos to pies and curries they are an essential ingredient which are really easy to grow. Growing them from teeny onion sets is really simple and they need very little attention other than some watering and weeding as we go. We always grow both white and red onions as well as shallots.
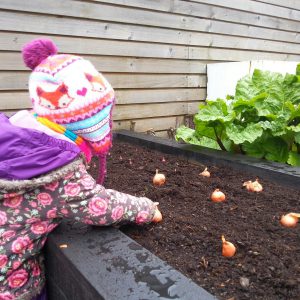
Make sure you space your onion sets out nicely like me
10. Spring Onions
You can’t have a spring veg list without Spring Onions can you?! Another one where you grow seeds in a row and thin out as seedlings come through. A lovely addition to salads and all sorts of cooking.
If you have never grown anything before why not choose just one thing off this list and give it a try? Whether it’s salad in a window box, tomatoes in a pot or potatoes in a bag there is always space to give it a bash. Let me know what you choose to grow this year and even better, send me some pics!
And don’t forget to label what you have sown so you remember what will be coming up. Forget expensive plant markers, why not make your own out of old lollipop sticks (1)…
- Lollipop sticks
- Paint
- Marker Pen
- Varnish
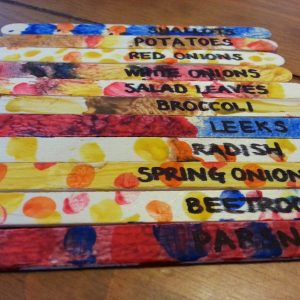
Make your own plant labels
To make:
1. Paint your lollipop sticks funky colours and leave to dry. You could draw pictures of what you are growing, add glitter or even make little people out of them too!
Easy to Grow Veg That’s Hard to Buy
So come on, join in and in just a few months you will be harvesting lots of lovely, home grown goodies.
1. Thank you to the wonderful, clever people at the RHS for the idea to make your own plant labels. For more cool projects like this read the fabulous “RHS Garden Projects” book.
2. Also, a BIG shout out to the cool people at Twigz who have designed a great range of garden tools for children, some of which you can see me using in this blog. I will tell you lots more about them in future blogs…
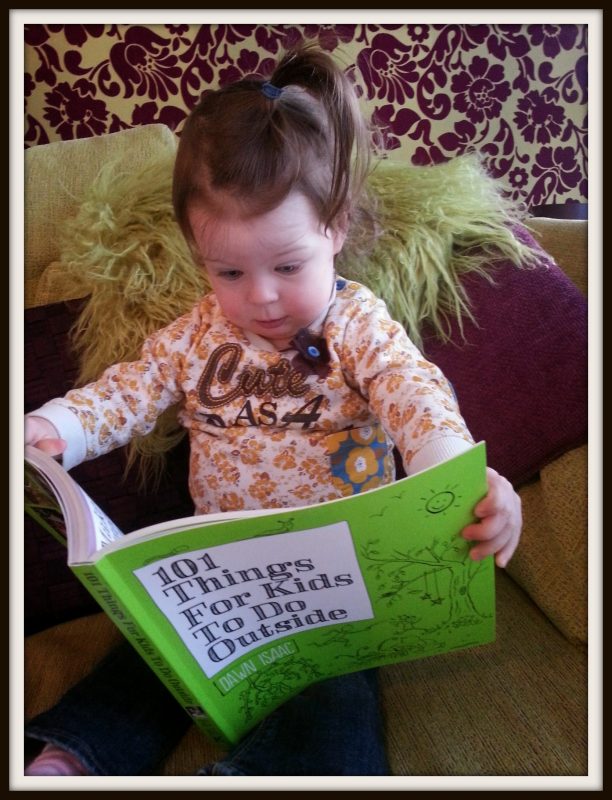
Book Review: 101 Things for Kids To Do Outside by Dawn Isaac
Next week a new book will be launched and I was lucky enough to be sent a sneaky preview copy so that I can tell you, my lovely readers, all about it. It’s written by a fellow blogger called Dawn Isaac (she is very clever and is also a garden designer like M&D) and is called “101 Things for Kids To Do Outside”. Could it be any more perfect for me and my super-duper blog? Here’s what it’s about, the sort of things you will find inside and what I think of it…

Clutching my special preview copy
Dawn Isaac has three kids of her own so she knows a thing or two (well 101 actually) about kids and how to have fun. She is firmly of the same mindset as me that it’s waaay more fun to head outside than to be stuck inside watching TV (although that can be fun too).
The book has been split into four seasons so frankly there is no excuse to not head outside, whatever the time of year. There are also projects for people who don’t have a garden. Just head outside to parks, woods, public gardens, wherever.
The book is PACKED full of lots (well 101 to be precise) of awesome ideas
Here are some of the things I just love about this book:
- There are lots of lovely big pictures for every single project so you can see how it is built and what the final project should look like.
- On every project it clearly lists all the materials you need so you can see quickly what you need to get or you can quickly choose a project where you already have everything you need. Loads of the projects just use the sort of things you will have lying about the house.
- The book is filled with lots of tips (like really awesome ones on how to make games messier, yay!)
- There are lots of ideas you can use as gifts throughout the year (home made gifts are so much nicer to give and receive.)
- There are lots of fun cartoons throughout the book.
- There is a great mix of quick and easy projects (that can be done in about an hour) as well as some which you can spend a bit more time on.
- It’s a great reference for things to do at parties or on play dates (your friends will think you are the coolest person ever having all these projects up your sleeve.)
- There’s a great mix of games, gardening and craft projects – exactly what my blog is all about.
There are lots of cool projects – do you want to hear some? But sshhh, don’t tell anyone else OK?
What’s in the book…
The lovely people at Kyle Books (hello Hannah!) have given me permission to tell you about some of these projects over the course of the year so watch out for these in future blogs. A few which have already caught my eye and I think are brilliant ideas are:
- Grow a potato tower (it uses old tyres and is a brilliant way of “earthing up”)
- Go on a bear hunt (hide and seek for all ages)
- Brew your own plant food (it’s like a witches brew and stinks, yay!)
- Make a twig plant pot (I think this would be an awesome Mother’s Day project, watch this space…)
- Make outdoor bunting (perfect for garden parties, if only we were having one soon Daddy that we could try this at…)
- Make a butterfly feeder (it involves painting so I am in!)
- Hold a snail race (I LOVE snails!)
- Make autumn crowns (as a princess I insist on this project!)
I hugely recommend “101 Things for Kids To Do Outside” . I think it would be a WONDERFUL gift to give friends for Easter (or drop hints to your grown up to buy it for you!) It will last a whole lot longer than a chocolate egg. This book is loads of fun for kids of all ages. The only thing you will need to watch out for is your grown up trying to steal it.
Lulu rating: 5 big shiny stars!
Hugs & kisses,
1. I would like to write a book when I am a big girl. Perhaps when I am three…
Sowing The Seeds Of Love
Hi everybody! It’s less than a month ’til the official start of Spring which is super-exciting! Already plants are pushing through the ground, buds are appearing on shrubs and slowly the garden is waking up from its winter sleep. Let’s have a big stretch everyone as it’s time to dust down your seed trays, rummage through your seed boxes and get sowing. If you’ve never sown seeds before, don’t worry, I will talk you through the process, making it super-easy. Plus you don’t have to have any fancy equipment as I have some neat alternatives to share with you. Come on, let’s do it…

Collecting nasturtium seeds for next year is really easy!
Step One – Organise your equipment
If you are a professional like me you will have lovely seed trays to grow your seeds in. But I think it’s cool to grow them in other things which are lying around the house. I will tell you more about them later. But first things first, make sure you give your trays, cells and covers (or whatever you are using) a good old clean. It gets rid of nasty bugs which could affect your seeds. It’s just the same as us washing our hands before we eat, right?
Step 2 – Fill your containers with compost
It’s important to use a good compost which is meant for sowing seeds to give them the best possible start. This sort of compost is lighter and holds water better which means the seeds can grow more easily. Read your packets in case your seeds have special instructions. We used Verve Sowing and Cutting Compost (it has to be the 12L bags) as it’s a Which Best Buy.
Fill your seed trays
Step 3 – Sow Your Seeds
Remember to read your packet and find out when and how your seeds are to be sown. Some like to sit on the top, some like a light covering. We have sown some of ours slightly early but we don’t have a heated propagator so that will be fine. Some of the seeds are teeny-tiny (like a Pontipine!) so you have to be really careful when you are handling them. I like the pumpkin and courgette seeds as they are big (like me!)
Step 4 – Label & Cover
Make sure you label your trays clearly so that you know exactly what is growing there. You could write the names or draw a picture of what it will look like. It’s important to label as whilst I love growing courgettes in the middle of our flower beds some people might not want their broccoli in a hanging basket 😉 Cover your trays to create a humid environment for the seeds to germinate well. Remember to keep the trays well watered and in a sunny spot.
Alternative Trays
If you don’t have seed trays there are lots of alternatives you can use such as plastic bottles, yogurt pots, tin cans, egg cartons, juice cartons, old boots, milk cartons or any old flower pots you have sitting around. To use a bottle, cut the plastic bottle in half long-ways (ask a grown-up to do this) to create a lid which you can easily flip up to water. Remember to put drainage holes in the bottom.
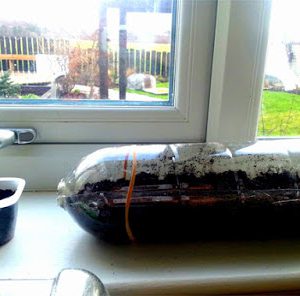
Use a juice bottle as a seed tray
So there you have it! And already, even in just a few days I can see my seeds starting to push through the soil. I have a selection of pretty flowers growing such as nasturtiums, poppies, sweet peas and cosmos as well as loads of different veg from courgettes and pumpkins to tomatoes (OK, technically a fruit) and broccoli. How exciting! Once your seedlings have developed their first true leaves and are large enough to be handled, carefully pot them into their own small pots. Be careful to handle them by the leaves or you may damage the stem.
Give on, give sowing some seeds a try. I promise you it’s waaaay more fun, more tasty, cheaper and better for the environment than relying on supermarket produce.
Hugs & kisses,
Lulu xx
Winter Jobs In The Garden
It looks like Spring hasn’t arrived quite yet but you know me, always desperate to get outside in the garden. There are always jobs to do, whatever time of year it is. I know ‘cos Mummy is always telling Daddy all about them 😉 So here is a list of winter jobs in the garden that can be done, both for grown ups (ie Daddy) or for littlies like me, in between rain showers…
Get wrapped up cosy and get outside. It’s fun!
Clearing the veg beds out is a perfect job for winter.
Jobs for Grown Ups
- Jet-wash patios, driveways and decking (just like me they get terribly mucky and need a good wash!)
- Seal your deck and stain timber fences, sheds, raised beds etc (this preserves them and keeps them looking good for many years to come.)
- Paint anything that looks a bit tired such as rendering to the back of the house, rendered troughs etc. Why not choose a cool colour? Mummy is painting our troughs pink this winter, which I think is awesome!
- Mulch the garden – whether you choose compost, farmyard manure (pooeeee!), your leaf mulch or some bark, they will add essential nutrients to your garden and make plants grow well this year. Don’t forget to top-dress any pots too.
- Clear out gutters. Be careful up those ladders though.
- Prune trees (though not plum and cherry trees which should wait until summer.)

Mummy is going to paint these troughs pink.
Awesome. Wonder if she will add some glitter too…
- Clean out your water butt (ha ha, I said butt!)
- Prepare any new ground and do some double digging (I am happy to sit that one out, that’s proper hard work!)
- Make any repairs which are required to paths, sheds etc.
- Plant bare root trees, hedges and shrubs.
- Cut back overgrown shrubs and hedging before nesting period begins
- Use what’s lying about to make some interesting features around the garden. We are going to make some cool containers out of some old van tyres that we have and a bird table out of some old pallets and some cedar shingle samples. Watch this space…
Jobs for Littlies
- Clean old pots and seed trays. You will need these for the next job…
- Help sow seeds in trays. I am helping sow tomatoes, pumpkins, nasturtiums, sweet peas and cosmos to name but a few.
- Get your potatoes chitting! This means placing them on a chitting tray (or some empty egg cartons) in a cool, light place so their “eyes” start to grow. Weird!

I’ve already got out potatoes chitting
away
- Help clean the garden tools and get the shed/greenhouse ship shape for Spring.
- Give the garden a good general tidy. I like doing jobs like “combing” the ornamental grasses which takes out dead bits. It’s like being a hairdresser!
- Feed the birds. Our feathered friends need even more TLC in winter so make sure their feeders are full and clean.
- Clear out the veg patch ready for the new crops which will be sown soon.
- Run around and have lots of fun!
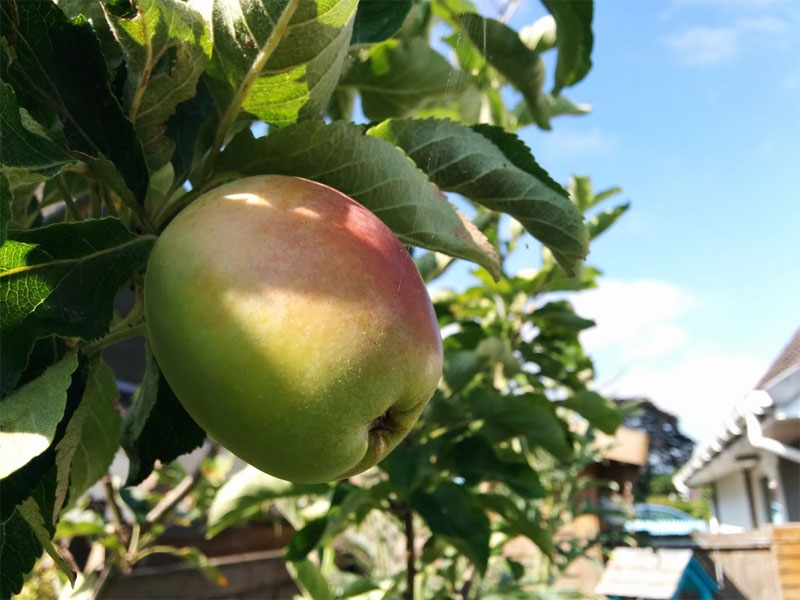
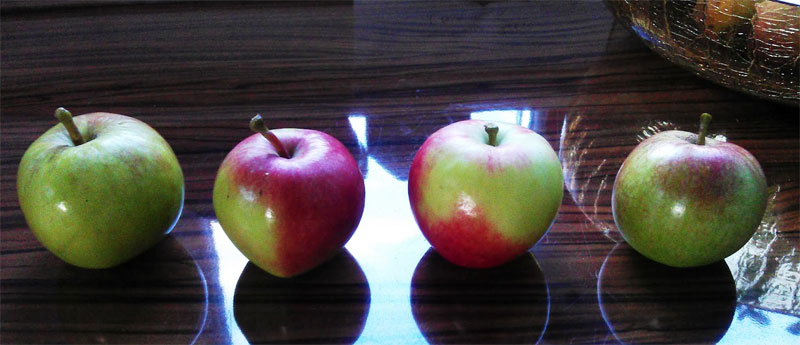
An Apple A Day…
Hi everyone! All my regular blog followers will know I love apples, especially the ones you can pick straight off the tree and eat there and then. There is nothing quite like picking your own apples and eating it right away. If you’re not as lucky as me to have apple trees in your garden, don’t worry, now is the perfect time to plant your very own apple tree and you could be picking your own this summer! Here is my list of the best apples to grow in your garden so you can easily have an apple a day…

Once your apple tree is established, remember to keep it pruned to make sure it stays healthy, looks pretty and provides the best possible crop. To read all about how to do that then click here.
If you have a lot of apples or your little one isn’t big enough to eat apples straight off the tree, turning them into a yummy puree which can also be frozen is a great idea.
Happy growing and remember to eat an apple a day!
Hugs & kisses,
Lulu xx
Lulu & The Sunflowers
As I might have mentioned last week, IT’S MY BIRTHDAY! I am now a big, grown up two year old. I don’t know where the last year went. Mind you, at least I can read back on my blogs to see what I have been up to 😉 Anyway, M&D threw me a wonderful party at the weekend and my lovely friends came along to celebrate. At the end I gave them all a party bag which contained something very special indeed…some sunflower seeds! So, I have officially launched the “Lulu & The Sunflowers Competition”. We all have to plant the sunflower seeds and send in photos of us standing beside our sunflowers. The person who grows the tallest sunflower wins a prize, huzzah!
Now, as I am taking part in this competition too (no show without punch!) I don’t want to give away too many tips to the opposition. But, I am taking my chances ‘cos I know that you, my lovely readers, all want to hear my top ten secrets for growing sunflowers…

Is there anything as cheery as sunflowers on a sunny day?
- You can plant your sunflower seed straight out where you plan to grow it. You need to wait until the last frost has passed though. Just dig over the soil and remove any weeds.
- If you don’t have anywhere in the garden to plant your seeds, don’t worry you can plant them in pots too, just make sure there is plenty space for the roots to grow.
- Sunflowers like lots of sun (isn’t that a coincidence Mummy?!) so choose your spot carefully.
- Dig a drill about 12mm deep
- Plant your seeds, leaving about 10cm between each one
- Cover your seeds with soil then water them gently. You will need to keep them well watered.
- As they grow, if they are too close together then thin out your sunflowers so they are 45cm apart, leaving the strongest seedlings.
- You may need to protect young seedlings from slugs and snails. If you cut the top off a plastic bottle you can use that to protect them.
- As your sunflower grows you will need to give it some support so add a cane and loosely tie the seedling to the cane.
- Sit back and watch your sunflower grow. And grow. And grow. And grow. And grow…
And remember, after your sunflowers have finished blooming, leave the flower heads so the birds can feast on the seeds.

I’m aiming high with my sunflowers!
I can’t wait to get started. I am soooooo going to win this competition! I’ll let you know later in the summer how everyone got on. Remember to send in pics of you with your sunflowers in the summer, I would love to see them.
Lulu
Birthday Carrot & Pineapple Muffins
It’s officially birthday season, hooray! I have been at birthday parties the last two weekends to celebrate with my lovely friends. What is even more exciting is there is another party this weekend and it’s mine! I will officially be a big girl – I, Lulu Ann Burt, will be TWO years old! As you know I (with a little help from M&D) like to cook with lovely things from the garden and that goes for birthday baking too. Here is one of the lovely treats in store for party-goers this weekend – carrot & pineapple muffins!
Carrots are a main ingredient of what I am going to tell you about today. Carrots store really well and you may be lucky enough to still have some left from your own garden. I love growing carrots – my top tips for growing carrots are:
- Grow them in a sandy soil. If they hit stones they will grow in very funny shapes!
- Sow your carrot seeds as thinly as possible. This means you will need to do less thinning and thus there will be less risk of them being affected by pests.
- Keep the carrots well watered (so you get lovely juicy carrots in the end!)
- Protect your carrots from carrot fly with a 60cm high polythene or cover with an insect-proof netting.

I love a carroty nibble! And look, my hair even looks like a pineapple!
Birthday Carrot & Pineapple Muffins
- 100g/4oz plain flour
- 100g/4oz plain wholemeal flour
- 1 tsp baking powder
- ¾tsp bicarbonate of soda
- 1½ tsp ground cinnamon
- ½ tsp salt
- 200ml/7fl oz vegetable oil
- 90g/3½oz caster sugar
- 2 eggs
- 120g/4½oz finely grated carrots
- 225g/8oz tinned crushed pineapple, semi-drained
- 100g/4oz raisins
Lulu
(1) If you want to make smaller ones you will need to reduce your baking time
Thanks to the very clever Annabel Karmel for coming up with this recipe. She rocks!
Make Your Own Hairy Caterpillar
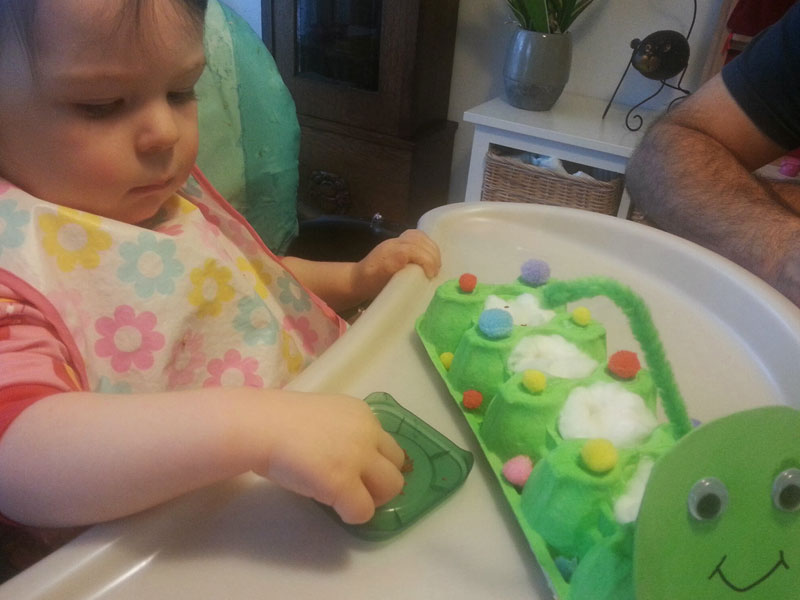
Hi everyone, you know me well enough by now to know what I love being outdoors in the garden as much as possible. Indeed, it’s my new year’s resolution. However there are times when even I am beaten by the weather and decide to stay indoors, all nice and cosy. But that doesn’t mean you can’t still garden. Today I am going to share the coolest indoor gardening project yet – make your own hairy caterpillar!
Most gardeners think I am weird as I love the “enemies” such as snails and caterpillars. In this blog I am going to show you how to make your own big hairy caterpillar which won’t munch your cabbages. Instead it will grow some lovely cress for you! Here’s how…
Make Your Own Hairy Caterpillar
You will need:
- A large egg box (10 or 12 eggs)
- Card
- Green paint
- Paint brush
- Scissors
- Glue
- Sellotape
- Marker pen
- Pipe cleaners
- Googly eyes
- Cotton wool
- Water
- Cress seeds
1. Take your egg box and remove the top half. Ask a grown up to cut off the pointy bits so your egg box can sit flat when you turn it upside down. Now you can paint it green.
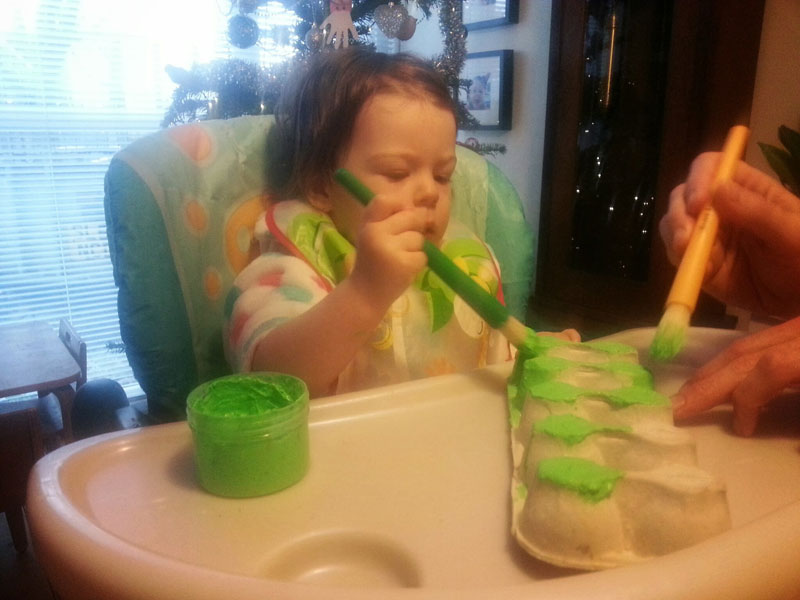
Paint your egg box green (or any colour you want!)
2. Cut out a round head from a piece of card and paint it green too. Leave the box and the head to dry then glue the head to the body.
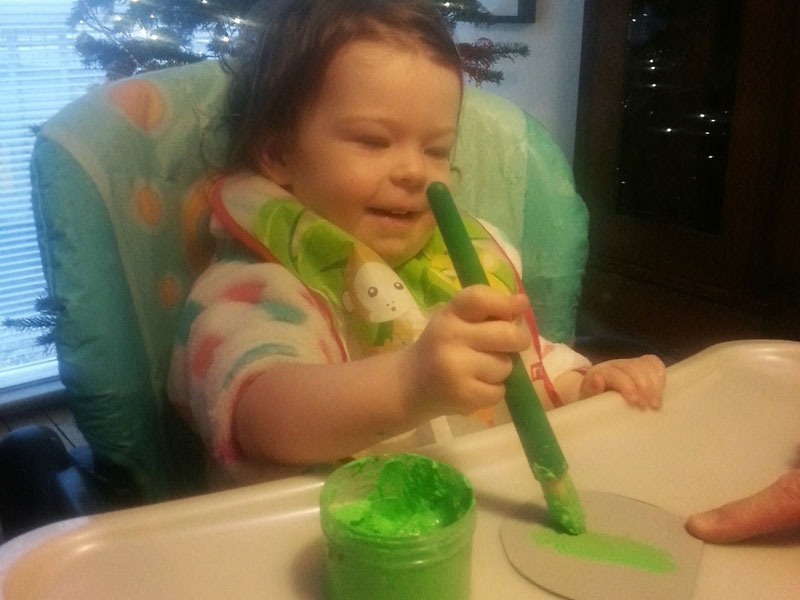
More painting – I love it!
3. Add colourful pom poms to your caterpillar.
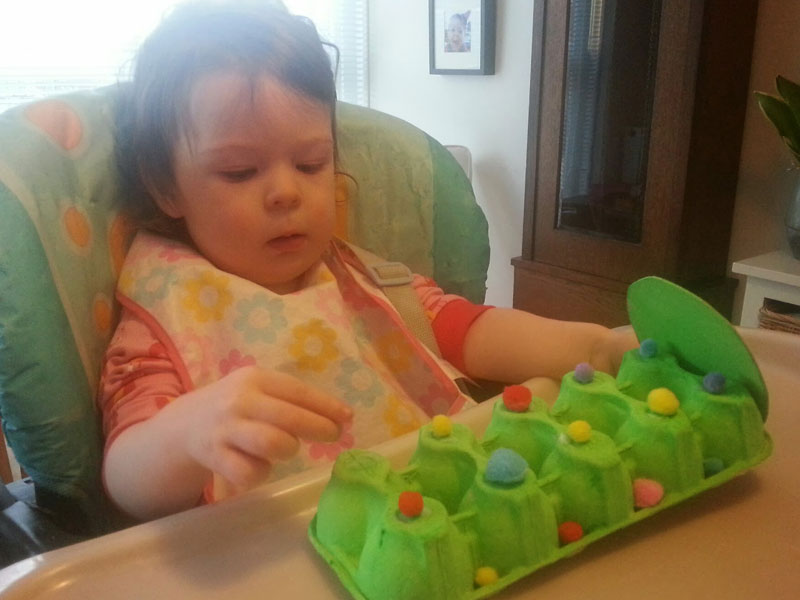
Add some colourful pom poms (or glitter or whatever you like!)
4. Cut the pipe cleaners and make feelers and sellotape them to the back of the head. Glue on googly eyes and draw on a smiley mouth.
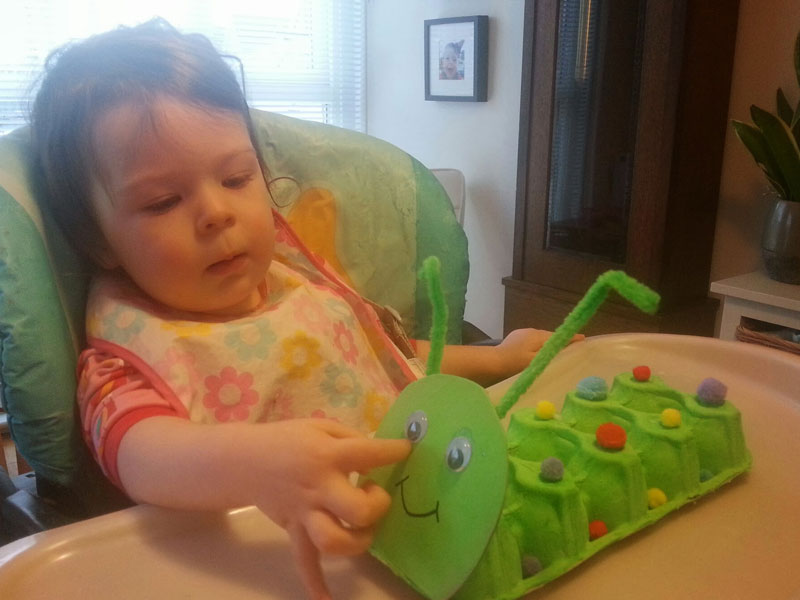
Googly eyes are a must!
5. Add cotton wool to each hole, pour in a little water to make it damp and then sprinkle your cress seeds. Pop it on a sunny windowsill and within a week you will see your cress sprouting and your caterpillar will become a hairy caterpillar! I love adding the cress to some boiled egg for eggy cressy sandwiches!
Carefully sprinkle on your cress seeds
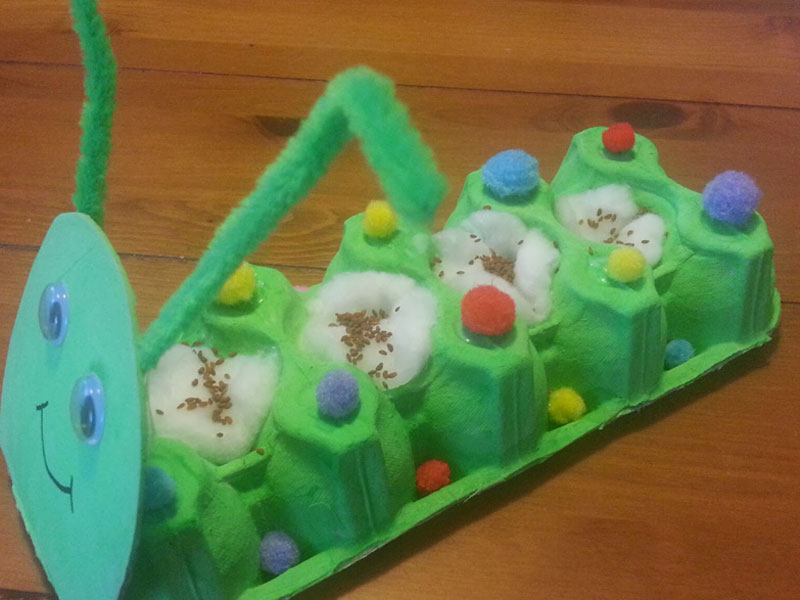
There you have it, your completed caterpillar!
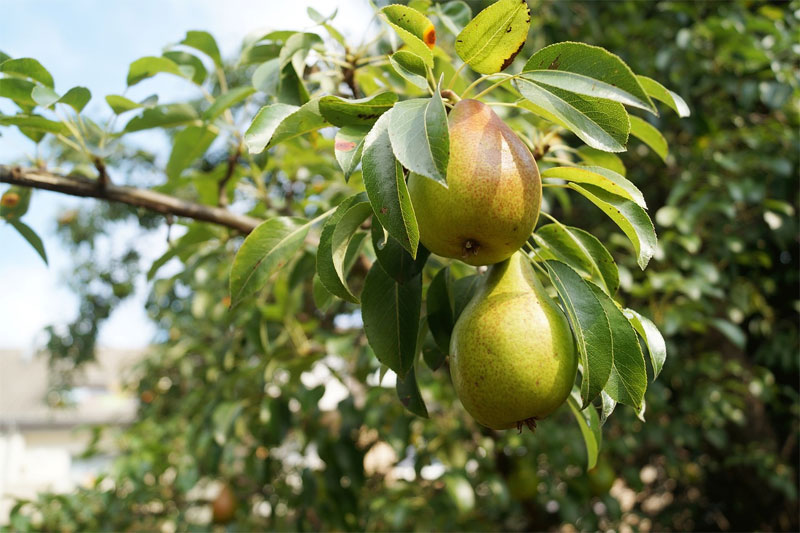
Up the apples and pears…
‘Tis the season to be jolly, fa la la la la la la la la! But did you know that it’s also the season to prune apple and pear trees? In my last blog of 2013 I tell you how, why, and what to do (I do love telling people what to do ;)) And if you don’t have an apple tree in your garden don’t worry, I have included a cool craft project telling you how to make your own!
Winter is the perfect time to prune apple and pear trees
The perfect time to prune your apple and pear trees is between November and March while your trees are dormant. Pruning is an important exercise so that you can:
- control the size of your tree
- control the shape of your tree
- remove diseased branches and reduce the risk of disease going forward
- remove older, less productive branches to allow space for newer branches (and thus more fruit, yum yum!)
A little bit of time spent on your apple and pear fruit trees just now will allow you to reap the benefits next year
- Remove any diseased or dead branches or those which cross or are rubbing
- Create an open shape removing any branches necessary
- Avoid over pruning or you will be left with just young, weak branches and a poor crop
- Shorten the previous year’s growth by around a third. Always cut back to an outward facing bud so the tree with continue to grow in a good shape
- Remove badly placed shoots
- Cut young sideshoots back to 5 or 6 buds
- Thin spurs on older trees to avoid congestion
And look at the wonderful reward you get for your effort
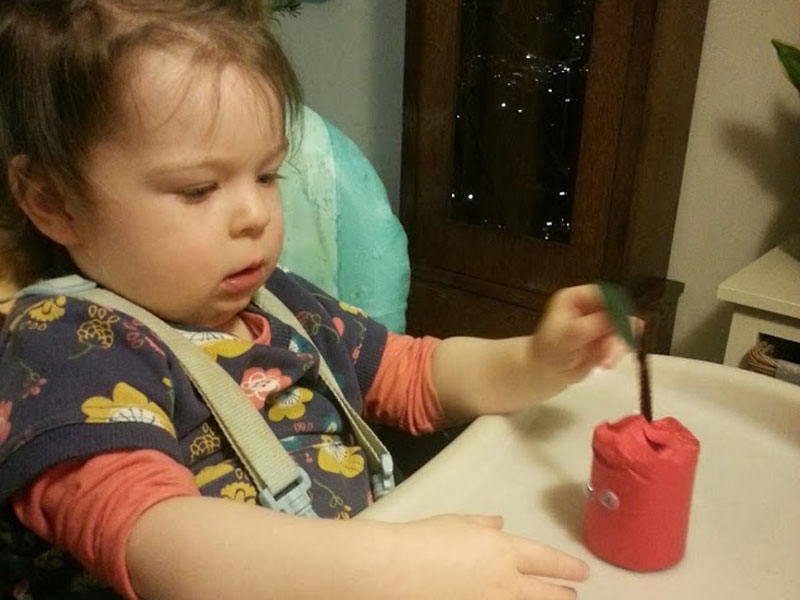
Create Your Very Own Apple Tree
- A toilet roll and a kitchen roll
- Glue
- Coloured paper
- Paper plate
- Pipe cleaner
- Googly eyes

Cover the kitchen roll in brown paper to make the trunk (it also makes a good trumpet!)
2. Take the paper plate and glue on pieces of green paper for the leaves and some red paper for the apples.
Gluing – my favourite!
3. Cut two slits into the edge of the plate so it can slot onto the toilet roll trunk. You may need to add some sellotape to the back to help secure it. Your tree is ready.
Make an apple to go with your tree
And there you have it, your very own apple tree and apple.

Your very own apple tree and apple!
I’m going to sign off now but I hope you all have a fun filled Christmas and a wonderful new year. I’ll be back in 2014 with lots of informative new blogs and great projects.
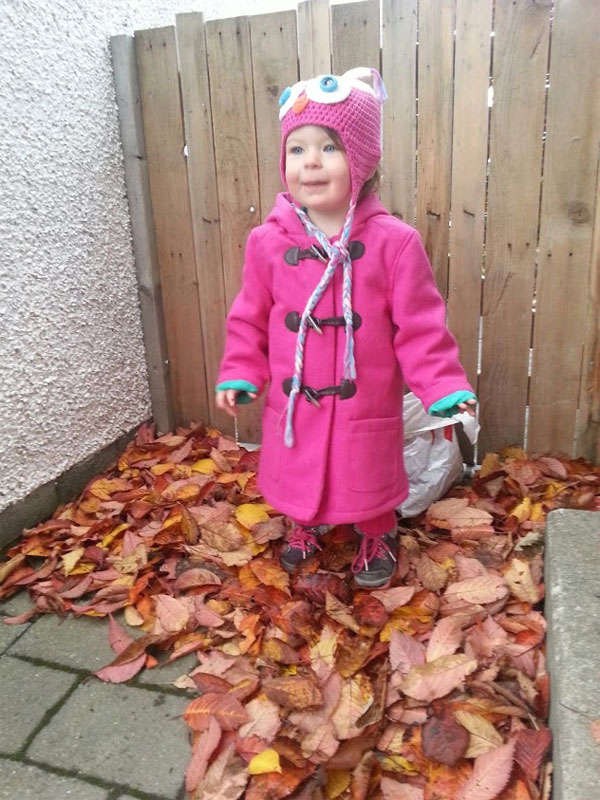
Leaf It To Me!
Autumn’s here hurrah! I love Autumn as I get to put on my cosy coat and winter boots and kick around all the leaves in the garden! There are lots of pretty colours in our garden just now whether it’s the leaves on the trees or plants such as Sedum coming into flower. Plus Autumn means exciting times like Hallowe’en and Bonfire Night. Now, as I mentioned, the leaves are falling thick and fast now so I thought I would share with you five things you can do with leaves in the garden as well as some pictures of common leaves for you to try and spot when you are out and about. I also have a very wonderful art project you can do with leaves…
Here are some leaves I found in the garde
Compost
Autumn leaves, especially those that have been chopped or shredded (use a shredder or your lawn mower to do this) are brilliant additions to the compost pile. Leaves are a great source of “brown,” high-carbon material for the compost. Like with any item you add to the compost heap, it’s important to create layers and not have too much of one thing. Alternate the “brown” leaves with some “green” waste such as grass clippings, weeds, veg/fruit waste etc. Soon this will all break down and you will have some wonderful compost to add to your garden in the Spring.

Oak Leaf
Leaf Mould
Leaf mould may sound yucky but it’s a useful addition to the garden. Create a corner where you can pile up all your collected leaves. Then leave them (excuse the pun) for a year and you will have a wonderful addition to your garden. This can be used to bulk out and improve your compost but won’t have enough nutrients to be a complete replacement to your compost.

Ash leaves
Mulch
Once shredded you can use the leaves to mulch your garden. Spread a layer (approx 5-7cm thick) of the shredded leaves around your borders, taking care to avoid contact with trunks/stems of plants. The mulch will help suppress weeds as well as keep moisture in the soil. As the leaves break down they will also add nutrients to the garden.
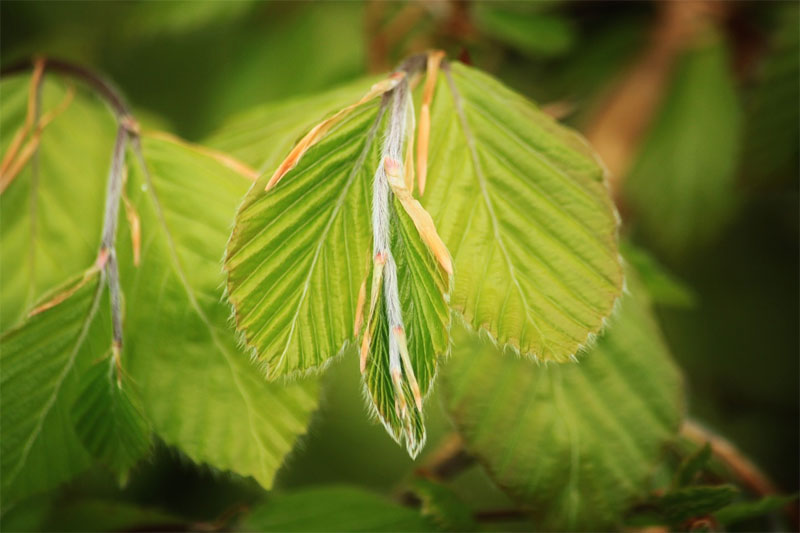
Beech leaves
Mow them
If you don’t want to bother with raking your leaves up, tackle the ones on the lawn by mowing them. Set the mower to its highest setting then run the mower over them, leaving the mown leaves on the lawn’s surface so that they breakdown and add nutrients to the lawn over winter. Do this every week until the leaves have all gone.
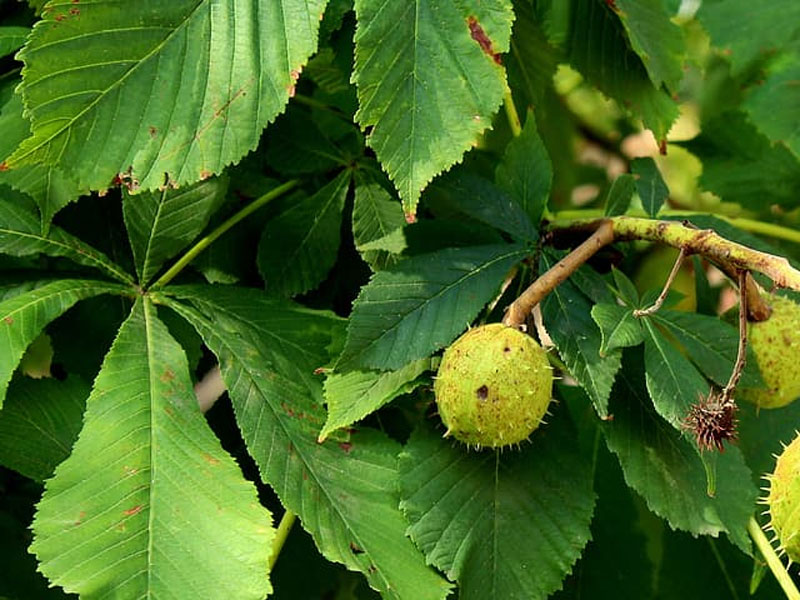
Horse chestnut leaves
Bag ‘Em Up
It’s useful to keep a couple of bags of the leaves you have collected and store them in your shed or garage over winter. Come Spring when you are adding more material to your compost heap you may struggle to find “brown” waste to alternate your layers. To save you having to rip up newspaper or shred cardboard you can just add a few handfuls of leaves at a time.
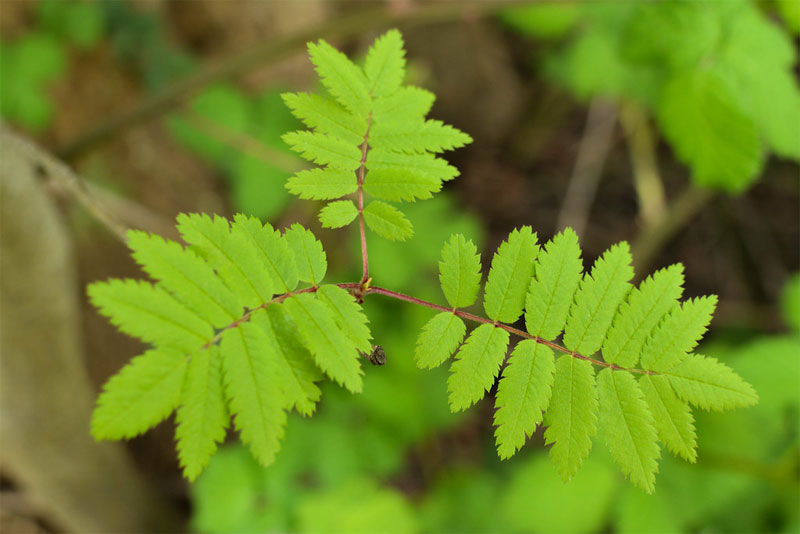
Rowan leaf
So there you go, even the common leaf can be super useful to the gardener and not just a nuisance to tidy. Another use I have for leaves is this wonderful art project:
Leaf Glitter Picture
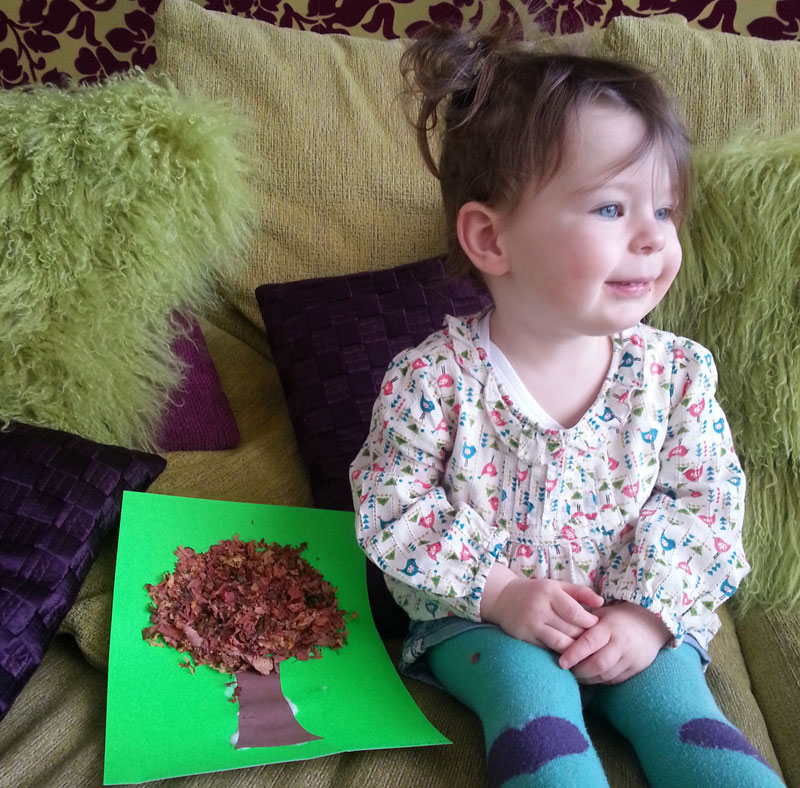
Make your own leaf glitter picture
You will need:
- Card
- Glue
- Leaves
1. Go on a hunt round the garden for some leaves. Look for lovely, dry, crispy leaves as they make the best glitter!
2. Now you get to scrunch the leaves into tiny pieces which is great fun! If the leaves aren’t dry enough this might not work and you will have to leave them in the basket overnight to dry more.
3. Using the glue draw a shape on the card. The shape can be whatever you want. I chose to draw a tree.
I’d love to see the pictures you make. Please email photographs of them in to me.
For other fun leaf projects check out these blog:
Thank you to Kiwicrate for the inspiration for this craft project
Peek-a-BOO!
Q:What’s a vampire’s favourite fruit?
A: A nec(k)tarine!
Hee hee! In case you haven’t noticed it’s Hallowe’en this week, a time for ghouls and ghosts and of course, my favourite, the pumpkin lantern! I love pumpkins as they are easy to grow, lovely to eat and fun to carve. Oh and they have a funny name too 😉 This week I am sharing with you my top tips for growing pumpkins and Mummy’s favourite pumpkin soup recipe.
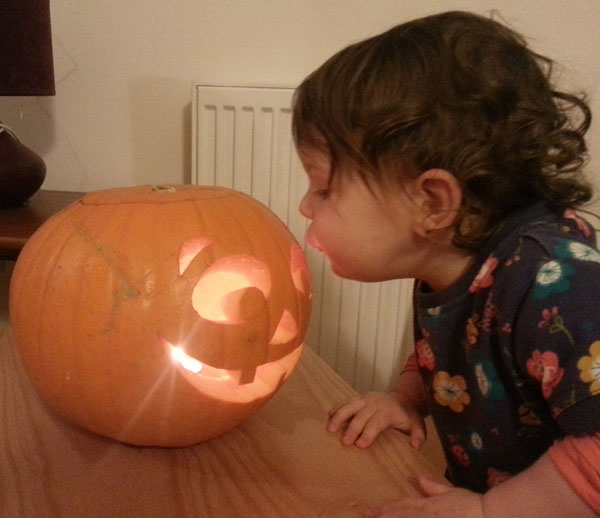
How did that light get in there?!
How to Grow Pumpkins
Pumpkins are easy to grow. Try growing them from next Spring and you could have some of your very own pumpkins to eat and carve by next Hallowe’en. Here’s how:
- You can easily grow pumpkins from seed. You can grow them in a pot indoors to start them off and plant them out once all the risk of frost has passed or just sow them where they are to grow. Sow between April and June.
- If you are growing in a pot start with a small (7.5cm) pot. Plant the seed on its side about 2.5cm deep in soil and cover. Once the roots come through the bottom pot onto a larger pot.
- When you are planting outside choose a sheltered spot and remove the weakest seedlings once they have germinated.
- Look after your seedlings by adding a mulch and a feed (tomato fertiliser is fine) and water regularly during the growing season.
- As your pumpkins grow, raise them by adding some wood or a brick underneath which will stop them from rotting.
- Remove any leaves which are shading the fruit – they need maximum light to ripen.
- If there is a risk of early frost protect your pumpkins using cardboard and straw.
- Keep the pumpkins on the plant as long as possible to make sure it is fully ripe. Once the stems starts cracking and the skin is really tough it is ready.
- Cut your pumpkin off with a long stalk. You can store it for 4-6 months.
If you are looking for a variety to grow which will make a good pumpkin for next Hallowe’en, try “Jack of all Lanterns”. It also stores and cooks well. And if you have plenty of pumpkins, a yummy recipe which is perfect for this time of year that you can ask your Mummy & Daddy to help you cook is…
Pumpkin Soup
Ingredients:
- 2 large onions
- 2 carrots
- 3 large butternut squash
- 2 large pumpkins
- 4 cloves garlic
- Olive oil
- Salt and pepper
- Beef stock
- Vegetable stock
- 1 tin of tomatoes
Pumpkin soup, perfect for this time of year – serve it in a pumpkin for the ultimate effect!
Method:
- 1. Cut the pumpkin and butternut squash into chunks. (We just want the flesh not the skin or seeds.)
- 2. Place on a baking tray and drizzle with oil , season with salt and pepper and some crushed garlic.
- 3. Roast in a hot oven (190C) for 30 mins.
- 4. Chop the onions and fry until soft. Chop and add the carrots and soften for a few minutes.
- 5. Add in a pint of vegetable stock and a pint of beef stock (you can make this with just vegetable stock if you prefer) and add the tin of tomatoes.
- 6. When the pumpkin and butternut is roasted add it to the pot and simmer for twenty minutes.
- 7. Put everything into a blender and blend and then pour back into the pot.
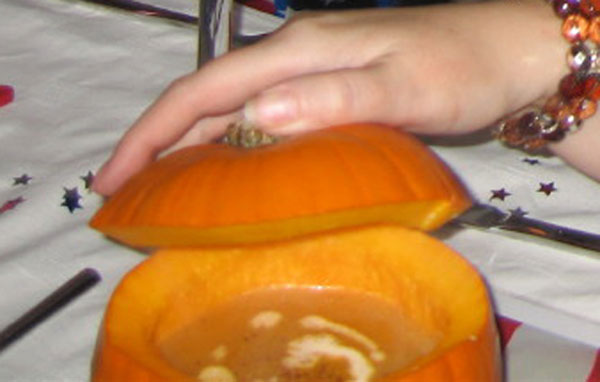
- If you want to be super fancy (!) you can serve your pumpkin soup in small pumpkins which have been hollowed out and made into bowls and add a swirl of cream on top 😉
For a wonderful Halloween themed craft project have a look at this blog:
Happy Hallowe’en everyone.
A (Light) Bulb Moment – Planting Spring Bulbs
Now is the perfect time of year to get outdoors, plant some bulbs and then sit back and wait for a Spring Spectacle! Here are my top tips for planting spring bulbs. I have also included a wonderful craft project, perfect for children who love gardening and art, so you can make your own daffodil to brighten up your home through winter while you are waiting on the real ones to spring to life.
Be Prepared
Now, I ain’t no Boy Scout (I will be joining Beavers when I’m bigger though!) but when it comes to bulbs I agree with their motto “Be Prepared”. Bulbs like well drained soil so if you have heavy soil add a bit of grit to the area when you are planting. A small handful at the bottom of your planting hole is always a good idea too. And make sure you have given your garden a good old weed and tidy before you plant your bulbs too in order to give them the best possible start.
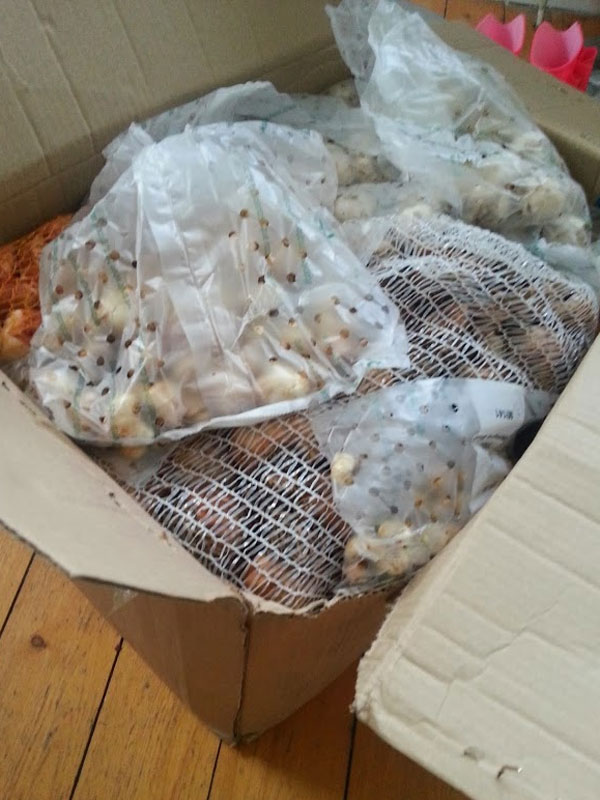
That’s a BIG box of bulbs to plant!
No Soggy Bottoms
Now, a bit like in “Great British Bake-Off”, we don’t want any soggy bottoms on our bulbs. Give the bulbs a squeeze before you buy them and make sure they are nice and firm. If you are digging out old bulbs from the shed, discard any that are soft, mouldy or shrivelled.
The Only Way Is Up
It might sound silly but plant your bulb the right way up. The top is the pointy end. The bottom is the round, hairy end (bit like my Daddy, tee hee). If you are not sure plant them on their side as they will turn themselves round the right way as they grow (aren’t plants clever?!) Some small bulbs such as fritillaria are often best planted on their side, especially in heavy soil, to stop water getting into the bulb and causing it to rot before it has become established.
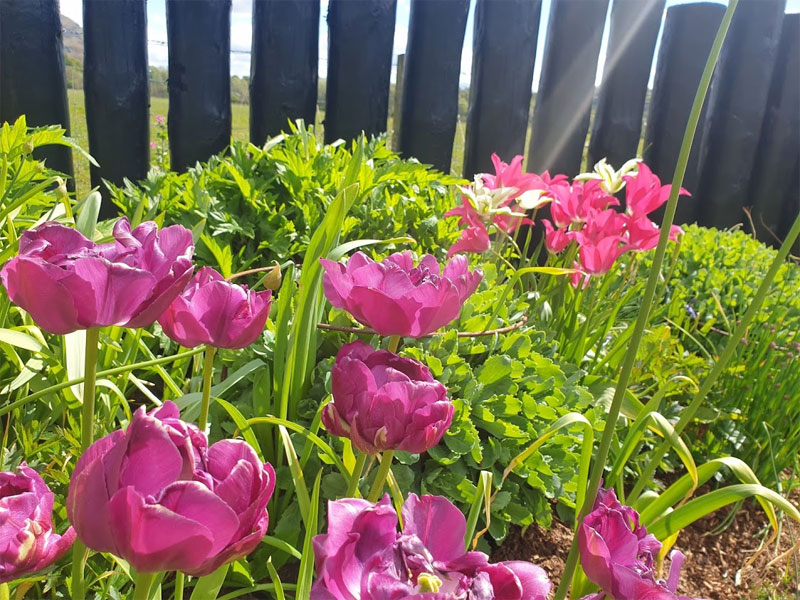
Beautiful tulips in the sunshine
Label ‘Em
It’s not just our nursery/school stuff that needs labels on them, plants need labels too. A little discreet wooden label won’t be offensive and will help you avoid putting a fork through your prized Allium bulbs 🙁
Dig Deep
As a general rule, plant bulbs two to three times their own depth and around two bulb widths apart. Replace the soil after planting, breaking down any large clumps and firm in gently, making sure there are no air spaces around the bulbs.
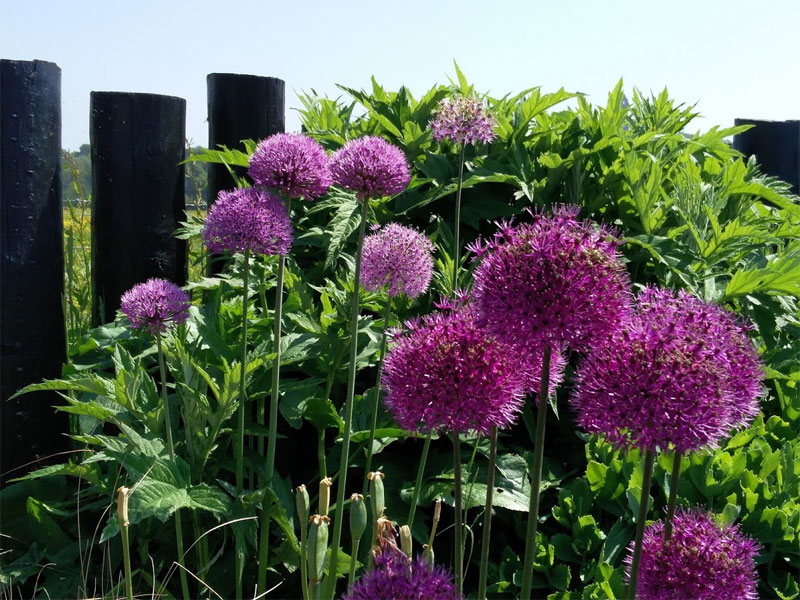
Allium Purple Sensation
Repeat After Me
After flowering, remove the seed head and wait for the foliage to yellow and die back, then lift the bulbs, clean off any soil and store in boxes or net bags in a cool, dry place. Remember to label them too! Next year you will have lovely, fresh bulbs and you can start again. You can leave the bulbs in the ground but they will eventually start to rot and die.
So there you go, a cheap and easy way to create a wonderful display in Spring and brighten up our days. But it will be a while before these beauties are ready so in the meantime M&D and I have put our heads together and come up with a wonderful craft project inspired by one of the most popular bulbs – the Narcissus. Or Daffodil to me and you!:
Make A Paper Plate Daffodil
You will need:
- Two Paper Plates
- Toilet Roll Tube
- Pencil
- Scissors
- Selection of yellow and orange paints and papers
- Glue
- String or ribbon
To make:
1. Take one of your paper plates and on the reverse side draw the outline of your daffodil shape. Ask your grown up to cut this shape out, then paint it a lovely bright yellow.
Painting the flower is a lot of fun
2. Take the other plate and draw a similar daffodil shape but slightly smaller and this time draw it on the correct side of the plate. You can paint this one the same colour, or add on some coloured paper to give a different texture. We chose some lovely yellow crepe paper to glue onto the plate.
I liked adding the glue to the flower
3. Stick your two plates together. You will now have a lovely 3D effect because the plates have been used opposite ways:

Stick the two flowers together
4. You now need to make the daffodil’s trumpet! To do this get a toilet roll tube. Ask a grown up to cut approx 2cm deep slits, approx 1.5cm wide, at one end of the tube (you will have roughly 9 “tabs” when you have finished. On the other end cut lots of slits to make a fringe effect. Once this has done paint the inside and out orange:
Yay, more painting!
5. Once the trumpet is dry glue the tabs and stick it in the middle of your petals and glue a loop onto the back to hang it up:
The finished daffodil to keep us cheery all winter ;
If you need any more advice on bulbs or would like to contact us about getting some planted in your own garden then please get in touch.
Lulu