Grass-ias
We all want the perfect lawn in our gardens. A lovely, flat, weed-free, green space for playing and lounging on. But it isn’t very easy to achieve with all the weeds flying about and our wet weather and heavy soils. But, to help you get closer to that dream, I have collated my top tips for a lovely lawn this summer..

Lulu loves lounging on a lovely lawn!
Scarify your lawn
You can add a moss killer to your lawn but you don’t need to. Just use your muscles and a good garden rake to get the moss out of your lawn. I used my Twigz rake which was perfect for the job (£8.99*)
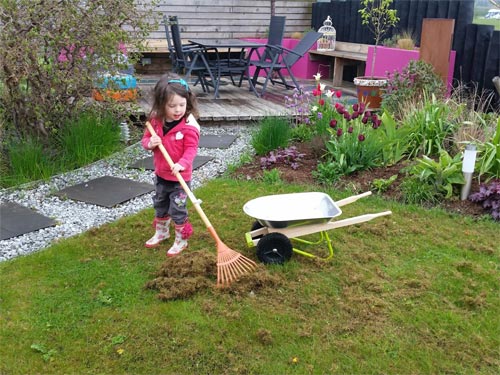
You need good muscles to rake up your moss
You can put the moss into your compost bin. My Twigz wheelbarrow is incredibly sturdy and perfect for this job (£49.99*)
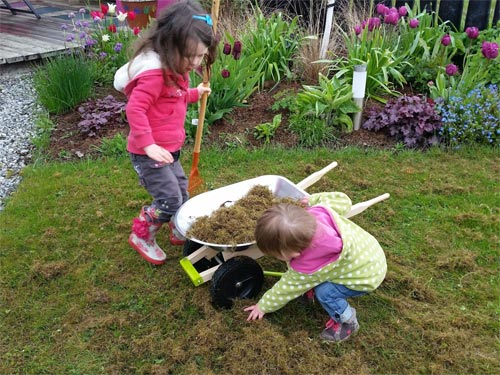
Collect your moss and put it on your compost bin
Weed Your Lawn
Lawn weeds can be a real pain. You can buy weedkiller to put on the lawn or you can use old fashioned muscle and dig up the offenders! Regular weeding is key so they don’t take over and leave no space for the grass to grow.
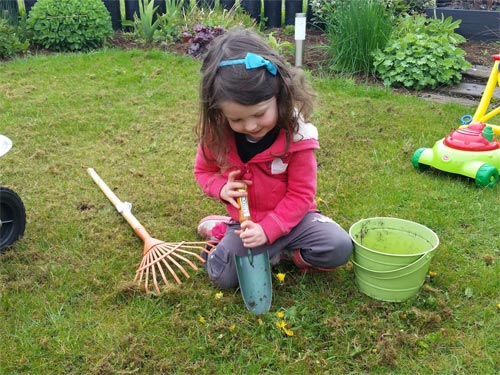
Tackle those weeds using a trowel and some muscles
Aerate your soil
If you have a heavy soil and a compacted lawn it makes it hard for the grass to grow well and thatch starts to build up. You can buy special tools to aerate your lawn or you can just use a garden fork to create the holes.
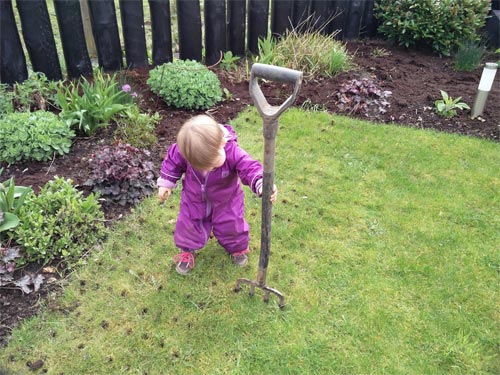
Tilda is an expert at aerating lawns!
Add a top dressing
You can add sand if you have clay soil or just a lawn improver to your lawn which will go into the holes you have made and improve the soil making the grass grow better. Use a brush like the Twigz garden broom (£8.99*) to spread the lawn improver around. You can add some grass seed to bare areas while you do this and some fertiliser too to give your grass a wee helping hand.
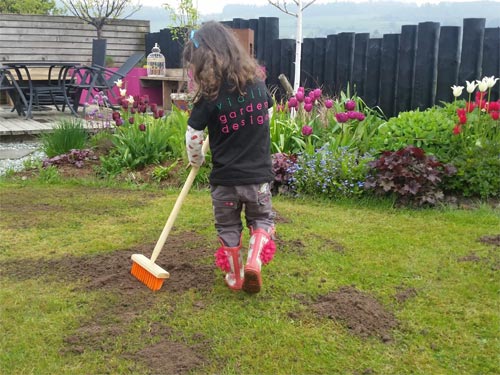
Brush your top dressing into the holes
Cut your grass
It’s always tempting to cut your grass very short to make it nice and neat but it’s not good for your lawn. Raise the level of your lawnmower and just give it a gentle trim or it will look bare and weeds will thrive instead of the grass. Little and often is the secret. How cute is this Flying Bee Lawnmower from Bigjigs? I love using it on my lawn and Tilda loves the bee which flies off into the air. (£32.99*)
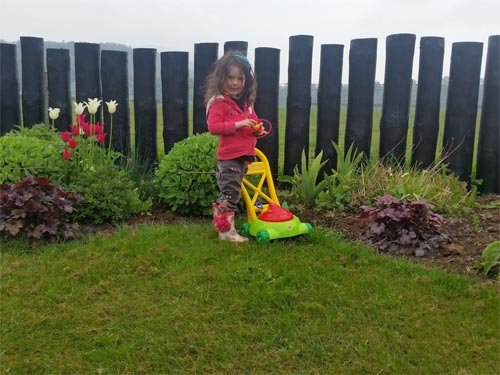
Don’t set your lawn mower too low when you cut your grass
Grass-ias! If all that seems like a bit too much hard work and you would rather just lie back and enjoy your garden while others did the work for you then contact us to arrange a quote for us to do your lawn treatments and grass cutting for you!
Lulu xx
*Prices correct at time of publication
Sow Sow Yummy!
The sun is shining (or at least it was when I wrote this, it is probably snowing now knowing Scotland!) so it’s the perfect time to sow vegetables in the garden. Don’t know what to do? Well, lucky I am here to show you how and to tell you about some wonderful tools I used along the way…
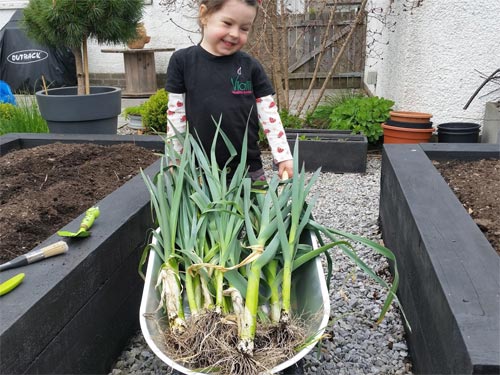
Soon you could have a barrow full of amazing leeks just like mine!
WEED YOUR VEG PATCH
It’s important that you have a weed free veg patch and that you have good quality soil. Add some new compost or fertiliser if you need to.
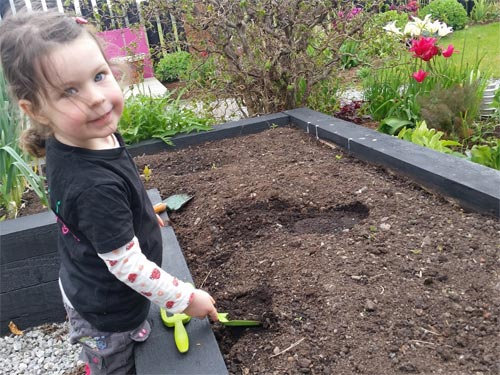
Weed your veg beds before you start sowing your seeds
PREPARE YOUR BED
Once you are weed free, take a few minutes to make sure your veg beds are nice and flat and even. It’s a bit like making your bed in the morning, you have to make it nice and neat and ready for bedtime! I used my Twigz rake, perfect for this job. Maybe not so much in your real bed though!
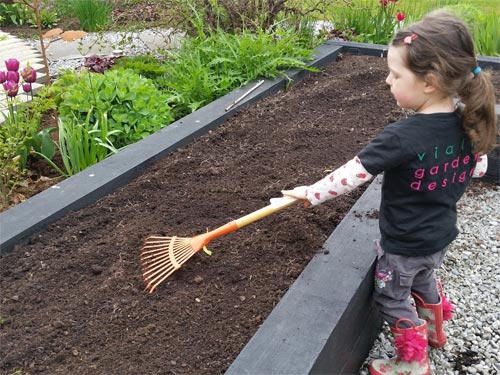
Rake out your veg beds and make the nice and even
MAKE A DRILL
Not the tool kind silly! It’s a little line in the soil where you can sow your seeds into. Use a cane to help make sure your row is nice and straight.
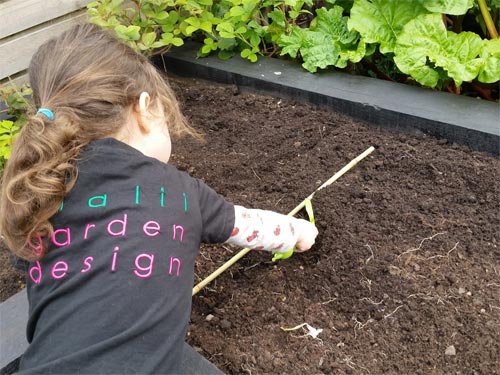
Make a row to sow your seeds into
SOW YOUR SEEDS
Carefully pour some seeds into your hand and sprinkle them into your row, making sure they are evenly sown. Gently cover them over and water them in. If you are sowing seed potatoes or onion sets, gently push them into the soil to the depth stated on the instructions.

This ickle onion will grow nice & big, just like me!
KNOW YOUR ONIONS
It’s important to remember what you have planted where – you don’t want to be making chips out of your shallots – so make sure you carefully write your vegetable names on a plant marker. I like to draw a picture too – here’s my rocket!!

Zoom zoom, a rocket!
Now you just need to sit back and watch your seedlings pop up. You will need to “thin them” which means removing some of the smaller seedlings and give some bigger ones space to grow. Keep your seedlings water and weed free and before you know it you will be picking fresh veg straight from your garden.
TOOLS
Good tools are the back bone of any good gardener and I have found some wonderful ones to use in my garden. To do all of the above I used:
- Twigz tool set (to weed and mark out my drills) £19.99*
- Twigz rake (to make sure the veg beds were nice and flat) £8.99*
- Twigz watering can (to water all my lovely wee seeds in with) £10.99*
- Twigz wheelbarrow (to barrow away last year’s leeks I dug up!) £49.99*
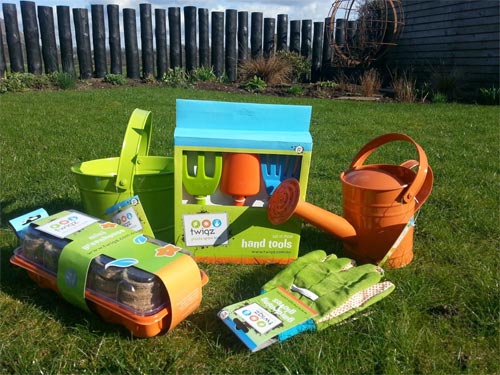
Twigz do a wonderful range of garden tools for children
I thoroughly recommend the Twigz range of gardening tools for kids. They are great quality and can even last the rigours of a professional like me! They are a little pricier than some alternatives but the quality and durability makes it worth it. They get a big green thumbs up from me!
For more seed sowing inspiration read my other blog Sowing The Seeds of Love.
Love Lulu xx
*Price correct at time of publication
If you’re not fast you’re last- in my garden anyway
If you’ve not yet started growing any seeds in your veg patch this year but would still love to have some yummy home grown goodies on your table this summer, don’t worry. It’s not too late as you can either buy small veg plants from garden centres or you can save money by growing heaps of different speedy veg from seed. Some are fab for little ‘uns like me to do all on my own but others were a bit more fiddly so I let Mummy feel all important and give me a hand.
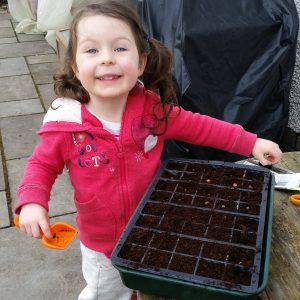
Lulu is growing some veg too!
Let’s see the contenders in the race to be the fastest thing growing in my garden this June…
On Your Marks
The competitors stepping up to the mark are:
Broccoli Rabe “60 day”
This isn’t technically a broccoli but is a cousin of the turnip and mustard family. So it has a slight bitter taste. It’s also known as turnip broccoli, rapini and rappone. All of the plant is harvested and the stem, leaves and flower buds are eaten. Don’t be fooled by the 60 days in the name as it can be ready well before then and it will bolt (and go yucky tasting) almost overnight so harvest as soon as you see the flower buds form. You can store it in the fridge for up to 10 days before using. These were little seeds so Mummy only gave me a small amount in my hand at a time for sowing.
Turnip- “Purple Top Milan”
Just 6-10 weeks to mature but you can eat some of the leaves in salads before roots have matured. This is a good plant for growing in-between slower crops. Harvest when golf ball size to eat raw or when tennis ball size to cook. Another fiddly little seed so Mummy had to help me get these sown.
Dwarf bean- “Bobis d’ Albenga”
These are all stripy and remind me of the beans in Jack and the Beanstalk. The plants will grow to 50cm tall so they won’t win the prize for biggest thing in garden as I’m already way taller than that! They need just 9-12 weeks to grow and if you harvest them whilst no bigger than a pencil you can cook them whole, making them super easy for weaning babies and toddlers to munch on. The pods grow to about 12 cm long and they are stringless. The beans were really easy for me to handle as they’re nice and chunky.
Pea – “Kelvedon Wonder”
My Mummy remembers helping her Mummy harvest fresh peas from the pods a little girl and this is the first year we’ve tried growing any in our garden, so I have a really important job to do making sure Mummy does everything right. This variety is really good for June sowing and is ready in 12-13 weeks. Each little branch on the plant produces 2 pods so the plants should produce a really big harvest of tasty peas. It is also resistant to pea diseases such as pea wilt and downy mildew. Plant will only grow to 45 cm tall so good for smaller gardens. Cool fact- you can eat the pea flowers, shoots or vine tendrils and they all taste like young peas. The pea seeds were also easy for me to handle and sow all on my own.
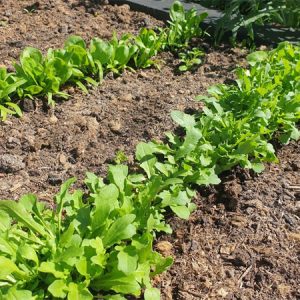
Some fast growing veg!
Mangetout – “Shiraz”
We grew these purple mangetout peas last year. They were easy to look after and they produced heaps of pods, the more we picked the more the plants produced. Pods are ready about 12 weeks after planting when the peas are just starting to form. This variety is resistant to powdery mildew and will tolerate downy mildew. Plants grow to 1 metre tall so need supporting with canes or a trellis but they will be happy in a large pot on your patio with a cane wigwam for support. We ate them raw in salads or lightly steamed. Again these were easy for me to hold and sow without help from Mummy.
Salad Leaves
Easy peasy to grow. You can get loads of different mixes with plants such as pac choi, mustards, cresses as well as lettuces. I like the spicy, peppery ones best. These only take about 3 weeks to grow so these must be the bookie’s favourite to win the growing race. simply harvest a few leaves from each plant so you can keep going back and harvest more and more. These are teeny tiny seeds so mummy just gave me a few seeds at a time that I sprinkled over our compost in a container for our patio.
Last contender of all:
Me
I am a growing 3.5 year old boy after all, especially when I eat all of this home grown veg!!
Get Set
Before sowing seeds you need to remove any weeds and rake your soil to make it all nice and a fine. Lulu has a set of funky kids garden hand tools from Twigz which I’ve tried unsuccessfully to take home with me on several occasions. Mummy recently got me my own set. She said it was so I could finally “work for my dinner” but I didn’t know that food could be your boss! I found them really easy to grip and work with and I love the funky colours- orange just happens to be my favourite colour at present. I even let Mummy have a go with them and she thought they were really study and would put up with me using them for planting and as pretend airplanes, not like the sand pit rakes and trowels I had been using in the garden.
Go!
If you’re quick (get it?) you’ve just got time to get some of these seeds planted. They (except rocket) should be in the ground by the end of June as they don’t like it too hot:
Rocket
I love space rockets AND I love peppery salad leaves so a whole container of this might yet start on our patio. Again it is really easy to grow and it only takes about 4 weeks for a crop to be ready. Pick only 1 or 2 leaves from each plant to get the longest harvest- called”cut and come again”. Pinch out any flower buds when they appear to lengthen the harvest time. To stop plants bolting and becoming yucky tasting make sure to keep the ground well watered and grow bolt- resistant varieties such as “Skyrocket” which is also really fast growing-wooosh!
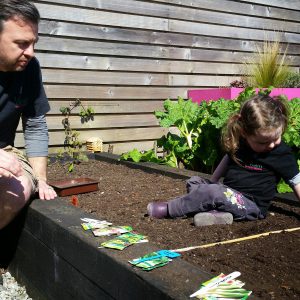
Prep your soil then sow your seeds in a nice neat row
Runner Beans
They like colder weather so are perfect for Scottish gardens. If you’re short on space you can even grow these in your flower borders as the plants produce lovely heart shaped leaves and pretty flowers. Also fab in containers but they do need supporting- make a wigwam out of canes. “Hestia” is a new dwarf runner bean variety. As it only grows to 45 cm tall it is great for containers and can easily be covered with a net to stop birds eating all your beans.
Outdoors Cucumbers
Radishes
These take only 3-4 weeks to crop but turn yucky and hard if you leave them in the ground too long so don’t get carried away and sow all your seeds at the same time. Sow some every week to spread out your harvest. Like runner beans, radishes don’t like too much heat so they are good for sowing in Spring and up until June. If you sow then in July you will need to be extra careful when watering- too much and their roots can split and rot, too little and they can bolt. Pick them when about 2cm in size and eat raw in your salads. You can keep them in your fridge for a week. “Sparkler” is a yummy type to try as it is reliable, easy and fast to grow.
So let’s get growing and see who/what can grow quickest in the next 2 months……
Quick update 2 months later and the first crop we got was broccoli rabe 60 days. It was yummy. Almost as yummy as the pigeons found our young pea plants! Peas now covered with a net and growing well.
Big hugs,
Euan xx
The “Lulu Burt Best of 2014 Awards”
Mummy says we’ve started a New Year called 2015 and it will be the year of the Sheep in the Chinese calendar. That’s fab as both me and my BFF Euan LOVE our toy sheep (both called Baa Baa!). I had an amazing time in 2014 so am hoping 2015 will be just as exciting. Here are my favourite things from 2014, otherwise known as the “Lulu Burt Best of 2014 Awards”.
Best product I used in garden
I had lots of fun last Spring using the fabby kids gardening tools from Twigz. I used them to grow veggies and flowers from seed and to look after the seedlings and plants as they got bigger. My favourite item was the watering can.
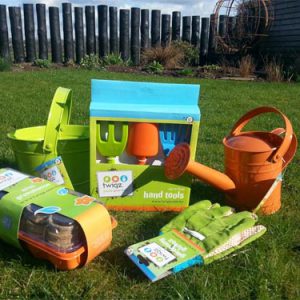
Twigz do a wonderful range of garden tools for children
Best things I grew (apart from taller that is!)
Regular readers will know that I LOVE a big bright sunflower. I even gave them away in the party bags from my birthday party last year. Two of my others faves to grow are tomatoes and potatoes. Imagine my excitement at discovering the TomTato plant. It grows tomatoes above the ground and potatoes below, all at the same time, cool huh? The big crop of sweet tomatoes was really, really yummy but the crop of potatoes didn’t stretch very far when it came to feeding a growing girl. It still wins the prize for yummy sweet tomatoes and being really different.
Best books I reviewed
The contest for best book was a close run thing, I gave 5 Lulu Burt gold stars to 2 fun books in 2014. So in this category we have a tie between fellow blogger Dawn Isaac’s “101 Things for Kids To Do Outside” and “Findus, Food and Fun” from Hawthorn Press.
Both books have really fab activities that little-uns like me can do.

The book is PACKED full of lots
(well 101 to be precise) of awesome ideas
Best places I visited
This is a no brainer. It just has to be Provost Park in Bridge of Allan. I (Lulu Ann Burt, aged 2.5 years) was the very important person who got to open the newly designed park. Mummy and Daddy were involved in this design project even before I was born (I still can’t believe anything of importance happened before I arrived!) It was great to see the site being turned into a low maintenance, Victorian themed place to meet friends or just relax.

Me officially opening MY park!
Best things I’ve made
Mummy tells me it is better to give a gift than to get one. This year I had lots of fun making presents for Mummy on Mothers Day and Daddy on Father’s day. Since I’m just little I didn’t have many pennies to spend so made do with up-cycling things from our kitchen.
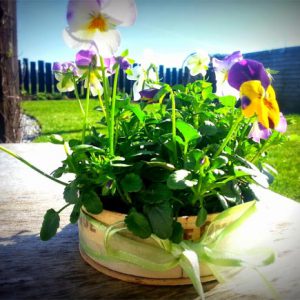
Pansies in cheese boxes makes a lovely gift

My decorated tin can planters
Best thing that happened in 2014
BIG DRUM ROLL PLEASE……. the overall, most wonderful and exciting thing that happened to me in 2014 was that I became a big sister. My very cute and cuddly (but not very good at playing hide and seek yet) little sister Tilda was born in November 2014. I can’t wait until she is old enough to do some gardening with me!

Tilda and I – double cuteness!
Wow, I did have a very busy year. What did you get up to in 2014? I’d love to hear all about your adventures. Let’s have even more in 2015!
Lulu xx
Nasturtiums: The Life Cycle
Nasturtiums. It’s a hard word to spell (and say!) but it’s a super easy plant to grow. From sowing to collecting the seeds I explain the life cycle of the nasturtium and share some interesting facts including the hilarious meaning behind the name!…
Nasturtium facts:
- Nasturtiums can be trailing, climbing or even dwarf varieties. I don’t think he was one of the Seven Dwarfs though…
- Nasturtiums are annual flowers which mean they complete their life cycle in one year. Don’t worry though they are easy to reproduce…
- The poorer the soil the more flowers your nasturtium plant will produce!
- Nasturtiums are great companion plants in the garden! They are known to deter aphids, whiteflies, cucumber beetles and other pests from roses, tomatoes, cucumbers, cabbage and other plants.
- You can eat nasturtiums – the flowers are a good source of Vitamin C and iron and look pretty on your plate. The leaves taste lovely and peppery and are great in salads.
- The name nasturtium means “nose twister” in Latin, referring to people’s reaction upon tasting the flowers!

Nasturtiums are easy to grow and taste and look great
How to grow nasturtiums:
To grow nasturtiums is super easy. You can plant the seeds straight into the ground, or you can make an earlier start and sow them indoors. Once your seedlings are bigger and all risk of frost has passed, plant your little nasturtium plants outdoors. I always plant some with my bush tomatoes which I grow in pots. They are great for keeping pests away and look sooooo pretty too.
How to collect nasturtium seeds:
After the flowers die away you will be left with a little green seed. Pick these and pop them into an envelope or paper bag and store in a cool, dark place over winter. Next Spring you will have free seeds to grow your nasturtiums again.

Collecting nasturtium seeds for next year is really easy!
You could also leave the seeds to fall into the surrounding ground and you will see them start growing there again the following year. How easy is that? Easy to grow, great for companion planting, you can eat them AND they look pretty. Why would you NOT want to grow them?
Lulu xx
Perfect Potatoes with Twigz
Our lovely friends at Twigz have supplied us with some awesome gardening equipment which I have used ALL year. One of my favourite things to grow is potatoes. Here I tell you a little about what I have grown, how my Twigz tools have helped and also a crafty project if you have a left over potato…
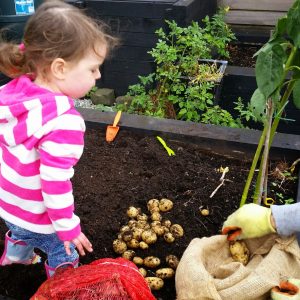
Me getting stuck into the tattie harvesting with some help from Twigz
Way back in March, I told you about 10 Easy Peasy Veg to Grow this year. Did you manage to grow any? One of the things I grew was potatoes, Maris Peer potatoes to be precise. They are really easy peasy to grow. You need to:
- Collect your seed potatoes in your handy Twigz bucket
- Clear/weed the area you want to plant the potatoes in using your Twigz hand tools

Twigz do a wonderful range of garden tools for children
- Dig holes using your Twigz trowel to plant your seed potatoes in.
- As the potatoes grow and you see the green leaves sprouting, cover them up (it’s called “earthing up”) until they get so high you can’t cover them any more.
- Keep your potatoes well watered while they are growing using your Twigz watering can.
- Keep the area around the potatoes well weeded
- Once the foliage has died back you can dig the potatoes up (time to get that trowel and bucket at the ready again!)
- Eat (yummy. Twigz need to make a knife and fork set for this part!)
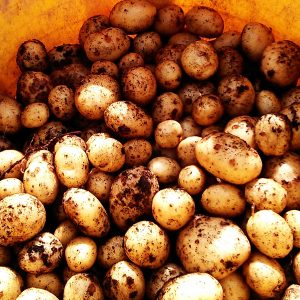
Our trug full of lovely perfect potatoes
So there you have it, easy peasy potatoes in one year. They store really well through winter too, just keep them in a hessian bag in a cool, dark spot. (The hessian bag is perfect for the sack race come Spring time too!)
Potato Stamping

Potato stamping fun
- A potato
- Paint
- Sharp knife (and a grown up to help)
- Paper
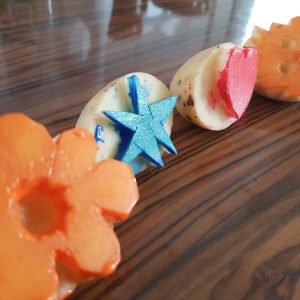
We cut some cool shapes
Cor-gette!
I love my seasonal veg. It tastes so yummy when it’s picked from the garden and is on your plate a matter of minutes later. This week my blog is all about courgettes. From how to grow them to a super yummy courgette cake recipe it’s ripe for the reading!

Cor-gette!
Funny Courgette Facts
- The courgette is called zucchini in America
- It is part of the gourd family along with pumpkins and squash
- If you let a courgette grow bigger it will become a marrow!
- You can also eat the flower of the courgette
- The biggest courgette ever recorded was over 1.76m long! Wowser!
Growing Courgettes
Waaaaay back in Spring I told you all about how to grow seeds. One of the ways that we spoke about was using the Twigz mini greenhouse. I used mine to plant a range of lovely veg and flowers and one of those was courgettes.
Over the months the seedlings have been nurtured from mini greenhouse to bigger greenhouse to bigger pots. Make sure you water them LOTS along the way. I have loved using my colourful Twigz tools to help me dig holes, rake soil, water the plants and carry compost to help make my courgettes grow well. My courgette plant now sits happily on the edge of one of our raised veg beds and it has been giving us some lovely courgettes.
There are all sorts of lovely things you can do with courgettes such as adding them to pasta sauces, soups, tarts, making frittata or even pickling them! But one of my favourite things to do with courgettes is to make cakes with them, yum! Here’s my courgette muffin recipe (1) – it tastes so good you won’t believe it has lots of fruit and veggies in it!
Courgette Muffins
You will need:
- 50g courgettes
- 1 apple, peeled and cored
- 1 orange, halved
- 1 egg
- 75g butter, melted
- 300g self-raising flour
- ½ tsp baking powder
- ½ tsp cinnamon
- 100g golden caster sugar
- handful of sultanas
- 1 tub soft cheese mixed with 3 tbsp icing sugar, to make icing
To make:
1. Brush the muffin tin with oil or add some muffin cases. Ask your grown-up to switch the oven to 190C/ 170C fan/gas 5.
2. Grate the courgettes and put them in a large bowl. Grate the apple and add to the bowl. Squeeze the orange and add the juice to the bowl.
3. Break the egg into a bowl. Stir the butter and egg into the courgette and apple mix.
4. Sieve the flour, baking powder and cinnamon into the bowl. Add the sugar and sultanas.
Mix with a spoon until everything is combined, but don’t worry if it is lumpy.
5. Spoon the mixture into the tin. Ask your grown up to put it in the oven and cook for 20-25 mins.
6. Cool in the tin, then spread some icing on each.

Yummy courgette muffins
If you haven’t already grown them this year make sure they are on your list for next year. Super easy, versatile and tasty. Cor-gette!
1. Thanks to the clever people at BBC Good Food for the recipe for the Courgette Muffins
Product Review: Twigz
As you all know I have very green fingers (and not just when I have been painting!) I love trying out the latest plants, products and books on the market and telling you what’s worth buying. Recently I have been trying out a range of garden tools aimed at cool kids like me. Here’s what I think of them…

Twigz do a wonderful range of garden tools for children
I was sent a colourful range of products as you can see from the pic I took above in my own sunny garden. There are certain requirement for children’s gardening tools – here’s what I look for:
- Good quality. The tools need to be properly robust if they are going to survive the hard work us mini gardeners put them through.
- Good fit. Extra thought needs to be given to make sure the products fit children, are the right dimensions, feel comfortable etc.
- Look good. We may be gardeners but that doesn’t mean we look any less cool when we are out in the veg patch!
Metal Bucket
Watering Can
Hand Tools
Mini Greenhouse
Gardening Gloves
