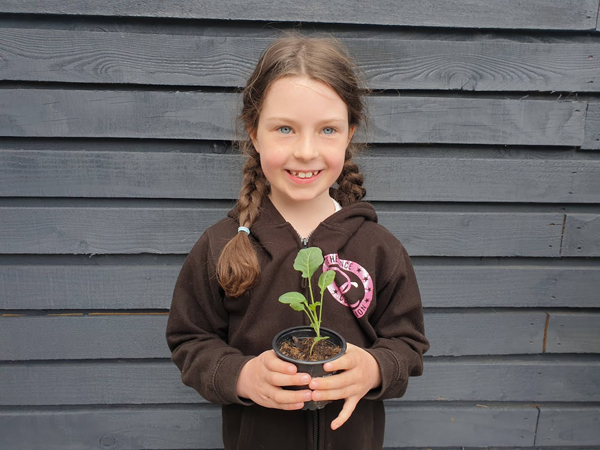
Beautiful Broccoli
Back at the beginning of Lockdown, like many of you, we started down the road of sowing seeds. Now, a few months on, we are seeing the fruits (and veg!) of our labour. As well as our usual fare, Lulu decided to give broccoli a bash this year. Here’s Lulu’s guide to how to grow broccoli…

Sow your broccoli seeds
First up, get something to sow your seeds into. We used a seed tray with cover to help the seeds grow quicker but you can choose anything you have (butter tub, drinks bottle, yoghurt pot etc) as long as it has drainage holes.
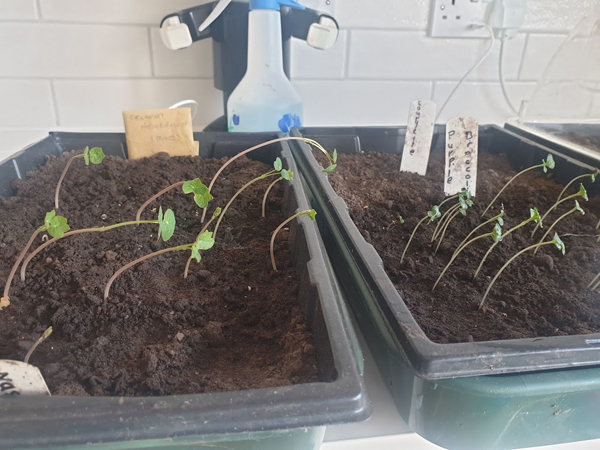
Help your seedlings grow
Keep your seedlings in a bright area, not in direct sunlight. Keep the soil moist but not too wet or your seeds will rot. If the seedlings start to lean towards the light keep turning the tray to make them stand upright (or find a brighter spot where they will grow upright).
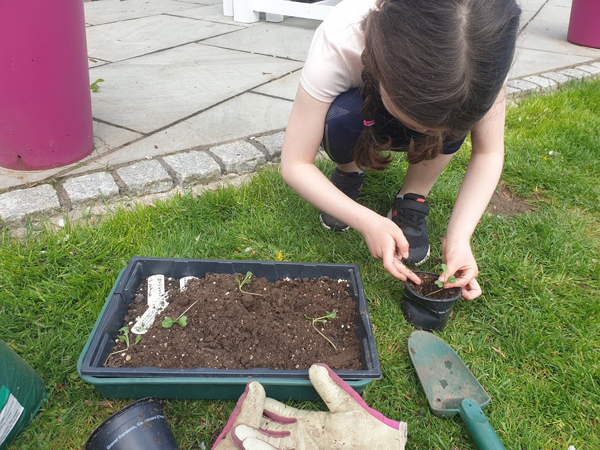
Pot on your seedlings
Once your seedlings have grown a bit bigger they will need to be potted on to their own pots. Be really careful with those fragile roots and stems. Continue to give them water and light so they can go stronger.
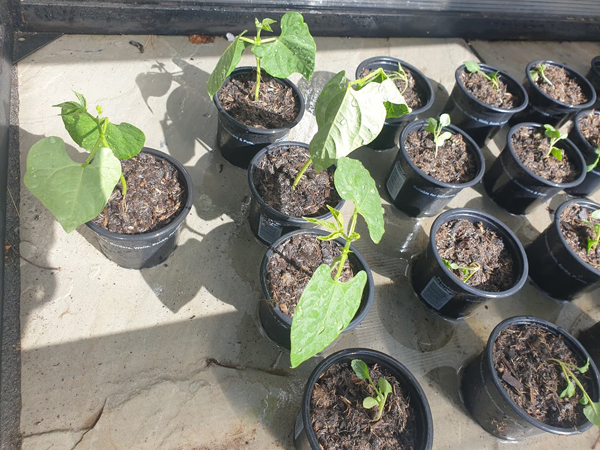
Harden off your seedlings
As your seedlings grow in their own pots they will be ready to be “hardened off”. This is getting them used to being outdoors after having been cosy indoors for so long. Take them outside during the day and take them inside at night. If you have one, you will then be able to keep them in a cold frame outdoors, closing it at night to keep them safe from any frosts.
Get ready to plant out
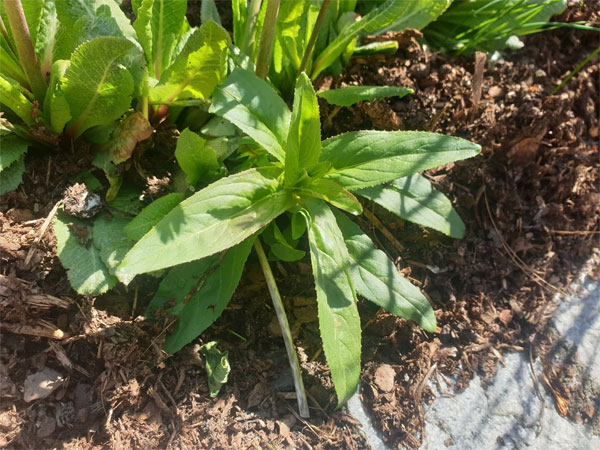
Before you plant your precious broccoli seedlings outside you need to make sure that you have a healthy plant with a good set of leaves and strong roots; make sure it has been suitably hardened off; make sure all risk of frost has passed; that you have a suitable place to plant it.
Make your marker
Knowing what’s where in your garden is always important. You can of course just use an old lolly stick or a plant marker. With lots of time on our hands during lockdown we made beautiful pebble markers. If you want to know how to make your own click here.

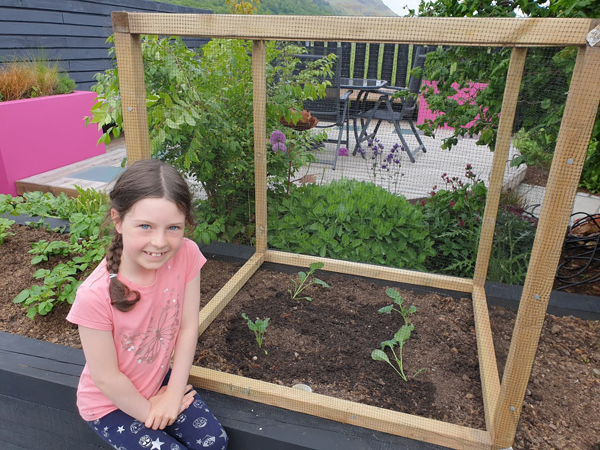
Plant out your seedlings
It’s time to be brave! If you have a strong plant that is used to being outside and the risk of frost has passed (normally May in Scotland) you can make the leap to planting your brocolli in your veg patch. Brassicas really need to be covered though to protect them from pigeons and the cabbage white butterfly (its caterpillars will decimate your crop!) We made a frame which was covered in netting but you could simply net over the top of them to keep them protected.
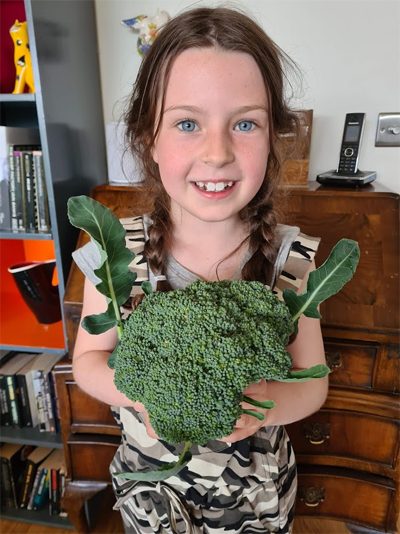
Harvest your crop
Keep an eye on your crop as they grow. We didn’t feed ours as we had plenty of nutrients in our soil but you may need to add a feed. Keep them well watered (Mother Nature did a good job of watering ours!) You will see the florets growing up from the centre of the plant. When they get to a good size cut off a floret and enjoy!
Enjoy growing and eating your own broccoli – good luck!
Vialii
Gardening During Lockdown – Week 4
Can you believe that’s been 4 weeks of lockdown? A whole month? It’s a long time in gardening and with all the sunny weather things are growing at a pace and we are being tempted into our gardens all the more. What have you been tackling? Here’s what what has been happening at Vialii Towers in Gardening During Lockdown – Week 4…
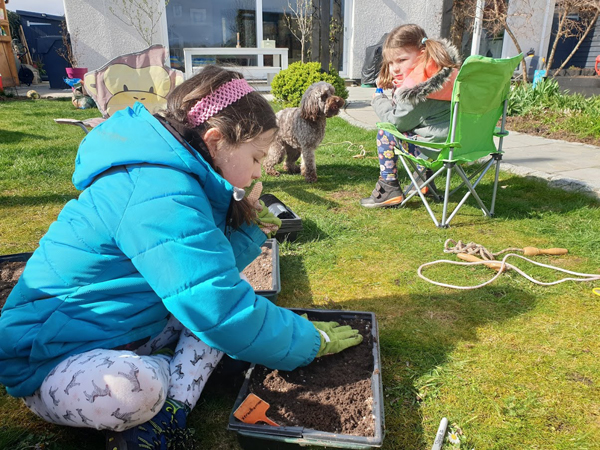
Sowing veg
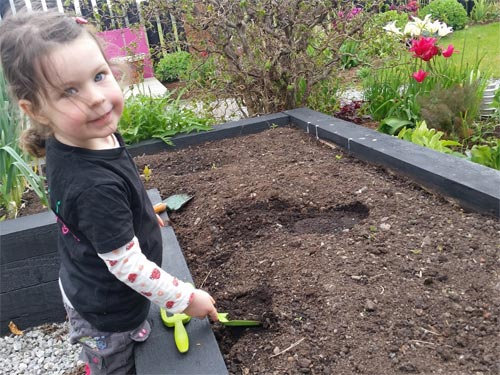
We had sown several seeds indoors during the first week of lockdown so our focus this week we turned our attention to the seeds which can be sown directly outdoors. Lulu and Tilda took over this task and armed with seeds and trowels set forth creating drills to fill with seeds. They have sown:
- Radish
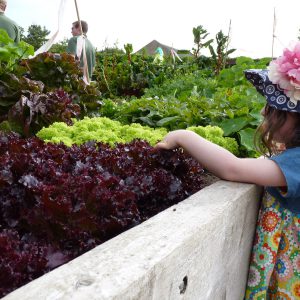
- Salad leaves
- Spinach
- Rocket
- Carrots
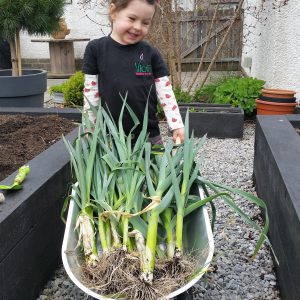
- Parsnips
- Beetroot
- Leeks
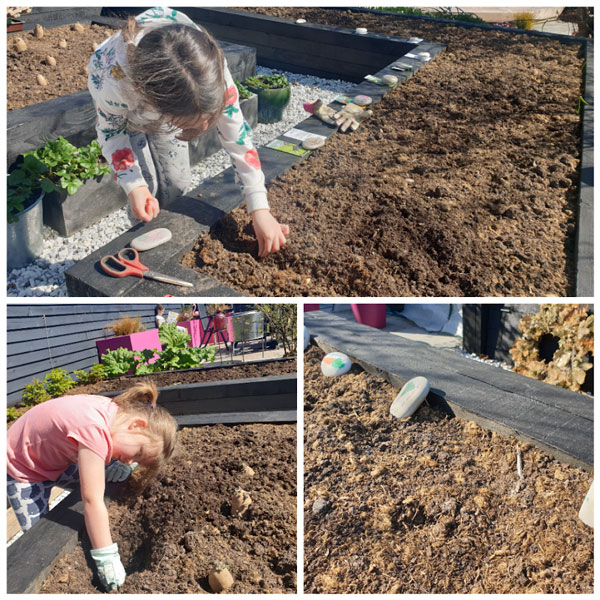
The girls sowed all the veg in our garden
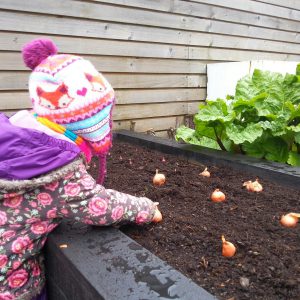
They also planted two types of onion sets and two varieties of seed potatoes and left space for our broccoli to be transplanted as it gets bigger and stronger. The finishing touches were the painted stones they created last week. Click here to find out how make your own plant labels.
Weeding and Tidying
Life is so much easier if you just weed and tidy as you go. Our rule is never walk past a weed you have spotted. Always stop and pick it out. Then you never have a jungle to tackle which takes hours and makes you dislike gardening. A quick weed, run the lawnmower over the grass or the odd prune here and there and you will easily keep on top of your gardening.
The Vialii rule – never walk past a weed. Stop and pick it out.
Encourage wildlife into your garden
Wildlife are enjoying this lockdown period more than ever. From tiny ladybirds and hedgehogs to long-tailed tits and partridges, wildlife are venturing into our gardens more and more. Encourage this by considering your planting, leaving some wild areas in your garden, creating hedgehog houses, putting out bird food, building bug hotels – it all makes such a difference. And all those animals and insects do amazing things for our gardens and eco-systems so we’re all winners.

This little ladybug is in our front garden
Relax and enjoy the spring sunshine
We have been having the MOST amazing spell of weather recently which is helping keeping us sane. So, in between all the garden jobs, sit back and enjoy your garden, your outdoor space, the lovely view, the beautiful planting, whatever is around you. There is a lot we can be grateful for so take some time to relax and enjoy it.
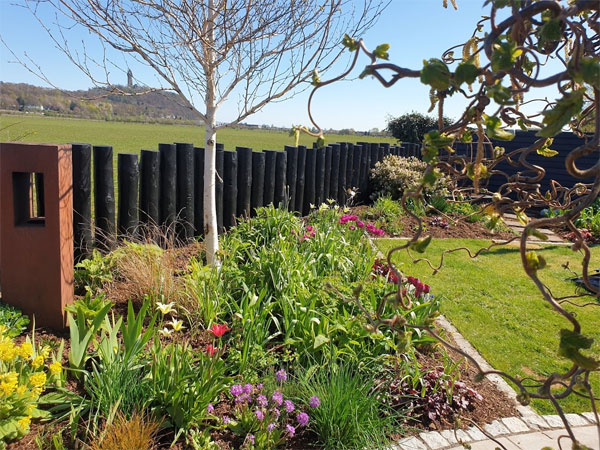
Relax and enjoy your garden and being outdoors
Other jobs to tackle this week:
- Keep on top of your painting jobs
- Continue working on your lawn, remembering to scarify and feed your lawn
- Keep getting your seedlings used to being outdoors
- Tie in climbing/rambling roses
- Increase the watering of house plants
I wonder what Week 5 will have in store for us – we still have lots to tackle on our to-do list. How about you?
Vialii
Vialii Guide to Kids Gardening Gifts for Christmas 2018
Every year it seems to get harder and harder to get gifts for the kids which are actually useful and something they will like for more than five minutes and not awful for the environment. Well, worry ye not, we have pulled together some ideas we think you will all love in our Vialii Guide to Kids Gardening Gifts for Christmas 2018…
Grow Your Own Mini Dinosaur Garden
Yup, you heard us! The dino lover in your life will be blown away by this creative gift. It comes with a pop up scene and you can grow your own “grass”. Available from Not on the High Street.
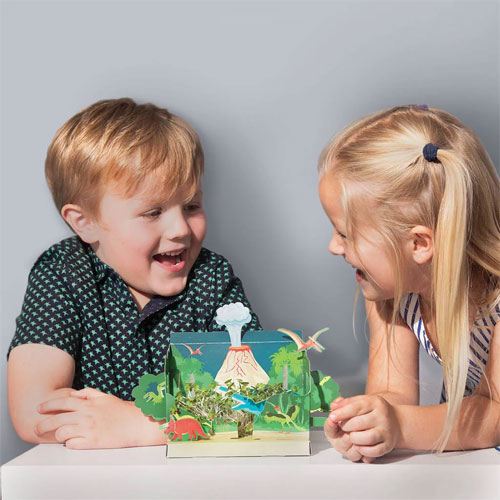
Raaaaar! Grow your own dino garden!
Little Gardener’s Mini Greenhouse
This lovely little greenhouse will be fun to build for your little ones then you can plant the various seeds that come with it. It is reusable so environmentally a good gift this Christmas. Available from the Ethical Superstore.
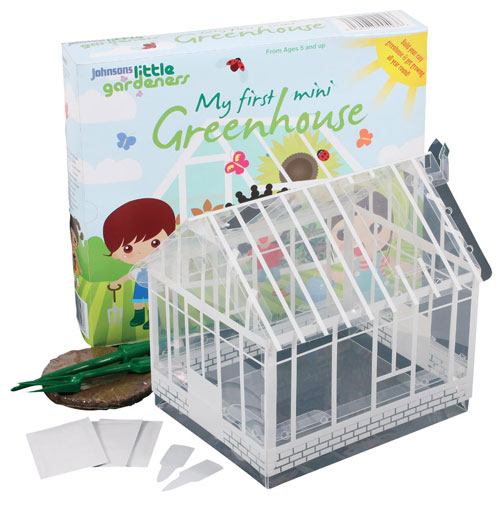
My first greenhouse!
Make Your Own Insect House
This fab wee kit comes flat packed, Ikea style! Make your insect home and then find the perfect corner of your garden to locate it. Available from Garden Divas.

Make your insect house
Peter Rabbit Wellie Socks
We LOVE Peter Rabbit here at Vialii Towers so these Peter Rabbit socks are perfect for us! Available in Peter Rabbit or Lily Bobtail designs from eBay and other retailers.

Cosy and cute Peter Rabbit tootsies!
Apprentice Gardener Tool Set
If you are serious gardeners like us then you will need a proper set of tools. This set from Spotty Green Frog will help you have your garden flourishing in no time!
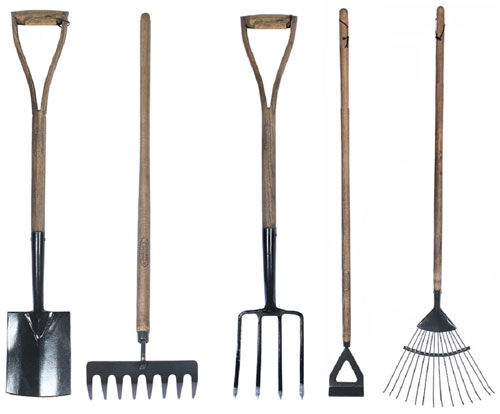
Get a head start on your career as apprentice gardener
Wildflower Glass Terrarium
How gorgeous is this little glass terrarium. It comes with all you need to grow your very own wildflower meadow. Beautiful! Available from Prezzy Box.
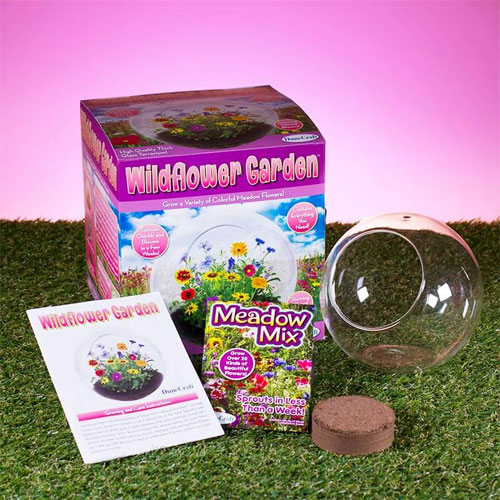
A beautiful terrarium of your own
Botanist Case
This stunning case would make any wannabe botanist proud. It contains a magnifying glass, notebook, 3 storage boxes for collecting specimens and a wooden flower press. The perfect way for your little ones to explore the natural world. Available from various suppliers including Trouva.
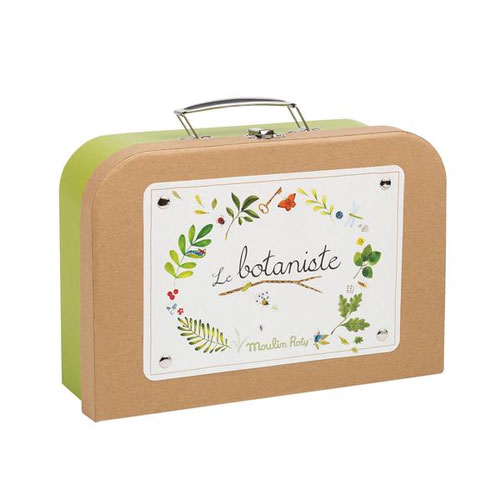
Be the most stylish botanist on the block!
Hope that helps round off your Christmas shopping. You a festive period full of fun and frivolities! See you in 2019!
For inspiration from previous gift blogs read:
Vialii Guide to Christmas Gardening Gifts 2017
Vialii Guide to Christmas Gardening Gifts 2016
Merry Christmas!
Lulu & Tilda xx
Make Your Own Bug Hotel
My recent blog “Make Your Own Bird Feeder” was all about helping birds. This one is all about helping the bugs which are an important part in keeping our gardens healthy. As we landscape our gardens with beautiful seating areas, carefully manicured lawns and garden sculptures there are less and less habitats for wildlife. We recently made a really cool bug hotel at school with help from M&D. Here are my tips on how to make your own bug hotel…
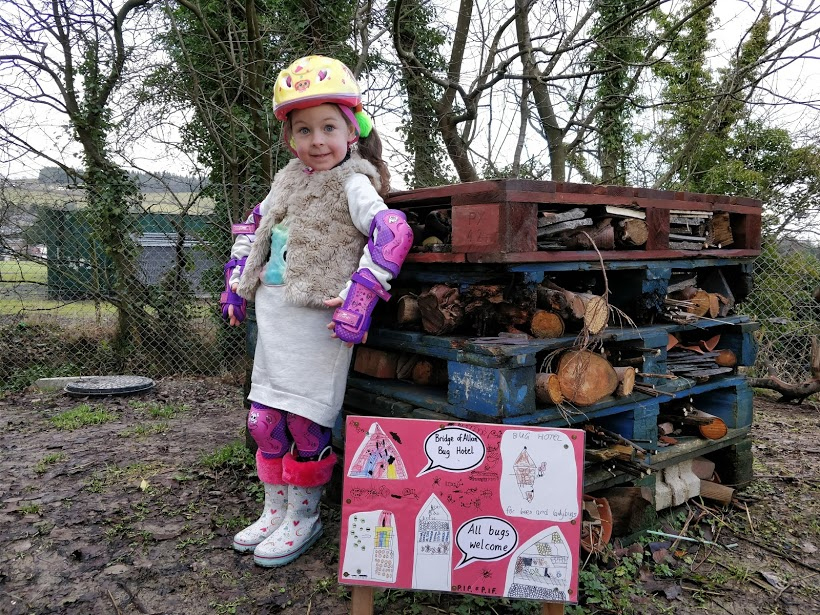
Our school bug hotel complete with the sign we made
You will need:
- 4 or 5 old pallets
- old bricks & slates
- old tin cans
- bamboo canes
- corrugated cardboard
- dried leaves, moss, sticks, pine cones and old herbaceous stems
- logs

Our bug hotel, doesn’t it look great?
To make:
1. Choose a quiet corner of your garden where the bugs won’t be disturbed too much and away from your veg beds
2. Carefully stack the pallets on top of each other with the help of a grown up
3. Now is the fun part, fill your bug hotel, adding the larger items such as bricks and logs first (it’s good to drill holes in the logs first too)
4. Roll up the cardboard and slot it into some gaps.
5. Fill your tin cans with various items such as cut down bamboo canes, collections of plant stems or old leaves and moss then add them to your bug hotel with the open end facing out
6. Stack slates up and slide them in
7. Fill all the gaps with leaves, moss, pine cones and sticks.
Once your bug hotel is finished it will be a beautiful feature in your garden as well as a 5 star hotel for your creepy crawly friends to check into. Keep filling up any gaps as the garden materials start to decay down.
And remember to give your hotel a name. Our favourite is the Grand Bug-and-Pest Hotel but we also love Bug-ingham Palace and Edin-bug Castle! What will you call yours?
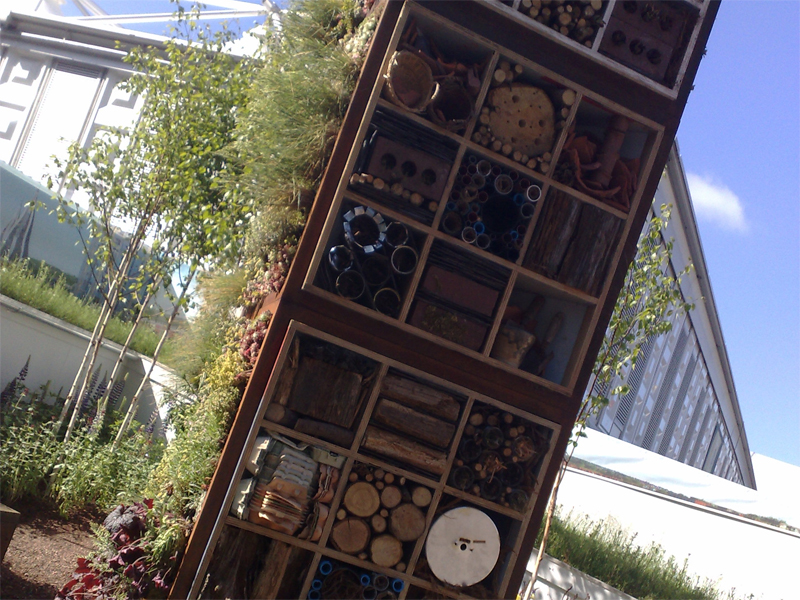
A bug hotel at Chelsea Flower Show
It’s not just us that loves bug hotels, they have even featured at the Chelsea Flower Show too!
Lulu x
What We’re Growing in 2018
We LOVE this time of year as we see all the bulbs pushing through in the garden and the weather (hopefully) starts to improve. We have BIG plans to grow lots of lovely things in our garden this year to supplement the fruit trees, rhubarb, raspberries and blueberries we already have growing. Here’s what we’re growing in 2018 in our veg garden:
VEGETABLES
- Rocket ‘Speedy’ -Rocket has become hugely popular in the last few years, and we have to say its warm, peppery flavour works well with so many other salad ingredients. As its name suggests, this is a fast grower and one of the very best strains available.
- Shallot ‘Vigarmor’ – This modern French variety is well worth growing. Firm, pink flesh and a coppery tinge to the skin make these banana shaped bulbs very attractive as well as being crammed with flavour. High yields and a good storer too.
- Garlic ‘Solent Wight’ – This superb, softneck strain yields large, high quality bulbs with a fragrance which is both long and strong.
- Onion ‘Hercules’ – Gives high yields of almost spherical bulbs with rich, golden skins and firm, well flavoured flesh. Hercules shows very good resistance to bolting and will keep for several months.
- Onion ‘Red Baron’ – Onion Red Baron AGM is the best red-skinned variety, the attractive, crimson-skinned bulbs when sliced reveal contrasting red and white rings, making it most attractive on the plate. Red Baron has a lovely, robust flavour and is a remarkably good keeper.
- Leeks ‘Porbella’ – Remarkable for its heavy yields of very upright shanks, which can be lifted from October right through to February, Porbella stands in good condition for months and shows good resistance to rust.
- Lettuce ‘Salad Bowl Mixed’ – These widely grown varieties are two of the very best loose-leaf lettuces. Simply cut and come again.
- Carrot ‘Nandor’ – This high quality Nantes hybrid has superb resistance to carrot fly. Quick maturing and can withstand variable weather conditions which make this an ideal variety for the UK climate.
- Chard ‘Perpetual Spinach’ – Worthwhile spinach-alternative which does not run to seed even on dry soils. High yields of large, dark, fleshy, tasty leaves produced over several months.
- Onion (Spring) ‘White Lisbon’ – Regarded by many as THE spring onion, it is a fast grower and has a great taste.
- Radish ‘Solito’ – A new red radish, crunchy and with a delicious flavour. This variety will mature in just over three weeks. Very uniform and up to 40mm in diameter. Has a fine tap root, good tolerance to cracking and high resistance to Fusarium.
- Courgette ‘Tuscany’ – Well suited to the UK climate, this vigorous variety produces few spines so it’s easier to pick. It has resistance to powdery mildew and yields a large supply of very dark straight fruits. Has firm flesh and excellent flavour.
- Beetroot ‘Bulls Blood’ – Grow as cut-and-come-again salad leaves with a mild beetroot flavour. The deep red foliage can be cut back to the ground three or four times and the colour intensifies as autumn approaches. The roots can also be eaten.
- Beetroot ‘Boltardy’ – Beetroot Boltardy can be sown earlier than most other varieties with little fear of bolting. The roots are deep red and of good quality and flavour, yielding well in most soils. Boltardy is a multigerm variety, so each seed which germinates successfully will produce several plants.
FRUIT
- Strawberry ‘Mara des Bois’ – Imagine the intense perfume and rich flavour of wild strawberries combined with the fruit size of modern varieties and you have strawberry Mara des Bois! The medium size fruits of this ever-bearer strawberry are a true treat and one which no strawberry fan will be able to resist. Truly scrumptious!
FLOWERS
We’re also growing a few flowers from seed too to add to our pretty garden:
- Cosmos ‘Sensation’ – Cosmos grows densely with large single pink, red and white flowers. Good for the back of the border and as a cut flower.
- Sweet Pea ‘Cupani’ – Believed to be the original sweet pea which was sent to England from Sicily in 1699 – or very closely akin to it – this eye-catching bicolour remains one of the most beautiful sweet peas you can grow. Grow a little piece of history, smell the fragrance of those blooms and you will understand why sweet peas became so popular.
As you know from our last blog, “Growing Potatoes” we will also be growing three different varieties of potatoes this year.
I’d love to hear what you plan to grow in your garden this year…
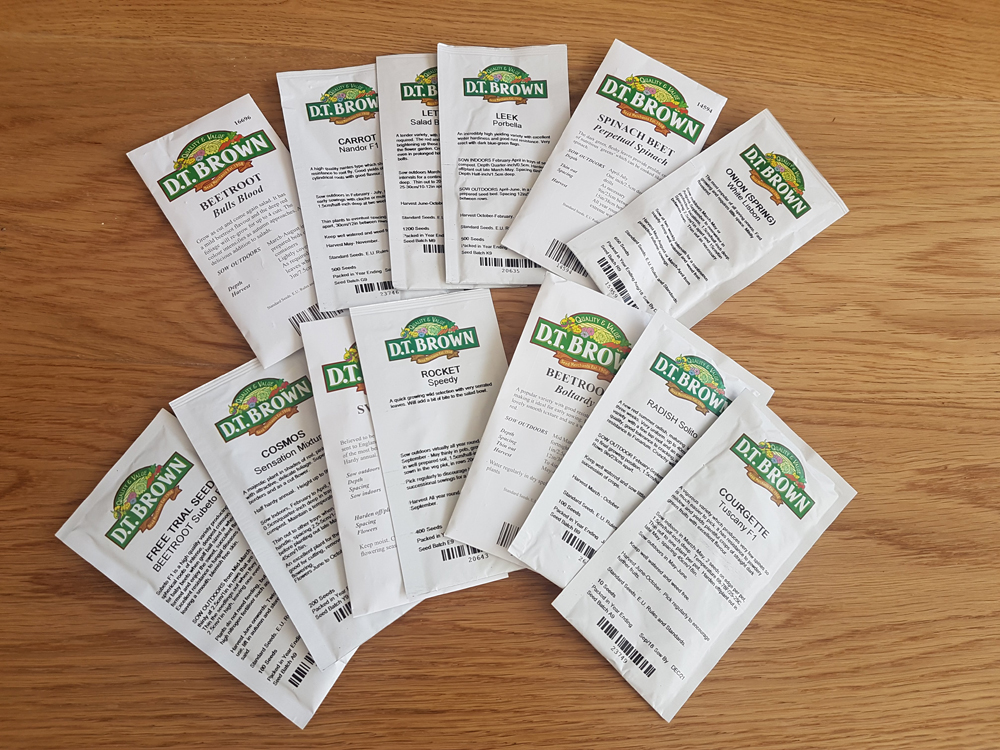
Lulu & Tilda xx
Thanks to DT Seeds who we purchased this year’s seeds from and for all their great plant descriptions.
Grow Your Own Strawberries
We just love growing our own fruit and you can pretty much find us in our raspberry patch at this time of year, catching the end of those rosy jewels! But we think we would like to grow some more strawberries for next summer. Did you know what now is the perfect time to plant them? Here is what you need to do to grow your own strawberries…

I’ve only got eyes for yummy strawberries!
You will need:
- A window box of plant pots
- Compost
- Gravel/pebbles
- Strawberry seeds/plants
To grow your strawberries:
- Add the gravel or pebbles to the bottom of your containers for drainage
- Add some compost leaving space for your seeds/plants
- Carefully plants your seeds or plants
- Add compost to the top
- Put your pot in a sunny, sheltered position and keep well watered
Here is a wonderful visual from the people at Sainsbury’s bank which shows you what you need to do…
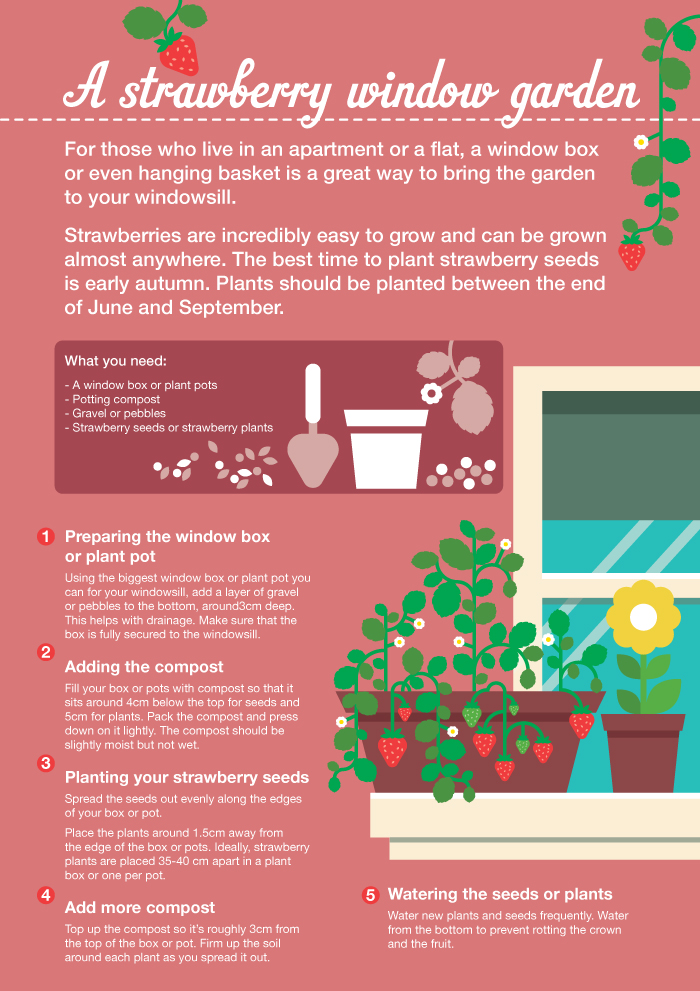
By next summer you will be picking the delicious fruit from your windowsill!
Enjoy!
Lulu & Tilda x
How To Grow Potatoes
My latest blog tells you all you need to know to grow the perfect potatoes in an easy to follow guide. It’s gotta be simple, I’m only 5 right!
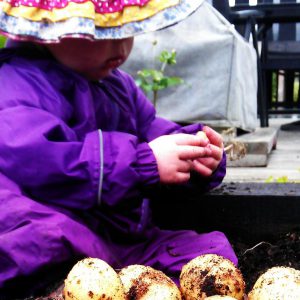
Lulu growing potatoes
How to grow potatoes…
- Buy some seed potatoes
- Chit your potatoes on a window sill as soon as you buy them. Chitting just means letting the wee “eyes” grow a bit longer which gives them a head start for when you pop them in the ground.
- Plant them in the ground about 20cm deep and about 30cm apart.
- “Earth up” your potatoes as soon as shoots start to appear, raking up the soil around them and covering them back up, protecting them from the sunlight. You will need to do this 2-3 times in the growing season.
- Feed your potatoes every week, they will grow big and strong, just like me.
- Early varieties will be ready in 8 weeks, main crops in the summer. Gently move soil aside to pick your potatoes, you don’t need to pick them all at once and they taste best freshly picked.

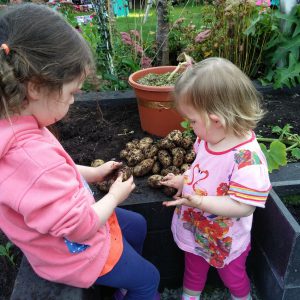
Our potato crop
Top tips:
- You can grow potatoes anywhere. Veg beds, compost bags, specialist potato bags, old tyres, tall pots, whatever you have to hand.
- Potatoes need drainage so if you have clay soil then dig in some gravel. You are planting in pots, raise the pots and make sure they have drainage holes.
- Potatoes like sunshine (like me!) so don’t grow them in a shady corner.
- Always water the base of the plant not the foliage.
- Remove flowers when they appear to put more energy into the tuber the plant is creating.
- Dig up your potatoes on a dry day and leave them to dry in the sun for an hour.
Lulu x
8 Best Apple Trees to Grow in Scotland
Our latest blog is short (like Tilda!) and sweet (like me!) If you don’t already have an apple tree in your garden then pop along to your nearest garden centre and make sure you have one fruiting away in your garden this summer. If, like us, you live in Scotland, you want to choose a variety perfect for our climate. Here are my favourite 8 apple trees to grow in Scotland…

A teeny Lulu munching a home grown apple
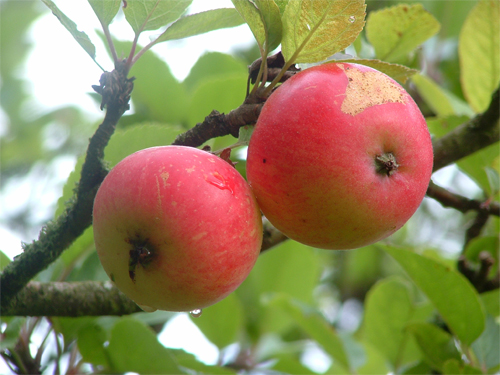
Egremont Russet
The Egremont Russet is a cultivar of dessert apple, of the russet type. It has a rich, nutty flavour and crisp, firm and fairly juicy flesh.
Discovery
Discovery is best known because it produces some of the earliest apples in the UK. The cropping time is mid to late August and lasts for about a month into September.
Discovery apples
Fiesta
Fiesta is a modern cultivar of domesticated apple which is often marketed as Red Pippin.
James Grieve
The multi-tasking James Grieve fulfils every apple expectation: it juices beautifully, cooks perfectly and is so refreshing to eat.
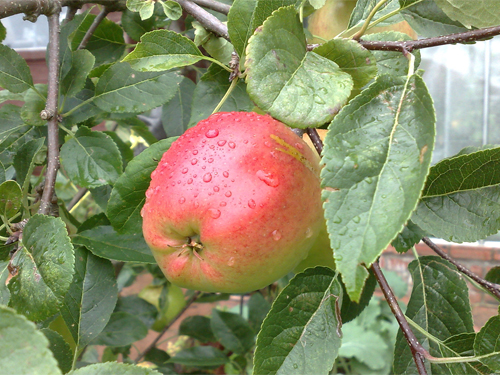
James Grieve
Katy
Katy is a great choice for newcomers to growing apple trees because disease resistance is high and it requires only minimal pruning. It grows well all over the UK but is especially valuable in cooler parts where it shrugs off late frosts with ease.
Laxtons Superb
‘Laxton’s Superb’ is a heavy-cropping, late-season, dessert apple with a sweet flavour and firm flesh.
Spartan
Attractive, crunchy, sweet, easy to grow, and with the characteristic delicate wine- like flavour of the McIntosh family of apples (or so mummy says!)
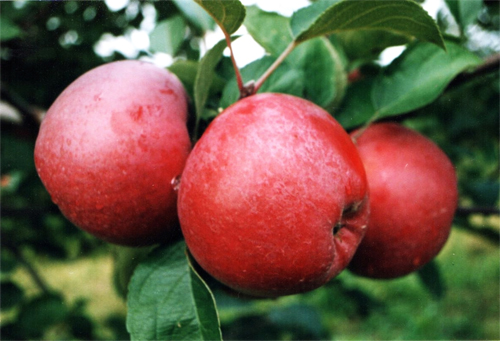
Spartan apples
Sunset
Sunset is a popular Cox-style apple, recommended as one of the best alternatives to Cox’s Orange Pippin as it is much easier to grow.
So there you go, there’s no excuse not be crunching on your very own home-grown apples this autumn!
Lulu & Tilda xx
5 Reasons To Grow Your Own Fruit & Veg
Sometimes people ask “Why bother to grow your own fruit and veg? It’s more hassle. Sometimes crops fail. Why not just pop along to the supermarket and get your ready picked, washed, convenient produce?” Well, there are lots of reasons but we’ve freshly picked our top five, just for you…
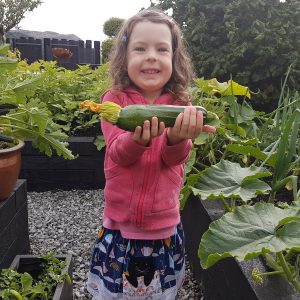
Cracking courgettes!
IT’S CHEAPER
In the current economic climate, more and more people are struggling to make ends meet. Growing your own fruit and veg is a lot cheaper than buying it fresh in the supermarket. Lots of us have our own garden or space for a few pots or there are lots of allotments available which are cheap to rent. Packets of seeds don’t cost much and if you keep your eyes peeled they are often being given away for free!
Lovely leeks!
IT’S HEALTHIER
Eating fruit and veg is a great way of keeping healthy. And when we grow it ourselves it’s even healthier as it couldn’t be any fresher. Plus we can grow it organically and know there hasn’t been any yucky pesticides sprayed all over it. Also, gardening is a great form of exercise so there’s another tick in the healthy box!
Super salad!
IT’S TASTIER
It’s genuinely true that what we grow ourselves tastes better. The tomatoes that we grow in our own garden couldn’t survive in a supermarket as they have such fine skins and are bursting with juiciness. Fruit and veg starts to deteriorate as soon as it’s picked so the quicker you can get it into your tummies the better. Raspberries don’t even make it to the house in our garden, they are in our tummies within two seconds of being picked!
Awesome onions!
IT’S BETTER FOR THE PLANET
By not relying on supermarkets as much, we are reducing carbon emissions by requiring less trucks which have to transport fruit and veg many miles to get from the grower to the supermarket and then to our homes. There’s also no packaging required to get your potatoes or carrots from your veg patch to your house. And no chemicals required to grow them if you grow organically.
Perfect potatoes!
IT’S FUN!
We all know that being outdoors and getting dirty is a lot of fun! Doctor’s are even prescribing gardening as therapy these days. So get outdoors, dig over a section of your garden and see how much fun it is to see fruit and veg growing from teeny tiny seeds which eventually are big enough for us to eat. Amazing!

Mucky fun!
So why not choose at least one new vegetable or fruit to try growing this year and see what you think…
Lulu & Tilda xx
Lulu’s Review of 2016
Now that Santa’s been and we are almost in 2017, it’s time to have a quick look back at what’s been happening in 2016. What was your favourite thing in 2016? Here are a few of my top picks, from best books and products to best places I visited…

Having fun outdoors was the most important part of 2016!
Garden of the Year
The winner of this accolade simply has to be Jupiter Artland this year. We had a wonderful day there this summer with the very talented photographer Julie Howden who took some lovely photos of me and Tilda. It’s such a fun place to hang out. Our favourite is the land-forms by Charles Jencks which we ran around for hours! It’s packed full of amazing sculptures and bits to explore.

Hide and seek is the best fun at Jupiter Artland
Event of the Year
The winner of this award is the Fairy Trail at the Woodland Experience in Balfron. It was such good fun we went there twice and I am already planning on going back again when they re-open next Spring. There are LOTS of fairy doors to find, a wishing chair, worry tree and LOTS more.

Fairy Trail Fun
Product of the Year
This was a hard choice and we have reviewed lots of amazing things this year. My pick is not cheap but it’s worth the money as it’s such great quality, very practical and we will use it for years. It’s the Twigz wheelbarrow! It’s so sturdy that it makes wheeling Tilda about super easy!

The Twigz wheelbarrow is great quality
Craft Project of the Year
We LOVE a craft project at Vialii Towers so we had plenty to consider for this award. My choice is this super cute glittery acorn.

Glittery acorns – gorgeous!
Top Tip of the Year
We are always looking for cheap and easy ways to have fun outdoors. We had lots of fun playing noughts and crosses with some twigs and pebbles on an old tree stump. Free fun is the best!
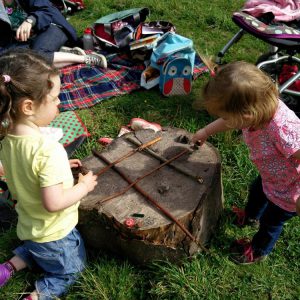
Free fun!
Book of the Year
Our final award, for the best book, goes to the The Children’s Garden. A brilliant book packed with loads of great ideas to do outdoors throughout the seasons.

My book of the year
So that’s my review of 2016. I hope you had as much fun as me. Here’s to getting outdoors and having a ball in 2017!
Happy New Year from me, Tilda and all at Vialii.
Lulu xx
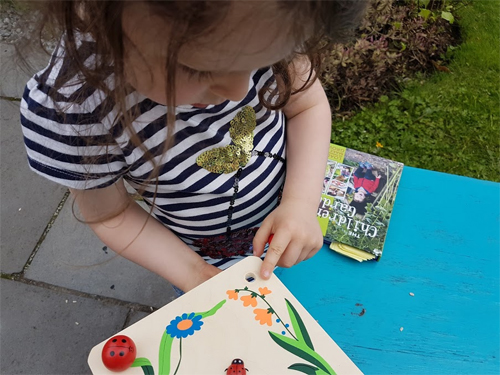
Flower Power
I was recently sent a lovely flower pressing kit by my buddies at BigJigs to review. As an expert flower grower I had plenty of choice of pretty flowers to pick in the garden and see how they looked once they pressed. Read on to see what I thought of the flower press and what you can make from your pressed flowers…

A pressed cirsium looks like a funny moustache!
The kit from BigJigs is made of a lovely wood with some pretty flowers and bugs painted on the front of it. It comes with some cardboard pieces inside to help you do your flower pressing, just add some parchment paper in between the cardboard and the flowers.
The BigJigs flower press kit
First you need to cut some flowers. You may need to ask a grown up to help you with bit, partly because they may not want you cutting off their prized roses but also because scissors and secateurs can be dangerous if you are not an expert like me!
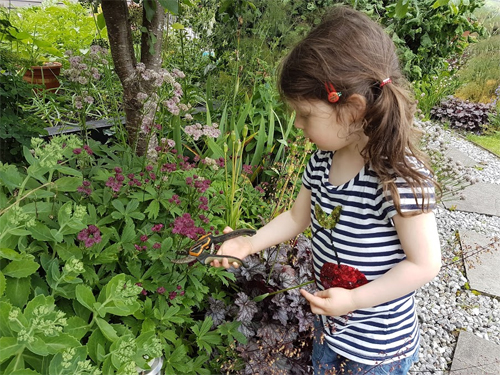
Be careful with those snippy snips!
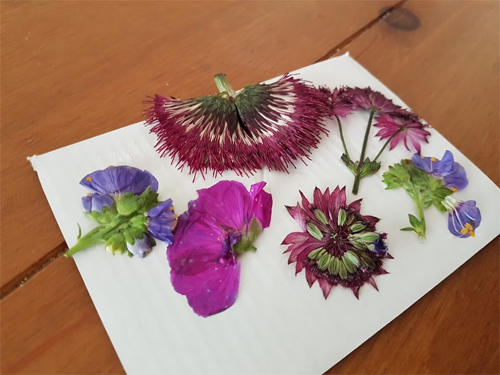
Once you have chosen a selection of flowers, lay them out on your cardboard pieces ready to be pressed.
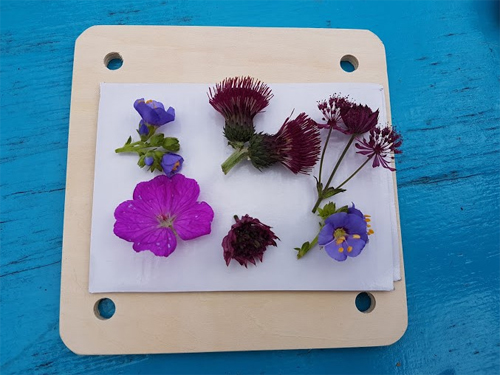
Lay your flowers out in your flower press
Next you need to tighten the screws really tightly and leave them to flatten – I left them overnight.
Tighten those screws really really tight!
The next morning I had some really pretty, really flat flowers to see!
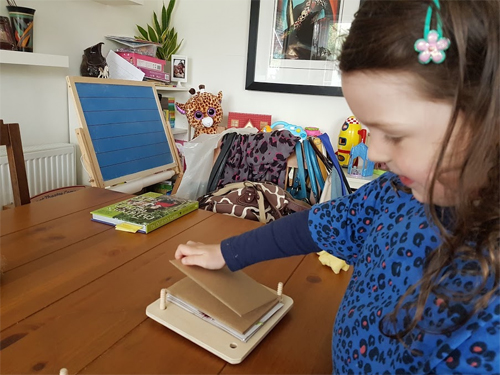
Opening the kit the next morning was really exciting!
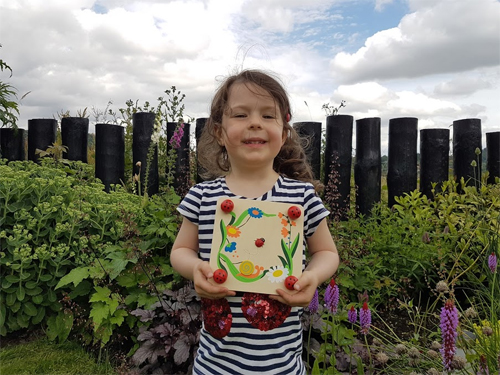
I decided I would like to make them into a bookmark so I chose a piece of card and then glued my flowers on to them.
My squished flowers looked really pretty!
Other ideas include making cards, decorate the front of a notebook, make pretty gift tags or just make a lovely picture.
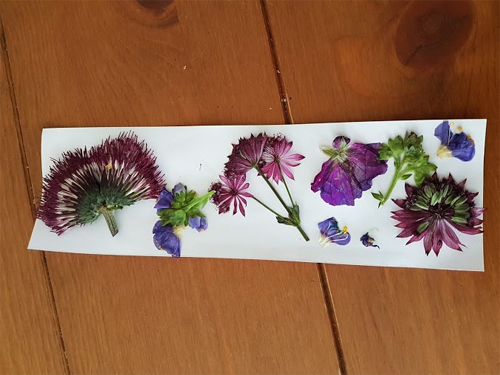
I made a pretty bookmark with my pressed flowers
It was a lovely thing to do during the summer holidays and a great way to preserve your pretty flowers. You can of course just use a large, heavy book to do your flower pressing but the kit is really handy, can be used again and again and is not expensive.
The flower pressing kit is available from BigJigs for £5.49.*
Happy pressing!
Lulu x
*Price correct at time of publication
“The Children’s Garden” – a book review by Lulu Burt
Hey y’all. I am always on the look-out for new ideas for things to do outside in the garden. You may have read my recent blog which had 19 Great Ideas for Summer Fun In The Garden. Well, now I have even more ideas to share with you thanks to a great new book called “The Children’s Garden” by Matthew Appleby.
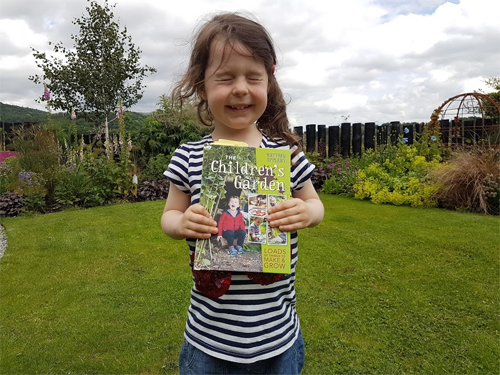
I am so excited about my new book I can’t open my eyes!
There are a whopping 52 projects packed into this book and they are done in a very engaging way. There are LOTS of lovely colour photos as well as plenty of tips and facts within each section. The book is split into the different seasons so that there are always plenty of ideas to choose from whatever time of year it may be. Everything is done on a really low budget and most projects use things which you already have lying about the house. Here are a few of my favourites:
Fun With Potatoes
Potato stamping is an old favourite and perfect for this time of year as we harvest our home grown tatties. There are always a few potatoes which aren’t quite up to my high standards so what better than to use them to do some potato stamping!

Potato stamping made me starry eyed!
Wet Work & Play
There are lots of water fun ideas in this chapter. One that I loved doing was really simple. Mummy gave me a bowl filled with soapy suds and I set about washing all my dolly’s clothes. My clothes ended up drying on the washing line too but it was great fun!
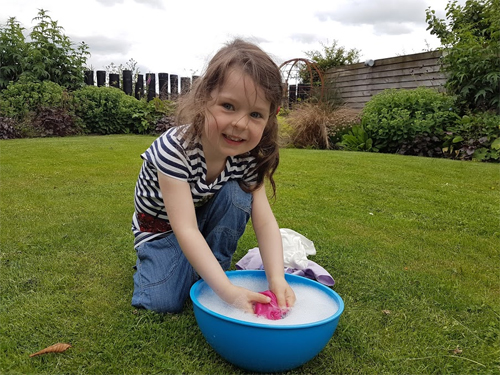
Doing the washing is fun – Mummy says I can always do it!
Flowers To Pick & Press
I have been sent a flower press to try out (I’ll blog all about that soon!) so combining that with this book was the perfect opportunity to try it out. I loved picking lots of pretty flowers then seeing how different they looked once pressed. I then made a pretty bookmark using them.
A pressed cirsium looks like a funny moustache!
Feed The Birds
This was a great project and all we needed was an old water bottle, a couple of pencils and some bird seed. My bird feeder looks great hanging in the garden.

The bird feeder I made out of an old water bottle
And here are some of the ones which I am desperate to try which I haven’t yet…
- Home made seed bombs – kaboom!
- Turf tattoos – hopscotch on the lawn will be fab!
- Butterfly World – M&D have bought me a butterfly cage so that I can do this at home
- Paint it Black – I have some chalk paint and I am going to paint my sand pit lid so that it can double as a chalk board.
- From Picking to Pie – yum, bramble picking, we will be able to do that soon!
- Thinking Ahead – this involves making a time capsule. I am definitely going to do that and get the builder’s to bury it in the foundations of our new house extension!
- Carrot: Root to Cake – I love eating carrots so it will be a struggle to keep some aside for cake making but I’m sure I will manage!
- Make a Cress Head – there are lots of fun ideas of what you can make a cress head from
- Craft a Model Garden – for rainy days when you can’t get outside, this is a perfect way to still enjoy gardening
I thoroughly enjoyed reading “The Children’s Garden” and would definitely recommend it for all children.
I give it a Lulu rating of:

Five out of five, woohoo!
Available on hardback, RRP 14.99 *
Happy reading!
Lulu xx
*Price correct at time of publication
19 Great Ideas for Summer Fun in the Garden
The summer holidays are stretching hazily out far in front of us. There’s no school (nursery) for weeks and weeks. There will be late nights and long lies. Playing with friends. Days out. Picnics. Now, I don’t want to be hearing any murmurs of “Muuuuuuuuum, I’m bored”. The garden is your oyster and I have loads of cool things for you to do outdoors this summer….

Have fun in the garden this summer
Stargaze at night…
With no school to get up for the next morning you have the perfect excuse to stay up late and look at stars on a clear night. You could maybe persuade an adult to camp in the garden with you one night too…
Quoit a lot of fun…
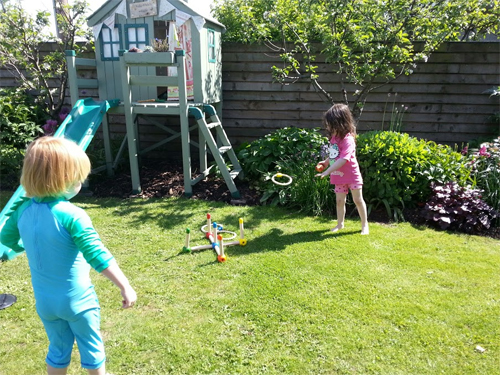
Quoit a lot of fun!
Garden treasure hunt…
This is a great game you can ask a grown up to make so that you and your friends can play at being detectives in the garden. They just need to take photos of some plants and features in the garden and print them on some paper so you can see if you can find them. See if you can remember the plant names too.
Set up your own garden band
Shake, rattle and roll!
Open air theatre
Try some open air theatre… Drag the dressing up box outside and put on a show. Who knows, next summer you could be putting on a Fringe show at the Edinburgh Festival!
Have a Snail Race…
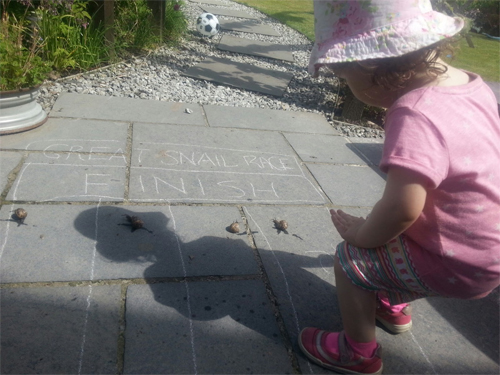
We have plenty of snails which we can race!
Make a miniature garden…
Find some fairy gifts…
Anyone for croquet…
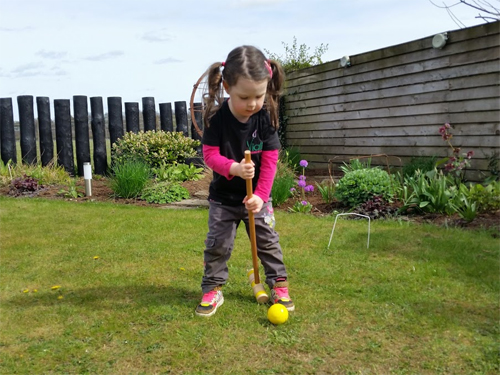
Anyone for croquet?
Make magic potions…
Blow bubbles…
Flower pressing…
Flower pressing is great fun
Make a sand pit…
Play a game of skittles…
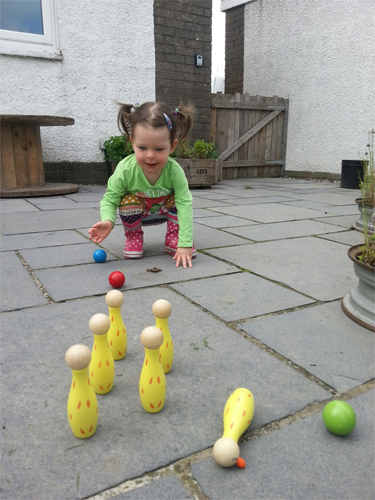
Cute skittles are great fun
Start a garden journal…
Make a garden crown…

Chief Lulu and her magic crown!
We’re going on a bear hunt…
I’m not scared! Well I’m definitely not scared of the cute bears we look for in our bear hunt anyway! Ask a grown up to hide a selection of your toy bears all around the garden so that you and your friends can hunt for them. Watch out for the thick oozy mud!
Make a den
Make a den from a clothes line, pegs and sheet and set up your own camp site. Make sure you set strict rules as to who can enter your den of course!
Crazy about golf
You don’t need to have a lawn like a fairway to enjoy some golf at home. Tilda and I love this crazy golf set for hours of fun in the garden! (£24.99*)
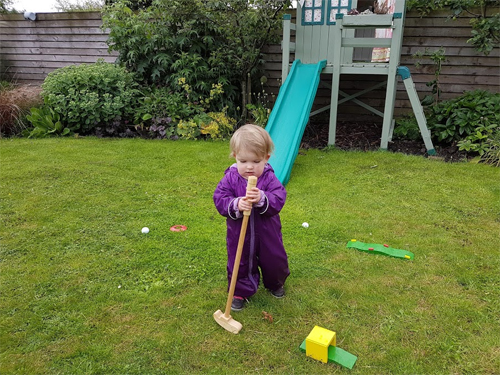
You don’t have to be crazy to play crazy golf. But it helps!
So there’s absolutely no excuse to be bored now these school holidays. Now, get outside and build a den…
Strawberry Fields Forever
I had a lovely weekend playing at farm parks with my friends. I had two favourite parts – one was horse-riding for the first time with my friend Georgia; the other was strawberry picking with my BFF Euan. Here’s a little story about it along with some strawberry facts, an awesome tip from my clever Mummy to make your strawbs’ last longer and a strawberry craft idea for the summer holidays…
I’ve only got eyes for yummy strawberries!
Briarlands Farm
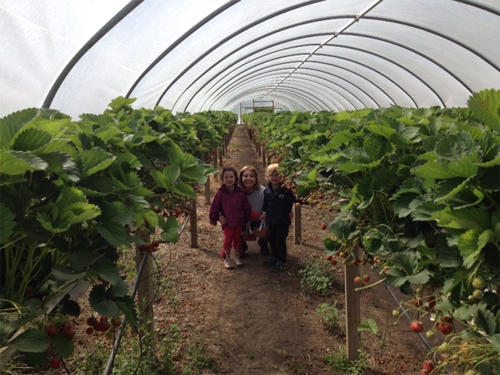
We visited the wonderful Briarlands Farm on Saturday which is one of my favourite places to hang out. There is always plenty to do there from the bouncy pillows to go-karting, petting the animals to going on tractor rides (and we did ALL of that!) At this time of year Briarlands is extra special as you can pick your own strawberries too. So, Euan, Tilda and I went off to the polytunnels to get picking. All of the strawberries at Briarlands are raised up which makes them easy for us to pick. Tilda and I picked a whole punnet each (and may have popped one or two in our mouths along the way, just to make sure they tasted OK, oh and yes they did! But ssshhh, don’t tell anyone!)
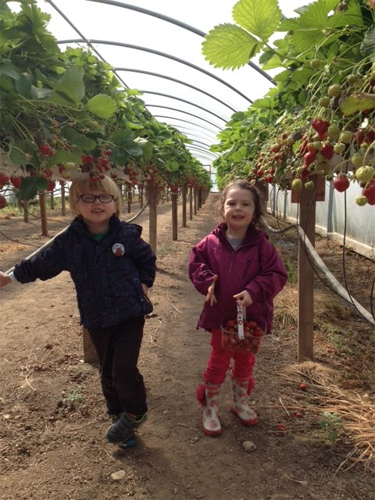
Euan and I had a great time strawberry picking!
Strawberry Facts
So, I thought that seeing as strawberries are in season, that I would share some amazing strawb’ facts with you. Did you know that…
- Strawberries are the only fruit to wear their seeds on the outside?!
- There are 200 seeds on an average strawberry!
- Strawberries are actually a member of the rose family!
- Strawberries are the first fruit to ripen.
- Strawberries have more Vitamin C per serving than an orange.
We had lots of punnets full of yummy strawberries to take home!
And one last fact from my super clever mummy. If you are buying LOTS of strawberries like we did at Briarlands, which might take (even strawberry lovers like me and Tilda) a few days to eat, here’s how to make them last longer. Mix 4 cups of water with 1/2 cup of any type of vinegar. Sit the strawberries in the mixture for 2-3 minutes, give them a swirl round then rinse off with some water. Leave them to air dry. Use the vinegar mixture to clean out your punnets so there are no spores left in there. Your strawberries will last longer (if you don’t eat them all first!) and don’t worry, they definitely don’t taste of vinegar.
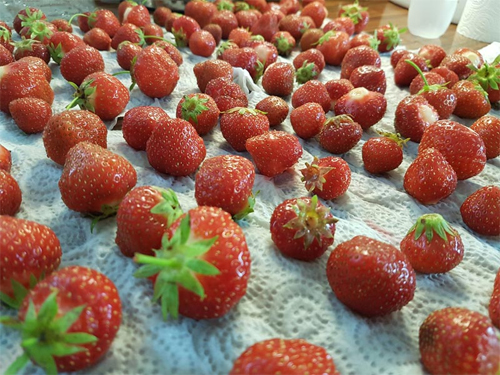
Make sure your strawberries are left to dry before putting them away
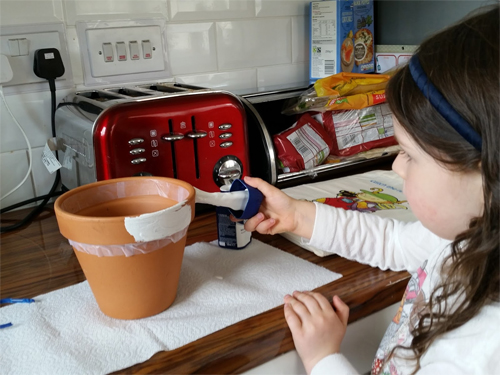
Strawberry craft project
And one way to make your strawberries last forever is with a lovely craft project for the summer holidays. You just need some pebbles and some paint and you can make your very own strawberry patch!
Happy strawberry picking everyone!
Chalkboard Planter: The Perfect Gift for Your Teacher
As school holidays beckon, it’s time to say thank you to our wonderful teachers for all their help and care over the last year. But are you fed up with the same old gifts for teachers? Are you feeling crafty and want something special and personal to give. Well, here is my step by step guide to making a chalkboard planter which combines crafts and plants, my favourite things!

A unique chalkboard planter for my lovely teacher Mrs Sneddon
I am going to show you how to make a chalkboard planter where you can write your own special message…
What you need:
- A terracotta pot
- White paint
- Blackboard paint
- Black marker pen
- Chalk
- A plant
- Compost
How to make it:
1. Paint the top rim of your plant pot white (I gave it a couple of coats)
Paint the top ridge of your terracotta pot white
2. Paint the bottom section with blackboard paint (allow 2-3 coats)
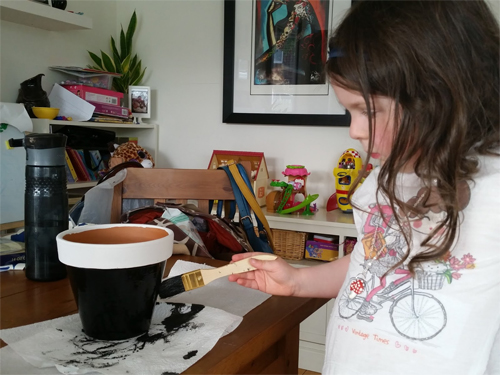
Add your blackboard paint
3. Once dry, draw on your measuring tape around the top using your black marker pen
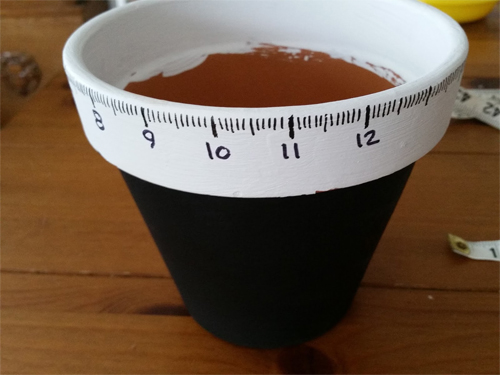
Draw on your measuring tape marks
4. Add your message in chalk. I wrote “Thanks for helping me grow” on one side and “Lulu x” on the other but you could draw/write whatever you want.
5. Plant your plant, being careful not to smudge your artwork.
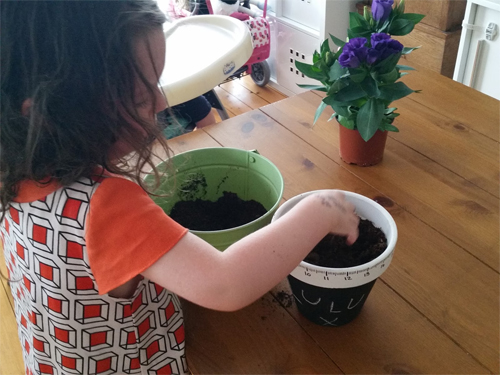
Carefully add compost and your plant
And there you have it, a wonderful, unique gift for your lovely teacher.
A BIG thank you to my clever Auntie Nicola Simm who inspired me to make this gift.
A HUGE thank you to Mrs Sneddon for being my wonderful teacher this year!
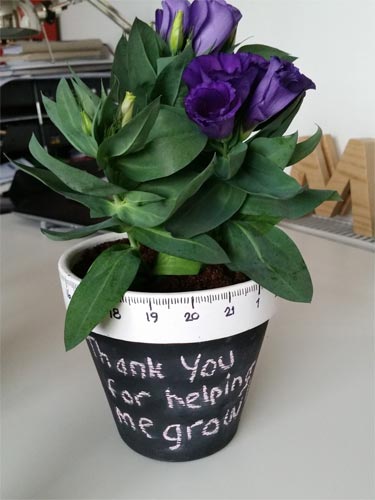
The finished chalkboard planter
Happy crafting!
Lulu xx
Love Local Mag
We share some brilliant tips on how to keep children entertained outdoors throughout the summer holidays.
The Foody: Time to Plant
Back in February, we introduced you to the Foody, a revolutionary new way to allow you to plant a wide range of fruit and veg in the tiniest of spaces. In February it was only warm enough to build it and get used to how it worked and make plans for what we would plant in it one sunny day. Well, that sunny day has finally arrived so here is how the Foody looks planted up and what we think of it so far…

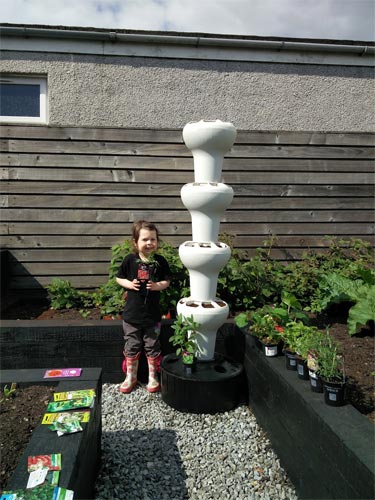
Our Foody, all planted up and looking great!
As we explained in our previous blog, the Foody is a vertical growing system which only needs a fraction of the water and space of traditional growing methods. You can choose different numbers of tiers depending on how tall you want to go. We are trialling the Foody 5, the daddy of the Foody world! So, what did we do?…
Well, we had already built the Foody when it arrived back in February so we were raring to go. We just needed to add our growing medium (compost, coir, whatever you prefer) and decide on what plants/seeds we were going to grow.
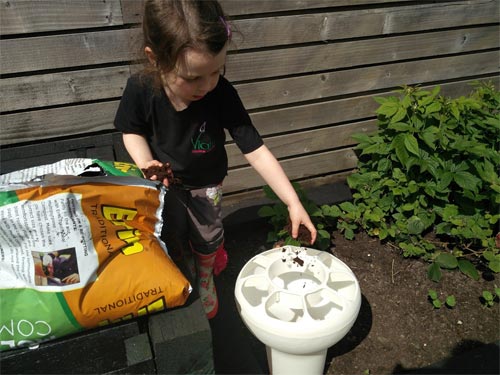
First you need to fill up your Foody with some compost
As we have the Foody 5, we had a whopping 39 spaces to fill! That’s a lot of different types of fruit and veg. We have gone for a yummy selection of things which we love to eat including:
- Bush tomatoes
- Courgettes
- Different types of salad leaves
- Spinach
- Rocket
- Radish
- Spring onions
- Strawberries
- Lots of different kinds of herbs.
We have all of these things growing in traditional methods around the garden too so we can compare how well the Foody works to them.
We needed lots of plants and seeds to fill our Foody!
The Foody looks really stylish and makes a real statement in the garden. It is also well made and looks like it will last well. It was great fun planting up the Foody as it’s such an unusual way to garden. To be able to fit all of this fruit and veg into such a tiny corner of our garden is amazing and we think it would be a wonderful solution for those with little space or who want to try “grow your own” without giving up too much garden space. The whole Foody spins easily so you can turn it around and make sure all areas get good sunlight as well as making it easy to water.
Gently plant your fruit and veg into the different pods (or
you could plant flowers to make an amazing floral sculpture!)
We are also very interested to see if it means our courgettes can escape being ravaged by slugs and snails or if they will make the journey up high! As our garden is a little windy and as we have the super-tall Foody 5, Daddy has had to build a collar for the Foody so that it doesn’t fall over in the wind. It would be good if the taller Foodies came with something to help stabilise them. Or if you live in a windy area then just choose one of the two shorter Foodies which will solve this issue.
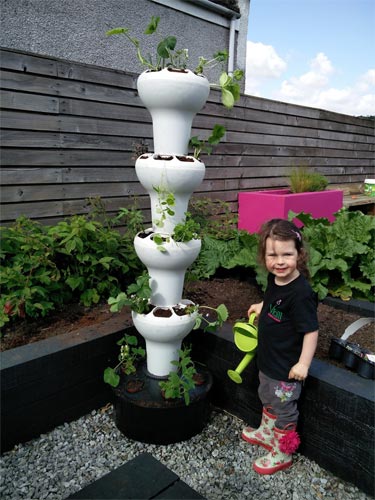
Once planted, water your Foody. The clever reservoir
in the bottom holds the water so you use much less water.
We will keep you posted as the season goes on but we are certainly loving our Foody adventure so far. For more information on the Foody visit LIFE.
Lulu x
Grass-ias
We all want the perfect lawn in our gardens. A lovely, flat, weed-free, green space for playing and lounging on. But it isn’t very easy to achieve with all the weeds flying about and our wet weather and heavy soils. But, to help you get closer to that dream, I have collated my top tips for a lovely lawn this summer..

Lulu loves lounging on a lovely lawn!
Scarify your lawn
You can add a moss killer to your lawn but you don’t need to. Just use your muscles and a good garden rake to get the moss out of your lawn. I used my Twigz rake which was perfect for the job (£8.99*)
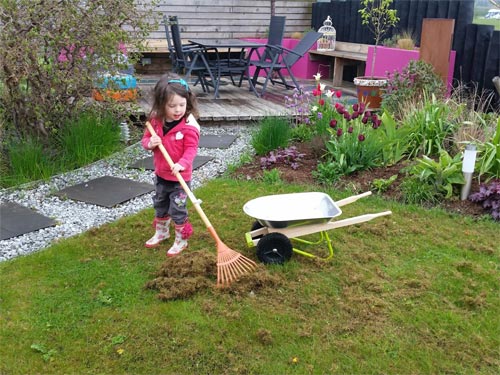
You need good muscles to rake up your moss
You can put the moss into your compost bin. My Twigz wheelbarrow is incredibly sturdy and perfect for this job (£49.99*)
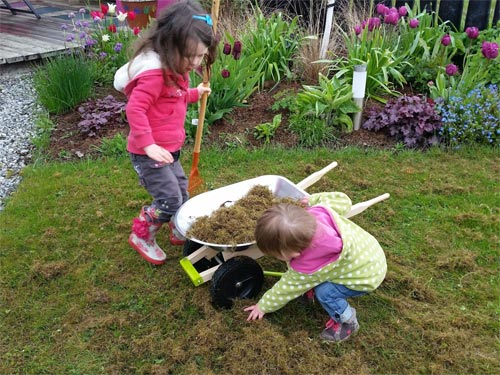
Collect your moss and put it on your compost bin
Weed Your Lawn
Lawn weeds can be a real pain. You can buy weedkiller to put on the lawn or you can use old fashioned muscle and dig up the offenders! Regular weeding is key so they don’t take over and leave no space for the grass to grow.
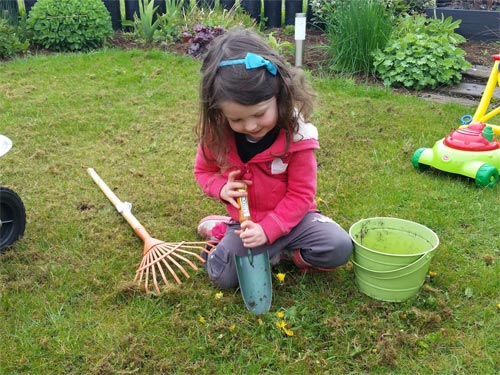
Tackle those weeds using a trowel and some muscles
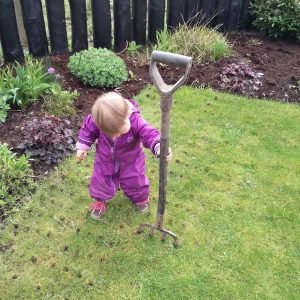
Aerate your soil
If you have a heavy soil and a compacted lawn it makes it hard for the grass to grow well and thatch starts to build up. You can buy special tools to aerate your lawn or you can just use a garden fork to create the holes.
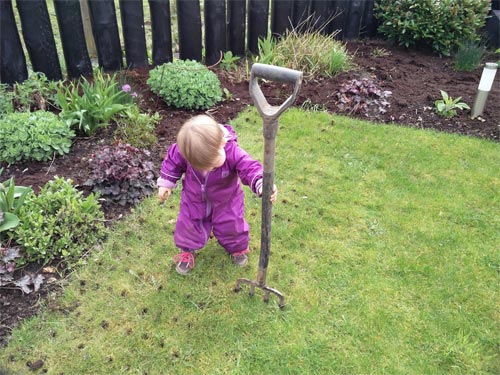
Tilda is an expert at aerating lawns!
Add a top dressing
You can add sand if you have clay soil or just a lawn improver to your lawn which will go into the holes you have made and improve the soil making the grass grow better. Use a brush like the Twigz garden broom (£8.99*) to spread the lawn improver around. You can add some grass seed to bare areas while you do this and some fertiliser too to give your grass a wee helping hand.
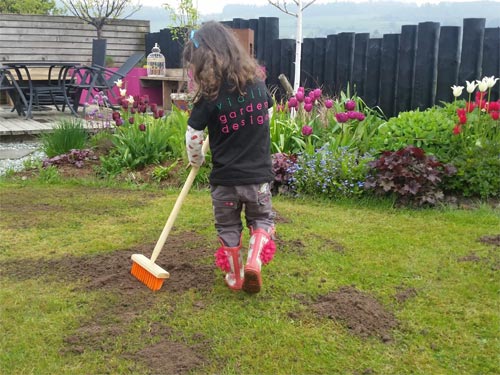
Brush your top dressing into the holes
Cut your grass
It’s always tempting to cut your grass very short to make it nice and neat but it’s not good for your lawn. Raise the level of your lawnmower and just give it a gentle trim or it will look bare and weeds will thrive instead of the grass. Little and often is the secret. How cute is this Flying Bee Lawnmower from Bigjigs? I love using it on my lawn and Tilda loves the bee which flies off into the air. (£32.99*)
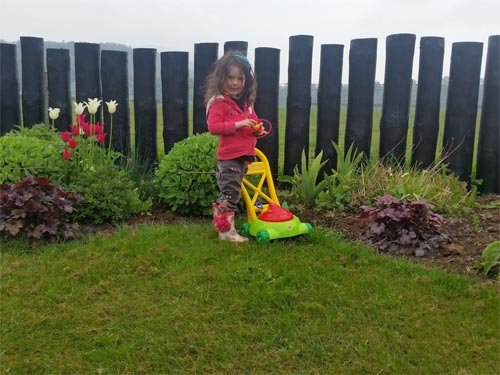
Don’t set your lawn mower too low when you cut your grass
Grass-ias! If all that seems like a bit too much hard work and you would rather just lie back and enjoy your garden while others did the work for you then contact us to arrange a quote for us to do your lawn treatments and grass cutting for you!
Lulu xx
*Prices correct at time of publication
Sow Sow Yummy!
The sun is shining (or at least it was when I wrote this, it is probably snowing now knowing Scotland!) so it’s the perfect time to sow vegetables in the garden. Don’t know what to do? Well, lucky I am here to show you how and to tell you about some wonderful tools I used along the way…
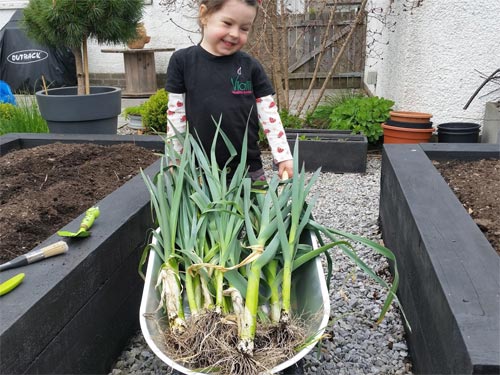
Soon you could have a barrow full of amazing leeks just like mine!
WEED YOUR VEG PATCH
It’s important that you have a weed free veg patch and that you have good quality soil. Add some new compost or fertiliser if you need to.
Weed your veg beds before you start sowing your seeds
PREPARE YOUR BED
Once you are weed free, take a few minutes to make sure your veg beds are nice and flat and even. It’s a bit like making your bed in the morning, you have to make it nice and neat and ready for bedtime! I used my Twigz rake, perfect for this job. Maybe not so much in your real bed though!
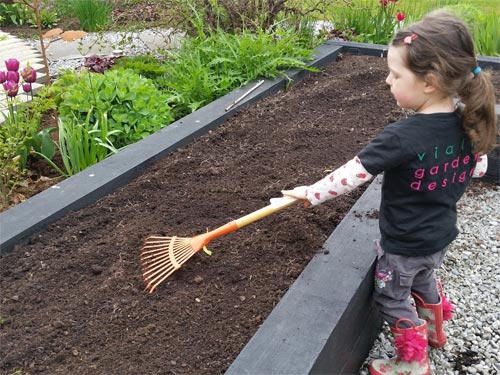
Rake out your veg beds and make the nice and even
MAKE A DRILL
Not the tool kind silly! It’s a little line in the soil where you can sow your seeds into. Use a cane to help make sure your row is nice and straight.
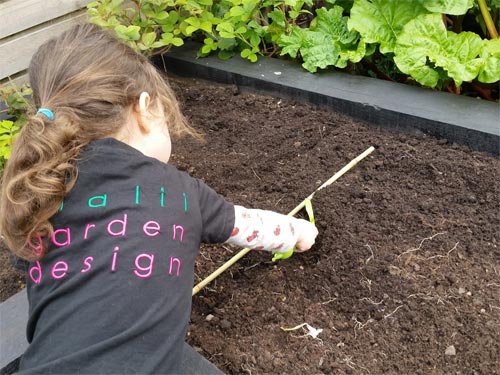
Make a row to sow your seeds into
SOW YOUR SEEDS
Carefully pour some seeds into your hand and sprinkle them into your row, making sure they are evenly sown. Gently cover them over and water them in. If you are sowing seed potatoes or onion sets, gently push them into the soil to the depth stated on the instructions.

This ickle onion will grow nice & big, just like me!
KNOW YOUR ONIONS
It’s important to remember what you have planted where – you don’t want to be making chips out of your shallots – so make sure you carefully write your vegetable names on a plant marker. I like to draw a picture too – here’s my rocket!!

Zoom zoom, a rocket!
Now you just need to sit back and watch your seedlings pop up. You will need to “thin them” which means removing some of the smaller seedlings and give some bigger ones space to grow. Keep your seedlings water and weed free and before you know it you will be picking fresh veg straight from your garden.
TOOLS
Good tools are the back bone of any good gardener and I have found some wonderful ones to use in my garden. To do all of the above I used:
- Twigz tool set (to weed and mark out my drills) £19.99*
- Twigz rake (to make sure the veg beds were nice and flat) £8.99*
- Twigz watering can (to water all my lovely wee seeds in with) £10.99*
- Twigz wheelbarrow (to barrow away last year’s leeks I dug up!) £49.99*
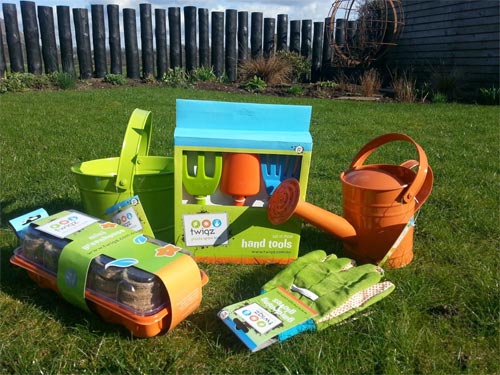
Twigz do a wonderful range of garden tools for children
I thoroughly recommend the Twigz range of gardening tools for kids. They are great quality and can even last the rigours of a professional like me! They are a little pricier than some alternatives but the quality and durability makes it worth it. They get a big green thumbs up from me!
For more seed sowing inspiration read my other blog Sowing The Seeds of Love.
Love Lulu xx
*Price correct at time of publication
National Gardening Week 2016
Today is the start of the 2016 National Gardening Week and to celebrate I have collated my eight favourite things I recommend that you do this week…

Get outside and have fun this National Gardening Week
Get Painting
I love all kinds of painting and this is the perfect time of year to get your garden looking spick and span. From fences and veg beds to playhouses and sand-pits, get outdoors and not only make everything look nice but keep it protected for another year.

My playhouse is lovely and fresh ready for a summer of play
Top dress your borders & pots
Like us, plants need nutrients to keep them healthy and growing strong. To do this we need to add compost to the garden and guess what else? Poo! Yes, actual poo! Not ours of course, farm manure. Well, I am going to leave that part to daddy! Poooeeeeee!!
Go visit a new garden
It’s always great to go visit a new garden and there are some amazing ones all over the UK. If you’re in London, go visit the new Magic Garden at Hampton Court. The RHS gardens and the Botanic Gardens are always worth a visit. More locally the maze at Scone Palace is a-maze-ing! And in a few weeks it will be the annual open day at the Garden of Cosmic Speculation. To read M&D’s list of their favourite gardens to visit, click here.

The gardens at Levens Hall in the Lake District are well worth a visit
Plant a new veg
You don’t need much space to grow veg. Why not try growing a courgette in a pot on your back door step. Or some tumbler tomatoes in a window box. It’s cool to watch them growing and yummy to eat. Go on, try one this year and see how it goes…
Spike your lawn
Spiking your lawn is a great way of getting air into a compacted lawn and letting the grass grow better (rather than just moss, thatch and weeds!) Try that as well as some lawn feeds and scarifying to get your grass in tip top condition for the summer.
Tilda helps spike our lawn
Sow wildflowers
There are always organisations giving out free packets of wildflowers to take advantage of. Use them in a quiet corner of your garden or see if you can find a piece of local wasteland which you can cheer up this summer.
Play a garden game
We are lucky to have a wonderful range of garden games from BigJigs which we will be featuring soon in one of my blogs. From crazy golf and skittles to quoits and croquet, there is a great range of fun games to invite your friends round to play. Or, of course, the old favourites of hide ‘n’ seek and tag are fun garden games and don’t cost a penny.

Anyone for a game of croquet?
Make mud soup
This is currently my favourite garden activity. Anything can be added to mud soup (herbs, sand, water, stones, you name it) but the base ingredient is, of course, mud! Mummy recommends rainsuits and wellies for this game!
For more information on National Gardening Week please click here.
Hopefully you will do at least ONE of these activities during this year’s National Gardening Week, but wherever you are and whatever you do I hope you really do love your garden.
Lulu xx